Well I think I recreated it and then some. Please let me know if I missed something.
I have read this thread and several others. I will try and summarize, because there is a lot of reading and a lot of repeated questions. Please realize a lot of this is from memory and my opinions so it could be wrong or now outdated. As this goes on I am posting more and more quotes. I tried to get the original post; this means that you can click the blue greater than symbol and view the original post and then the posts around it if you need additional information.
And thank you to all of the people (too numerous to count) that have supplied this information. I have added some information from notes that CJO took (and he updated the info Thanks). I am sorry, but I do not know if they are direct quotes or just notes. I am not trying to plagiarize.
So I can keep track of it this is version 3.0
These are some only seminars that if you really want to know more might help. Thanks Electronic Design and Digi-Key and a bunch of companies.
INFORMATION COLLECTED FROM HERE (and probably some others)
So if you are still interested in doing LEDs I recommend looking at them as well:
Related threads that might be useful:
There are numerous other threads relating to builds, but I think these cover most of it. If you think I missed an important thread (highly possible there are a lot of threads out there), please let me know.
LED Specs
Cree XR-E Royal Blue
Color: Royal Blue
Dominant Wavelength Range (nm): 450 465
Max Current (ma): 1000
Viewing Angle (°): 100
Standard Min. Flux @ 350 ma: 425 mw, 350 mw
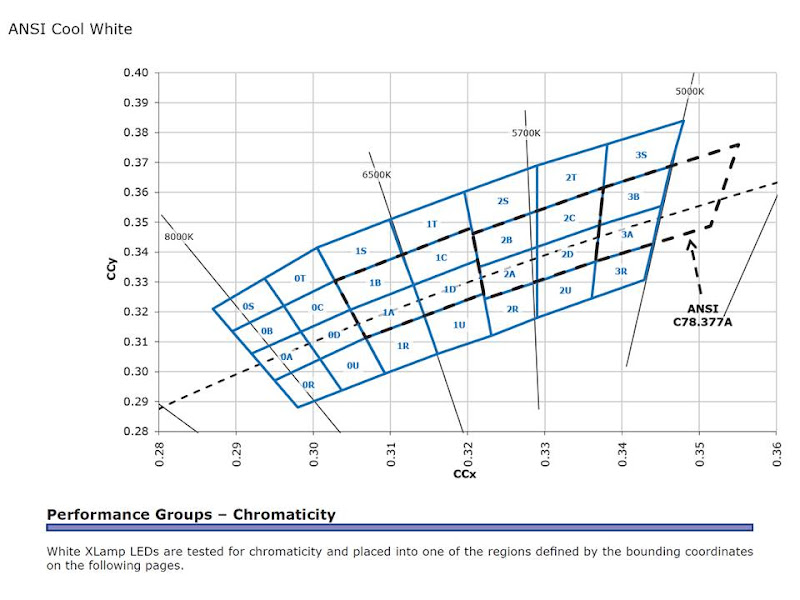
Cree XP-G Cool White
White: Cool
CCT (K): 8,300 5,000
Max Current (mA): 1500
Viewing Angle (°): 125
Standard Min. Flux @ 350 ma: 139 lm, 130 lm, 122 lm, 114 lm
WHERE TO GET THE STUFF
Here are the most common location where people are getting supplies.
LEDs - Rapid LED
- LED Supply
- ETG Tech I find this site confusing so you may have to contact anna@etgtech.com. Also last time I checked the minimum order was $75, which is doable with a 12 LED configuration with lenses.
- Deal Extreme The cheapest place for Cool White Q5 XR-E (~$4.50), but slow to ship.
- Cutter They are out of Australia, good prices. I have read they are slow to ship, and at one point had real hard time getting you what you ordered.
Power Supplies
TOOLS
You will need the following tools (and some others probably) to complete this project.
Soldering Iron
Most of the recommendation is for a 40 watt. There was a nice discussion in one of the threads. If I could just remember where I would quote it. A post by der_wille_zur_macht says 40-50 watts.
Here is a decent, low-priced soldering iron that CJ found.
How to Solder a Star
Quote:
Originally Posted by kcress

In the LED thread I detailed proper soldering technique. Here's it is lifted in its entirety:
Soldering... It's a bit of an art form. It you're an expert you could probably solder the stars with anything but a torch. But if you aren't accomplished a 'just right' soldering iron is required. Something around 25 to 40watts. The biggest problem would be one too small as then you damage what you are soldering by sitting there with the heat on, waiting, and waiting for the solder temperature to be reached. Meanwhile the device is being roasted.
You need "rosin core solder." Make absolutely sure it's not 'ACID' core solder. Acid core is solder for soldering radiators and copper pipe. The acid remains and will dissolve your electronics in short order. No-core or plain solder is also very bad as there is no cleaning action which is vital to an acceptable solder joint.
You want lead solder too - NOT "lead free".
Let your iron heat up fully. Then wet it with your rosin core solder until it's blobbed up in a wad. This lets the rosin act on the tip to clean it. Wipe this blob off on a moist sponge,(not sopping wet, just barely damp). If you have no sponge use a damp folded up paper towel.
Wipe with a very fast twirling dragging motion as you are trying to clear all the solder off the tip before you cool the tip to the point that the solder freezes again.
Apply a weee bit of solder to the tip and then immediately apply the tip to the star's pad. As soon as you apply the tip to the pad take your solder and touch it to the exact point where the tip meets the pad. You are trying to maximize heat transfer from the tip to the pad. You do this by filling all the voids with a molten metal thermal bridge. Pause for, perhaps, one or two seconds move the solder to a distant place on the pad and hold it there. When the pad heats up enough to melt the solder feed the solder in at a good clip until the pad has a large mound of solder on it.
Do the same thing to your wire if it is un-tinned. (actually do this before you do the pad!) Better(superior) would be to use only pre-tinned wire in the first place.
Now once you have your mound of solder on the star pad bring over your wire, hold it on the Star's pad. Place the tip on top of the wire. You want to reheat the pad thru the wire. When the wire sinks into the blob hold the position and watch the blob. You want the entire blob to melt again. The instant the blob has remelted remove the tip while holding the wire EXACTLY where it is. No wiggling allowed! Coffee shakes need not apply. Once the solder has refrozen move on to the next connection.
|
Quote:
Originally Posted by kcress
Hi hllywd.
Pre-tinning has its place but.. The physics of soldering are kind of complex. When you pre-tin you leave a layer of already heated flux on all the various surfaces. This can cause subsequent soldering to be sub-par. Also using the 'heat up the two and just melt them together' method means you get almost no flux action on this second solder-less heating.
If you ever watch the flux action under a microscope you will see the flux push everything foreign away allowing only the two items to be connected with solder. When you use the tack them together method none of this happens.
In most cases for our LED fixtures it's still good enough. But I would rather not. I realize that to do it the right way you need three hands.  I have one of those little stands with alligator clips sticking off of it. I just grab the wire with one of them and have it hold the wire to the pad. Then I can show up with the iron and the solder.
Jay1982; You would want to re-heat that joint. You always want a hot solder joint, not a cold solder joint. 'Bulbous' is often a sign of a cold solder joint. The other sign is a dull un-shiny result. |
This thread has a lot of information on soldering
Soldering Technique
Multi Meter
You will need to be able to measure voltage, current and you will probably want resistance. Almost all meters have these so it should not be a problem. However, when measuring current you will need a meter that goes to at least 1 amp I would recommend 10 amp.
And a few tips from kcress:
Quote:
Originally Posted by kcress
You can change the settings with the driver on. Be very careful you touch nothing when that driver is plugged in. Anything could be live, like those pieces of metal.
On your meter, if you change things over to current measure absolutely always power down. Remember if you interrupt the chain while the driver is powered - you will fry the chain.
Also, always unplug the meter current lead from the meter and replug it into the voltage position IMMEDIATELY when done measuring current. Not doing that will surly result in you picking up the probes and trying to measure a voltage while the meter is in current mode. Result - blown meter.
|
LEDs
Which LED
The whole reason most of got into this light scheme was for efficiency. Having said that there have been a lot of question like will this LED work. The thing to look for is efficiency and spectrum. If the spectrum is what you want (matches the bulbs in there now) then you are fine. Most people have picked the CREE XR-E and XP-G LEDs because of their efficiency of over 100 lumens per watt. If the LED you are looking at is not over 100 lumens per watt you probably dont want it.
How Many
The current recommendation is 1 LED for every 10-20 square inches of tank surface. Fish only could get by with the lower count, and a coral tank would need to be near the higher end. However if you take advantage of LEDs ability to focus corals could be spot lighted and cut down on the number of LEDs required.
More recently I have seen to set of numbers based on square inches:
The guideline (Ok this is one coming from memory):
12-14=Hard Coral
14-16=Soft Corals
16-18=Fish Only
The guideline:
10=Hard Core (Too Much) Light. Very Deep Tank
15=SPS (most people use)
20=LPS, Softies
25=Softies
Spacing
Currently the general recommendation is 2 to 3 inches between LEDs.
Color Mix
Currently the general recommendation is:
- 50/50 for white XR-E and royal blue XR-E
- 40/60 for white XP-G and royal blue XR-E
If I remember correctly this is 14k. If you want a bluer tank you more royal blue. Before you ask, there is no XP-G in royal blue.
To find more information on color, see
der_wille_zur_machts post .
Here are some more pictures that may help:
From lpsouth1978

And I can't imagine where dur_wille_zur_macht found these

XR-G spectra:

XR-E spectra:
 Ultra Violet LEDs
Since a corals UV protection is clear and metal halide lights have UV shields, it is believed that UV LEDs are not needed. But if you do here is a source that hlsooner found:
UV LED
Forward Voltage
This always comes up and I found this real nice post that was talking about meanwells, but applies in general.
Quote:
Originally Posted by der_wille_zur_macht
Yep, that's more or less correct. In the datasheet for each respective LED, there's a V/I curve that lets you look up the voltage the LED will drop at a specific current. With this information in hand, you can calculate the voltage expected across a certain number of LEDs in series.
The numbers do vary a bit from model to model and even color to color, so it's important to look up the actual figure if you're interested in doing the math. And of course, clearly, it varies as the current varies.
Plus, there is a fair amount of variation from LED to LED, around the number quoted in the datasheet. So, LED XYZ might be quoted at 3.5v at your desired current, but you might find some that drop 3.55 or 3.48 or whatever. So, it's important to leave a margin of safety when planning how many LEDs can be run on a given driver.
In most cases, with the 48v meanwell drivers, you can just assume 12 LEDs and be safe. But if you're using some of the lower-drop LEDs (i.e. the XP-G or Rebels) and lower currents, and you want to really load things up, you might be able to get away with 13 or even 14 per string.
|
POWER SUPPLIES
If you are doing a really big fixture multiple power supplies can be a problem. See this post by kcress:[*]
Summary of multiple power supply issues)
SPLASH GUARD
I think the recommendation is anything less than two feet should have a splash shield to keep the spray away from the LEDs.
Wire
To quote der_wille_zur_macht, Wire gauge between LEDs should be 20 - 26 gauge, pretinned, with good insulation.
Kcress found a great place for wire:
Stranded wire
HEAT SINK
Types
True aluminum heat sink. Most have used this so far but it is expensive and heavy. The advantage is that will a fan to get good air flow you wont have to worry about heat.
People are beginning to experiment with some the the aluminum channel found at local hardware store. Not a lot of reports, but I have not heard anything bad. The advantage are that is lighter and cheaper. I also think it would work better for convection cooling. If air can rise through your fixture with smaller pieces of aluminum you should get fewer areas where air flow is limited also yet to be proven.
Mounting
There are three main mounting options (that I can remember).
- Screw and thermal paste
Screw make for the easiest changes later, but a lot of time to drill and tap. I personally did the screw method, but did not tap. If you follow me lead DO NOT tap with the same screw twice the head will twist off. Oh what fun .
- Thermal Adhesive pads
These may be hard to take off. Some have done it, but it was early and the longer they sit and the hotter they get The better they sick if I remember correctly.
- Thermal epoxy
Quote:
Originally Posted by Jay1982
To the OP: I just spoke with a rep at Arctic Silver about their Arctic Alumnia thermal adhesive. If you use this product, its on for life. He said its basically made with the same compounds as used in cement and if someone were to try and remove an LED from the heatsink that the LED itself would fragment apart before the adhesive gives way.
|
However, people have been able to remove LEDs that were affixed with the thermal adhesive without too many issues in the short term (a couple of weeks).
How hot is too hot
Kcress said this very clearly:
Quote:
Originally Posted by kcress
If you can keep your finger on it you're OK.
And I mean the bulk area of the heat sink not the edge of a fin. |
After doing some research kcress changed his mind:
Quote:
Originally Posted by kcress
Temperature..
While some effort is required in this direction almost all the builds we're seeing, with the exception of Stu's  , are massive overkill. Note my recent build. That's just 0.063" Al with some simple fins. Even that is more than necessary! We should step back and recognize that trying to get 10 years out of these fixtures is folly.
Look how far the state-of-the-art HBLEDs have gone in the last 3 years. We are at 100 lumens per watt now. It is expected that we will be at 150 lumens a watt in something like 2 years. Are you really going to want your same old fixture running over your same old tank in 10 years, when your fixture is costing you perhaps three times more to run than a newer fixture? That's way after the time you should've recycled your present one just to save energy costs.
Spending a fortune on aluminum and running 6 fans for a wind tunnel sound effect is not the way to go.
I recently researched this for my build.
How hot?
This is how hot:
One hundred fifty eight degrees F directly behind the center of the star on your heatsink's base metal - not fins - is where we should be aiming.
That puts the LED's operating temperature on the far far left of the recommended operating curve for lifetime. The curve goes far to the right from there. How far? The curve goes to 302F!!!
So, even though in the past I've suggested if you can touch it you're certainly cool enough I've changed my opinion. With my new understanding I'm upping that recommendation to a value that actually makes more sense. 158F
158F is instantly painful to the touch. That's a reasonable temperature - as far as the HBLEDs are concerned. At that temperature the L70 is still seventy thousand hours that's 19 years!!! LEDs will probably be 1000 lum/W by then and our fixtures will be long dead, economically and aesthetically.
Save some money and start aiming for too hot to touch directly behind the LEDs and really, really warm heatsinks. |
Heatsink Size
CJO found this information and I think he got it from lynxvs.
[QUOTE[I've posted this before I think but it might be helpful. I use just a flat plate of aluminum as my heat sink. I did some calculations below to justify heat sink size. I attach a PCB directly to the plate using screws.
Max Junction Temp = 150° C
Power of Single LED = 3.4 Forward Voltage X 700 mA = 2.38 W
Ambient Temp = 70° C ( A SWAG)
Thermal Resistance between Junction â Case (From Data Sheet) = 10° C/W
Thermal Resistance between Junction and PCB (From Rebel application note) = 7° C/W
Total Thermal Resistance = 10 + 7 = 17° C/W
Total Thermal Resistance between Junction and ambient air = (150 â 70)/ 2.38 = 33.61 ° C/W
Thermal resistance between Case and Ambient air = 33.61 â 17 = 16.61 ° C/W
The amount of heat dissipation that can be achieved with a flat plate of aluminum is indicated below.

Using a 3mm plate looks about 20 cm^2 per LED converting to inches is equal to 3.1 in^2 * 50 LEDs = 155 in^2 The plate I am using is 24 X 7.25 = 174 in^2 not sure if you can count both sides of plate as surface area⦠I also have two cooling fans to help [/QUOTE]