
|
|
 08/26/2016, 09:18 PM
|
#1 |
|
Registered Member
Join Date: Jul 2013
Location: Glass City USA
Posts: 77
|
Rimless 120g TSVBI Dream Build
Hey Guys! I'm on my third tank, and this one is going to be awesome. My wife is finally good with adding a tank to our house. I'm choosing the basement because thats where we do most of our living. TSVBI: Two-Sided Visible Built-In
In the middle of my basement are two 18" box columns, spaced 54" apart. I'll add some photos shortly, but my intention is to build in a 48x24x24 rimless tank in between the columns. The columns are mostly hollow, so I'll be adding access doors for plumbing. I'll also run a 3" hollow chase down between the columns and the 24" sides of the tank to hide plumbing/pump/electric. My intention is to put a Synergy Reef 16" overflow in one of the 24" sides, and running the returns into the other 24" side. I'd also run a chase over the top of the tank at about 7' off the ground, to hang the lighting from. That chase would be hollow as well, and contain most of my electronics. The space under the 48x24 stand would house the sump. I'll add some photos and sketches here to clarify my description.. But I was able to confirm the size tank, sump, and rest of the equipment I want. I figured its time to start the build thread! Equipment: 48x24x24 Rimless from Glass Cages Synergy Reef 16" Overflow Synergy Reef SS-34 Sump Synergy Reef 5gal Top-Off Containers (3x: one for RODI, others for two-part) Waveline DC6000 Return Pump Full Apex System (Already Have) Vertex 150 Skimmer (Depending on budget, I already have a Coralife Super SKimmer 125 I could start the tank with, and upgrade to the Vertex) 3x Kessil A360WE Lights Vortech MP40 I was planning on starting the tank with Real Reef Rock, I was inspired by this aquascape, among others I'll post to this thread: http://www.reefcentral.com/forums/sh....php?t=2401746 More to come! Things I'm still deciding on: - Starphire or Not? Its an additional $400 - Sand or Bare Bottom? - Zeovit or keep it simple with just carbon and gfo? |

|

|
|
08/27/2016, 05:51 PM
|
#2 |
|
Registered Member
Join Date: Jul 2013
Location: Glass City USA
Posts: 77
|
Skip the 5Gal Top-Off Containers, I'm going to run line from my back room area into the tank area using the columns. A total of 5 lines, plus an apex USB cable.
5 Lines: New Salt Water, Old Salt Water, RODI for Top Off, Calcium, Alk Planning on using 2 Neptune DOS, one for 2 Part, one for AWC Sent from my iPhone using Tapatalk |
|
|
|
|
08/30/2016, 03:48 PM
|
#3 |
|
Registered Member
Join Date: Jul 2013
Location: Glass City USA
Posts: 77
|
Big Update:
1. I'm going to MACNA this year! Just so happens that a business conference I had to attend in San Francisco is on the 8th and 9th, so I'm going to catch a quick flight down from SF to San Diego. My first time, and I'm super pumped 2. I'm starting on the construction prep this Thursday, details to follow. 3. Glass is ordered. Went with a Rimless 4-side Starphire 48x24x24 Tank from GlassCages.com. I'll be picking it up from Cleveland on 9/18 right when I get back from MACNA So here are my plans. I'd like to place the tank between the two columns in my basement:  I made some hand-drawn descriptions of how the tank will work out. It shows my initial design for a 48x30 tank, but the wife shot that down. 3.5" pop out will be good enough to give it an edgy look.  Here are some of the images I found on Reef Central and other sites that served as my inspiration for the tank design.  
|
|
|
|
|
08/30/2016, 04:15 PM
|
#4 |
|
Registered Member
Join Date: Jul 2013
Location: Glass City USA
Posts: 77
|
So this thursday is my first major work day on the project. We'll be doing the following:
1. Removing the granite counter and existing dark brown header 2. Running 2x 20a GFI circuits to the column, coming from the far side shown in the photos. 3. Running 2x USB cables from the column. One to the back room, one to the far side where the electric is coming from. These are cheap to pre-run, and will allow me to add 2x EB8's to my apex system in the future. 4. Running 6x small water lines (RODI size and Neptune DOS size) to the back room 5. Cutting the back sides of the columns to allow for access panels I purchased. I purchased 3x 8"x12" hidden-hinge access panels for each column for easy access to plumbing, etc. The access panels are 14 days out, so will have to be installed later. For now, we will just rough cut the openings to open up the columns and run the cables/tubes. 6. I also purchased a 36" wide commercial prep sink with drain board to use in the back room. I got a swing faucet to fill the sink, as well as a gooseneck style sprayer to aid in the cleaning process of things. I'm also planning on bringing my old 75g tank and all other aquarium supplies back from the office tomorrow. I'm planning on using the tank for a Quarantine Tank. I also have a 29g Biocube HQI to use as a coral QT for frags, etc.. I have an MP10 and an MP40 that were on the 75g tank. I'm planning on using the MP40 on the new build, and the MP10 on the coral QT biocube. I was just going to use the return pump flow for the 75g QT, what are your thoughts on this? I could also purchase an MP60 to use on the new tank, but would rather invest in a good protein skimmer for the new tank instead. My next project that wouldn't require construction, and could be done in advance is setting up my water change station. I'm planning on using a design like the following:   So overall, the back room (current utility room with furnace and hot water heater) will have a commercial stainless steel prep sink with sprayer faucet, and an 18" drainboard to be used for general cleaning and maintenance. It will also have a water change station as shown above. I will have my RODI filters in this room. I will add in some stainless steel rack shelving for equipment storage, etc.. And the two QT Tanks. I'll have 1x EB8 on this side for apex control. |
|
|
|
|
09/17/2016, 02:45 PM
|
#5 |
|
Registered Member
Join Date: Jul 2013
Location: Glass City USA
Posts: 77
|
Rimless 120g TSVBI Dream Build
Time for an update! So far, the columns have been cut open, two 20a electric circuits have been run, the wash sink has been installed in the back room, and my two 55g water storage containers are on their table.
 The tank arrives Monday, couldn't be more excited about it! I went to MACNA this year for the first time, was blown away by the coral and equipment there. I was able to speak to many knowledgeable people, including the designer of the vertex sump himself. I'm leaning towards a complete vertex setup including their iSupra sump, Zeovit reactor, and calcium reactor. My thoughts on flow have changed, I'm planning on going with two Maxspect Gyres. I was really impressed with their updated 200-series models. I'm sticking with 3x Kessil a360we for lighting. Also leaning towards going bare-bottom in the main display, but this may change. I'm planning on using the BioCube 29 for a quarantine tank, and the 75g i tore down from the office as a frag grow-out tank. Sent from my iPhone using Tapatalk |
|
|
|
|
09/18/2016, 06:53 PM
|
#6 |
|
Registered Member
Join Date: Apr 2016
Location: Long Beach, CA
Posts: 129
|
stainless steel is the best.
|
|
|
|
|
09/19/2016, 10:03 PM
|
#7 | |
|
Registered Member
Join Date: Jul 2013
Location: Glass City USA
Posts: 77
|
Quote:
Agreed! Being in the restaurant business, I'm a fan of stainless everything! webstaurant.com has the best deals on stainless tables, sinks, etc. I think it's going to be a good match against the corrosive effects of salts/saltwater Sent from my iPhone using Tapatalk |
|
|
|
|
|
09/20/2016, 11:04 AM
|
#8 |
|
Registered Member
Join Date: Jul 2013
Location: Glass City USA
Posts: 77
|
A little more work done today:
- Countertop removed - Stand Built - Carpet & Pad removed   Just the right amount of pop-out. Glad I didn't go with the 30" depth    Sent from my iPhone using Tapatalk |
|
|
|
|
09/20/2016, 11:06 AM
|
#9 |
|
Registered Member
Join Date: Jul 2013
Location: Glass City USA
Posts: 77
|
I forgot to write an update after picking up the GlassCages tank. Overall I'm happy with the purchase, but disappointed in certain aspects. Once I get it out of my car and down to the basement tomorrow I'll post some pictures and a review
Sent from my iPhone using Tapatalk |
|
|
|
|
09/22/2016, 05:25 AM
|
#10 |
|
Registered Member
Join Date: Dec 2011
Location: Tucson AZ.
Posts: 54
|
That's a prime spot for the tank... will be interesting to see how it goes.
__________________
Theres a Way To Do It BetterFind It ~Thomas Edison Half of everything in this hobby wants to eat the other half... Current Tank Info: Working on an Elos |
|
|
|
|
09/23/2016, 12:08 AM
|
#11 |
|
Registered Member

Join Date: Oct 2011
Location: NY,NY
Posts: 78
|
Tagging along.
|
|
|
|
|
09/23/2016, 01:25 AM
|
#12 |
|
Registered Member
Join Date: Jul 2016
Posts: 55
|
Great real estate! Can't wait to see this.
|
|
|
|
|
09/23/2016, 02:36 PM
|
#13 | |
|
Registered Member
Join Date: Jul 2013
Location: Glass City USA
Posts: 77
|
Quote:
|
|
|
|
|
|
09/23/2016, 02:37 PM
|
#14 | |
|
Registered Member
Join Date: Jul 2013
Location: Glass City USA
Posts: 77
|
Quote:

|
|
|
|
|
|
09/23/2016, 02:56 PM
|
#15 |
|
Registered Member
Join Date: Jul 2013
Location: Glass City USA
Posts: 77
|
More prep work done and out of the way! The prep sink is tapcon'd into the wall for security, and plumbed in nice and clean.
 All the lighting in the back room is in, adding in the switch makes all the difference. Went from one light to five.  Also used some left over plywood as mounting boards for electronics, all placed next to the new outlets added in. I placed 3 quads on their own 20a circuit, with gfi in the panel.    Also did some work on the columns. Removed the baseboard that was facing inwards towards the tank, and cut 16" of drywall out of the inside of the columns. Also removed the original header, and replaced with one that is 2.75" so it will match the chases that will be built. The chases will cover the drywall that was taken out. In this way, I'll be able to reach in through the access doors on the back of the column through to the side of the tank. I'll also be able to easily run cables from below the tank all the way up through the chases, and into the top header.   Up next: I need to order all the components and parts, then pretty much put the whole tank together and plumb it. I can't finish doing that until I receive my 16" shadow overflow from Synergy Reef the first week of November. Once the whole tank is plumbed and leak tested, I'll be able to board everything up so it looks nice and pretty! I linked up with a local millworker to match the doors and trim to the rest of the house, it should look pretty good when we're ready to fill with saltwater! Sent from my iPhone using Tapatalk |
|
|
|
|
09/23/2016, 03:09 PM
|
#16 |
|
Registered Member
Join Date: Jul 2013
Location: Glass City USA
Posts: 77
|
So the glass cages tank... two issues off the bat. I decided to splurge on Starphire low-iron glass, especially after they sent the following photo showing the difference between the regular and low iron:
 However, when looking at the sides of my tank I received, it looks pretty green to me:   Also, I had it drilled for 3/4" returns. They drilled it for 3/4" schedule 80 and included the bulk heads, however the holes seem to be too small, the bulk heads don't go past the threading      Other than those two fairly serious issues, not seeing the sloppy silicone work I was worried about after reading some reviews on RC. The seams look clean, it's a badass tank. Still, after spending $1500, a 2.5hr drive each way to pick it up I'm not thrilled. I sent out an email, and called down right after sending it. I'm supposed to receive a call from "Becky" on Monday. We'll see how it goes. I have it pretty well documented. It was a bear to get downstairs, and we had to rent some paddles and used 4 guys. Still was quite the struggle. It's going to be a b*tch to get back up the stairs for a replacement if it comes to that. Sent from my iPhone using Tapatalk |
|
|
|
|
09/23/2016, 03:13 PM
|
#17 |
|
Registered Member
Join Date: Jul 2013
Location: Glass City USA
Posts: 77
|
Just received the following response from GC. What do you guys think?
 Sent from my iPhone using Tapatalk |
|
|
|
|
11/06/2016, 12:17 PM
|
#18 |
|
Registered Member
Join Date: Jul 2013
Location: Glass City USA
Posts: 77
|
It's been a long time since my last update, but it's only because I've been busy at work. Lots of progress made on the build and I'm excited to catch you up on it.
My main holdup at this point is the shadow overflow from synergy. They should be shipping around thanksgiving time so I'll definitely have water in the tank in 2016. Starting from the last post, I received two 3/4" glass samples from GlassCages, as well as new bulkheads, they just sent the wrong ones.  Although the edges of the tank have the greenish tinge of plate glass, it's definitely starphire on the sides. I was able to tell when viewing through the glass samples and sides of the tank. 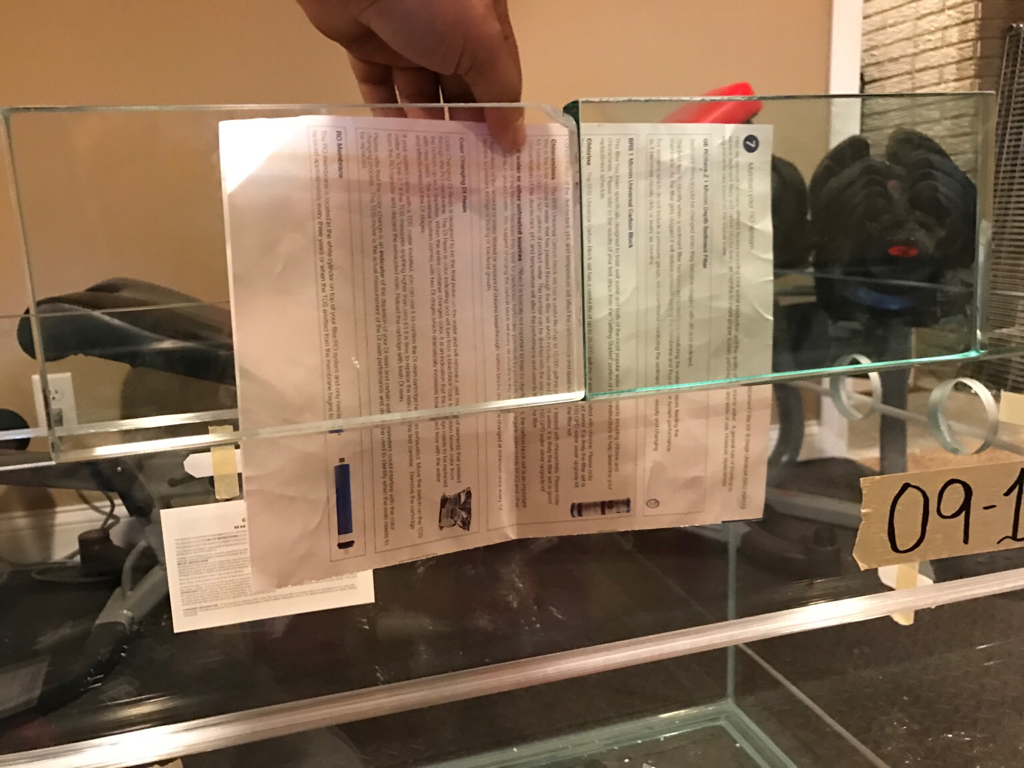 So far I've plumbed the water mixing station, ordered and received 4 buckets of bright well salt. When speaking to the spectrapure guys at MACNA I learned that had the least issues with residue/buildup in their litermeter lines when using brightwell. Also that brightwell has the least amount of residue buildup in holding tanks. I figured I'd give it a shot.   I've lined the interior of the columns with plywood, and installed the access panels. I used the existing electrical supply (previously supplying convenience outlets and led lighting in the old soffit) to power an led pull-chain light and convenience outlet in each column. I'll use the convenience outlets to power small computer fans for ventilation in the columns, hopefully mitigating some temperature/humidity issues in the sump and column areas. I also painted the interior of the stand and columns with white epoxy.   I've ordered and received the RODI system, may have gone a bit overboard but I think it'll be a good choice in the long run. As of today I've only mounted the system and haven't completed the plumbing yet. I ordered a few extra supplies and want to hook everything up with all the bells and whistles off the beginning. I went with a BRS 6-stage universal 150gpd. I added an extra 5 micron sediment filter previous to the included 1 micron sediment, a booster pump and an auto-flush kit. Combined with the tunze ro controller it's pretty much completely automated filling 35 gallon batches at a time to the 50 gallon holding container.    I'm adding a few components to the system to further optimize it. Because I live in Ohio and the system is in an unfinished area of my basement, I'm planning to pre-heat the water going into the RODI. I've ordered 50' of 1/4" tubing for the inside of a 5 gallon bucket, to which I'll add a heater. This should keep the source water for the RODI within the recommended range. Also for the cool factor I ordered another stainless steel shelf, which I'll mount next to the one currently over the sink holding test kits. I'll drill in 3 pressure gauges (source, post pump, post carbon blocks), add a triple tds meter and a filter monitor. Pictures coming soon! I've also ordered and received my 3 kessils, I'll mount them with about a 4" drop so I'm going to use the kessil mount kits that are accessories for their gooseneck mounts. Here's a picture of me holding the light in place, better pictures once I have them mounted! I've also received 2 link cables and an apex control cable  Sent from my iPhone using Tapatalk |
|
|
|
|
11/06/2016, 12:18 PM
|
#19 |
|
Registered Member
Join Date: Jul 2013
Location: Glass City USA
Posts: 77
|
Last but far from least, I made a trip to Detroit to pickup my custom BashSea life support system. I met Steve at MACNA and was immediately a big fan of his work. His shop is nuts, and he's showed me his space and tanks for his new reef club. I'll post updates on my next trip up there, but his stuff is top notch. Here are some pics
          He made me a custom 40x20x16 sump, twisted skimmer, bio reactor, and two media reactors. The sump has 4 filter socks, custom holes for power cable routing, two locations for dosing lines, adjustable water level, and a probe holder with cable management. Very impressed with the quality of his work! I have some neoprene on order, and I'll silicone the stand to the concrete and line the interior with the neoprene before installing the sump and getting started on the plumbing. I went with all sicce pumps, planning on plumbing sump with black vinyl tubing for a clean install. All schedule 80 for the drains and returns. I've already received the more expensive valves like the gate valve for my drains, ball valve and Wyse check valve for return. Looking forward to more updates! In the next few weeks I'll finish up the RODI, RO Controller, and setup and mix my first batch of salt. I'll setup my 29g biocube as my quarantine tank and get my first fish. I'll place my sump in the stand, and start to wire up all my electric components. I'll plumb as much as possible, and as soon as I get my overflow I can get the glass onto the stand. Once the tank is filled with water, and I'm mixing salt in the tank, I can put the finishing carpentry onto the tank. Then aquascape, and move my fish from the quarantine to the display! Sent from my iPhone using Tapatalk |
|
|
|
|
11/06/2016, 12:19 PM
|
#20 |
|
Registered Member
Join Date: Jul 2013
Location: Glass City USA
Posts: 77
|
Slowly but surely, getting there. Already got started on wiring up the pump for the water mixing station this morning, my first stab at electrical work!
 Sent from my iPhone using Tapatalk |
|
|
|
|
11/06/2016, 01:00 PM
|
#21 |
|
Registered Member
Join Date: Mar 2005
Location: Kansas City, MO
Posts: 644
|
Wow that's a really nice sump. Going to be great!
Sent from my iPhone using Tapatalk
__________________
Andy 265g w/ 20" synergy overflow box Hamilton Cebu MH/T5 fixture w/ 250w Radium bulbs SPS/LPS mix | 30g (long) refugium with cheato | 40g sump |
|
|
|
|
11/06/2016, 04:31 PM
|
#22 |
|
Registered Member
Join Date: Nov 2014
Posts: 68
|
Looks good. Why'd you go with the fluidized bed (Kaldnes) reactor?
d. |
|
|
|
|
11/06/2016, 09:01 PM
|
#23 | ||
|
Registered Member
Join Date: Jul 2013
Location: Glass City USA
Posts: 77
|
Quote:
Quote:
Tried and true technology. These fluidized bed reactors are used at public aquariums and other large installs, so I figured I wasn't going down the wrong path. They're really efficient at converting ammonia, and require virtually no maintenance. They don't do much for NO3 or PO4, but I'm still planning on using a DOS for continuous water change which should keep NO3 in check, and GFO for PO4 management. I want a minimal aquascape, a rock wall isn't the look I enjoy. If the bioreactor doesn't do the trick I'll give ZeoVit a shot. What are your thoughts? Do you have any experience with a Kaldnes reactor? Sent from my iPhone using Tapatalk |
||
|
|
|
|
11/07/2016, 10:30 AM
|
#24 |
|
Registered Member
Join Date: Nov 2014
Posts: 68
|
I understand, I've built a few at public aquariums and have one on my pond....just seems more people go with siporax/matrix/rubble on their reef tanks. They do work well and are easily cleaned...
Starting with zeovit is nice because you can reduce the problem algae right from the beginning though I don't love it for long term maintenance. More pics! d. |
|
|
|
|
11/07/2016, 10:52 AM
|
#25 |
|
Registered Member
Join Date: Mar 2015
Location: Elkhorn, NE
Posts: 1,405
|
jesus....that sump is SEXY...wow
__________________
50 Gallon cube |
|
|
|
 |
| Thread Tools | |
|
|


