
|
|
 03/26/2009, 08:53 AM
|
#501 |
|
Registered Member
Join Date: Sep 2008
Location: MA
Posts: 189
|
The best thermal interface is a mechanical one free of thermal grease, epoxy etc. If the two surfaces are smooth a mechanical fastener is the best way to go. These seem expensive and you still need some sort of mechanical fastener anyway.
|

|
|
03/26/2009, 08:55 AM
|
#502 |
|
Premium Member
 Join Date: Oct 2007
Location: Cary, NC
Posts: 3,760
|
You really think aluminum heatsinks are smooth enough to not require a heat transfer medium? first I've heard that.
__________________
- Ryan B "that is enough skimmate to ruin lives." - GSMguy Current Tank Info: 220g Display, 70g sump, 35g frag, 50g fuge, 2x250w MH, 1x400w MH, 2x80w T5, 2x140w VHO Actinic |
|
|
|
03/26/2009, 10:01 AM
|
#503 |
|
Registered Member
Join Date: Sep 2008
Location: MA
Posts: 189
|
Normally you would machine smooth both metal surfaces.... I know that is beyond most DIY projects. If you have to use thermal grease you use as little as possible just enough to fill in gaps and have a tight mechanical fit.
|
|
|
|
03/26/2009, 10:16 AM
|
#504 |
|
Registered Member
Join Date: Sep 2008
Location: MA
Posts: 189
|
I've posted this before I think but it might be helpful. I use just a flat plate of aluminum as my heat sink. I did some calculations below to justify heat sink size. I attach a PCB directly to the plate using screws.
Max Junction Temp = 150° C Power of Single LED = 3.4 Forward Voltage X 700 mA = 2.38 W Ambient Temp = 70° C ( A SWAG) Thermal Resistance between Junction â Case (From Data Sheet) = 10° C/W Thermal Resistance between Junction and PCB (From Rebel application note) = 7° C/W Total Thermal Resistance = 10 + 7 = 17° C/W Total Thermal Resistance between Junction and ambient air = (150 â 70)/ 2.38 = 33.61 ° C/W Thermal resistance between Case and Ambient air = 33.61 â 17 = 16.61 ° C/W The amount of heat dissipation that can be achieved with a flat plate of aluminum is indicated below.  Using a 3mm plate looks about 20 cm^2 per LED converting to inches is equal to 3.1 in^2 * 50 LEDs = 155 in^2 The plate I am using is 24 X 7.25 = 174 in^2 not sure if you can count both sides of plate as surface area⦠I also have two cooling fans to help⦠
|
|
|
|
03/26/2009, 10:29 AM
|
#505 |
|
Premium Member
Join Date: Oct 2007
Location: Cary, NC
Posts: 3,760
|
Soundwave, do you know how hard it would be to remove a luxeon from the heatsink with the AA Epoxy??
I read elsewhere that its possible to mix AA Epoxy with regular Arctic Silver compound which will keep enough strength for mounting the LEDs but will make it possible to pry off a star without damaging it.
__________________
- Ryan B "that is enough skimmate to ruin lives." - GSMguy Current Tank Info: 220g Display, 70g sump, 35g frag, 50g fuge, 2x250w MH, 1x400w MH, 2x80w T5, 2x140w VHO Actinic |
|
|
|
03/26/2009, 10:32 AM
|
#506 |
|
Registered Member
Join Date: Apr 2007
Location: Madison
Posts: 62
|
I like the thermal pad idea. It would probably be less messy in the end too!
__________________
- Eric Current Tank Info: 90g reef, w/ 100g sump/growout |
|
|
|
03/26/2009, 12:11 PM
|
#507 | |
|
Registered Member
Join Date: Sep 2008
Location: MA
Posts: 189
|
Quote:
Soundwave do you have before and after pics? |
|
|
|
|
03/26/2009, 01:48 PM
|
#508 |
|
Premium Member
Join Date: May 2004
Location: Longmont, Co
Posts: 4,566
|
lynxvs,
"The best thermal interface is a mechanical one free of thermal grease, epoxy etc." In my experience, this is not true & you still need something to "complete the thermal circuit". When we bolt a flight box onto a spacecraft, the two surfaces are required to be VERY flat and we still use something between. Long ago, we used plain old silicone RTV. It was one of the best. Now that we know silicone is an awful contaminant, we cant use it anymore. So we now use something known as "Q-pad": http://electrical.appliances.harbour...-SHEET-RC.html I can get it from work, but have no idea what it costs. Stu
__________________
Some people think that I have Attention Deficit Disorder. They just dont understand that........ Hey! Look a chicken! Well, We KNOW GOD exists, but for US to exist without a GOD is preposterous .Umm wait a minute . Sounds a bit circular to me Current Tank Info: 125 Gal. display w/80 gal mud/caulerpa sump. Basement sump w/ LED Grow Light,Gravity fed Reeflo200 skimmer w/ ORCA Recirc, DIY calc reactor & kalk stirrer. Inline plumbed 75 Gal frag/settling tank. |
|
|
|
03/26/2009, 02:03 PM
|
#509 | |
|
Clown Hoarder
Join Date: Apr 2001
Location: Wixom, MI
Posts: 1,603
|
Quote:
__________________
-Frank Save 'Wild' Nemo and his Nem.! Would you transplant a Redwood b/c it looks good with birds in the backyard??? Buy CB fish and Captive-Cloned nems. Current Tank Info: 175gal. 3-tier Reef, 400W/250W Radiums, LED/CFL Par38 Mangrove Lagoon 12g Aquapod GBTA 'sterile' tank w/ DIY LED Lighting |
|
|
|
|
03/26/2009, 03:27 PM
|
#510 |
|
Registered Member
Join Date: Dec 2007
Location: Central California Coast.
Posts: 5,383
|
stugray; I usually go with grease because all those pads are stunningly expensive. Every time I need to use them it grates on me. You bend over backwards to design the cost out of some design, then find out you need to pay as much for the thermal pad as you paid for the IC you're putting on top of it. I think it borders on being a scam, but maybe the stuff it expensive to make. I just don't see why.
Berquest is a huge supplier of it and I always get these product announcements for great new thermal pads. I hunt them down and am horrified by the cost every time. Grease works just fine if you have reasonably smooth surfaces. Most of the time, and I'm guilty of it too, people think, "Grease is, cheap and more must be better", and we make a mess. Usually you need about a fifth of what you actually use. If applied correctly none should even ooze out from under the device. Sometimes the pads stick on both sides, and get torn, then you have real leveling issues with trying to replace a part. Grease just wipes off, or a little alcohol does the trick. |
|
|
|
03/26/2009, 03:36 PM
|
#511 | |
|
Registered Member
Join Date: Sep 2008
Location: MA
Posts: 189
|
Quote:
In the real world the two surfaces are not perfectly flat and you need thermal grease to fill in those gaps. My point in my comments was you should use as little thermal grease as possible. |
|
|
|
|
03/26/2009, 04:16 PM
|
#512 |
|
Premium Member
Join Date: Oct 2007
Location: Cary, NC
Posts: 3,760
|
we need more peeps to vote in the April ThOTM poll..... the lighting thread is really good, but not better than this thread!
http://reefcentral.com/forums/showth...8#post14697288
__________________
- Ryan B "that is enough skimmate to ruin lives." - GSMguy Current Tank Info: 220g Display, 70g sump, 35g frag, 50g fuge, 2x250w MH, 1x400w MH, 2x80w T5, 2x140w VHO Actinic |
|
|
|
03/26/2009, 09:07 PM
|
#513 |
|
Registered Member
Join Date: Sep 2008
Location: Ottawa, Ontario, Canada
Posts: 1,281
|
Great thread.. Just read all 21 pages and obviously some brilliant people contributing... Had to vote, just had to.
Soundwave, do you have any coral color/growth coloring photos... Technical stuff is wonderful, but at the end of the day it's all about the healthy corals, amazing colors and good growth... (for me..)
__________________
Spellking is an art form to which I have no brush. I'm not sure FOWLRs actually exist, I think they're like unicorns or platonic girlfriends. A FOWLR is just a reef tank that doesn't yet hold any coral. Current Tank Info: 180g display, 150gallon sump in-wall 4-side viewable sps dominated tank, ATI Powermodule, MRC MR-4 skimmer, GHL controller, Baling Method, Ultralith Reactor, Carbon & Phosphate Reactors, and general time consuming money pit that I live for. |
|
|
|
03/26/2009, 11:08 PM
|
#514 |
|
Registered Member
Join Date: Mar 2008
Location: Maroa, Il
Posts: 361
|
I just got done spending 6 hours redoing all my rock work. Unfortunately, I broke my orange monti cap into about 4 pieces. I guess I can sell the frags cheap, locally. A good size piece that looks whole is staying in there. After this little remodel, I have about 50 some odd pounds or more of rock left over. Amazed me. I kept out all the Tufa rock that I think was part of my problem with nutrients. That stuff traps everything.
I'll post pics when the tank clears up and I get final positions on things. |
|
|
|
03/26/2009, 11:22 PM
|
#515 |
|
Registered Member
Join Date: Aug 2008
Location: US ARMY - El Paso TX
Posts: 3,678
|
i'll take a piece of orange monti

__________________
Yes I hear voices in my head, but they speak spanish so I can't understand anything they say. there's no place like 127.0.0.1 It's a shame that stupidity isn't painful.... Current Tank Info: currently tankless....but planning an AIO |
|
|
|
03/26/2009, 11:49 PM
|
#516 |
|
Registered Member
Join Date: Mar 2008
Location: Maroa, Il
Posts: 361
|
You are a little far away.
|
|
|
|
03/27/2009, 08:19 AM
|
#517 |
|
Registered Member
Join Date: Dec 2003
Location: Milwaukee, WI
Posts: 1,161
|
LED driver Cheaper LED driver. This is a $3-4 driver that will run many more LEDs then the over-priced buck pucks. They do not have the dimming feature, but you can make one pulse width modulator (cheap) dim an entire series of these. Just a suggestion for doing the project much cheaper for DIYers.
The Luxeon Rebels are still in the lead for intensity, but are not cheaper and are not easy to solder (as we discussed at NR). I'm waiting for stronger and cheaper bins to arrive. (200lumen bins exist but are hard to find). I think I told you about how much of a difference an optic made in my old Luxeon K2 design didn't I? It increased my intensity by 2.5 times with no checkerboard pattern. I think you will find it WORTH the investment to buy and mount optics on each lens. I think I used 20 degree optics, you can crunch some numbers to see how much coverage the cone at x" will give you. The LEDs are throwing light in 140 some degrees and we want them around 20-45 degrees, going DOWN not out. You will be amazed at your new PAR readings. Shoot me a PM if you want any more advice.
__________________
300G SPS reef build in progress Current Tank Info: 300G reef under construction |
|
|
|
03/27/2009, 08:22 AM
|
#518 |
|
Registered Member
Join Date: May 2006
Location: Savannah, GA
Posts: 175
|
James I just noticed you are in Nashville. I am from Franklin and was just down there visiting family. Now I am back in KS with this crazy weather.
|
|
|
|
03/27/2009, 08:24 AM
|
#519 | |
|
Premium Member
Join Date: Oct 2007
Location: Cary, NC
Posts: 3,760
|
Quote:
Pure awesome.
__________________
- Ryan B "that is enough skimmate to ruin lives." - GSMguy Current Tank Info: 220g Display, 70g sump, 35g frag, 50g fuge, 2x250w MH, 1x400w MH, 2x80w T5, 2x140w VHO Actinic |
|
|
|
|
03/27/2009, 08:42 AM
|
#520 | |||
|
Clown Hoarder
Join Date: Apr 2001
Location: Wixom, MI
Posts: 1,603
|
Quote:
Quote:
Quote:
I agree conduction (transfer through a non-fluid medium) is the best method for heat transfer. Transfer to a heat sink with a void between the two materials IS not ideal. Thermal compounds between surfaces truly act as a medium for convection, so there is no ideal case except having a solid block. This is obviously not possible in most all cases. I'll agree to disagree about the specifics of a 'mechanical' interface and the value of this argument to the thread. I'm done ranting, sorry.... 
__________________
-Frank Save 'Wild' Nemo and his Nem.! Would you transplant a Redwood b/c it looks good with birds in the backyard??? Buy CB fish and Captive-Cloned nems. Current Tank Info: 175gal. 3-tier Reef, 400W/250W Radiums, LED/CFL Par38 Mangrove Lagoon 12g Aquapod GBTA 'sterile' tank w/ DIY LED Lighting |
|||
|
|
|
03/27/2009, 08:51 AM
|
#521 |
|
Registered Member

Join Date: Jan 2008
Location: New York City
Posts: 425
|
One thing that I haven't been able to find a lot of information on in this thread is regarding dimming (actual wiring, programing).
Can someone shed some light in this area? Also, Digital Aquatics RKE's LED controller can be used to control Aquailluminations LED. If I have the RKE, how can we use this for our own DIY LED purposes? |
|
|
|
03/27/2009, 08:57 AM
|
#522 |
|
Registered Member
Join Date: Mar 2008
Location: Maroa, Il
Posts: 361
|
I spent all of last night doing this...
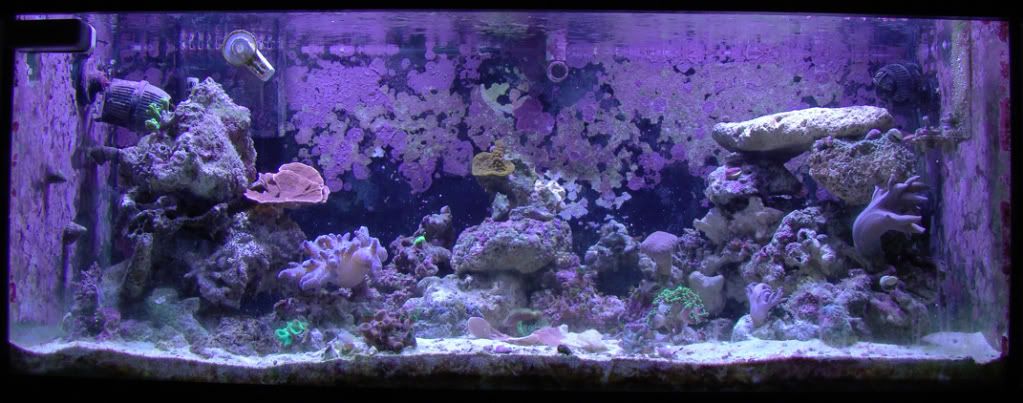 I don't like it yet but I plan on adding more corals in the near future. I don't have any optics pictures. I was so mad, I just ripped them off. I'll still be doing more experimenting this weekend. |
|
|
|
03/27/2009, 10:33 AM
|
#523 | |
|
Registered Member
Join Date: Dec 2003
Location: Milwaukee, WI
Posts: 1,161
|
Quote:
Yes, optics I consider a requirement to do this for our hobby, it increases the PAR so much that it's ridiculous to not do it. Speaking from experience here. If you want to dim the lights, some of the buck pucks have 2 pins that you insert a potentiometer between. You can even get the harness pre-wired for a few dollars. Look up the spec. sheet for more detail. I am discouraging use of the buck pucks now as they are expensive, and you can achieve the same thing by using the above mentioned driver circuit. I found that at the candlepower forums (they ONLY talk about LEDs, they know their stuff). Also, the driver I mentioned above, you can dim an unlimited amount of blue and white with just two dimmer circuits feeding into those drivers instead of having several dozen potentiometers. This is the way the newer solaris works, shh. **edited** selling items in this forum is not permitted.
__________________
300G SPS reef build in progress Current Tank Info: 300G reef under construction Last edited by szwab; 04/06/2009 at 09:15 AM. |
|
|
|
|
03/27/2009, 10:39 AM
|
#524 |
|
Premium Member
Join Date: Oct 2007
Location: Cary, NC
Posts: 3,760
|
ah I see. I guess if you're planning on optics maybe not the best choice, but I am using a few tri emitters just to cut down on the amount of different stars I have to mount and solder.
Might even get something done this weekend! Last night I started drilling some holes in my heatsinks. Even tapped my first hole but still have a few more. Definitely time consuming!I should add that I am not seeking to use these LEDs for intense PAR. I am looking to get "fill lighting" at a 45 degree angle which will supplement my main lighting. Basically just trying to illuminate the shadowed areas from my other lighting (which is downward rays)... I think this will help the growth forms of acros and milles and get more colorful tissue from the frontal view. Also like Soundwave, I will only be grouping LEDs in smaller areas, so I dont have room to have LEDS everywhere like optics require. I am using Green blue and white LEDs.... probably the only one to use Greens so far  I am also aware that light passing through water at an angle loses intensity. Dont care
__________________
- Ryan B "that is enough skimmate to ruin lives." - GSMguy Current Tank Info: 220g Display, 70g sump, 35g frag, 50g fuge, 2x250w MH, 1x400w MH, 2x80w T5, 2x140w VHO Actinic Last edited by ReefEnabler; 03/27/2009 at 10:53 AM. |
|
|
|
03/27/2009, 10:57 AM
|
#525 |
|
Registered Member
Join Date: Dec 2003
Location: Milwaukee, WI
Posts: 1,161
|
I doubt you'll like the 'fill' lighting. I tried this and it looked like a 6500K spotlight mixed into my 14K lights. yuck. good moonlights though. The acros will be a different color (for the worse) under white only tri stars.
How are you soldering your tri stars? Are you mixing blue and white on one disc? I was going to do royal blue/blue/cool white on each star and buy a optic but it is too expensive to buy a hot air gun just for this project alone... eventually I want one though. I think not using optics is the wrong direction either way. It's like mounting a MH w/o a reflector. Light is going at 140degrees! Why waste that light? you can half the amount of LEDs w/ optics for our usage. If you can get strong enough LEDs, you can add shimmer to your T5 setup if you have one. I couldn't find a good way to mount mine or I would have done so. They do great for a refugium by the way, or a FW planted tank or even to add light for house plants. Nope, I've used green in my array that I have for sale. 2 of them per 24 works well. It supplements some of the missing spectrum from the whites/blues.
__________________
300G SPS reef build in progress Current Tank Info: 300G reef under construction |
|
|
 |
|
|


