
|
|
 10/15/2011, 05:51 AM
|
#101 |
|
Reefing is my middle name
Join Date: Mar 2009
Location: Clearwater, FL
Posts: 5,796
|
Thanks for the reference. I will be ordering the kit they have.
|

|

|
|
10/16/2011, 04:41 PM
|
#102 |
|
Reefing is my middle name
Join Date: Mar 2009
Location: Clearwater, FL
Posts: 5,796
|
Tank is home. Now the fun begins.
 It its what it is and how it should be. |
|
|
|
|
10/16/2011, 04:42 PM
|
#103 |
|
Reefing is my middle name
Join Date: Mar 2009
Location: Clearwater, FL
Posts: 5,796
|
 It its what it is and how it should be. |
|
|
|
|
10/16/2011, 06:12 PM
|
#104 |
|
Registered Member
Join Date: May 2011
Location: LARGO, FLORIDA
Posts: 220
|
I am wright there with you my tank is on the stand but today i had to get the 500 ready for pick up.
Looks good so far cant wait to see it with water in it.
__________________
IT IS NOT A HOBBY IT IS A LIFE CHANGING EXPERIENCE Current Tank Info: 300 dd in the works |
|
|
|
|
10/16/2011, 06:56 PM
|
#105 |
|
Registered Member
Join Date: Nov 2010
Location: Fort Wayne
Posts: 104
|
Awesome find, sanding and polishing isn't really all that hard but it does take a lot of elbow grease. Can't wait to see it full.
|
|
|
|
|
10/18/2011, 06:59 AM
|
#106 |
|
Reefing is my middle name
Join Date: Mar 2009
Location: Clearwater, FL
Posts: 5,796
|
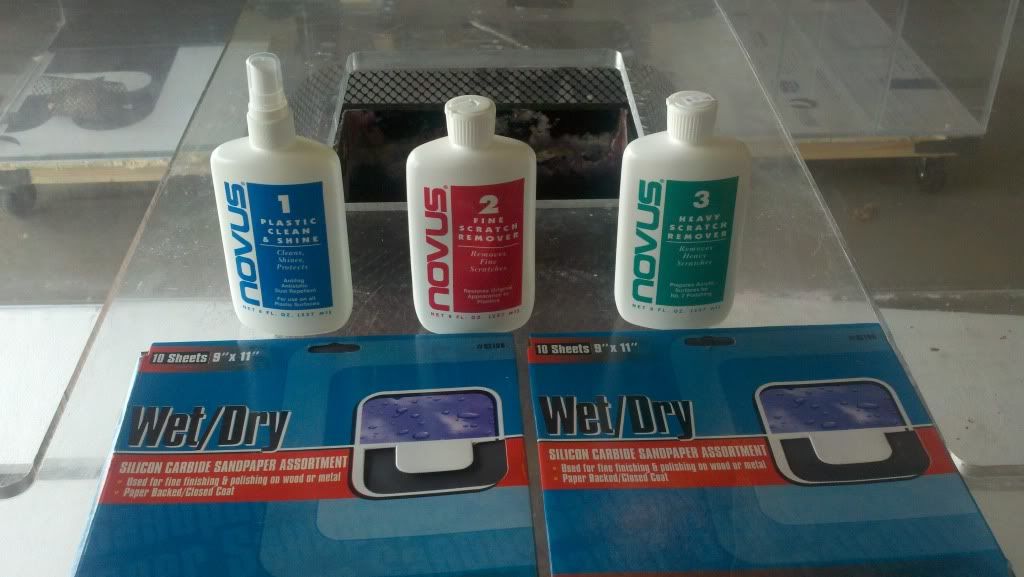 Time for some elbow grease. |
|
|
|
|
10/18/2011, 06:59 AM
|
#107 | |
|
Reefing is my middle name
Join Date: Mar 2009
Location: Clearwater, FL
Posts: 5,796
|
Quote:
|
|
|
|
|
|
10/19/2011, 07:39 PM
|
#108 |
|
Reefing is my middle name
Join Date: Mar 2009
Location: Clearwater, FL
Posts: 5,796
|
While awaiting on the sander I started to examine my overflow. I always wanted to do a bean animal so I will try with this center overflow. Here is the current overflow.
 Once I get the hole saw I will incorporate this for my new overflow and return. 
|
|
|
|
|
10/26/2011, 02:40 PM
|
#109 |
|
Reefing is my middle name
Join Date: Mar 2009
Location: Clearwater, FL
Posts: 5,796
|
Change #5,6,or 7
I have to change the style of my closed loop for the simple fact that my build went from building the tank to acquiring a tank with a center overflow. This is my new idea for drilling the closed loop. I would like your opinions or ideas.
Thanks Wayne Before: 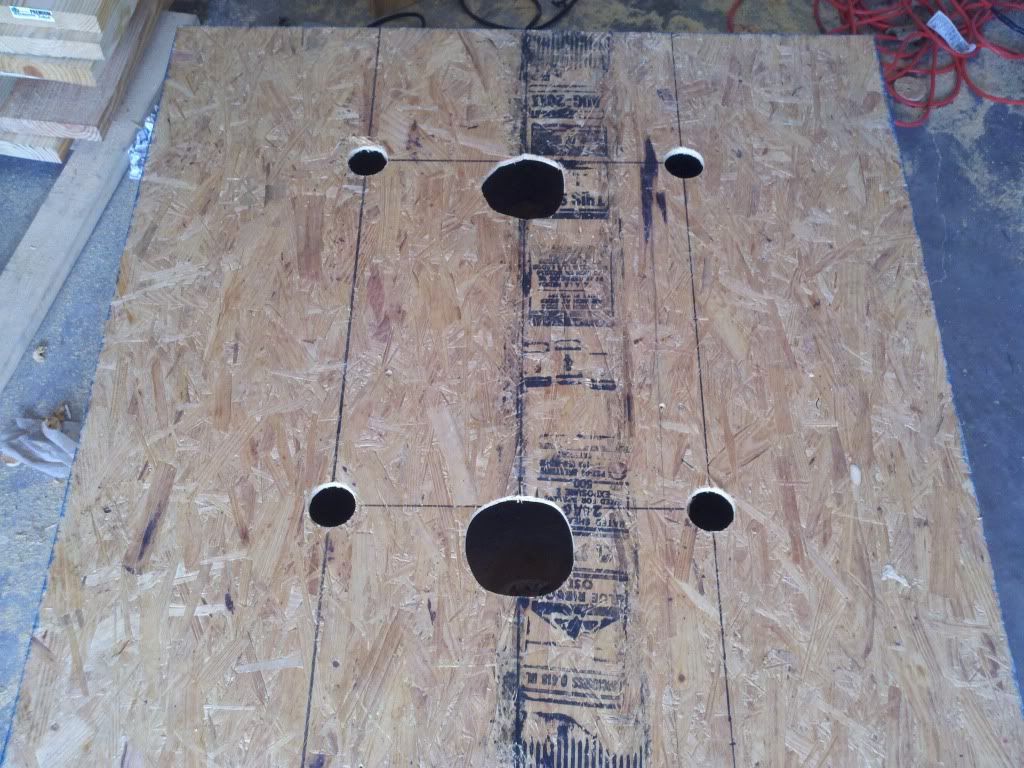 After:  
|
|
|
|
|
10/26/2011, 05:47 PM
|
#110 |
|
Registered Member
Join Date: May 2011
Location: LARGO, FLORIDA
Posts: 220
|
are you doing one cl or two
__________________
IT IS NOT A HOBBY IT IS A LIFE CHANGING EXPERIENCE Current Tank Info: 300 dd in the works |
|
|
|
|
10/26/2011, 05:57 PM
|
#111 | |
|
Reefing is my middle name
Join Date: Mar 2009
Location: Clearwater, FL
Posts: 5,796
|
Quote:
It its what it is and how it should be. |
|
|
|
|
|
10/26/2011, 06:22 PM
|
#112 |
|
Registered Member
Join Date: May 2011
Location: LARGO, FLORIDA
Posts: 220
|
you are tieing two drains in two one just get strainers for the drains would be easier i would think.
__________________
IT IS NOT A HOBBY IT IS A LIFE CHANGING EXPERIENCE Current Tank Info: 300 dd in the works |
|
|
|
|
10/26/2011, 06:29 PM
|
#113 | |
|
Reefing is my middle name
Join Date: Mar 2009
Location: Clearwater, FL
Posts: 5,796
|
Quote:
It its what it is and how it should be. |
|
|
|
|
|
10/28/2011, 10:12 AM
|
#114 |
|
SALTWATER since '73
Join Date: Apr 2006
Location: Katonah, NY/ San Fernando Ca./ Sea Isle City NJ
Posts: 6,210
|
We're Waaaaaaaaiiiiiiii TING!
Any progress?
__________________
______________________________________ Jan. '11 TOTM Manhattan Reefs Current Tank Info: 500g & 200g acrylic DTs/2 separate reef systems |
|
|
|
|
10/28/2011, 10:30 AM
|
#115 | |
|
Reefing is my middle name
Join Date: Mar 2009
Location: Clearwater, FL
Posts: 5,796
|
Quote:
|
|
|
|
|
|
10/28/2011, 10:53 AM
|
#116 |
|
SALTWATER since '73
Join Date: Apr 2006
Location: Katonah, NY/ San Fernando Ca./ Sea Isle City NJ
Posts: 6,210
|
I'm no expert on acrylic, but I have had and used them since 1991, and when I have 'redone' them, I used a small electric 'buffer/sander' (never questioned RPMs, and never had a problem) IMO I wouldn't be using 1500 grit, unless you have very bad/deep scratches. I'd start with 'finer' grit for the entire job, and go back to 'problem areas' with the courser grits.
I just purchased 4000,6000,& 8000 micro mesh, and a Novus kit to redo THREE 130g tanks that I am taking out of service, and will be selling 2 of them, after I make them 'like new'!
__________________
______________________________________ Jan. '11 TOTM Manhattan Reefs Current Tank Info: 500g & 200g acrylic DTs/2 separate reef systems |
|
|
|
|
10/28/2011, 11:06 AM
|
#117 |
|
Reefing is my middle name
Join Date: Mar 2009
Location: Clearwater, FL
Posts: 5,796
|
Well I was on the phone with Matt Conrad from See Clear Acrylic Refinishing and we talked for a good while and said start off with 1500 with a spray bottle of water and work my way up to 6000. Where did you get those sand paper grits from?
|
|
|
|
|
10/28/2011, 11:27 AM
|
#118 |
|
SALTWATER since '73
Join Date: Apr 2006
Location: Katonah, NY/ San Fernando Ca./ Sea Isle City NJ
Posts: 6,210
|
Amazon
__________________
______________________________________ Jan. '11 TOTM Manhattan Reefs Current Tank Info: 500g & 200g acrylic DTs/2 separate reef systems |
|
|
|
|
10/28/2011, 11:59 AM
|
#119 |
|
Reefing is my middle name
Join Date: Mar 2009
Location: Clearwater, FL
Posts: 5,796
|
Thanks.
|
|
|
|
|
10/28/2011, 12:19 PM
|
#120 |
|
Registered Member
Join Date: Oct 2007
Location: FLORIDA
Posts: 297
|
Nice set up. Tagging along. Which shop closed down?
|
|
|
|
|
10/28/2011, 01:48 PM
|
#121 |
|
Registered Member
Join Date: Aug 2006
Posts: 306
|
Maybe its already been recommender but, I'd suggest to use a random orbital sander for better results;
|
|
|
|
|
10/28/2011, 03:27 PM
|
#122 | |
|
Reefing is my middle name
Join Date: Mar 2009
Location: Clearwater, FL
Posts: 5,796
|
Quote:
It its what it is and how it should be. |
|
|
|
|
|
10/28/2011, 03:28 PM
|
#123 | |
|
Reefing is my middle name
Join Date: Mar 2009
Location: Clearwater, FL
Posts: 5,796
|
Quote:
It its what it is and how it should be. |
|
|
|
|
|
10/28/2011, 04:07 PM
|
#124 |
|
Registered Member
Join Date: May 2011
Location: LARGO, FLORIDA
Posts: 220
|
Do you need air or electric for your sander i have both you are welcome to use eather one if you would like
__________________
IT IS NOT A HOBBY IT IS A LIFE CHANGING EXPERIENCE Current Tank Info: 300 dd in the works |
|
|
|
|
10/28/2011, 06:24 PM
|
#125 |
|
Registered Member
Join Date: Jan 2010
Location: Las Vegas
Posts: 152
|
This is a cut and paste from a previous thread, but should get you in the right direction on polishing. Also, make sure you use quality sand paper (3m). It will last ten times as long.
Polishing acrylic 101 I'm going give everyone a a few tips and hopefully show a few of you guys how to polish out some of the old acrylic tanks we all have sitting around. Maybe even give you the confidence to remove that big scratch in our main display tank. I would first like to say that I'm not an acrylic expert like Lee. I don't work in acrylic everyday, nor have I ever. I gained my knowledge from owning a detail shop in Lake Havasu City about ten years ago, and master my skills by polishing boats and cars. I realized when I got in aquariums/reefs a little over a year and half ago that all the same principles to polishing paint transfer over to acrylic for the most part. Lets get started Step #1 WET SANDING There are a few different ways to do this. I have found the most efficient method is a D/A sander with a 1000 grit sand paper. I will basically wet sand the entire inside of the tank with the D/A and 1000 grit. If you dont have a D/A sander. You can use a rubber sanding block. Just make sure you dont use just your fingers behind the sand paper. If you do, this can lead to grooves in the surface your sanding & you will not be happy camper. I try to stay away from the corners if possible since its hard to get a polisher in the corner. I'll cover that a little more in the future. If there is any deep scrathes (one that you can feel if you slide your finger nail across it), I'll take a sharpie and draw a line in the scratch. This will help you know when the scratch is gone. Basically the sharpie high light the scratch. The scratch/shapie mark will slowly disappear/fade as you wet sand the surrounding area down to deepth of the scratch. If scratch's are too deep, sometimes they need to be left alone, or polished out only slightly. The only reason I would ever leave a scratch, is if the scratch is so deep that it would create a visual distortion if it was sanded out. This is very rare instance. Let me go back a little. The second reason I use the sharpie is because once you start wet sanding, the water will turn into a white milky solution, and the acrylic will turn into a white haze. The scratch's will get lost in the haze & only seem to re-appear once you start to polish. Then you have to go back and wet sand that spot again. This creates the one step forward, two steps back effect. If you dont have a D/A sander, I would highly recommend buying one. You can pick up a cheapo one at Harbor Frieght for about 30 bucks. Your arms will thank you for it & you'll save yourself a few hours. I know everyone has thier own opoins on what grits to use. I dont really recommend using anything more then 1000 grit. If you use a 600 or lower you'll blow right through the scratch's, but you will also be creating additional steps by having to remove scratch's from the 600. I use 1000 then 1500. I don't really see the need for anything higher since the high speed buffer will remove the scratchs from the 1500 with ease. So now you have wet sanded out all the scratchs with the 1000 and 1500 grit. Your tank should look like a smooth white haze that's difficult to see through. All the scratch's should be gone. Now your ready for the next step. Step #2 POLISHING There are a few tools that most of us already have, and few you may need to purchase. They are all pretty reasonable prices, unless your buying MAC or Snap On. #1- cordless drill #2- varible speed polisher with a velcro backing plate #3- wool/foam polishing pads #4- Mothers Power ball or cone #5- polishing compound (NOVUS works well) I start by putting a wool pad on my 7" varible speed polisher. I start with a wool pad over foam since wool has the most cutting action. I then put a little compund on the pad, and smear it in a little. I smear the compound to prevent it from slinging off the pad once the buffer starts spinning. Start with the buffer on the slowest speed. You can increase the speed a little once you get going. It does take practice to get comfortable with the polisher. I'll go over the larger surfaces with the larger polisher. The large polisher will give you the best results. It works pretty fast compared to the other methods. Just make sure you keep the polisher on a low speed, keep the polisher moving at all time to avoid heat/compund build up. Make sure you keep the pad tiled at a slight angle. The rest you will just have to figure out by trial and error. I also keep a squirt bottle filled with water, I will mist the surface I'm working every few minutes to get a little more work time out of the buffing compound, and keep the tempature down. You want to make sure that you don't get too much heat build up, the heat can cause crazing. Once your done polishing. You'll find some spots you missed, or some scratchs you didn't notice. Just go back and sand them out and polish that spot again. I like to use the Mothers power cone and my cordless drill get into area's where my polisher could not reach. You'll find that the corners are a little difficult to get into. The cone gets in there pretty good, but the results are a little less than that of the polisher. Once your done polishing, you need to was the tank out & get rid of the compounds that were slung around. All in all, polishing out acrylic is not rocket science. It is labor intesive and takes some time. You'll get better with time, but can save yourself a ton of cash. I Think ATM charges like $75 an hour. If anything, go slow, take your time and you'll be happy with the result |
|
|
|
 |
|
|
 Similar Threads
|
||||
| Thread | Thread Starter | Forum | Replies | Last Post |
| New to forum!!! 150 gallon +40 Gallon sump Build!!!!! | curryb15 | Large Reef Tanks | 15 | 04/30/2012 09:01 AM |
| 56 Gallon Column Build, Movin on UP | jjmill1980 | Reef Discussion | 15 | 06/06/2011 12:16 PM |
| 90 Gal Build | BradMugs | Do It Yourself |
15 | 12/08/2010 07:49 PM |
| 600 gallon Tank build... | eisaiasjr | Large Reef Tanks | 6 | 07/31/2008 03:32 PM |
| Try this again-My 600 gallon tank build | blfuller123 | Large Reef Tanks | 99 | 01/23/2008 10:33 AM |


