
|
|
 03/12/2010, 09:33 PM
|
#126 |
|
Team RC Member
Join Date: Jul 2005
Location: houstonia
Posts: 7,989
|
When you lift it, does the middle section holding the lights bend at all? I've heard from others with similar setups that they had to reinforce them to keep these pendants from bowing down. In any case, this looks awesome!
__________________
-Chris- You don't win friends with salad. "Look! They're trying to learn for free!" ... "Use your phony guns as clubs!" Current Tank Info: rectangluar? wet? |

|

|
|
03/13/2010, 10:17 AM
|
#127 | |
|
SPS Slave
 Join Date: Aug 2003
Location: Richmond, VA
Posts: 3,388
|
Quote:
__________________
- Mike & Terry "Less technology, more biology ... indeed." - Gary White Current Tank Info: 200g temp garage tank |
|
|
|
|
|
03/13/2010, 01:17 PM
|
#128 |
|
Team RC Member
Join Date: Jul 2005
Location: houstonia
Posts: 7,989
|
I'm still waiting to see how drummereef's setup plays out, but he used estoconnectors (which uses shorter interconnects) and says he had some bending. I may end up with ez tube just for that reason.
__________________
-Chris- You don't win friends with salad. "Look! They're trying to learn for free!" ... "Use your phony guns as clubs!" Current Tank Info: rectangluar? wet? |
|
|
|
|
03/13/2010, 01:49 PM
|
#129 | |
|
Team RC Member
Join Date: Jul 2006
Location: STL
Posts: 14,754
|
Quote:
 Amazing build Mike!!! 
__________________
-Brett 180g Marineland Starfire In-Wall 278 gallon system |
|
|
|
|
|
03/16/2010, 08:56 PM
|
#130 | |
|
SPS Slave
Join Date: Aug 2003
Location: Richmond, VA
Posts: 3,388
|
Quote:
The thing that really makes our light rack strong is the outside rails that dont have any of the connectors except at the corners. We're hoping to figure out how to mount VHOs in space between the outside rails and inner structure.
__________________
- Mike & Terry "Less technology, more biology ... indeed." - Gary White Current Tank Info: 200g temp garage tank |
|
|
|
|
|
03/19/2010, 05:42 AM
|
#131 | |
|
Registered Member
Join Date: Feb 2002
Posts: 278
|
Quote:
__________________
Have nothing in your home you do not believe to be beautiful, or know to be functional. - William Morris Current Tank Info: 180 delivered...working on stand |
|
|
|
|
|
03/19/2010, 10:04 AM
|
#132 |
|
Registered Member
Join Date: Feb 2008
Location: Independence, KY
Posts: 194
|
Amazing set up! Any chance you have a copy of the design you used for the lighting so I could duplicate it with EZtube? I feel like I am copying homework! Also interested in how you fit the VHO's in there. Are you planning to go with two 60" in the front and back?
|
|
|
|
|
03/19/2010, 10:06 AM
|
#133 |
|
Registered Member
Join Date: Feb 2008
Location: Independence, KY
Posts: 194
|
NEVER Mind!!! Sorry, did not realize the picture on the other page had the dimensions! Guess I am getting caught cheating! lol
|
|
|
|
|
03/19/2010, 10:50 AM
|
#134 |
|
Premium Member
Join Date: Apr 2003
Location: Chesapeake VA
Posts: 399
|
Not to answer for him but the pic being referenced is from Sanjay's setup and was used as an example. If you've seen any of Sanjay's recent pic's I'd say there's no problem what so ever with using them, I'd just make sure they're clean and it might not hurt to let them soak for awhile to "cure" before dumping them in a new or established system just to be sure.
__________________
Mike Current Tank Info: Currently tankless planning ~90G nano |
|
|
|
|
03/19/2010, 10:54 AM
|
#135 |
|
Premium Member
Join Date: Apr 2003
Location: Chesapeake VA
Posts: 399
|
BTW the build is really looking good and I can't wait to see it with water in it and then with all your existing corals. It's going to be sweet and like others I'm watching closely to get ideas for a similar upgrade in my future.
When the time comes if you don't mind I'll probably give you a shout to get the cabinet builders contact info since I'm in the VB area and it looks like he does good work.
__________________
Mike Current Tank Info: Currently tankless planning ~90G nano |
|
|
|
|
03/22/2010, 02:51 PM
|
#136 |
|
Registered Member
Join Date: Mar 2008
Location: Orange, Va.
Posts: 28
|
Come on Mike, lets see some more pics.
  
|
|
|
|
|
03/22/2010, 06:05 PM
|
#137 | |
|
Registered Member
Join Date: Jun 2009
Location: Richmond, VA
Posts: 449
|
Quote:
I agree completely.....that thing should have water in it by now....... 
__________________
Chuck and Milissa Current Tank Info: 150 gal with 40b sump/fuge |
|
|
|
|
|
03/22/2010, 07:43 PM
|
#138 | |
|
SPS Slave
Join Date: Aug 2003
Location: Richmond, VA
Posts: 3,388
|
Quote:
Feel free to give us a shout about any of the subs or companies we've used.
__________________
- Mike & Terry "Less technology, more biology ... indeed." - Gary White Current Tank Info: 200g temp garage tank |
|
|
|
|
|
03/22/2010, 07:45 PM
|
#139 | ||
|
SPS Slave
Join Date: Aug 2003
Location: Richmond, VA
Posts: 3,388
|
Quote:
Quote:

__________________
- Mike & Terry "Less technology, more biology ... indeed." - Gary White Current Tank Info: 200g temp garage tank |
||
|
|
|
|
03/22/2010, 08:32 PM
|
#140 |
|
SPS Slave
Join Date: Aug 2003
Location: Richmond, VA
Posts: 3,388
|
OK, we've got some progress to show you guys.
The humongous 3.25" diamond hole saw finally arrived. Big Joe from FW came by last night to drill our CL intake hole. That went without a hitch, and we now have the "Sea World" bulkhead installed  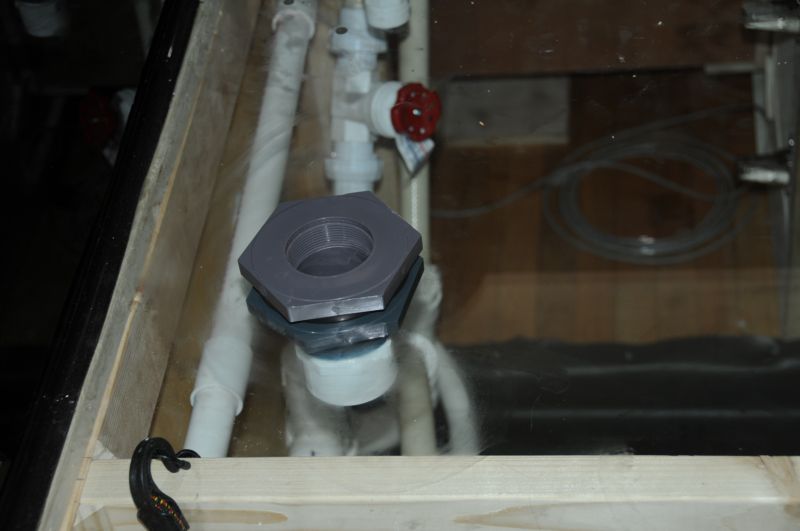 Here's a shot of what the CL pump with the OM4 and the intake plumbing is going to look like.  This 2" plumbing stuff is huge. Seems like overkill, but we're very interested to see how this Dart performs with a full 2" intake and the OM4 going... the CL should really be generating some massive flow!  Switching gears - let's talk about the light rack. We experimented with several designs before we landed on this one. Recall that the original canopy design had a board mounted on sliding rails that were affixed horizontally. 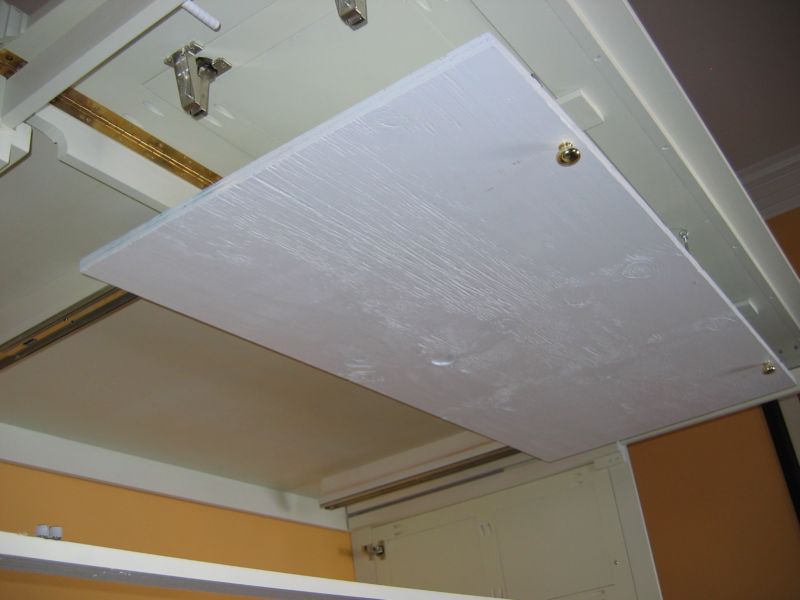 So of course, we designed the light rack to have a board mount flush in the top of it and slide right into the existing rails. So off to Lowes, pick up some 1/2" plywood, sand it, apply three coats of white enamel, mount the rail inserts on there (after careful measurements), and voila! 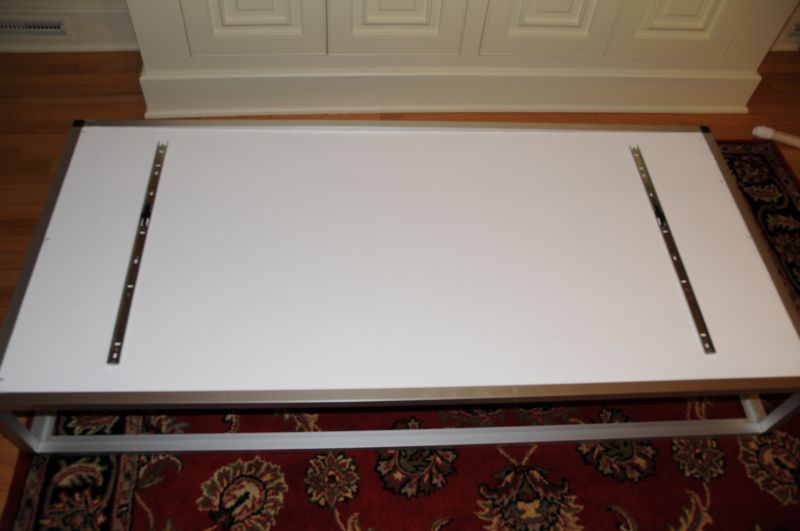 Problem is, the board added a lot of weight to the rack - and we do mean a LOT. So much in fact that the rails would no longer hold the rack, seeing as how they are mounted rather "non traditionally". Hermione the project inspector was not amused:  So as is often the case with these projects, it was back to the drawing board...
__________________
- Mike & Terry "Less technology, more biology ... indeed." - Gary White Current Tank Info: 200g temp garage tank Last edited by Dino; 04/20/2013 at 05:00 AM. |
|
|
|
|
03/22/2010, 08:51 PM
|
#141 |
|
SPS Slave
Join Date: Aug 2003
Location: Richmond, VA
Posts: 3,388
|
So to fix our light rack canopy-mounting dilemma, we looked around at some big weight-bearing sliding rail setups. The closest thing we could think of was those pots & pans rack jobbies they sell at Lowe's. Those all had the sliding rails mounted vertically - makes sense, as that provides the greatest load-bearing strength. So then we got to thinking, let's flip the rails vertical, and then construct some kind of bracket system on top of the light rack so we can attach the rails. Here's how it turned out:
  We picked up some of those DIY plugs and created quick-disconnects for the Lumenmax Elites. The wires are run into the wall at canopy level, and come out underneath the stand, where they'll be connected up to the ballasts: 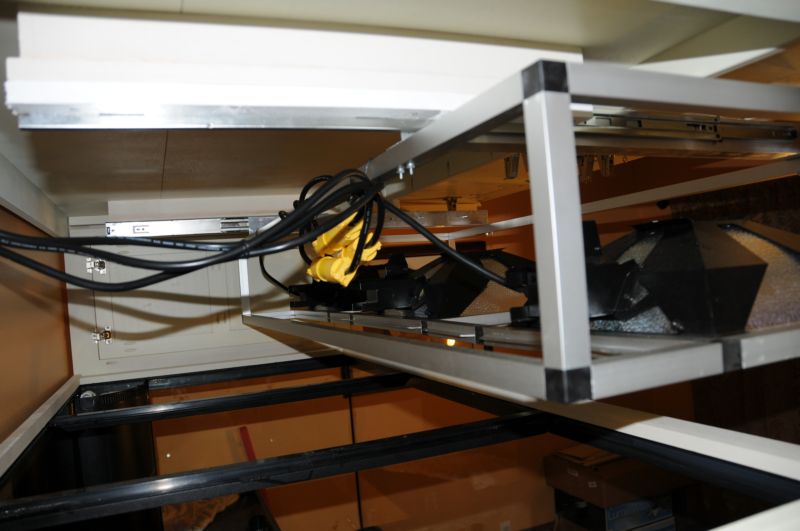 Here's how it looks from underneath:   Still quite a few more things to do with the lighting:
But getting the rack mounted was a big check mark for the project.
__________________
- Mike & Terry "Less technology, more biology ... indeed." - Gary White Current Tank Info: 200g temp garage tank Last edited by Dino; 04/20/2013 at 05:00 AM. |
|
|
|
|
03/22/2010, 09:38 PM
|
#142 |
|
Registered Member
Join Date: May 2007
Location: Midlothian, VA
Posts: 713
|
Looking dang good. Keep up the progress so we can get some water in there.
__________________
Rob __________ __________________ Current Tank Info: 500g w/ a few fish & little coral, but that will change. 4 MH(400w-2-10K & 2-20k), 4-6' VHO, CL thru eurobracing, 2-Tunze's, OCT 5000ext., RKE, 2-550's LFR(GFO & Carbon), 2-part, and more equipment to add down the road. |
|
|
|
|
03/23/2010, 06:08 PM
|
#143 |
|
Registered Member
Join Date: Jun 2009
Location: Richmond, VA
Posts: 449
|
Wow!!! You guys don't disappoint the waiting masses. Great job, very impressive....Now I know I want to be just like you when I grow up. ;-)
__________________
Chuck and Milissa Current Tank Info: 150 gal with 40b sump/fuge |
|
|
|
|
03/23/2010, 06:29 PM
|
#144 |
|
Registered Member
Join Date: Dec 2005
Location: Canada
Posts: 1,578
|
Nice work on the slides for the light rack.
I've been thinking about your access to inside the tank... With the lights over the tank, you'll burn yourself if you reach in. So anytime you need to do something inside the display, you'll have to roll the lights out of the way and all of your access will be from the ends. That's fine, but with the lights rolled out it will be dark in the display tank. You might consider mounting some sort of light to the top/inside of your canopy. That way, you can turn that light on so you can see what you are doing when you are working in the tank. Plumbing coming along...don't forget to put union ball valves on every output of that 4-way.
__________________
Fishlist: Tangs: Yellow, Vlamingi, Blonde Naso, Unicorn, Atlantic Blue Others: Maroon Clown(s), Foxface, Majestic Angel, Hawkfish and more.. Current Tank Info: 400gal Envision Acrylic reef started 04/07 |
|
|
|
|
03/25/2010, 12:16 AM
|
#145 |
|
Registered Member
Join Date: Sep 2006
Location: Lake Jackson, Tx
Posts: 548
|
Tagging along...really like how your stand turned out
|
|
|
|
|
03/28/2010, 12:34 AM
|
#146 | ||||
|
SPS Slave
Join Date: Aug 2003
Location: Richmond, VA
Posts: 3,388
|
Quote:
Quote:
Quote:
Quote:
You guys stay tuned. The tank's got water in it finally. We're both exhausted of two full days work on it, and need some sleep. 
__________________
- Mike & Terry "Less technology, more biology ... indeed." - Gary White Current Tank Info: 200g temp garage tank Last edited by prop-frags; 03/28/2010 at 12:41 AM. |
||||
|
|
|
|
03/28/2010, 05:56 AM
|
#147 | |
|
Registered Member
Join Date: Jun 2009
Location: Richmond, VA
Posts: 449
|
Quote:
__________________
Chuck and Milissa Current Tank Info: 150 gal with 40b sump/fuge |
|
|
|
|
|
03/28/2010, 07:20 AM
|
#148 |
|
Registered Member
Join Date: Jan 2006
Location: Yukon, Oklahoma
Posts: 1,908
|
Great build thread. Love the cabinet work and quartz. I am beginning a build on my 300DD. I am considering doing something like you have done in regards to the cabinet top. What kind of supplimental lighting are you using?
__________________
Doug G. "We can't help everyone, but everyone can help someone" Ronald Reagan (Eagles) LIFE'S BEEN GOOD Current Tank Info: 300 Gal starfire Reef Tank, SPS, LPS and zoas, 3-LumenMax MH fixtures driven by 250 watt icecap's and Radium bulbs, 2-Tunze 6105 controllable pumps with 7095 multi controller, 100 gal sump/refugium... 100 gal tank with T-5's |
|
|
|
|
03/28/2010, 06:43 PM
|
#149 | |
|
SPS Slave
Join Date: Aug 2003
Location: Richmond, VA
Posts: 3,388
|
Quote:
The whole rack 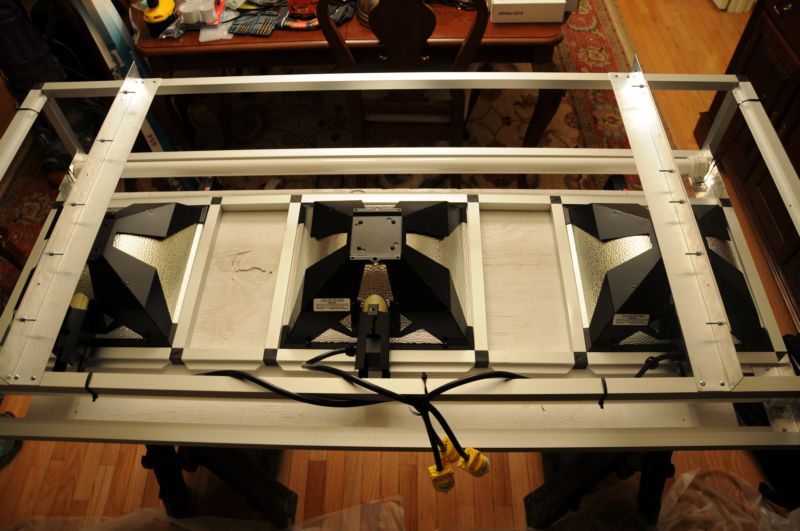 Close up of one end so you can see the VHO brackets 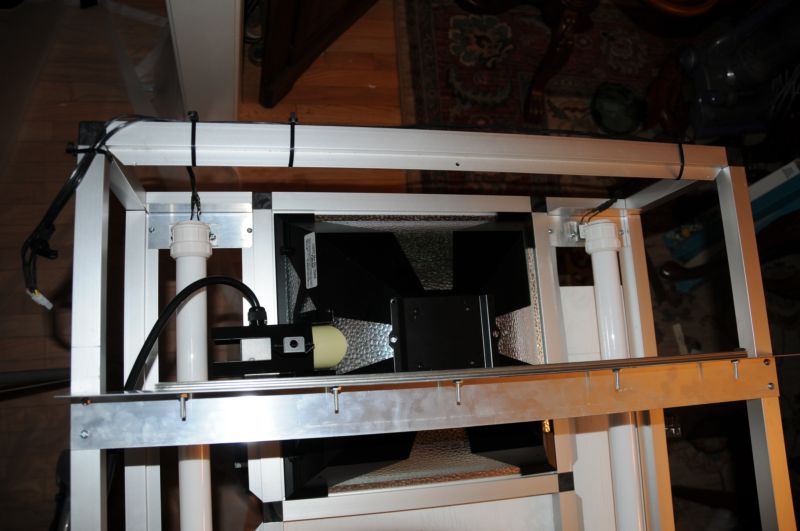
__________________
- Mike & Terry "Less technology, more biology ... indeed." - Gary White Current Tank Info: 200g temp garage tank Last edited by Dino; 04/20/2013 at 05:01 AM. |
|
|
|
|
|
03/28/2010, 07:04 PM
|
#150 |
|
SPS Slave
Join Date: Aug 2003
Location: Richmond, VA
Posts: 3,388
|
OK, I promised you guys some pics for the progress we've made over the weekend...
First, let's cover the aquascaping. This was the most time-consuming work, but we were expecting a long investment to get everything looking the way we have planned. We started out with setting up our work area out in the garage - set up the work table, got all the tools, fiberglass rods, epoxy, and live rock. Laying everything out helped us a lot as we went to select the pieces and get the design to work the way we needed it to. 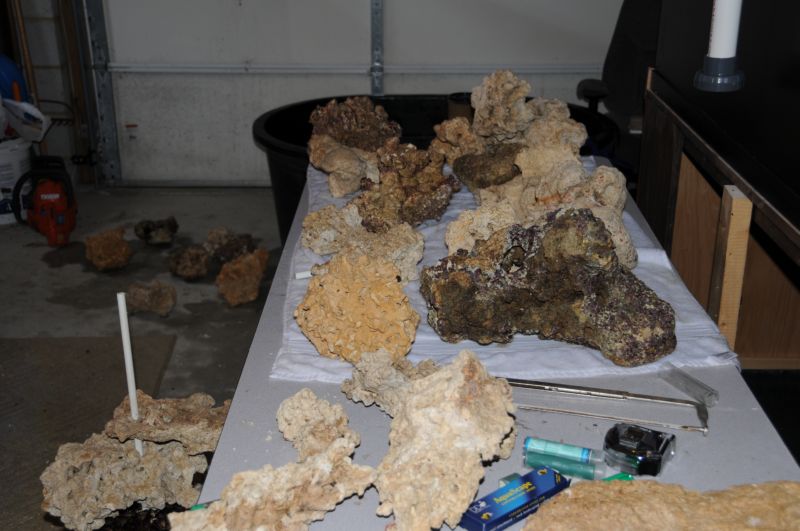 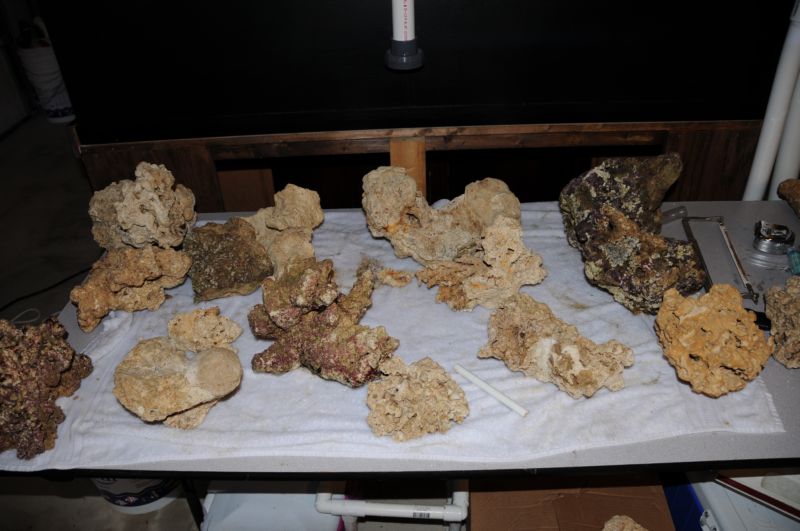 The process went pretty much just like the prototyping we did. Lay out the rock, use a 1/2" wood bore bit to drill the holes, and stack using the fiberglass rods. It was important to choose the placement of the rock carefully in order to get the friction/binding action we wanted. This allowed the pieces to stay in place without the need for much epoxy, and balanced the structures so we were able to get some of the "gravity defying" designs we wanted.  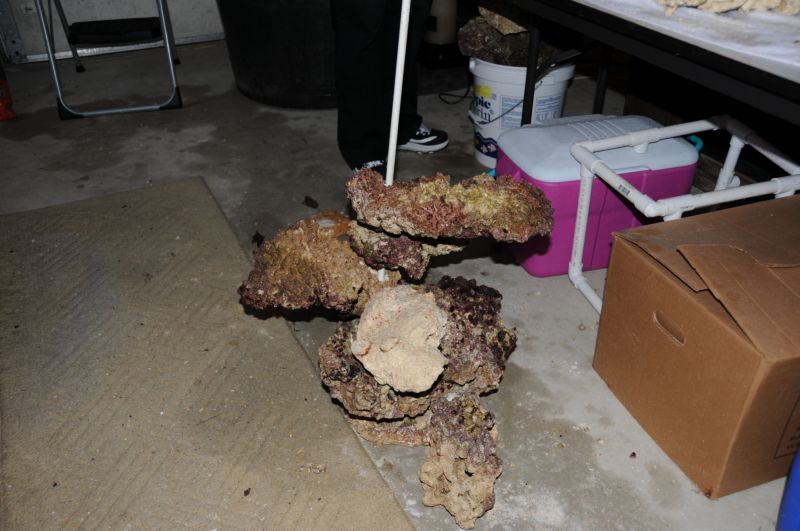 We taped out the dimensions of the tank on the garage floor, along with the overflows and CL bulkheads to guide our designs. Clearly, it was important to get a good fit within the tank and have our "bonsai trees" integrated well into the CL design. In this set of pics you might be able to make out some of the "branch extensions" we did. This was accomplished with smaller 1/4" rods pushed in along the horizontal length of the rock and some epoxy between the joints: 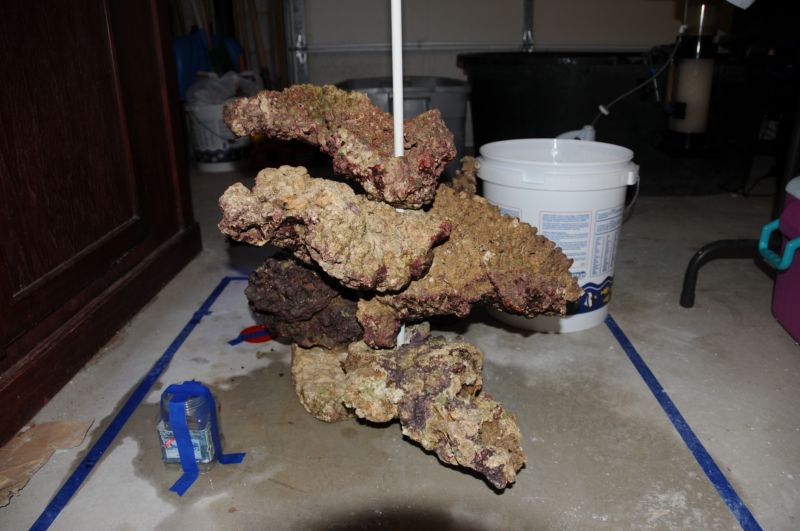 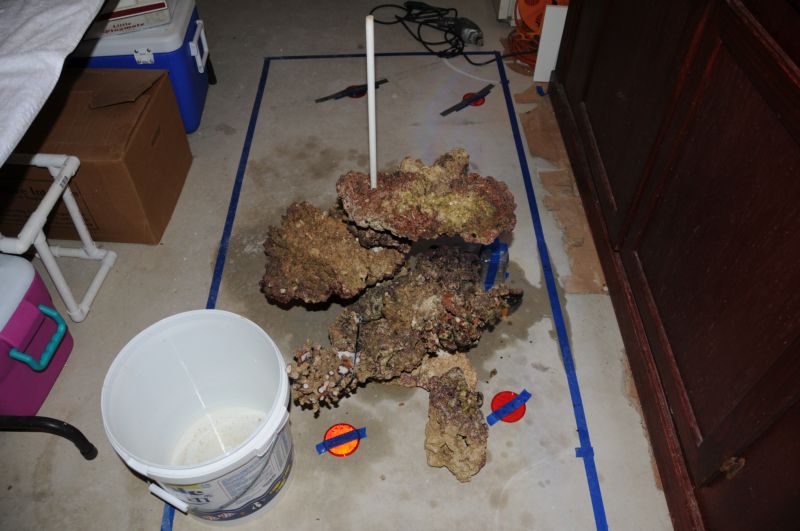 Next up - vinegar and R/O water sponge bath for the inside of the tank - get her all shined up and ready to go... Mr. Frodo the tank inspector gave it the once over when we were done 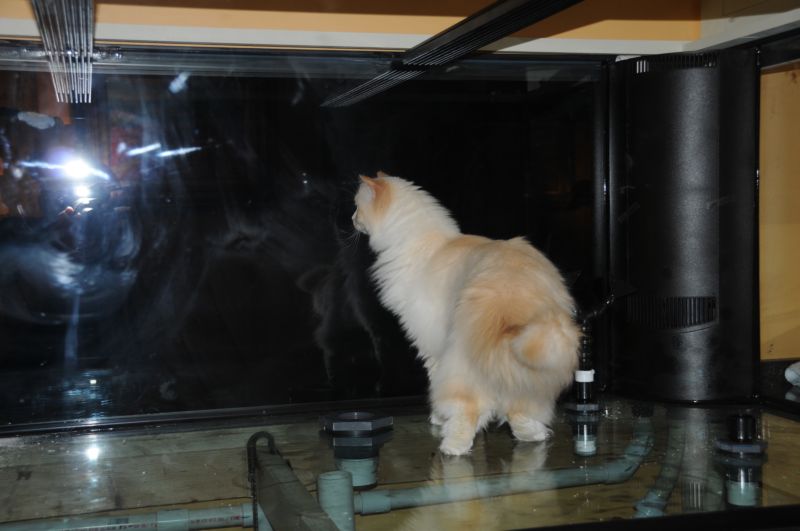
__________________
- Mike & Terry "Less technology, more biology ... indeed." - Gary White Current Tank Info: 200g temp garage tank Last edited by Dino; 04/20/2013 at 05:01 AM. |
|
|
|
 |
|
|


