


|
 |
|
|
#1 |
|
Registered Member
Join Date: Oct 2013
Posts: 85
|
Kannon's 210 Gallon Build
SO.... I pulled the trigger on a brand new 210 tank and stand i found on CL for $600. I promised the wife I wouldnt upgrade for at least another year but... that was 3 months ago and this deal couldnt be passed up. I believe its a Aqueon 210 gallon. 72x25x28.
Most likely it will be several months before this baby is up an running, as i have lots to plan out  I do have some concerns on this stand, best i can figure its the same one offered on the Aqueon website, however it doesnt seem very structurally sound. I mean its brand new and everything is in perfect condition, it just seems to simple. Maybe my construction back ground is getting the best of since "i didnt build it, i dont trust it".... so i will probably sell this thing or modify it not really sure. I do have question about plumbing. would it be ok to drill another hole in the bottom of both of these overflows? i still want to run the return through there and not run it up the back, and run a full siphon and full open drain in each one. ..... would that be ok? or am i asking for too much? here is my 2 year old(Kannon) in "his" new tank, you can see my wife in the reflection maybe a little upset...  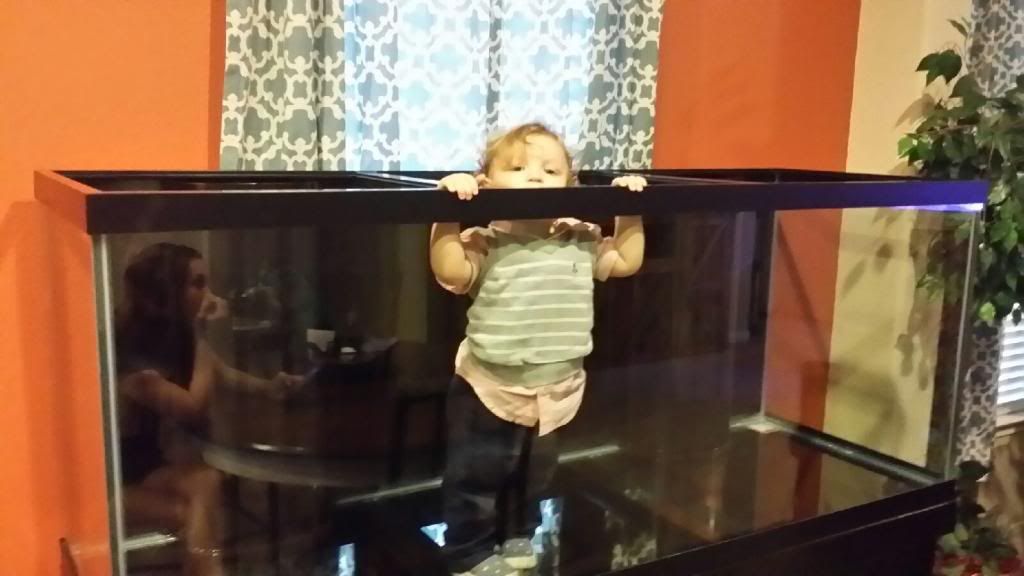
|
|
|

|
|
|
#2 |
|
Registered Member
Join Date: Oct 2013
Posts: 85
|
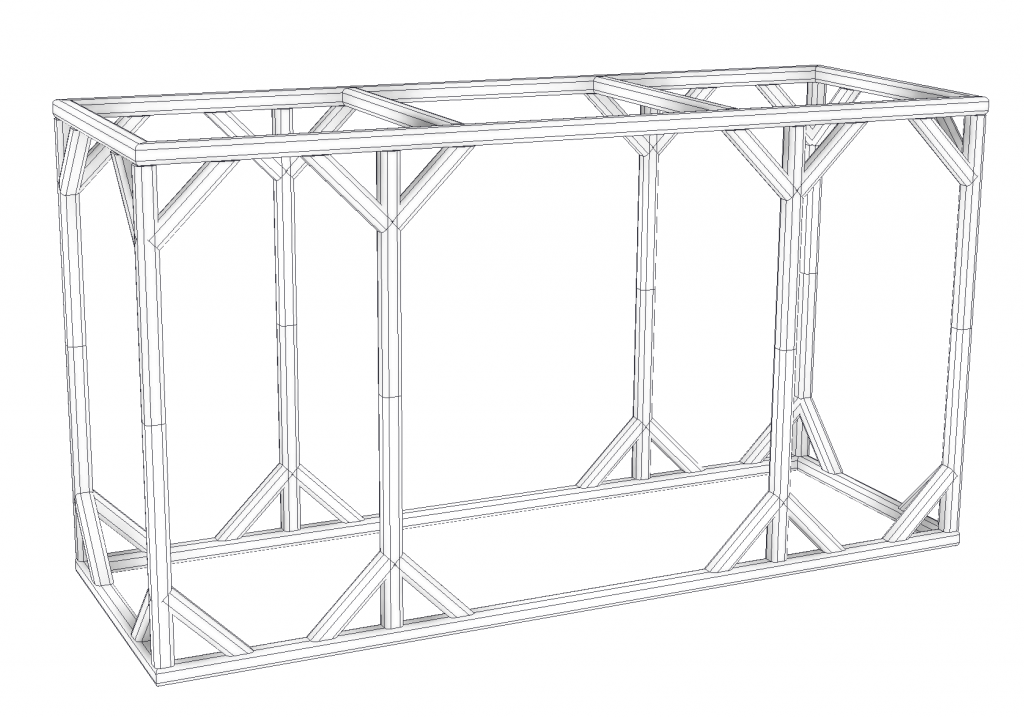
here is the picture of the metal stand i have our fab shop at work building. I worked with out engineers to ensure there would be no material fatique. the design is deffinitely overkill but id rather be safe than sorry. ..... for some reason the dimensions are not showing up in the picture. the stand is 73x26x36. Made out of 1-1/2" Square Tubing 3/16" wall thickness. should be done by the end of the week. Im excited!
|
|
|

|
|
|
#3 |
|
Registered Member
Join Date: Mar 2002
Location: Thorp, WA
Posts: 124
|
Looks like a good start, I'm in the planning stage of a 210 build myself. I'll be watching how yours is coming along.
Gary
__________________
One Fish, Two Fish, Red Fish, Blue Fish Current Tank Info: 46G Bowfront |
|
|

|
|
|
#4 |
|
Registered Member
Join Date: Jan 2006
Location: Godfrey,Il
Posts: 1
|
Tempered glass bottom so drilling isn't an option.
|
|
|

|
|
|
#5 |
|
Registered Member
Join Date: Mar 2002
Location: Thorp, WA
Posts: 124
|
True, but you could drill through the back low in the overflow.
__________________
One Fish, Two Fish, Red Fish, Blue Fish Current Tank Info: 46G Bowfront |
|
|

|
|
|
#6 |
|
Reefing is my middle name
Join Date: Mar 2009
Location: Clearwater, FL
Posts: 5,796
|
What type of drain system are you trying to accomplish because I thought each overflow came with originally 2 holes in each. And like the fellow aquarist said above, drilling another hole is not an option unless you place a couple sea swirls along the back as returns.
|
|
|

|
|
|
#7 | |
|
Registered Member
Join Date: Oct 2013
Posts: 85
|
Quote:
Option 1(easiest) run 1 Durso and return in each overflow. Tee the returns and use lockline. Option 2 Running 1 durso in each, one ER line in one overflow, and one surface siphon in the other. and running over the back. ..... i think im probably going to go with Option 1. that way i dont have any stale water in any overflow box. i will but a valves on the drain and on the return so i can match the flows both directions and dial everything in. i just ordered the ruturn pump, new skimmer, reactors, dosing system and new RODI system. once my stand gets done i will have to figure out how i want to do the sump.... i thinking of doing a two tier sump and incorporate possibly a frag tank inside the stand.... too many creative juices flowing at the moment. LOL all thats left to purchase is lights and conroller. i am so excited its not even funny PS the wife said i should just smoke crack instead |
|
|
|

|
|
|
#8 |
|
Registered Member
Join Date: Oct 2013
Posts: 85
|
UPDATES:
Stand is still not done yet  we have alot of "Paying" jobs so my stand is only half finished. we have alot of "Paying" jobs so my stand is only half finished. BUT...... i have been ordering my butt off preparing to get wet on the weekend of 5/16 thats exactly a month from now! i am so excited!!! Recent Purchases: Radion Pro G3 x3 MP40wes x1 (i will be bringing another on out of my current tank along with my battery backup) Reeflink Skimz Skimmer rated for 750gal .... i love the way these thing discharge water Skimz Bio Pellet Reactor Skimz Media Reactor x2 RO/DI with dual DI system BRS 2part dosers x2 Tunze ATO 200lbs ReefRocks.net 275lbs of sand 40gallon breeder(at the $1 a gallon sale) to act as a temperary sump, then it will be a new QT tank ordered a BOA custom sump(will not be in till June) Reeflo Dart/Snapper lots of plumbing parts EZtube to make my hanging fixture i am sure there is more but thats all i can think of right now..... here are a few pictures almost ready to get wet!!!! Look at how big that skimmer is! 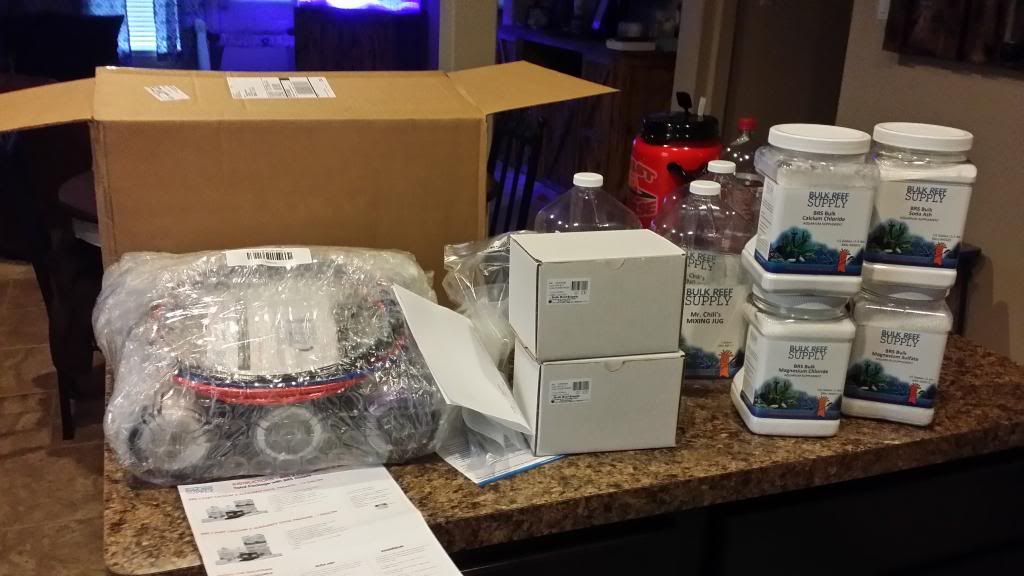 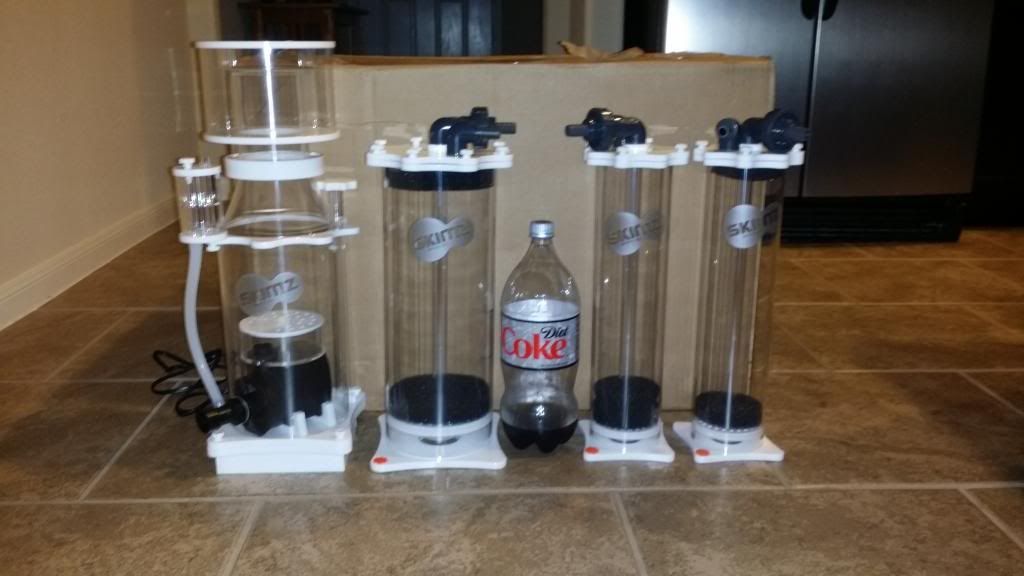
|
|
|

|
|
|
#9 |
|
Registered Member
 Join Date: Oct 2011
Location: Crown Point, Indiana
Posts: 464
|
Nice build so far!
You'll be happy with your skimz skimmer, just got one about a 3 weeks ago and love the thing. Haven't really put it to the test of a heavy bioload but the thing is dead silent. Only thing I changed was I took the air intake off of the skimmer itself and moved it to a dryer location. What model did you end up ordering? Those reactors look nice, I almost went that route and ordered those but I have never had any complaints using the BRS reactors.
__________________
If you can't test for it, Dont add it! Current Tank Info: 240 Gallon DT + 100 Gallon Sump, 2 MP-40's, 6 Kessil A360's, 60" ATI 4x80w, Geo 624 CR, GAC, GFO, Skimz 201 Skimmer. All powered by APEX! |
|
|

|
|
|
#10 | |
|
Registered Member
Join Date: Oct 2013
Posts: 85
|
Quote:
here is the model i bought. http://www.aquacave.com/SKIMZ-SM-201...mer-P3238.aspx i too have the BRS reactors on my 80, no complaints, these smikz look so sexy i had to get them 
|
|
|
|

|
|
|
#11 |
|
Registered Member
Join Date: Oct 2013
Posts: 85
|
BIG UPDATE!!!!!!
ok so after fathersday delays, and then my wife wanted to go on vacation, this past weekend ALOT got done. not as much as i would have liked but we all know hows that goes. i sent my wife and our two year old son over to her parents for the weekend so i could have unitturrupted time to devote to getting this project rolling. Finally got the stand. Ended up getting it built with 1/4" thick square tubing. Apparently the 3/16" was not in stock at the time i required it so the supplier delivered the 1/4" stuff at no additional costs. With that change i had the engineers re run the FEA and remove the corner bracing. SOLID as can be, even did horizontal loading of 250lbs incase my friend Big Jon bumped into it. I figure when i add the top, bottom, back and oak wrap this thing will be able ot support my Ford F-250 with ease. are the pictures from the weekend. here you see the stand and the part of the wrap in the back ground. ..... along with all my madness lol 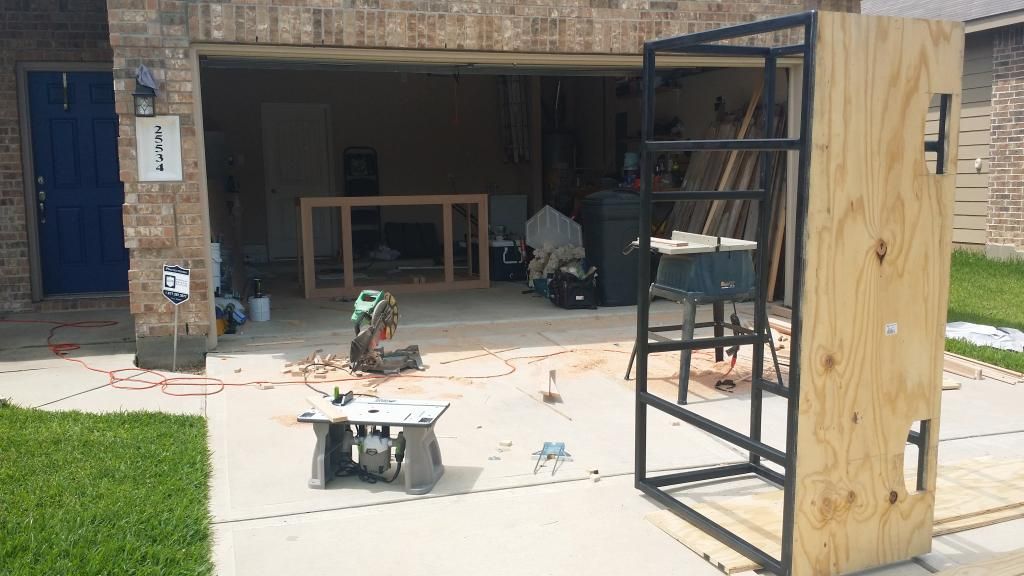 here is a better picture of the wrap frame and all the cut for the doors laying beside it 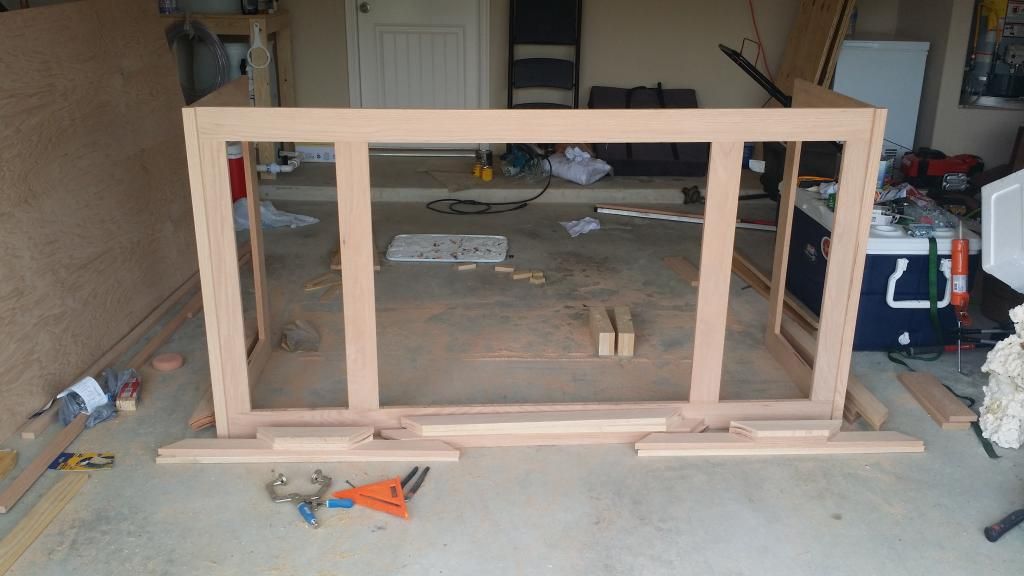 this is how i plan on making the doors "Child Proof" i have a 2 yr old that like to push the envelope. There are identical groves routed into the top that are twice as deep as these, on the back of the doors there will be "guides" that slide up and then down to rest inplace. No hinges, no door handles, totally seemless 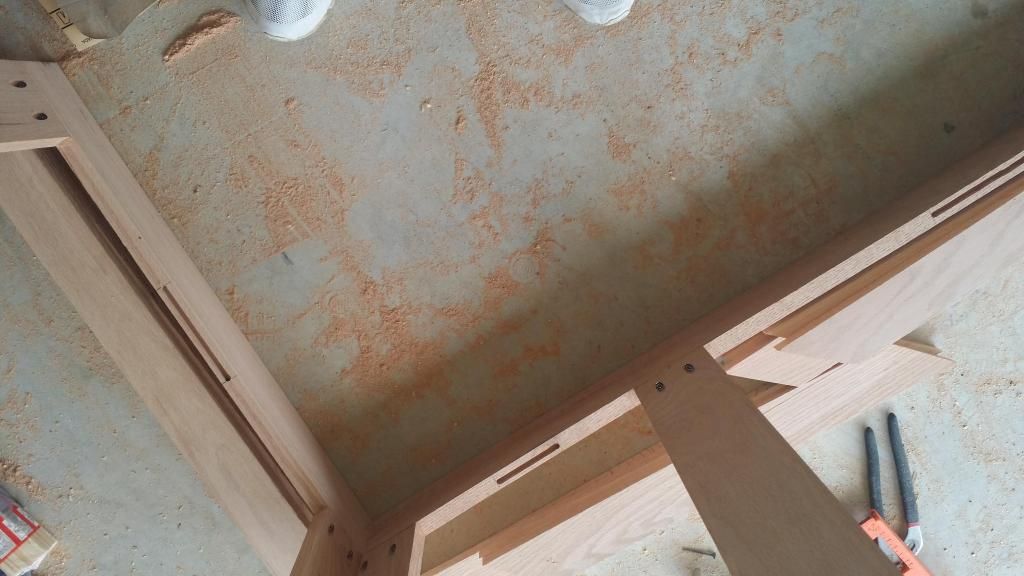 here are some of the doors and ready for stain. there will be inside trim on them as well, just havent found the right trim i like or router bit to make them myself.  now for the dreaded plumbing portion of this build. Lots of time spent on paper designing it and redesigning it. Here is what i came up with. from this 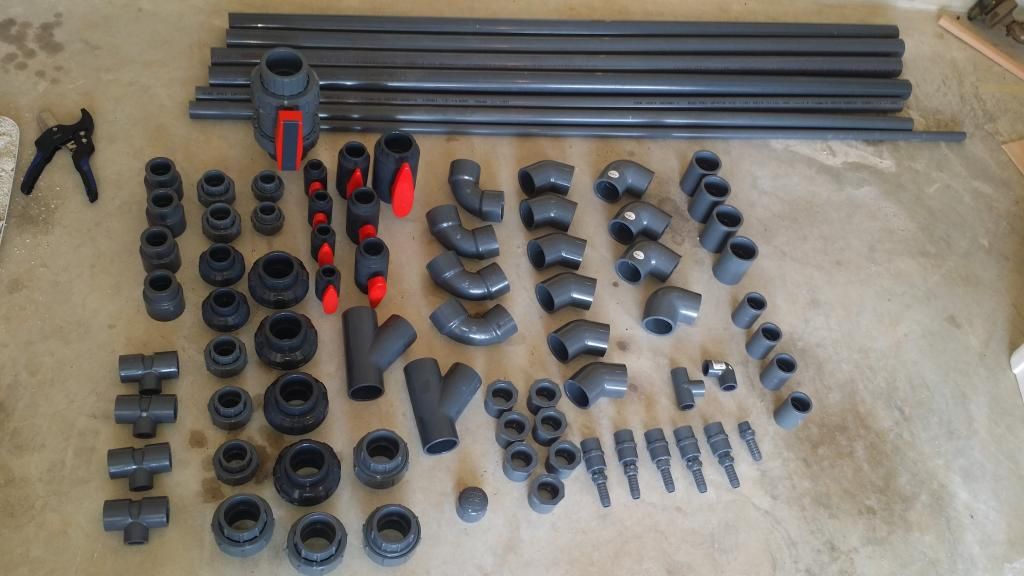 to this 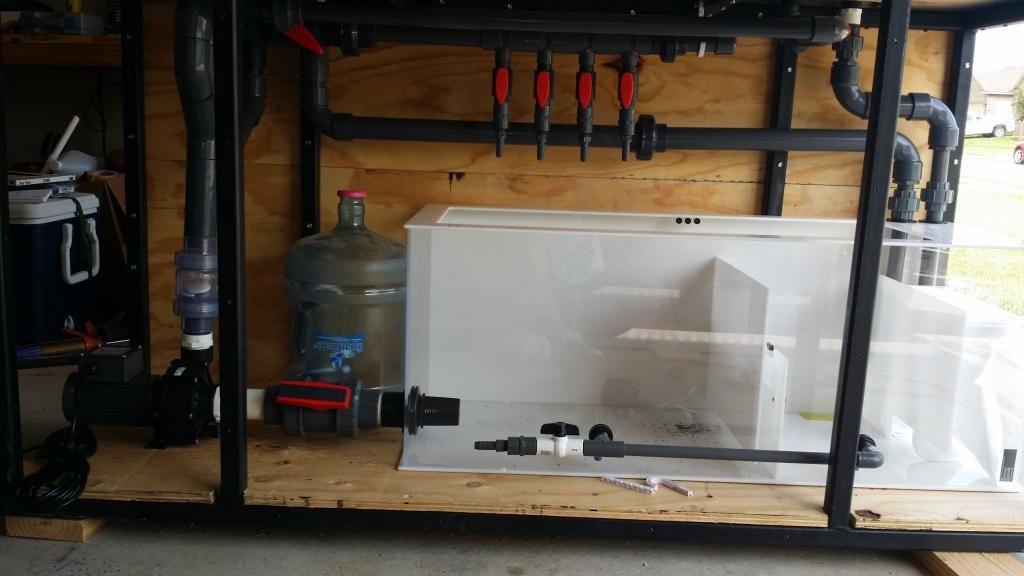 here is the BAO sump and how the flow works. 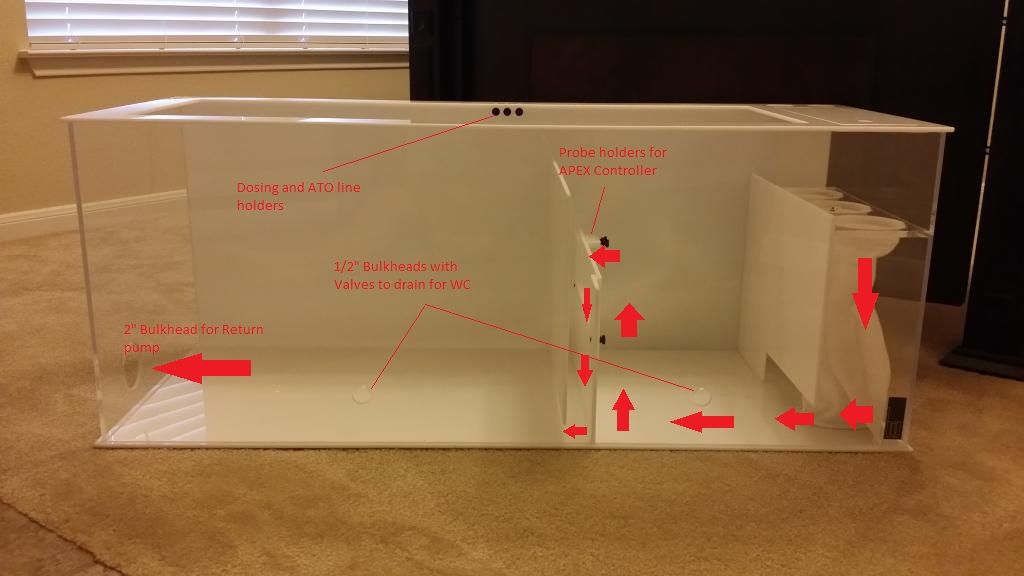 Water Change/Storage system built a few weeks ago just havent had time to post a picture yet. 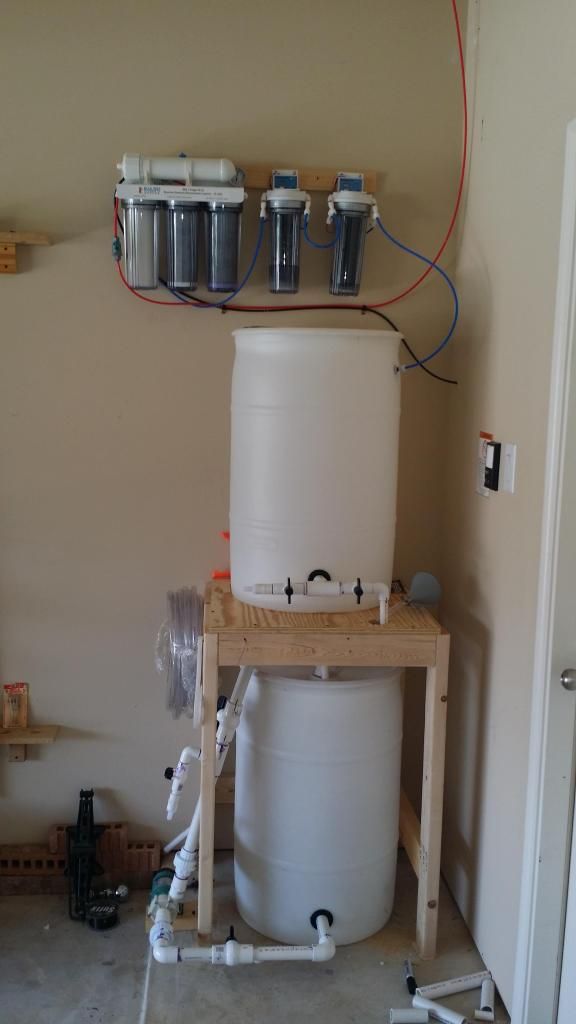 thats it for now, i ran out of energy on sunday after the plumbing so i will post more pictures as the progress continues. Please feel free to give me your feedback or advice. thanks guys. |
|
|

|
|
|
#12 |
|
Registered Member
Join Date: Oct 2013
Posts: 85
|
|
|
|

|
|
|
#13 |
|
Registered Member
Join Date: Jun 2013
Location: Sault Ste Marie Ont
Posts: 2,475
|
Quote:
|
|
|

|
|
|
#14 |
|
Registered Member
Join Date: Oct 2013
Posts: 85
|
|
|
|

|
|
|
#15 |
|
Registered Member
Join Date: Jun 2013
Location: Sault Ste Marie Ont
Posts: 2,475
|
|
|
|

|
|
|
#16 |
|
Registered Member
Join Date: Oct 2013
Posts: 85
|
got a smoking deal on them! i got them from a company that sells live minnows. paid like $15 each for them.
|
|
|

|
|
|
#17 |
|
Registered Member
Join Date: Oct 2013
Posts: 85
|
got the tank moved inside on Saturday and my got all the sand and rock placed. here are some photos i hope you just for joy like i did. ..... i will say when the water started being pumped in i almost didnt believe this day was here. it has been such a long time coming.
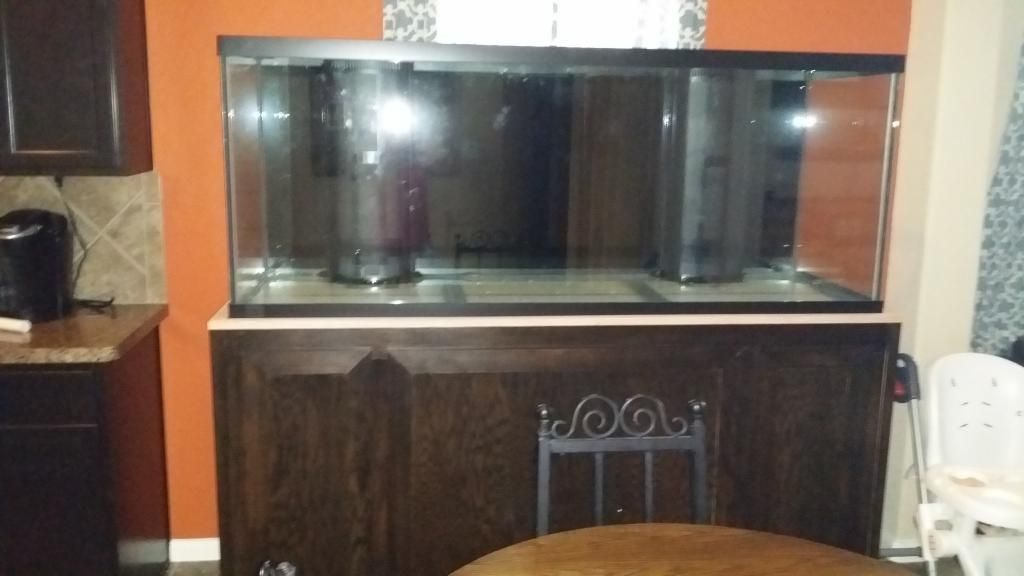 tank in place but dry. 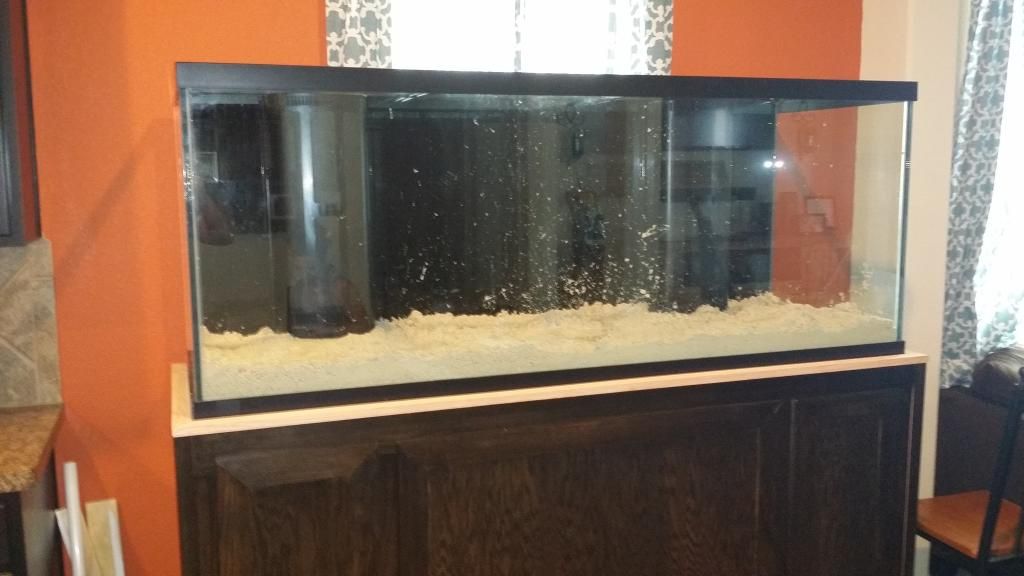 340lbs of sand added. about a 4 DSP 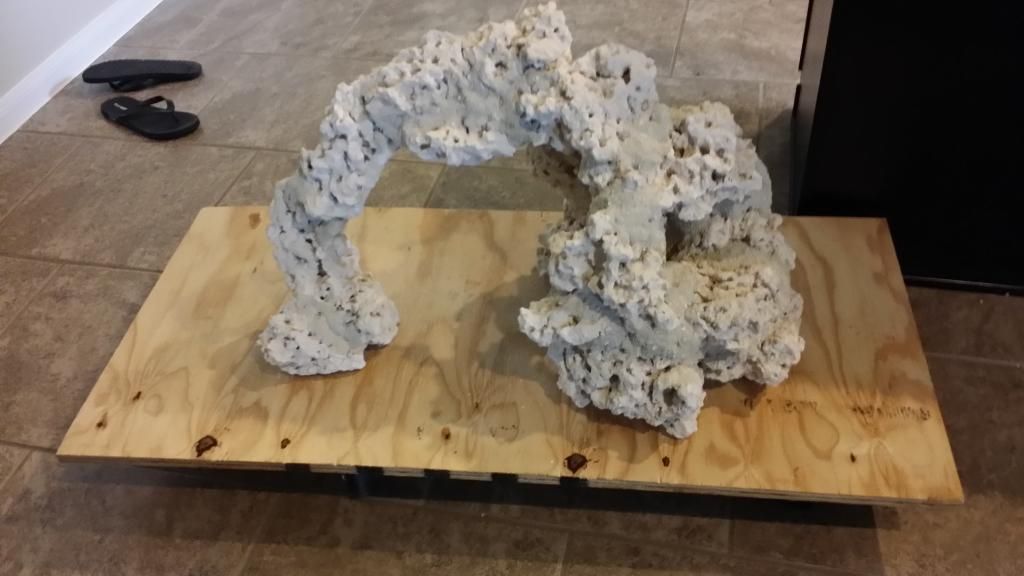 Right Side rock build sculpture 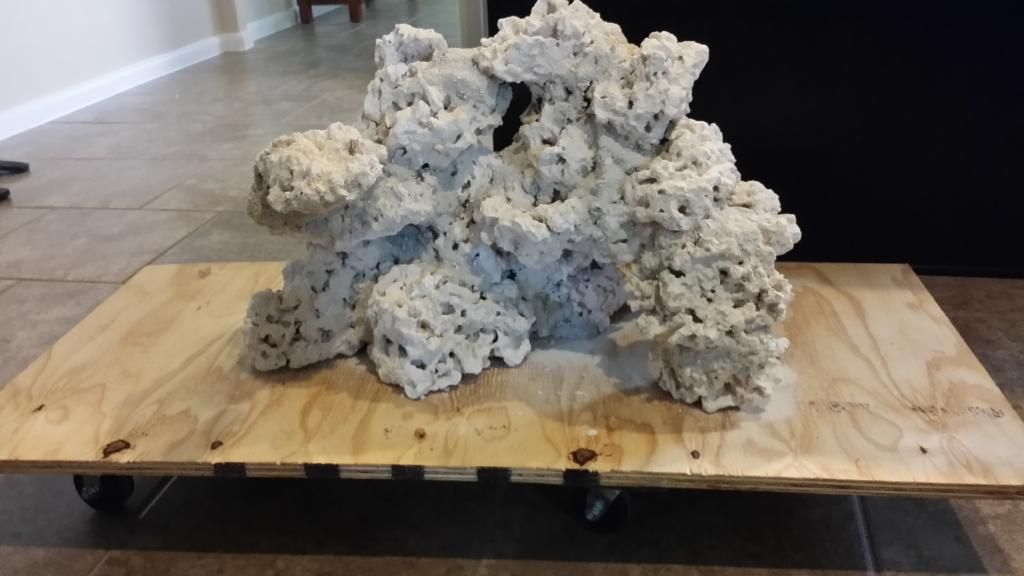 Left Side Rock sculpture ANDDDDDDDDD... the moment we have all been waiting for(ok maybe just me)...... WATER!!!! 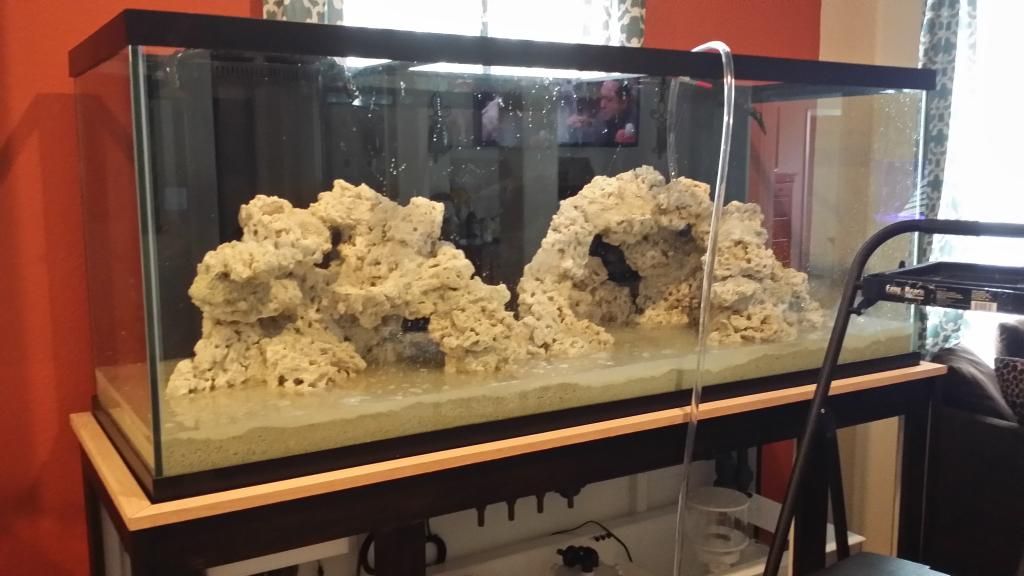 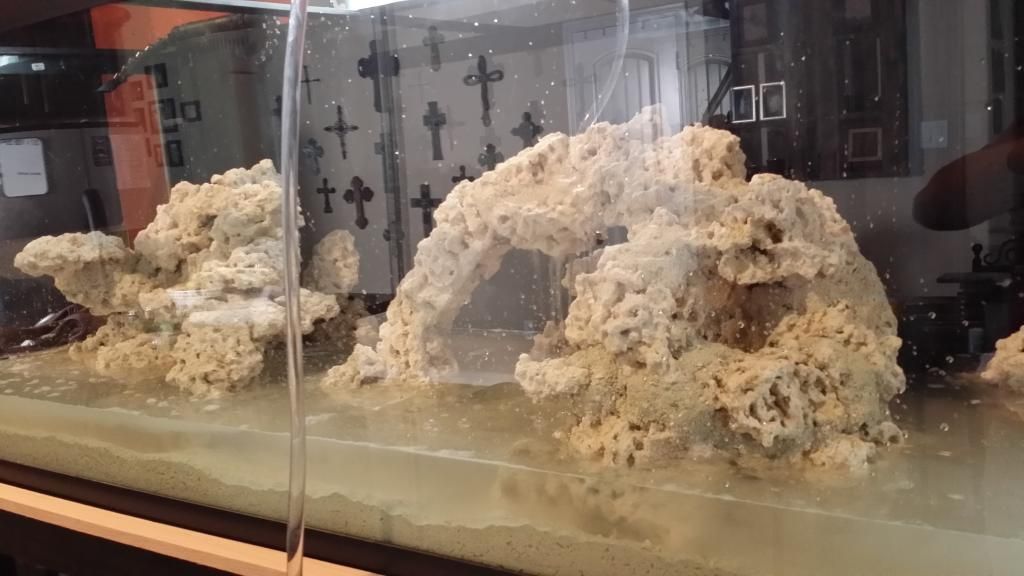 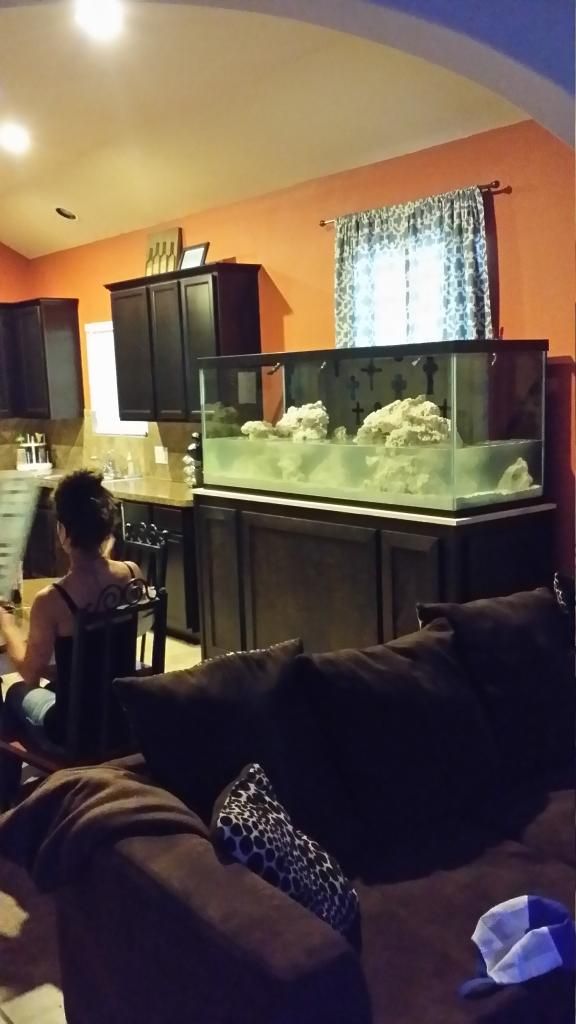 stay tuned!!! |
|
|

|
|
|
#18 |
|
Registered Member
Join Date: Jun 2013
Location: Sault Ste Marie Ont
Posts: 2,475
|
Quote:
|
|
|

|
|
|
#19 |
|
Registered Member
Join Date: Oct 2013
Posts: 85
|
thanks seamless was the look i was going for.... i used pond foam and z-poxy then covered with aggregate to get rid of the black foam.... i used this method several years ago on a friend of mines 125 and it turned out great, still looking good 6+ years later.
this tank is going to be mostly sps dominate so i have many ledges and what not to attach frags too. once its filled and the lights are up you will be able to see more of what im talking about. |
|
|

|
|
|
#20 |
|
Registered Member
Join Date: Oct 2008
Location: Cali.
Posts: 3,199
|
great set up.
thanks for the pics. |
|
|

|
|
|
#21 |
|
Grizzled & Cynical
 Join Date: Apr 2006
Location: Stamford, CT
Posts: 17,319
|
Do yourself a favor and replace the check valve with a second true-union ball valve.
__________________
Simon Got back into the hobby ..... planned to keep it simple ..... yeah, right ..... clearly I need a new plan! Pet peeve: anemones host clowns; clowns do not host anemones! Current Tank Info: 450 Reef; 120 refugium; 60 Frag Tank, 30 Introduction tank; multiple QTs |
|
|

|
|
|
#22 |
|
Registered Member
Join Date: Oct 2013
Posts: 85
|
there is a second true union ball valve up above the check valve in the circuit. i build oilfield equipment so i know the how important it is to have redundancy built in.
there are a total of 12 unions, and 4 valves in the setup(8 if you include the manifold. thanks for the suggestion tho bro. |
|
|

|
|
|
#23 |
|
Grizzled & Cynical
 Join Date: Apr 2006
Location: Stamford, CT
Posts: 17,319
|
My point was more about the folly of relying on a check valve .... they invariably fail to do what it is you need them to do. Consequently, they are unnecessary - design the return so that a siphon break stops the back siphon.
__________________
Simon Got back into the hobby ..... planned to keep it simple ..... yeah, right ..... clearly I need a new plan! Pet peeve: anemones host clowns; clowns do not host anemones! Current Tank Info: 450 Reef; 120 refugium; 60 Frag Tank, 30 Introduction tank; multiple QTs |
|
|

|
|
|
#24 | |
|
Registered Member
Join Date: Oct 2013
Posts: 85
|
Quote:
|
|
|
|

|
|
|
#25 |
|
Registered Member
Join Date: Oct 2013
Posts: 85
|
UPDATE: 7/21/2014
Apex Programmed, Reef Link Programmed and Cycle Complete, Dr Tims Cycled my tank in 5 days! here is what it looks like now 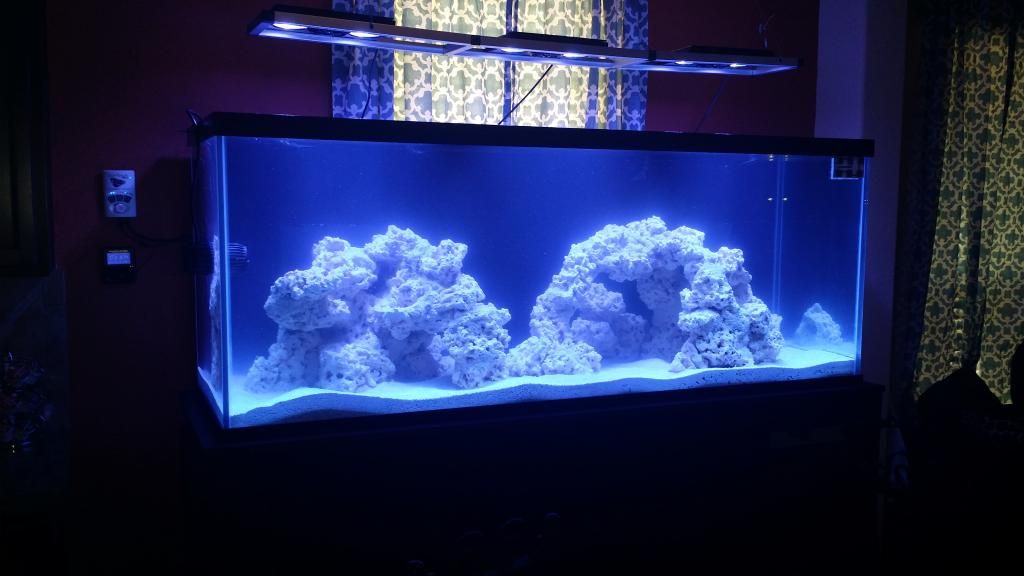 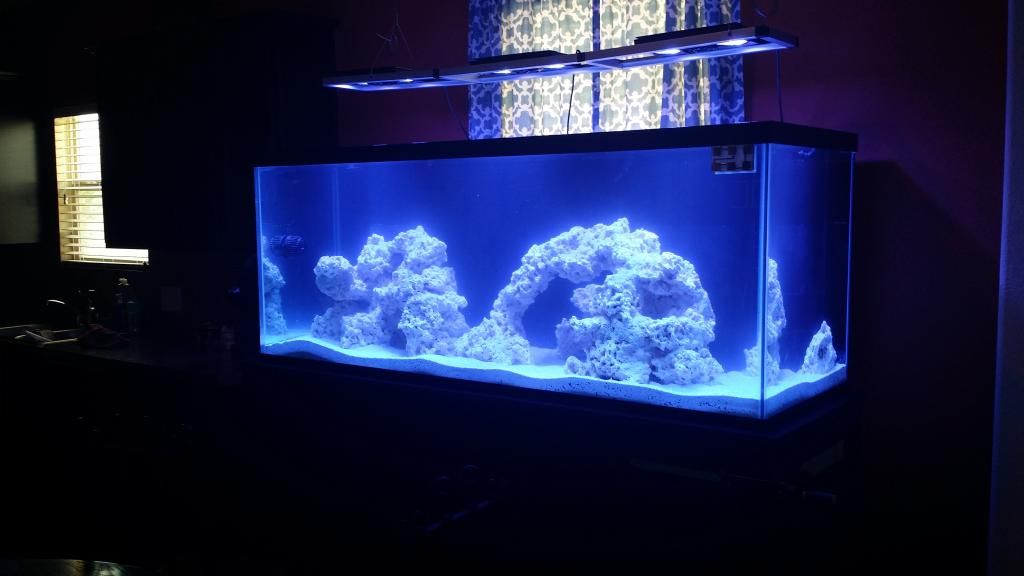 i originally had the apex hooked up with a network adapter, also had my electrical running on my kitchen GFCI circuit. Well last weekend i ran into some problems on saturday morning. i woke and started the coffee pot and tripped my breaker! apparently a Kureig pulls 9.8 amps when its heating up. my tank runs at 11.5 amps (at worst) thats with the titanium heater running and the radions at peak power. .... since im a both a Reef Junkie and Starbuck Verona Junkie. This was not going to work. so..... this weekend i ran two deadicated 20amp circuits from the tank wall to the breaker box. also decided since im going through this trouble might as well run a hardline ethernet cable for the Apex. All in all this about $100. well worth the peace of mind knowing the tank is running on its own juice, and i can enjoy a cup of coffee while staring at my tank 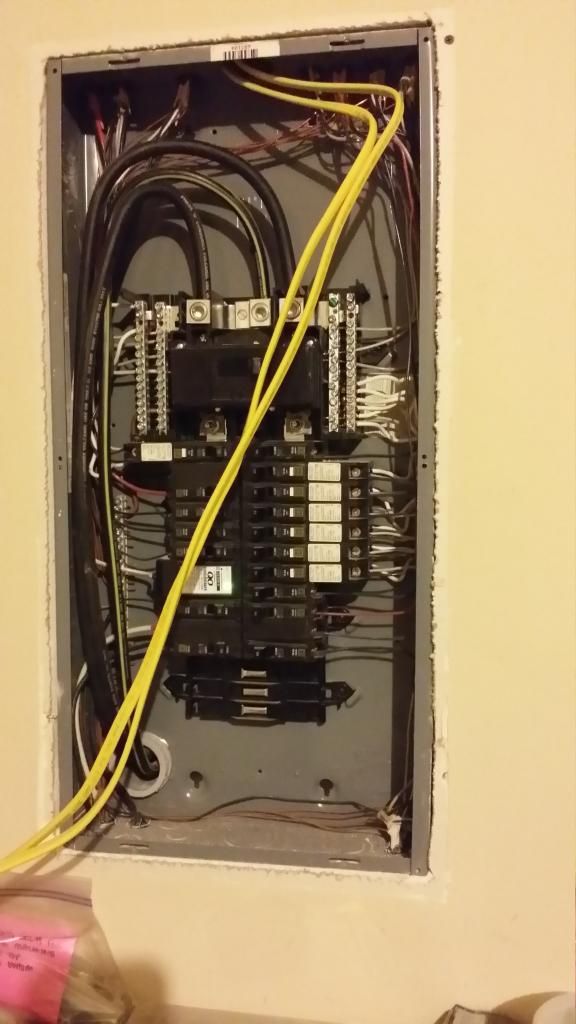 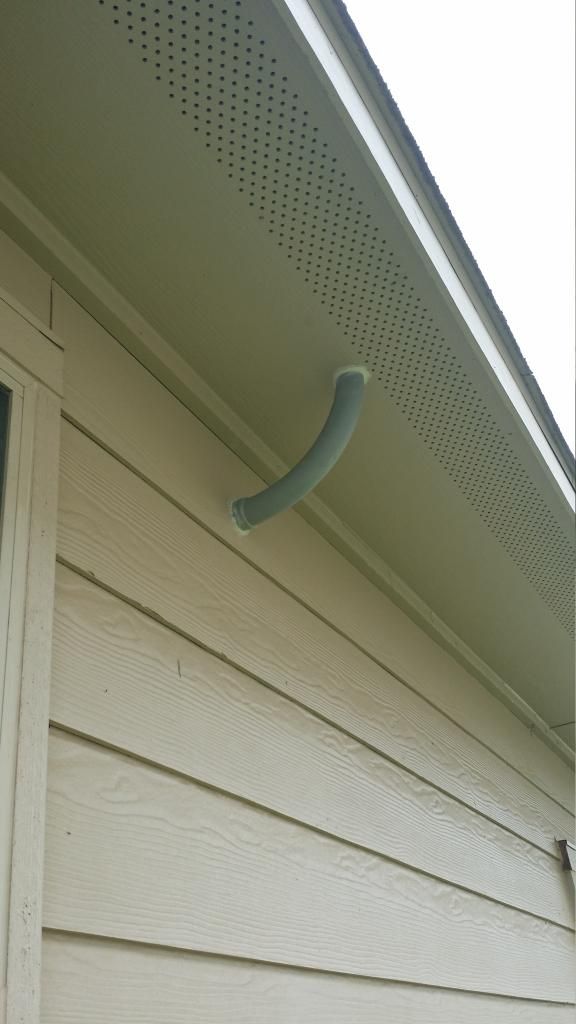 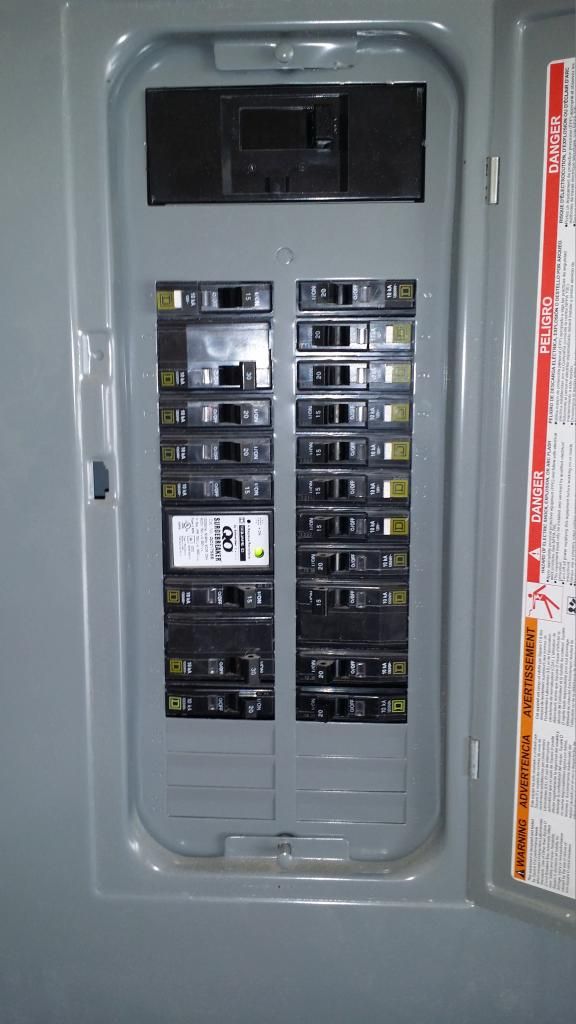 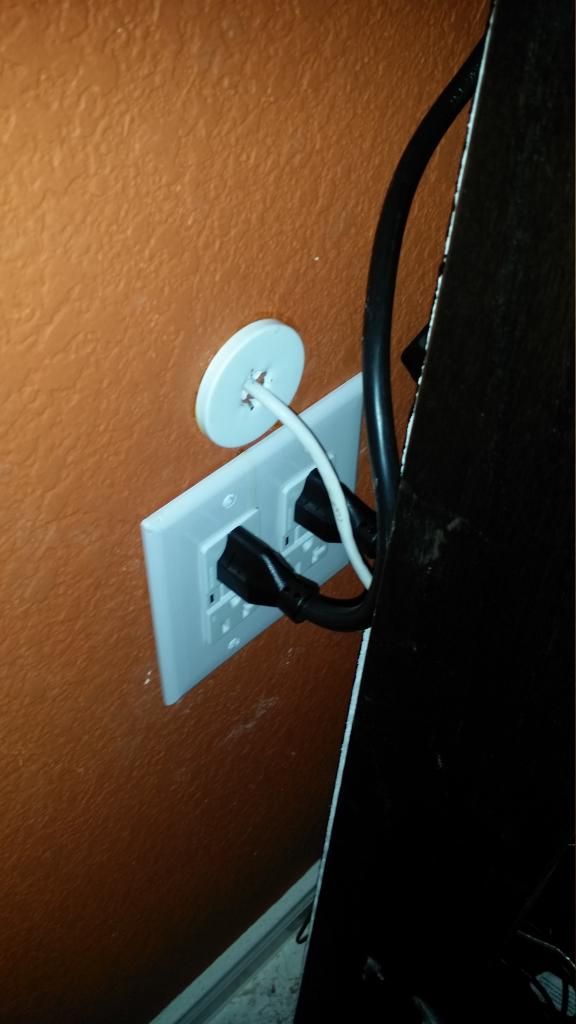
|
|
|

|
 |
|
|