
|
|
 06/19/2016, 11:45 AM
|
#4501 | |
|
Registered Member
Join Date: Dec 2010
Location: San Jose, CA
Posts: 1,030
|
Quote:

|
|

|

|
|
06/20/2016, 02:24 AM
|
#4502 |
|
Registered Member
Join Date: Mar 2010
Posts: 1,617
|
I'm building a stand for my dad's new dart frog aquarium. Ithe tank is 72" long x 24" front to back x 36" high. There may be 4" of water in the bottom and about 8 inches if substrate. What would you recommend to use for building this? I will be enclosing it with plywood. The stand will be the same dimension as the tank but be 40" tall.
Thanks in advanced |
|
|
|
|
06/21/2016, 12:28 AM
|
#4503 | |
|
Registered Member
Join Date: Apr 2015
Location: Richmond, VA
Posts: 1,642
|
Quote:
|
|
|
|
|
|
06/21/2016, 12:52 AM
|
#4504 |
|
Registered Member
Join Date: Mar 2016
Location: Illinois
Posts: 71
|
Big Johnny, either way you do it is fine, as long as you overlap with the legs its basically the same result. The only plus to having the sides shorter between the face boards is that your legs for the front and rear will be wider for a little more support, but you lose just a little width for your opening. It really comes down to your preference. I personally choose the latter for my stand build
|
|
|
|
|
06/21/2016, 07:34 AM
|
#4505 |
|
Registered Member
Join Date: Nov 2014
Posts: 199
|
Sorry if this is already somewhere else in this massive thread but I couldn't find it when searching. I have a couple of issues / questions that I would really appreciate some help with.
My current stand is steel (came second hand with the tank) but was not painted properly and I have noticed a couple of small bits of rust. So i want to build a new stand asap. Here is the rough sketch up of the stand frame I want to build (using 90mmx45mm pine): 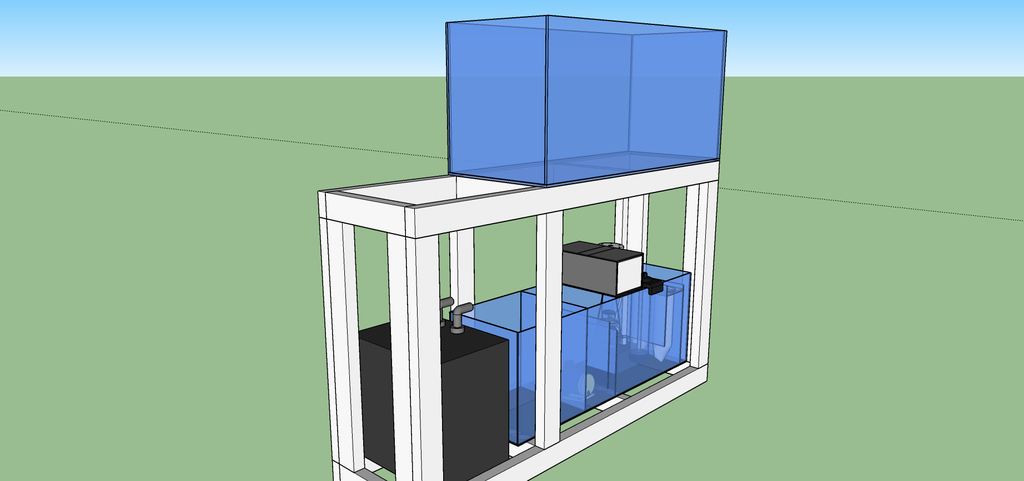 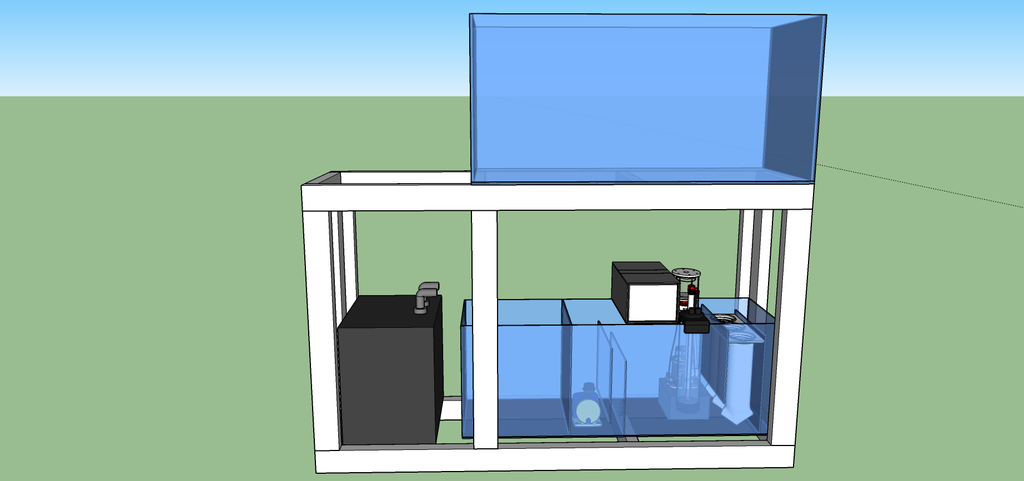 I want to make the new stand longer than the tank so that i can also fit in the chiller and a sectioned off electrical compartment. This has me a bit confused with where to put the supports for the left hand side of the tank. The DT footprint is 48x20 and the new sump footprint is 48x14. Because the new sump is the same length as the DT I wouldn't be able to use 2 planks perpendicular to each other on each left hand corner as in the recommended design. Is 1 support either side here OK? Or if I did 2 or 3 supports side by side would that support the weight (bulky but I would be ok with it). If this is OK then could I also only use 1 support on each far left corner near the chiller or does it still need the right angle supports? I also wanted to skin the stand with removable panels but it seems like a plywood skin secured to the stand might be required? Cheers, Macca
__________________
Tank Journal - http://web2.reefcentral.com/forums/showthread.php?t=2489289 "Love is the feeling you get when you like something as much as your motorcycle" |
|
|
|
|
06/23/2016, 03:47 PM
|
#4506 | |
|
Registered Member
Join Date: Dec 2010
Location: San Jose, CA
Posts: 1,030
|
Quote:
It is highly recommended you attach plywood. you may be able to get away with attaching it to the back and then one of the sides, leaving the front and the other side removable. Now about the perpendicular boards on the left end of the tank. assuming the sump is exactly 14", you could build the stand to be 21" or 21.5" deep instead of 20", then position the perpendicular boards so that one edge is even with the outside of the stand. then put the parallel board (the ones already in your drawing) to the right of those. this closes off your front opening a bit (1.5"), but you should have just enough space for the sump to fit in between. EDIT: looking at your drawing again, you should actually orient the boards on the right side this way too, so that you bridge the gap between the boards in the frame. this would close your front opening 3" total. Last edited by Meshmez; 06/23/2016 at 03:55 PM. |
|
|
|
|
|
06/25/2016, 01:53 PM
|
#4507 |
|
Registered Member
Join Date: Feb 2012
Location: Lake in the hills, IL
Posts: 806
|
I am doing an inwall build in an existing non-load bearing wall (6' 125 gallon) where I want the tank flush with the drywall. Can the existing wall studs be used with a 2x4 across the top of the studs and the stand pushed up against the wall. Here is an example I found online:
 That seems possibly not safe since it is recommended to use a 2x8 for the long beams, but that is the recommendation because there are no vertical support studs in the middle. The wall has vertical studs for support. The other option would be to cut down the studs 7.25" below the drywall hole and rest the top front of the stand on the studs and attach them. That would be a bit more difficult to cut without ripping out the drywall below the viewing hole. Thoughts? |
|
|
|
|
06/25/2016, 05:57 PM
|
#4508 |
|
Registered Member
Join Date: Dec 2010
Location: San Jose, CA
Posts: 1,030
|
ok the part facing upward here is the back of my stand, would it make sense to attach the 2 pieces of plywood as shown in the second pic? or leave it open? the sides will have plywood, and the front will have one piece of plywood, but cut out for the openings.
 
|
|
|
|
|
06/26/2016, 07:27 AM
|
#4509 | |
|
Registered Member
Join Date: Feb 2012
Location: Orlando
Posts: 1,109
|
Quote:
When I did my in wall tank I simply built this stand without modification and removed the studs and toe plate entirely, then I attached the drywall to the stand. I considered adding a few 2x4's in the stand for additional places to attach the drywall, but didn't. It doesn't seem to be a problem. The drywall still seems solid enough. There are some pictures in my build thread here: https://r.tapatalk.com/shareLink?url...9&share_type=t |
|
|
|
|
|
06/26/2016, 08:32 AM
|
#4510 | |
|
Registered Member
Join Date: Feb 2012
Location: Lake in the hills, IL
Posts: 806
|
Quote:
|
|
|
|
|
|
06/26/2016, 08:40 AM
|
#4511 | |
|
Registered Member
Join Date: Feb 2012
Location: Orlando
Posts: 1,109
|
Quote:
Yes, I used a reciprocating saw to cut 95% of the way through the studs... Just had to go slow and be very careful not to accidentally go through the drywall. Then I used a hand saw for the last little bit. Once the studs were cut I just carefully pulled them out pulling the screws through the back of the drywall. I wound up with one or two screw holes on the finished side that needed to be patched, but not many. I also made some additional screw holes on the finished side when I screwed the drywall to the stand, so I just patched them all at the same time. Patching screw holes like that is quick and easy. |
|
|
|
|
|
06/26/2016, 08:57 AM
|
#4512 | |
|
Registered Member
Join Date: Feb 2012
Location: Lake in the hills, IL
Posts: 806
|
Quote:
I am doing this project without my kids knowing. Two weeks from today they are leaving on a one week trip and when they get back I want the fish moved from their old home into the in-wall. Doing it the way you did I can do all of the steps except cutting the drywall before they leave. Two weeks from today I could cut the hole, move the tank, fill it and start moving rock. I could spend that week cleaning up the the wiring, finishing the unfinished side so it looks nice, etc. |
|
|
|
|
|
06/26/2016, 09:12 AM
|
#4513 |
|
Registered Member
Join Date: Feb 2012
Location: Orlando
Posts: 1,109
|
Sounds like a plan, although cutting out the hole in the drywall might be a pain with the tank already in place... And once you plumb the tank it will probably be difficult to remove. In my case I set up the tank and stand and plumbed the tank elsewhere in the room, then I prepped the wall and cut the hole and then moved the plumbed tank and stand into position.
|
|
|
|
|
06/26/2016, 09:36 AM
|
#4514 | |
|
Registered Member
Join Date: Feb 2012
Location: Lake in the hills, IL
Posts: 806
|
Quote:
Sent from my XT1064 using Tapatalk
__________________
[URL=https://datesnow.life]Actual Women[/URL] |
|
|
|
|
|
06/28/2016, 10:16 PM
|
#4515 |
|
Registered Member
Join Date: May 2015
Posts: 3
|
Hey everyone, thanks so much for this thread, this is my first attempt at woodworking.
I followed the directions except there is a small gap from the red/yellow and the purple on a couple of the sides. I've attached a link to some pictures. Should I redrill? https://photos.google.com/share/AF1Q...p1ZkpQMm5FSW9R |
|
|
|
|
06/30/2016, 11:52 AM
|
#4516 |
|
Registered Member
Join Date: Jun 2016
Posts: 1
|
I think I F'ed up here on my design...
This is for a 48x30x12 shallow tank with bottom trim... I designed and built my stand last year but haven't used it yet, then I found this design and I fear mine just won't work... I would appreciate opinions or suggestions please: Please disregard the flat 2x4s on the ground... Didn't end up using those... The front 2x4 is doubled up to account for no center brace, but I haven't added vertical supports for that piece yet... 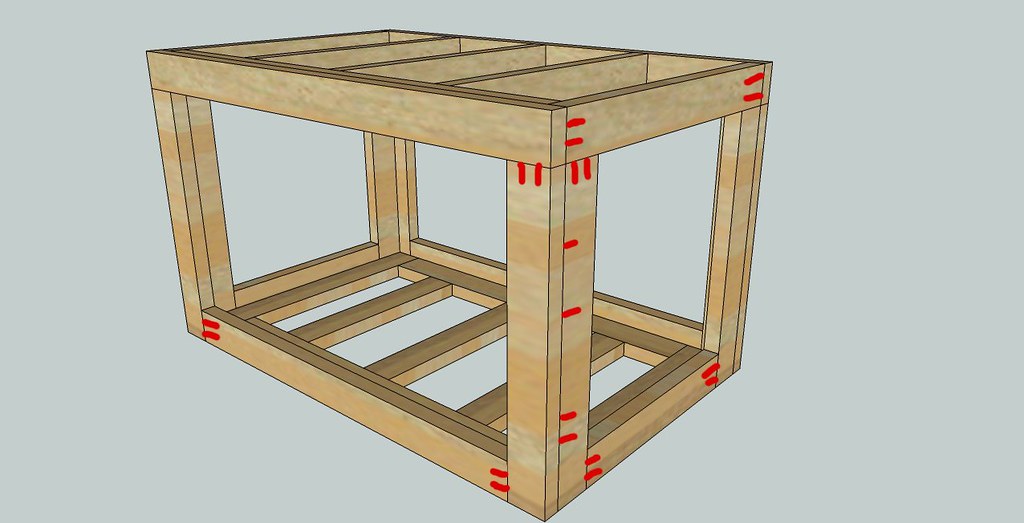
|
|
|
|
|
07/01/2016, 07:40 PM
|
#4517 | |
|
Registered Member
Join Date: Jan 2015
Location: Pacoima (SFV)
Posts: 1,481
|
Quote:
__________________
-Ricardo 22g RBTA tank build: http://www.reefcentral.com/forums/showthread.php?t=2578399 Current Tank Info: 22g Peninsula tank RBTA / Euphyllia / Clownfish |
|
|
|
|
|
07/01/2016, 10:56 PM
|
#4518 | |
|
Registered Member
Join Date: Dec 2010
Location: San Jose, CA
Posts: 1,030
|
Quote:
also i would change the orientation of the legs so the seam doesnt match up with frame. like this: 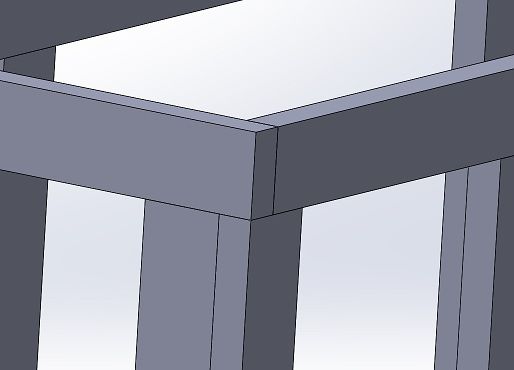
|
|
|
|
|
|
07/04/2016, 02:46 PM
|
#4519 |
|
BlueWorldAquatics.com
Join Date: May 2012
Location: Murrieta, CA
Posts: 657
|
I'm sorry if this is redundant in this thread and I missed the original post.
I am looking for plans for a stand to hold a 48"x48"x24" glass cube tank with a center overflow (11"x8"). Looking for the stand to be 32" tall. Can I use 2x6s without a center brace? Would like 2 doors on three sides (tank will be against a wall. Also, behind one of the back doors, away from the sump, I was thinking of boxing it off and making an isolated electrical box for my Apex and all the power blocks. I need to skin it and add molding so it looks nice, but that is secondary to strength and building it right. I was also thinking of making the doors recessed into the plywood for a seamless look. I also have young boys, so the less they can get into the better Any ideas would be helpful. Thank you
__________________
Stats: 180 g Mixed SPS/LPS reef tank, 30 gallon sump, live rock, GFO\Carbon, AquaMaxx AM250 in-sump skimmer, felt filter socks, cleaning crew |
|
|
|
|
07/04/2016, 03:22 PM
|
#4520 | |
|
Registered Member
Join Date: Jan 2016
Location: So-Cal
Posts: 54
|
Quote:
Yes since your longest span is only 48" you can keep the center open on all sides if you use 2x6. |
|
|
|
|
|
07/04/2016, 03:32 PM
|
#4521 | |
|
BlueWorldAquatics.com
Join Date: May 2012
Location: Murrieta, CA
Posts: 657
|
Quote:
 I need a base for my sump underneath too, so how much bracing would I need for the bottom box
__________________
Stats: 180 g Mixed SPS/LPS reef tank, 30 gallon sump, live rock, GFO\Carbon, AquaMaxx AM250 in-sump skimmer, felt filter socks, cleaning crew |
|
|
|
|
|
07/05/2016, 11:00 AM
|
#4522 | |
|
BlueWorldAquatics.com
Join Date: May 2012
Location: Murrieta, CA
Posts: 657
|
Quote:
 Definitely needs more support. Should I double up the 2x6 on the top around the outer frame as well? The tank is 48.5" to the outside of the black frame on the bottom. So it will be sitting on the outside of the 2x6s. Should I make the square 49x49 instead to have it sit in the middle? I am going to add some molding to cover the black frame later
__________________
Stats: 180 g Mixed SPS/LPS reef tank, 30 gallon sump, live rock, GFO\Carbon, AquaMaxx AM250 in-sump skimmer, felt filter socks, cleaning crew |
|
|
|
|
|
07/05/2016, 11:17 AM
|
#4523 |
|
Registered Member
Join Date: Dec 2010
Location: San Jose, CA
Posts: 1,030
|
jharding08, are you going to put plywood across the top? or have the tank frame rest on the 2x6? I normally oversize by 1" so that the tank sits 1/2" from the edge of the 2x6 on all sides.
|
|
|
|
|
07/05/2016, 11:21 AM
|
#4524 | |
|
BlueWorldAquatics.com
Join Date: May 2012
Location: Murrieta, CA
Posts: 657
|
Quote:
Even with plywood, wont I need cross braces on the top and bottom parts?
__________________
Stats: 180 g Mixed SPS/LPS reef tank, 30 gallon sump, live rock, GFO\Carbon, AquaMaxx AM250 in-sump skimmer, felt filter socks, cleaning crew |
|
|
|
|
|
07/05/2016, 11:41 AM
|
#4525 | |
|
Registered Member
Join Date: Jan 2016
Location: So-Cal
Posts: 54
|
Quote:
If it were me I'd do cross beams on both the top and bottom frame, plus 3/4 ply on top. It prevents skewing or twisting. Also, if you're not putting doors on all four sides you could add a center stud on the faces that won't be accessed but I don't know it to be necessary. |
|
|
|
|
 |
|
|


