
|
|
|
|||||||
 |
| Thread Tools |
 02/26/2006, 09:28 PM
|
#1 |
|
Premium Member
 Join Date: Mar 2004
Location: Cape Girardeau, MO
Posts: 2,529
|
Another Custom Stand Construction Thread- 120 Gal.
I just finished construction on the stand for my 120 gallon tank. It is made of maple and will be stained cherry to match my bar. Raised panel doors will be ordered for the front and sides.
    I have pics of the entire construction process if anyone is interested. |

|

|
|
02/26/2006, 09:33 PM
|
#2 |
|
Premium Member
Join Date: Sep 2003
Location: Missouri
Posts: 717
|
Very nice!
__________________
Trent Current Tank Info: 90 gal. AGA, 100 lbs LR, 29 gal sump with ASM G4 skimmer, Mag 12 return, 1-Vortech, 8x54 Tek light |
|
|
|
|
02/26/2006, 09:51 PM
|
#3 |
|
Premium Member
Join Date: Mar 2004
Location: Cape Girardeau, MO
Posts: 2,529
|
Thanks Trent. As you can see, I am about to upgrade. I bought a used tank from another RC member and have been working quite a while on this stand. I'm just ready to get it completed now.
|
|
|
|
|
02/26/2006, 09:58 PM
|
#4 |
|
Premium Member
Join Date: Feb 2006
Location: West Michigan
Posts: 928
|
wow, that stand is very nice.. I am about done with a stand I am building for my 90g.. mine looks like complete *** next to that thing lol.. This is my first wood project though hehe
|
|
|
|
|
02/26/2006, 10:08 PM
|
#5 |
|
Premium Member
Join Date: Feb 2006
Location: West Michigan
Posts: 928
|
I notice on alot of diy stands the top is always covered, was wondering why that is?
|
|
|
|
|
02/27/2006, 12:26 AM
|
#6 |
|
Premium Member
Join Date: Aug 2001
Location: Tucson, AZ
Posts: 2,551
|
I notice on alot of diy stands the top is always covered, was wondering why that is?
for added strength of the stand and supporting equipment below the stand, like for mounting refugium lights. It is not necessary to have it covered though, just optional in most cases.
__________________
Cheers, Scott |
|
|
|
|
02/27/2006, 12:51 AM
|
#7 |
|
Registered Member
Join Date: Jan 2005
Location: Arkansas
Posts: 108
|
Hats off to ya guy...thats one great looking stand
|
|
|
|
|
02/27/2006, 01:28 AM
|
#8 |
|
Registered Member

Join Date: Mar 2004
Location: fla
Posts: 154
|
how much do you charge? great lookin stand
|
|
|
|
|
02/27/2006, 02:37 AM
|
#9 | |
|
Registered Member
Join Date: Aug 2004
Location: OKC
Posts: 1,127
|
Re: Another Custom Stand Construction Thread- 120 Gal.
Please, I would love to see them
Quote:
|
|
|
|
|
|
02/27/2006, 07:37 AM
|
#10 |
|
Registered Member
Join Date: Jun 2003
Location: Maryland
Posts: 25
|
Wow that is nice!
Congrats! I wish my woodworking skills were that good. How did you do the bumpouts? Are they structural or just cosmetic? I'm in the early process of building a stand and tank and now I feel quite inadequate. Marker |
|
|
|
|
02/27/2006, 07:53 AM
|
#11 |
|
Registered Member
Join Date: Jan 2006
Posts: 305
|
I would love to see the entire construction process too! ...but I bet more would love to see them posted here! Thanks for sharing its gorgeous! ~Matt
__________________
http://mattcegelske.com Current Tank Info: Hiatus Last edited by joeychitwood; 05/14/2012 at 05:18 PM. Reason: Deleted email address at poster's request |
|
|
|
|
02/27/2006, 08:15 AM
|
#12 |
|
Premium Member
Join Date: Dec 2004
Location: Westchester, NY
Posts: 704
|
Awsome looking stand. I too would love to see the process details

|
|
|
|
|
02/27/2006, 08:23 AM
|
#13 |
|
Registered Member
Join Date: Feb 2002
Location: Indianapolis - Indiana
Posts: 1,340
|
thats beautiful!
__________________
Goby Current Tank Info: 1/8 gal. super-mega nano |
|
|
|
|
02/27/2006, 08:40 AM
|
#14 |
|
Premium Member
Join Date: Feb 2006
Location: West Michigan
Posts: 928
|
yes, I would love to see the entire process as well, email em to poofph @ balancedblade.com please.
|
|
|
|
|
02/27/2006, 08:51 AM
|
#15 |
|
Premium Member
Join Date: Aug 2004
Location: West-Central, Wisconsin (right on the Mississippi)
Posts: 438
|
I, too would like to see the construction. I am about to start one for an AGA 125 gal and it would be similar to what you have done. I want mine to be simple, but jazzing it up a little couldn't hurt either!
Thanks in advance.
__________________
A reef isn't just for oceans anymore... Current Tank Info: Gearing up for my 180 build! |
|
|
|
|
02/27/2006, 10:27 AM
|
#16 |
|
Registered Member
Join Date: Aug 2004
Location: Nashville, TN
Posts: 783
|
looks very nice. i'm thinking of building a stand for an upgrade soon, and would love to see construction pics.
|
|
|
|
|
02/27/2006, 12:02 PM
|
#17 |
|
Premium Member
Join Date: Mar 2004
Location: Cape Girardeau, MO
Posts: 2,529
|
I have gotten several request for pics of the construction process so I will post pics in this thread. Feel free to ask any questions.
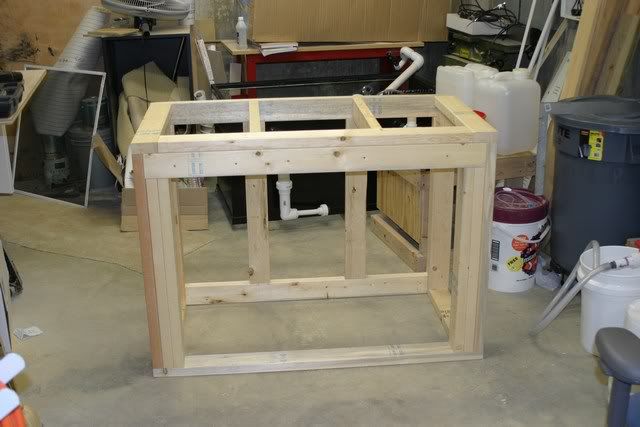
I wanted to say first of all that a lot of my ideas and inspiration for this project came from a stand that sonofgaladriel built and documented in a thread on RC. I really liked the look of his stand and copied many of it traits into mine. Here is the 2X4 framing going together with wood screws 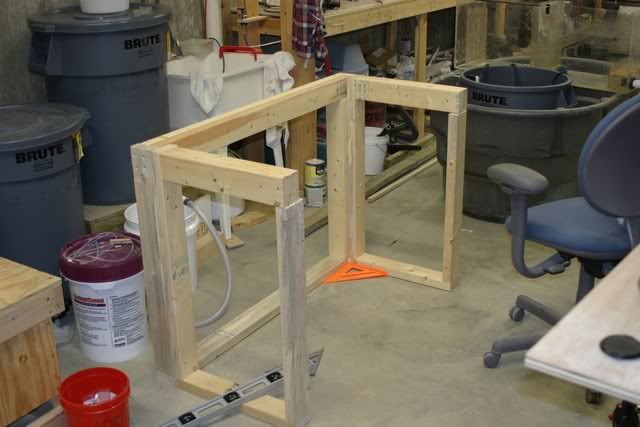 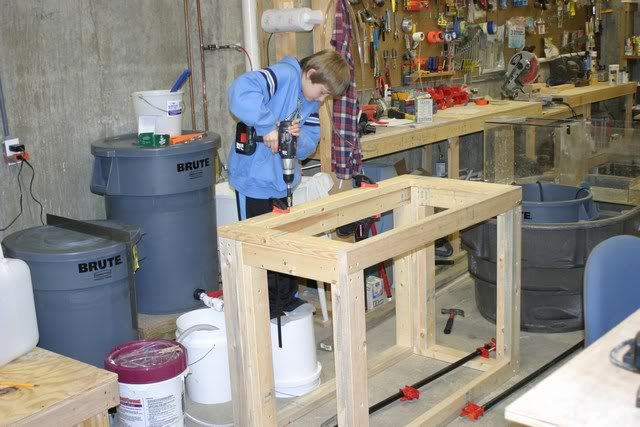 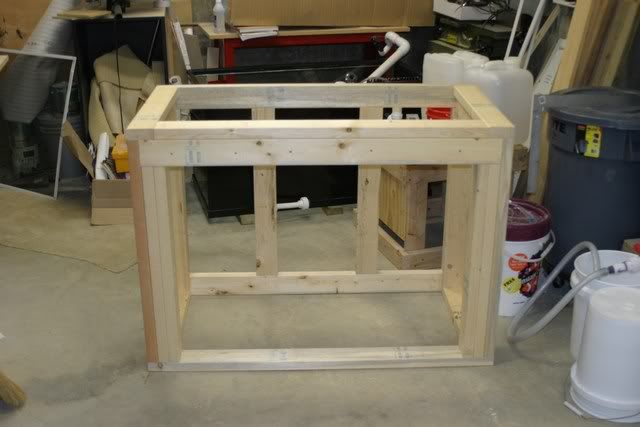
|
|
|
|
|
02/27/2006, 12:05 PM
|
#18 |
|
Premium Member
Join Date: Mar 2004
Location: Cape Girardeau, MO
Posts: 2,529
|
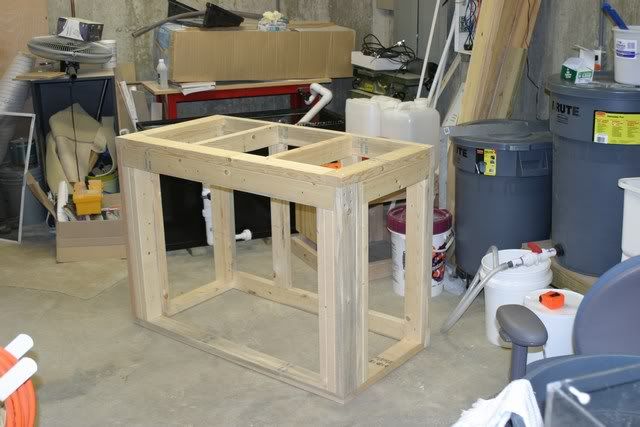
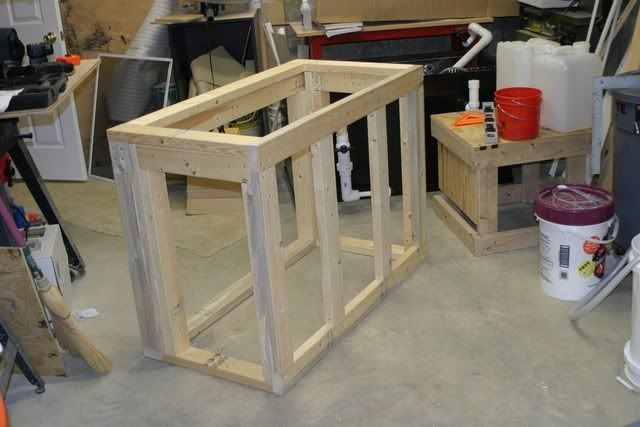
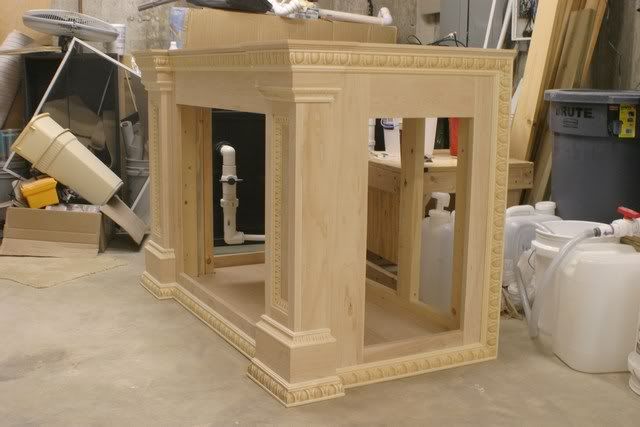
Here are pics of the finished framing
|
|
|
|
|
02/27/2006, 12:14 PM
|
#19 |
|
Premium Member
Join Date: Mar 2004
Location: Cape Girardeau, MO
Posts: 2,529
|
The framing was then "skinned" with face frames made from solid maple. These frames were made using wood glue and pocket holes
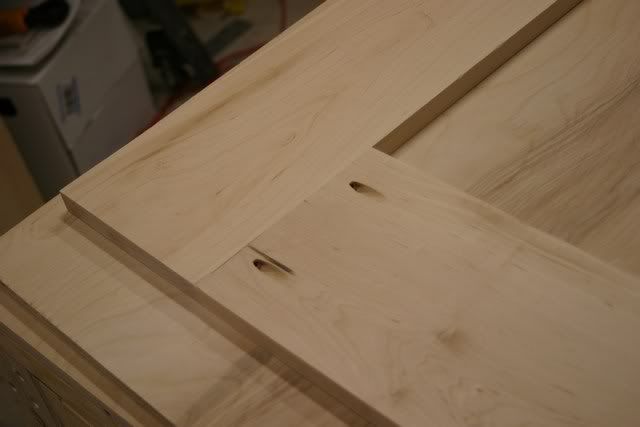   These were attached using wood screws. The holes will be hidden by trim attached later. |
|
|
|
|
02/27/2006, 12:18 PM
|
#20 |
|
Premium Member
Join Date: Mar 2004
Location: Cape Girardeau, MO
Posts: 2,529
|
Next step was to build up for the columns. I attached some 3/4" Birch plywood and some solid maple for this.
 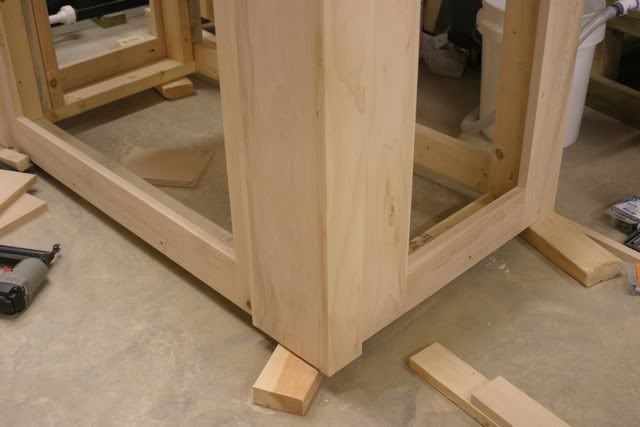 Column structure now taking shape 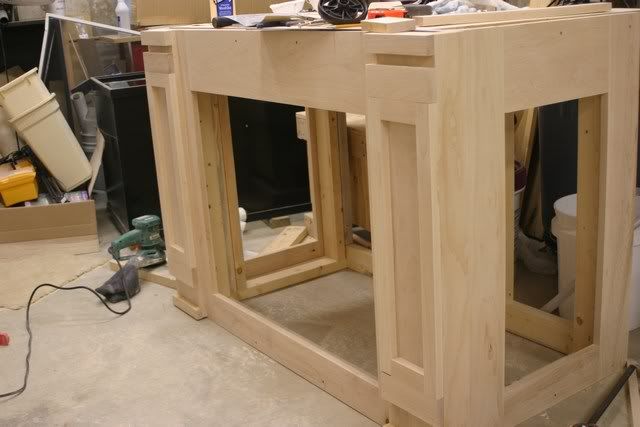 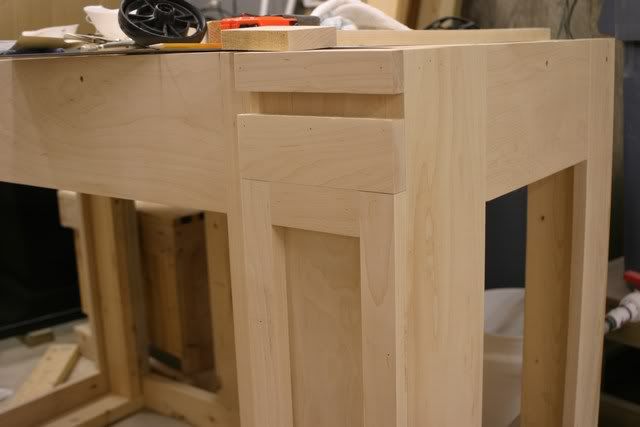 I did not want any plywood edges or any endgrain visible. |
|
|
|
|
02/27/2006, 12:24 PM
|
#21 |
|
Premium Member
Join Date: Mar 2004
Location: Cape Girardeau, MO
Posts: 2,529
|
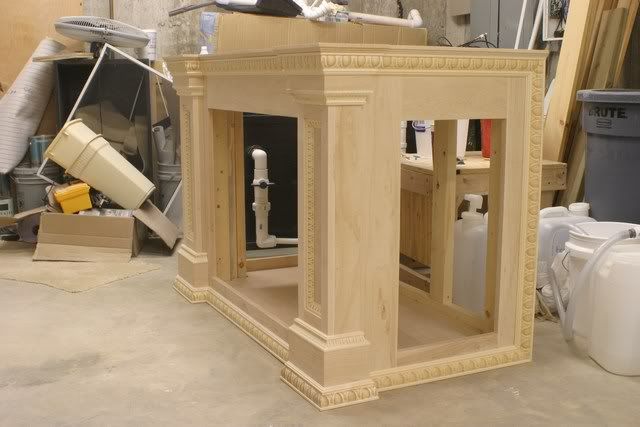
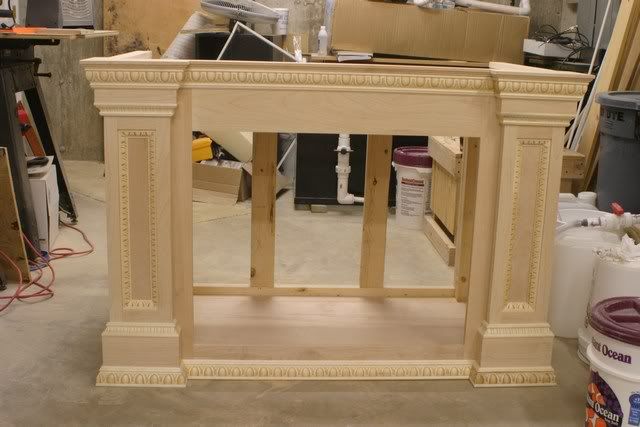
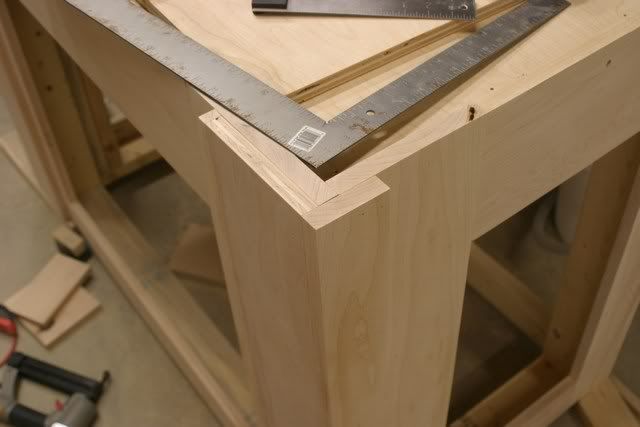
I then used solid maple and decorative trim to wrap the columns at the top and bottom. I used this same trim to hide all of the screw holes in the face frames.
All of the joints are mitered (45 degrees) and everything is attached using wood glue and brad nails. 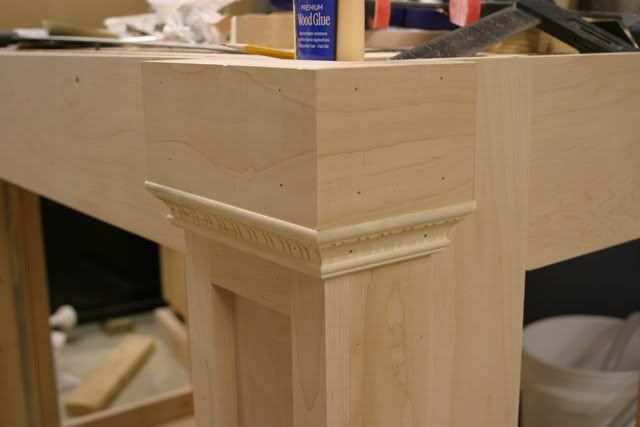 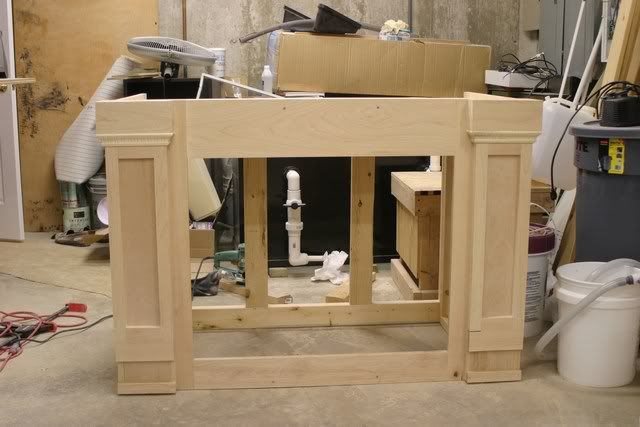 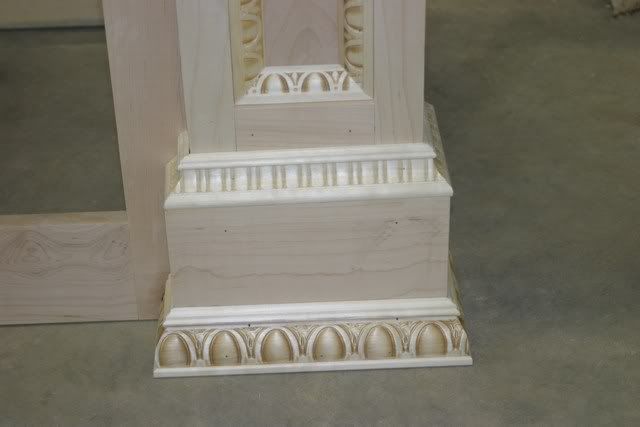 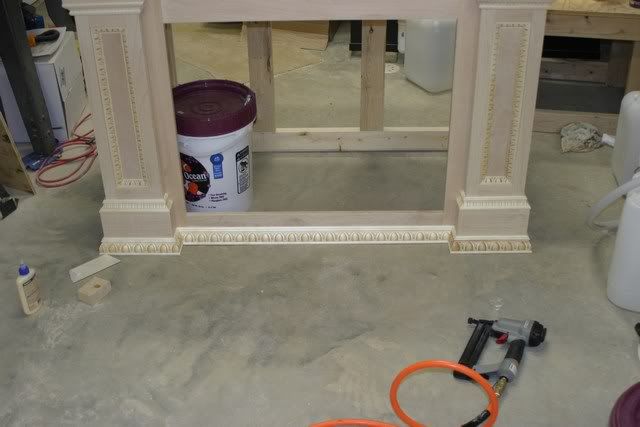
|
|
|
|
|
02/27/2006, 12:32 PM
|
#22 |
|
Premium Member
Join Date: Jul 2003
Location: Ft. Bragg NC
Posts: 346
|
Very nice, cant wait to see it with the doors.
__________________
Semper Fi Current Tank Info: 24g Aquapod, 10g Sump, 150watt 14k HQI |
|
|
|
|
02/27/2006, 12:34 PM
|
#23 |
|
Premium Member
Join Date: Mar 2004
Location: Cape Girardeau, MO
Posts: 2,529
|
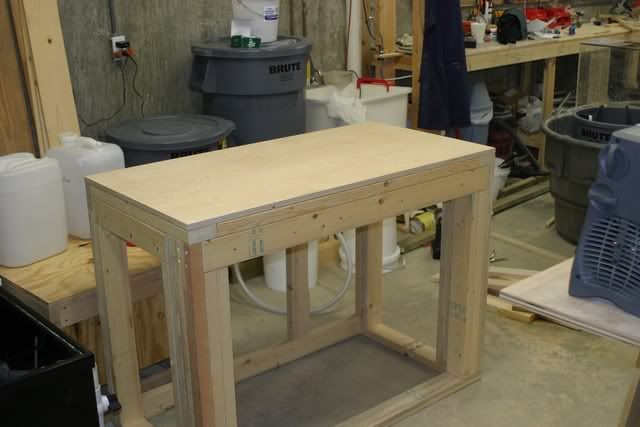
Here is a picture of the stand with the tank on it- for the first time! Trust me, I measured about 100 times before getting this far. You can see a small block of wood on top of the right column. Solid Maple trim will be applied around the entire top that will hide the black tank frame.
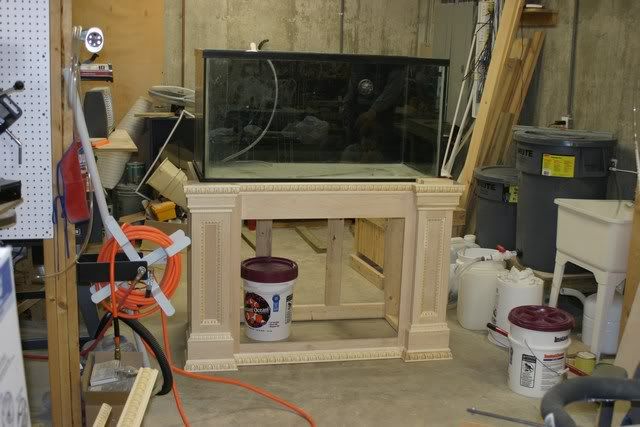 Here is a close up of the block I was referring to 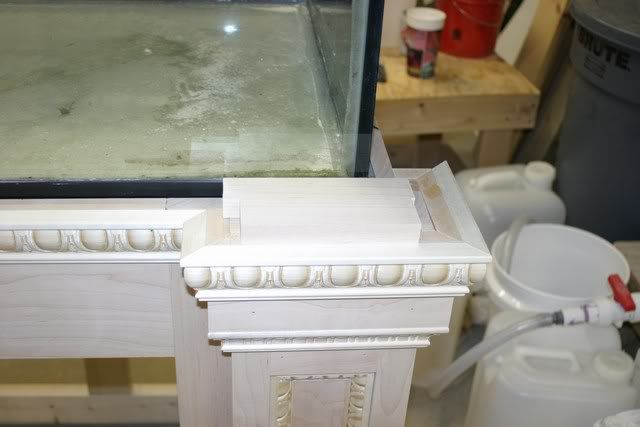 Some floor supports were added before 3/4" birch plywood floor was nailed in. 
|
|
|
|
|
02/27/2006, 12:39 PM
|
#24 |
|
Premium Member
Join Date: Mar 2004
Location: Cape Girardeau, MO
Posts: 2,529
|
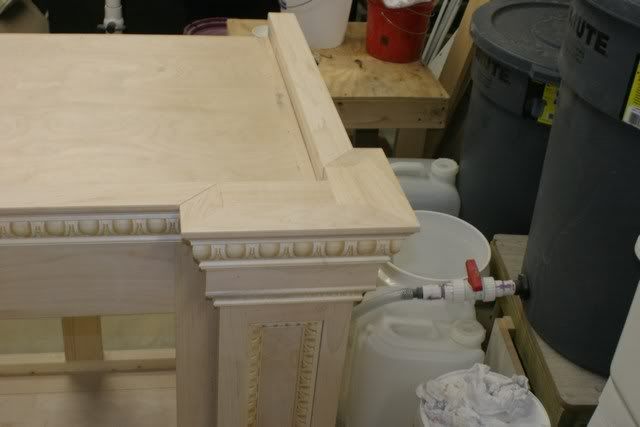
Finally, construction phase is complete. I now have to order raised panel doors for the front and each end.
 Here is a detailed shot of the trim work on top. It is made of solid maple and the front edge has an ogee design routed for a decorative touch. This trim work completetly hides the black tank frame. Now for the fun part- sanding, sanding again, then more sanding. The stand will be stained in a cherry color and coated with polyurethane. I'll post pics of that process as well when I begin. |
|
|
|
|
02/27/2006, 01:04 PM
|
#25 |
|
Registered Member
Join Date: Aug 2004
Location: Nashville, TN
Posts: 783
|
that is some very, very nice work. I love your attention to detail. If you don't mind me asking, how much in raw materials went into the stand?
I thought the stand looked similar to sonofgaladriel's, I followed that thread and loved the design; I think yours is even better-proportioned. Great work! |
|
|
|
|
|
|


