
|
|
 09/09/2014, 10:20 PM
|
#26 | |
|
Registered Member
 Join Date: Feb 2004
Location: Carol Stream, IL
Posts: 23,162
|
Quote:
The sump (( model 3 )), was $525 -- the pictures on their site are the old ones, would look like mine. The ATO was $175. Could have found something cheaper, but my OCD wins over too much. Case in point, going to have to get a Non-GFCI, but GFCI shape outlet to match the GFCI outlet that will be in the same 2 gang box, just so I can get the outlet cover that is the same as the rest of the house. Should note that the outlet cover will be behind the tank.
__________________
Click my name and then "visit toddrtrex's homepage" for tank pictures Current Tank Info: 210g reef and 65g reef |
|

|

|
|
09/09/2014, 10:47 PM
|
#27 |
|
Premium Member
Join Date: Nov 2004
Location: Calgary, Canada
Posts: 4,479
|
Following along.
__________________
______________________ Greg ~ June 2015 TOTM ~ ~ April 2010 TOTM ~ |
|
|
|
|
09/19/2014, 11:30 AM
|
#28 |
|
Registered Member
Join Date: Feb 2004
Location: Carol Stream, IL
Posts: 23,162
|
Some updates...
Had the electrician out the other day, ran 2 20 amp circuits just for the tank --- on of them (( on the outlet )) is GFCI, and the other is normal. Have read too much about T5 ballasts tripping GFCI outlets, and on tripping at the worse possible time. Figure I will have the lights, main pump and a few other "dry" items plugged in to the normal outlet. Received my skimmer the other day, Skimz Leopard SL203 DC, which fits perfectly in the sump. Though I wish the adjuster and main pump were on the same side. As I have it, the adjuster is in the back, and the pump is in the front. I figured it was easier to reach for the adjuster, as opposed to reaching for the pump when it comes time to clean it. Ordered my plumping parts last night (( from both BRS and PVConline )), have a feeling that I am going to have missed a part or two. With using Schedule 80, no running to Home Depot for the missing part. (( should note, the missing part wouldn't be because of a screw up from them, but a planning screw up on my part )). At least I am not in a huge hurry, so I will be able to wait for any parts. Have to say, pleased with PVC online. They called me this morning to confirm 2 parts, which didn't match up with the rest of my order (( all Sch80, but 2 were CPVC, and the rest is PVC )). Nice to see that they look over the orders that closely. I plan on trying to run "Herbies" in both overflows, using the 3/4" as the main drain and the 1" as the emergency. There shouldn't be much difference, since all the pipe/fittings will be 1", except for the actual bulkheads on the main drain. Will run the return up and over the back of the tank --- the tank will be as close to the wall as possible, so I will a have to be smart on the returns. I have read about the issues that may come up with using the way in dual overflows, but if there ends up being a bit of noise, that won't be the end of the world; the tank is in the family room/dinning room. Plus I figure it will be quieter than the current 40 breeder. Lastly, and most importantly, the tank will be here in 7 days. The canopy won't be ready yet, but that won't matter just yet.
__________________
Click my name and then "visit toddrtrex's homepage" for tank pictures Current Tank Info: 210g reef and 65g reef |
|
|
|
|
09/23/2014, 08:03 PM
|
#29 |
|
Registered Member
Join Date: Feb 2004
Location: Carol Stream, IL
Posts: 23,162
|
Still getting things ready for Friday.
On Sunday I managed to take down the 40 breeder and move it out to the garage --- stupidly moved it by myself, which is dumb after 6 back surgeries, in a good deal of pain. But, on a better note, I did find a buyer for it. A few pictures of that process, 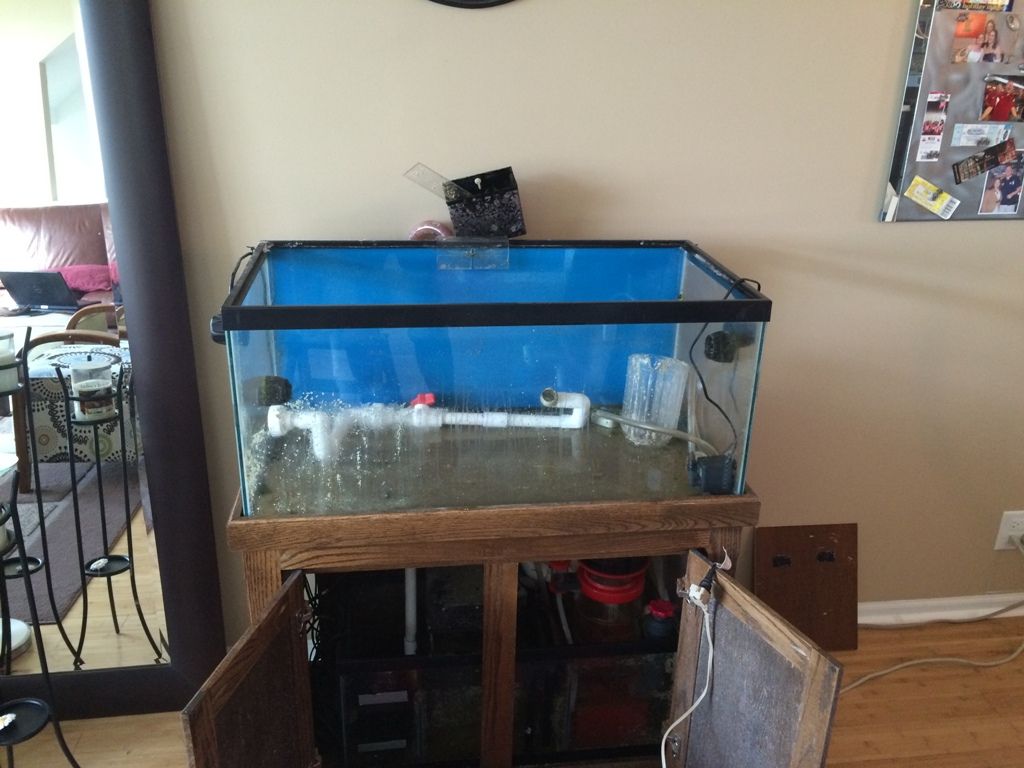 Almost there, 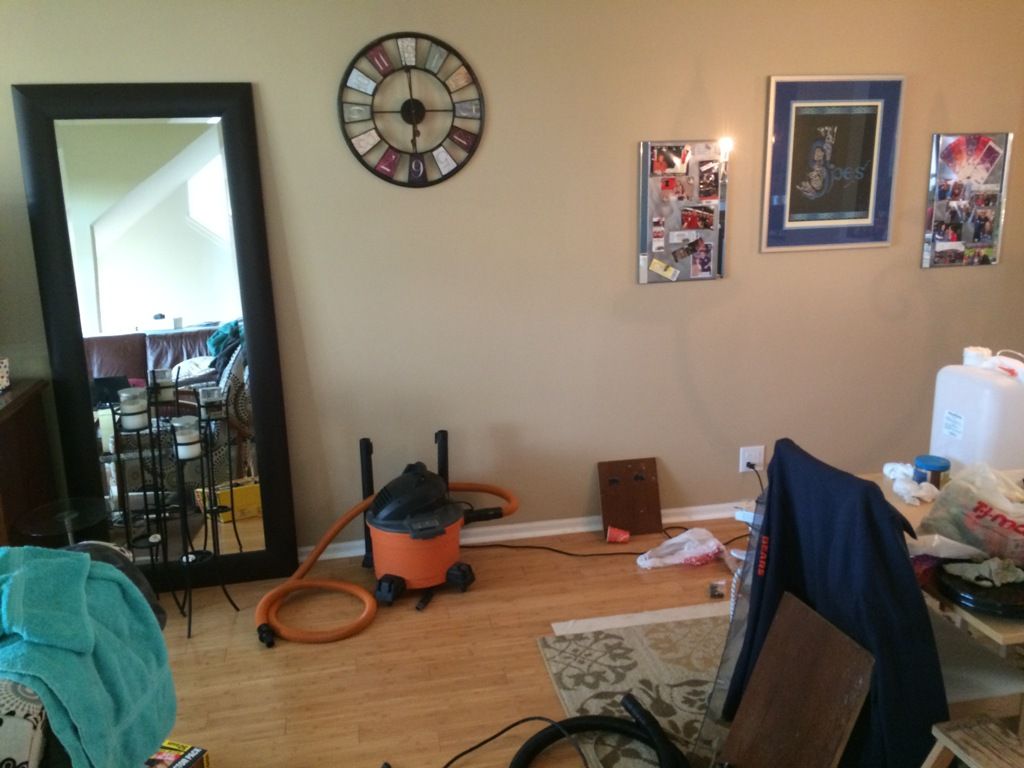 Over all, looks pretty good. Though, still have to take down the 3 pictures, 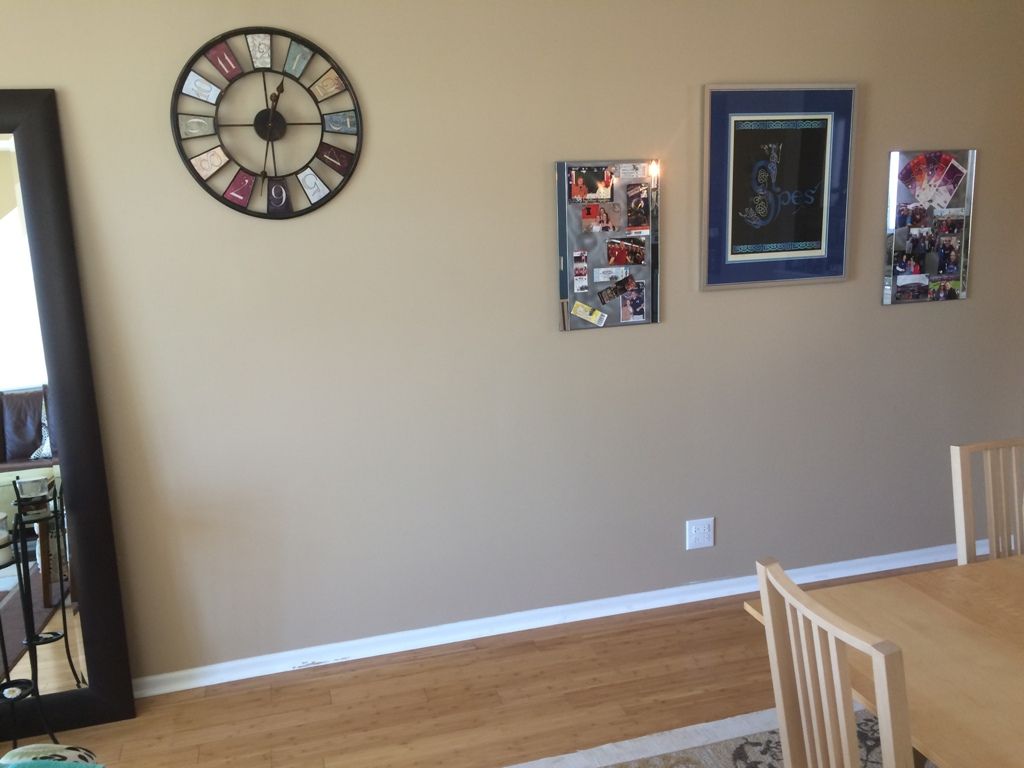 And found a fish -- never knew what happened to it, not sure how it got out, must have been right before/after a water change when the top was off. Still sucks, but nice to know there wasn't some thing I did (( meaning lack of food, water conditions, etc )). 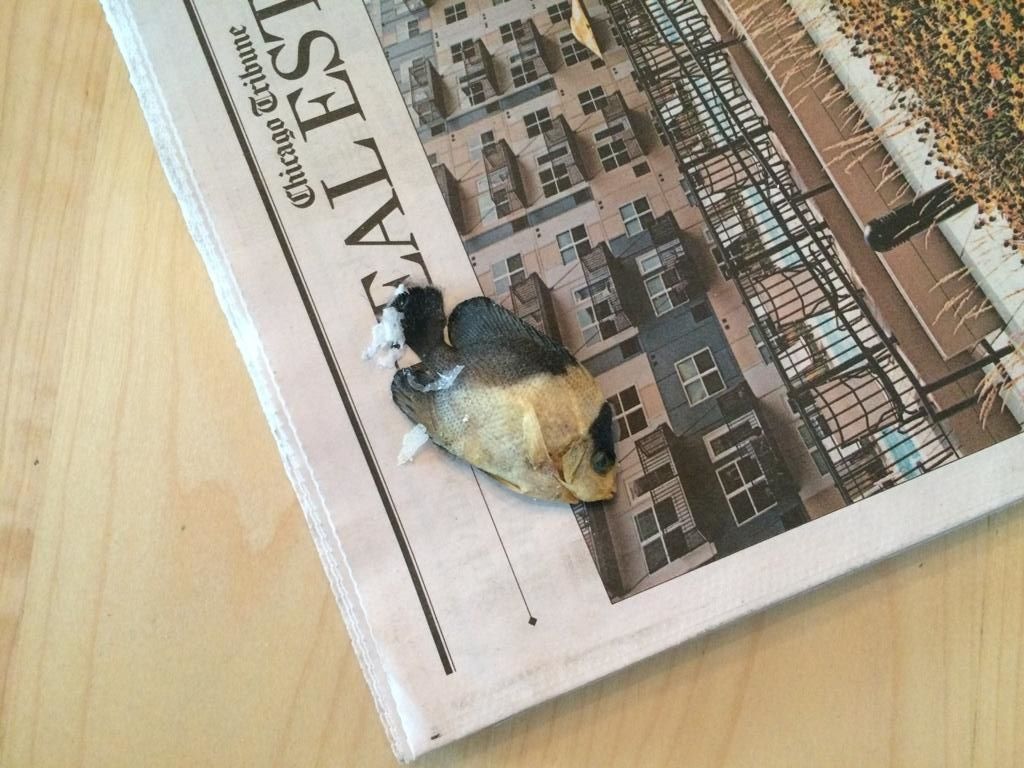 Lastly, most of the plumbing came today -- still waiting for the 1" gate valves and a few other pieces. Will be interesting to see if there is anything that I forgot to order when I start plumbing it. (( in front of the 75 that will be taken down { a lot of the 40 breeder is in there }, when the 210 is up and running )) 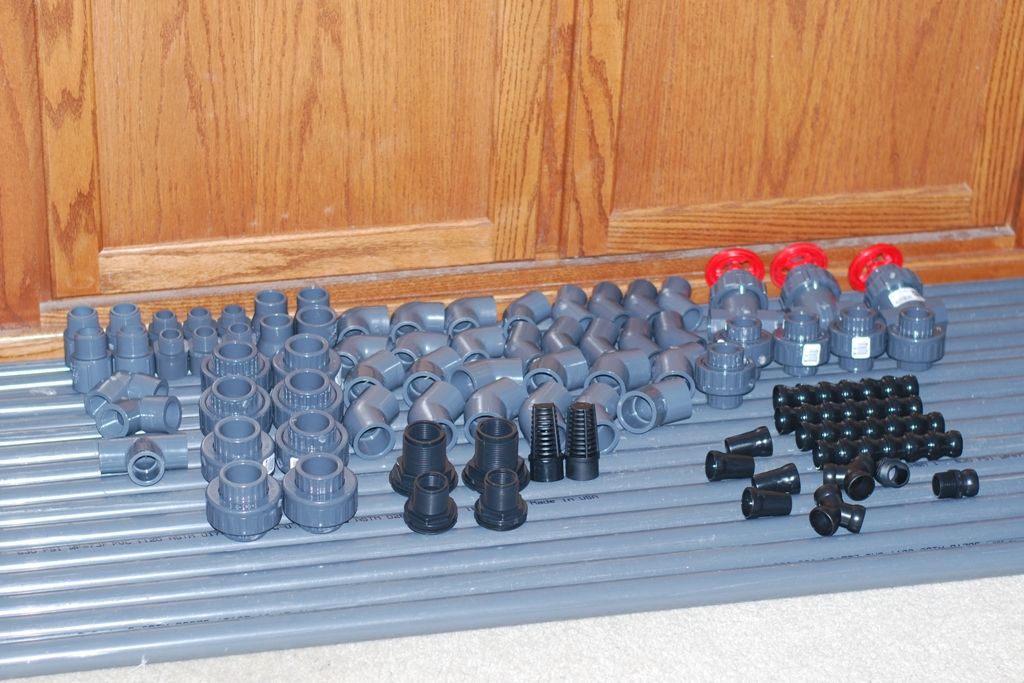
__________________
Click my name and then "visit toddrtrex's homepage" for tank pictures Current Tank Info: 210g reef and 65g reef |
|
|
|
|
09/23/2014, 09:49 PM
|
#30 |
|
Thread Ender
Join Date: Sep 2009
Location: new jersey
Posts: 915
|
Looks like a Venusta, no?
|
|
|
|
|
09/23/2014, 10:17 PM
|
#31 |
|
Registered Member
Join Date: Oct 2012
Location: DFW,Area
Posts: 798
|
Following along as for I just completed my 180 in wall build. Looks like you are off to a great start.
I have had several tanks and I really took my time with this one took me about 7 months to get salt water in it. Like you I probably could have done things cheaper however I wanted things to look good or look right. I had a custom built ATO tank to match my 48" long sump. Plan to have my dosing containers built to match those but I am not ready for that part as of yet. |
|
|
|
|
09/24/2014, 09:46 AM
|
#32 | ||
|
Registered Member
Join Date: Feb 2004
Location: Carol Stream, IL
Posts: 23,162
|
Quote:
The one that I found in happier times,   Quote:
Thanks. Any pictures? More stuff should be coming today, at this point I can't recall exactly what, home stretch of the orders, but I think it is the controller. To add to the work, we have decided to paint that room (( family room/dinning room )). Have plans to have someone paint the staircase (( not going to do that myself, don't want to be on a 25 foot ladder )), and figured to use the same color paint for the family/dinning room. With the 40 breeder down, now is the time. Not ideal, but not much can be done about it.
__________________
Click my name and then "visit toddrtrex's homepage" for tank pictures Current Tank Info: 210g reef and 65g reef |
||
|
|
|
|
09/24/2014, 06:03 PM
|
#33 |
|
Love The Fish
Join Date: Jan 2003
Location: Tucson, AZ
Posts: 5,652
|
Sorry about the venustus jerky Todd, happy plumbing!
__________________
Brett Current Tank Info: Leemar 60x36x24, 8x80 T5/LED Sfiligoi GENESIS Alpha 300 skimmer |
|
|
|
|
09/24/2014, 08:34 PM
|
#34 | |
|
Registered Member
Join Date: Feb 2004
Location: Carol Stream, IL
Posts: 23,162
|
Quote:
Received one of the last big packages, the controller.  And another picture -- not sure which hobby costs me more... 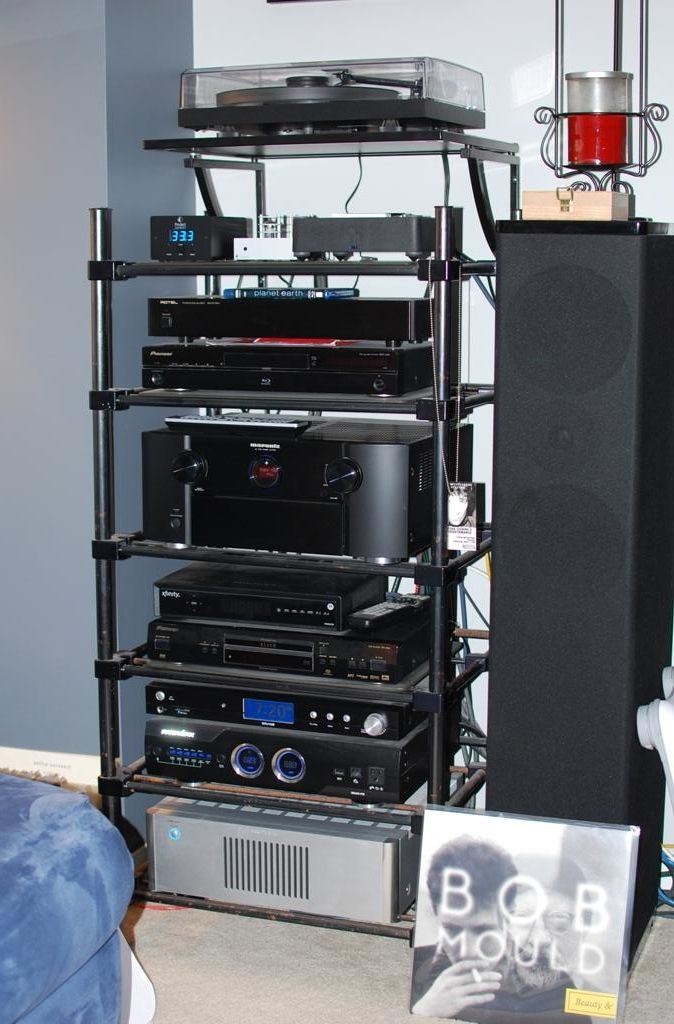
__________________
Click my name and then "visit toddrtrex's homepage" for tank pictures Current Tank Info: 210g reef and 65g reef |
|
|
|
|
|
09/28/2014, 09:44 PM
|
#35 |
|
Registered Member
Join Date: Feb 2004
Location: Carol Stream, IL
Posts: 23,162
|
Well, the tank came on Friday, and was brought into the place without an issue --- though I am glad that I didn't have to do it, didn't look like fun.
There was one minor issue (( and mainly it was my fault for not checking this first )), both holes in each overflow are 1", and not one 1" and one 3/4" like on my other RR tanks. The problem is that I bought plumbing for two 1" and two 3/4" holes. Placed a new order for 1" parts, hopefully they will be here on Tuesday and I can move onto getting this thing plumbed. I am not sure that I will be able to get everything I want under the tank (( at least as neat as I want it to be )), so I am thinking that I will have the ATO container next to the tank. (( in the pictures below it would be to the right of the tank, near the ladder )). Might even get the stand builder to make some sort of cabinet to hold the container (( and perhaps the Vortec battery back up )), that would match the stand. Right now the tank/stand are on those sliding moving pads, which will make working on the plumbing and what not a lot easier. Once all that is done, will remove them and add water/sand/rocks. Now some pics; While waiting for it to be delivered I decided to make a "stand" to raise my skimmer up a bit over 1". So much easier to cut PVC with power... 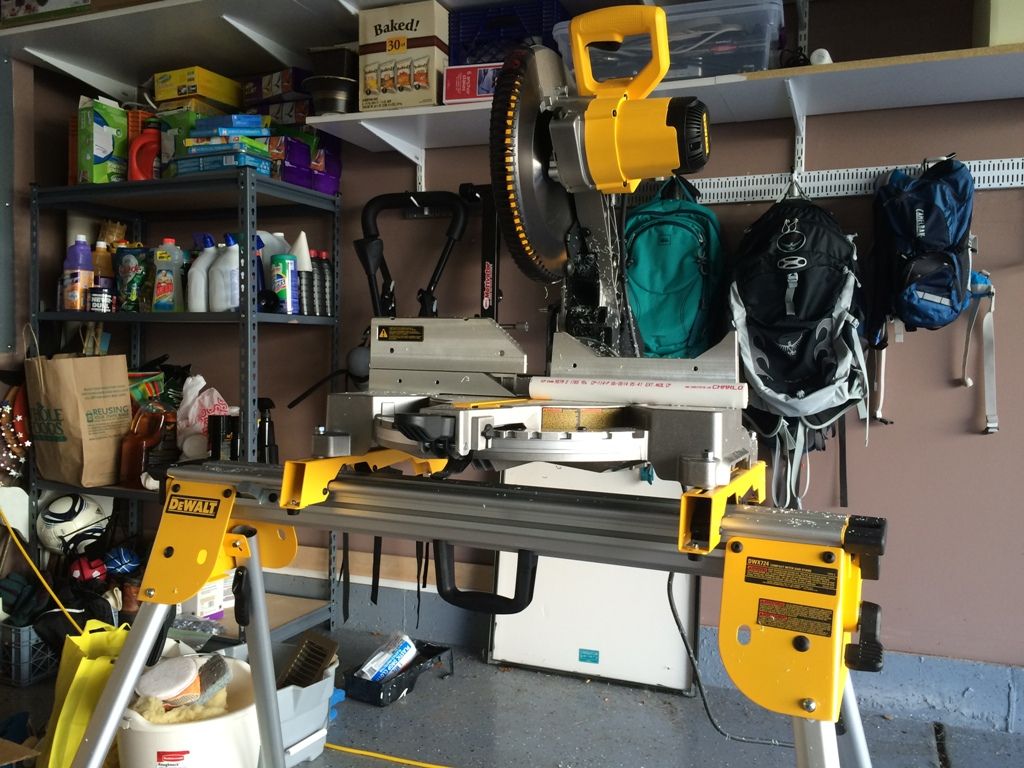 Egg crate and zip ties finished it off, 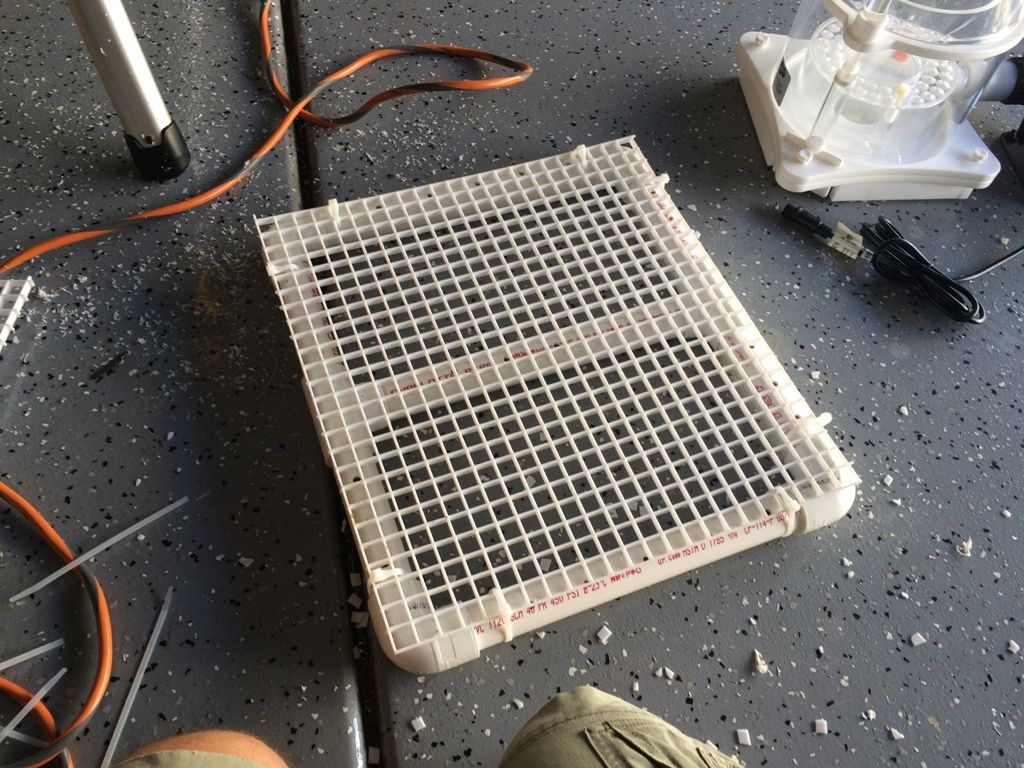 Placed in the sump (( might a piece of acrylic )) to help support the skimmer better. (( should add, the outlet cover is off because we put up the second coat of paint in the morning )) 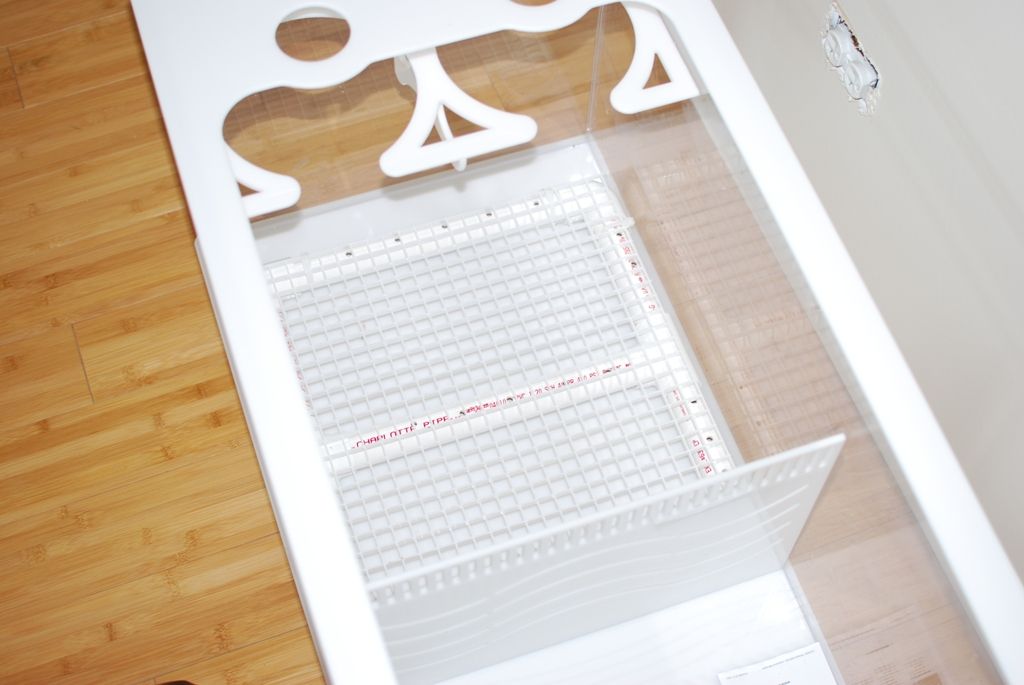 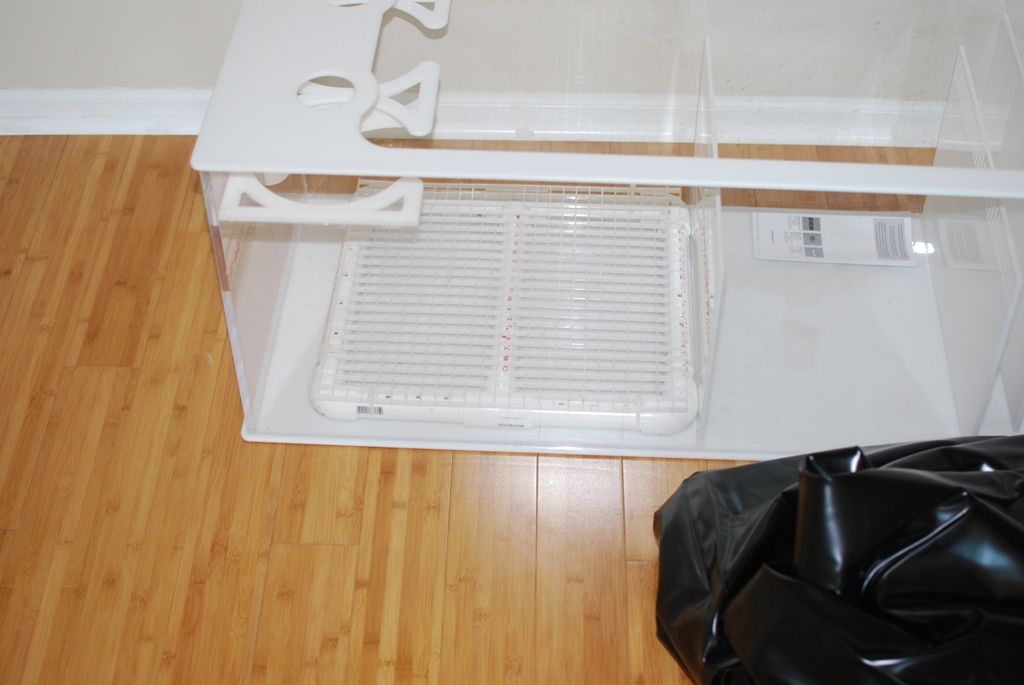 Tank in the house!! (( the dinning room table was out of the way, made it easier for the movers ))  Con't.
__________________
Click my name and then "visit toddrtrex's homepage" for tank pictures Current Tank Info: 210g reef and 65g reef |
|
|
|
|
09/28/2014, 09:48 PM
|
#36 |
|
Registered Member
Join Date: Feb 2004
Location: Carol Stream, IL
Posts: 23,162
|
Some covers for the overflows --- keep algae to a minimum.
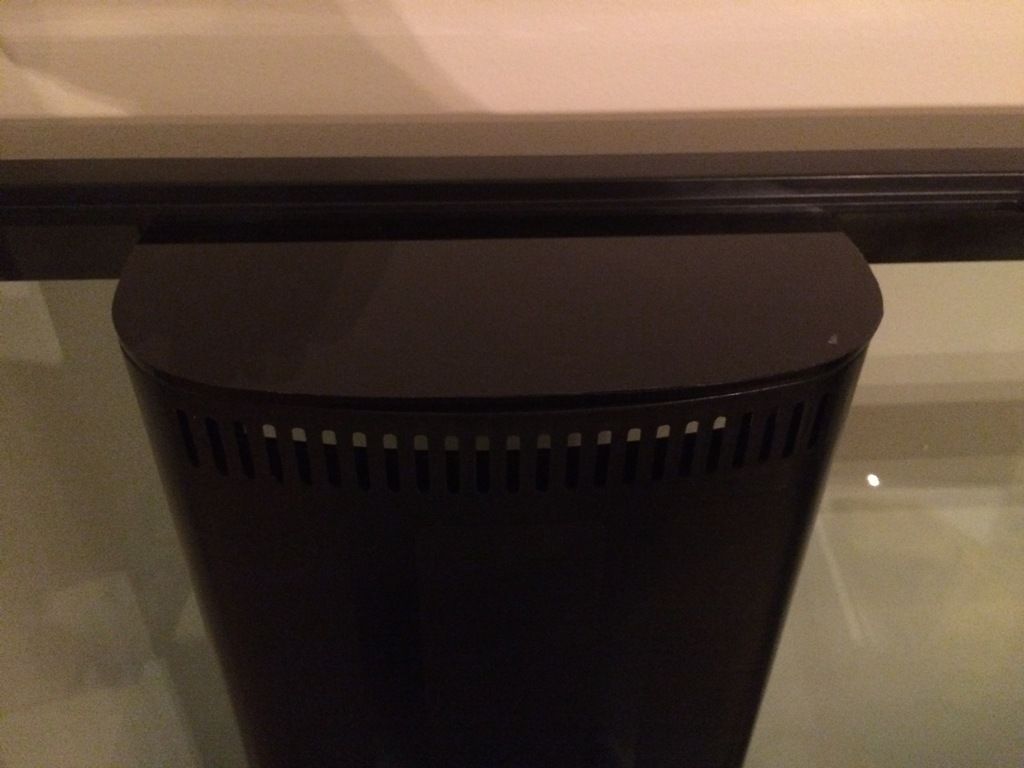 Rough placement of where the tank (( might move it a bit left/right, but overall this is the place. The ATO container will be near the ladder, but right next to the stand )) 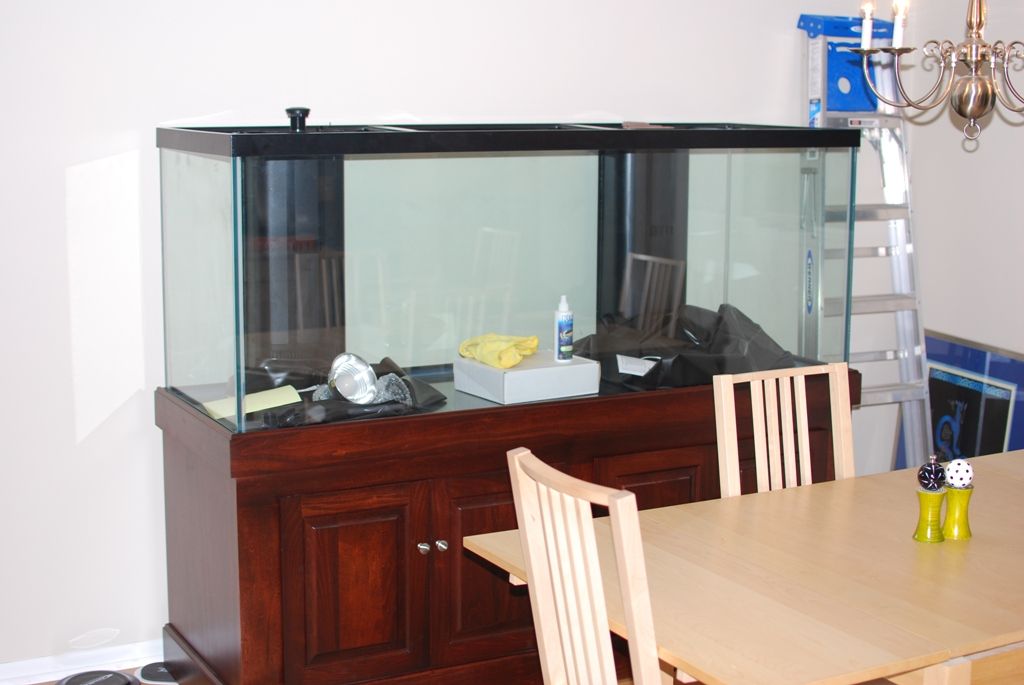 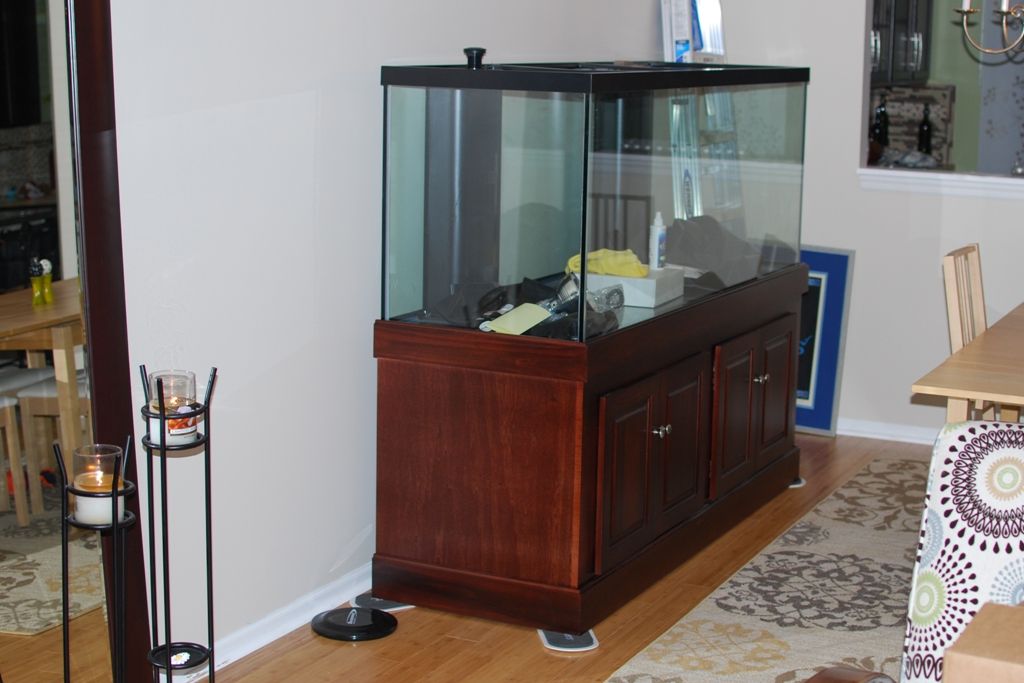 Some pics from under the stand (( not shown is the controller )) Left side -- doser & dosing containers and one of the two reactors --- I had forgotten about those 2, part of the reason I have to move the ATO container. 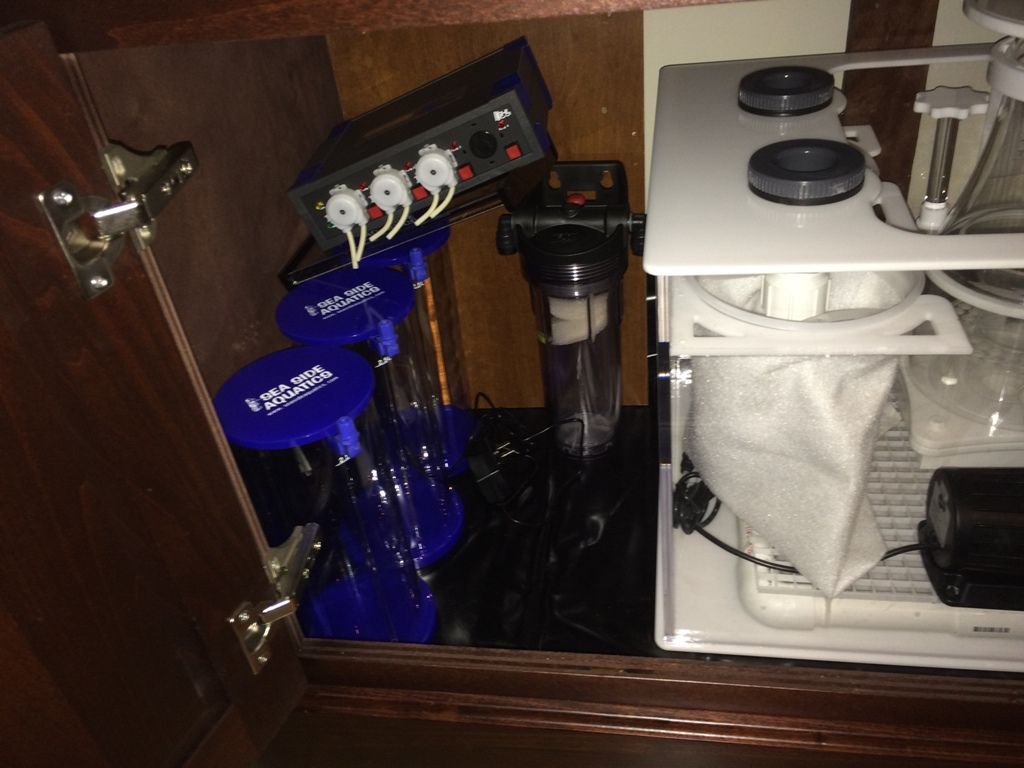 Inflow and skimmer sections of the sump, 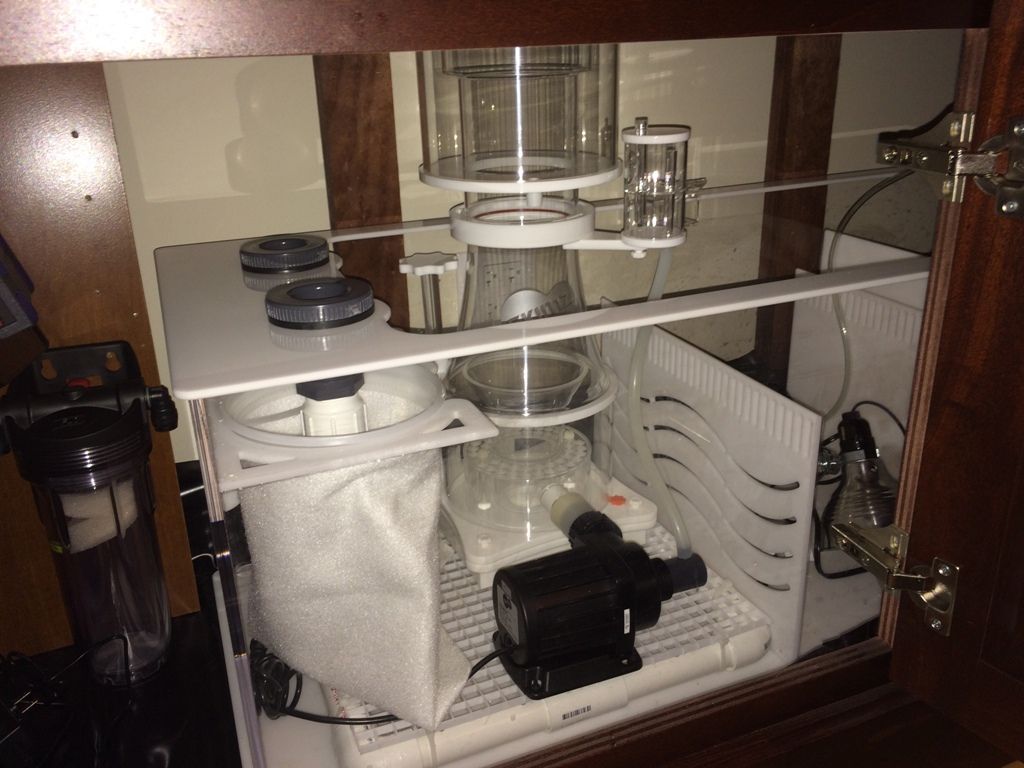 Fuge and return section 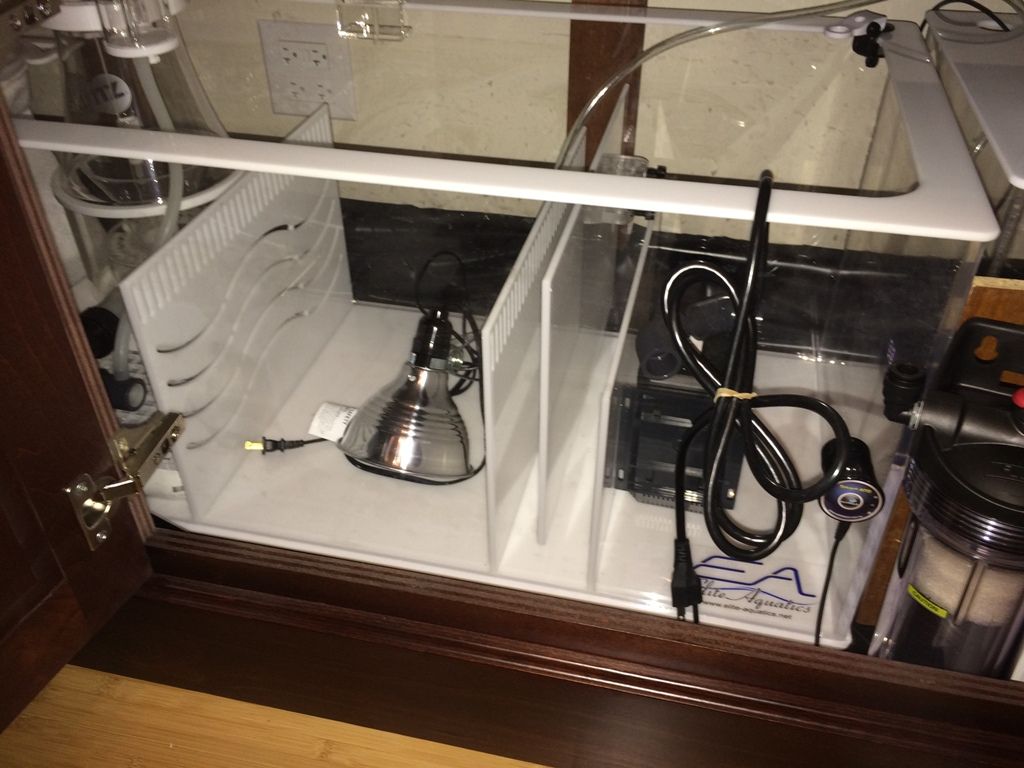 ATO container and battery backup. (( which will be moved )) 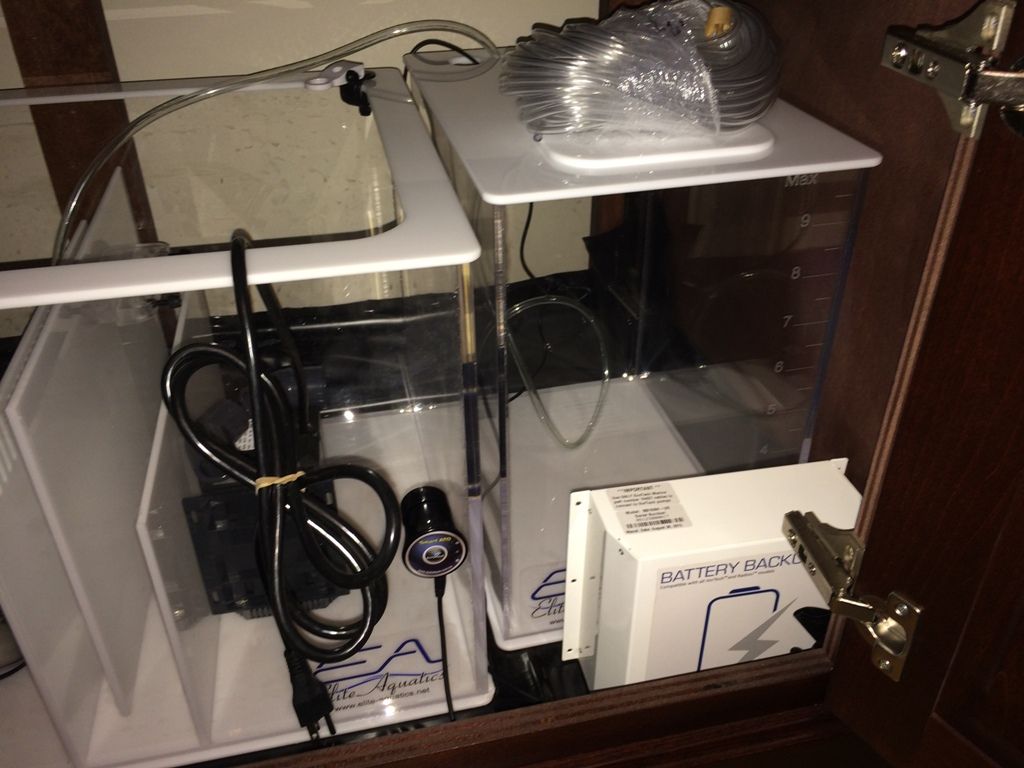 Lastly, put a pond liner in the base of the stand, and up the sides a few inches, to catch the spills that will happen. 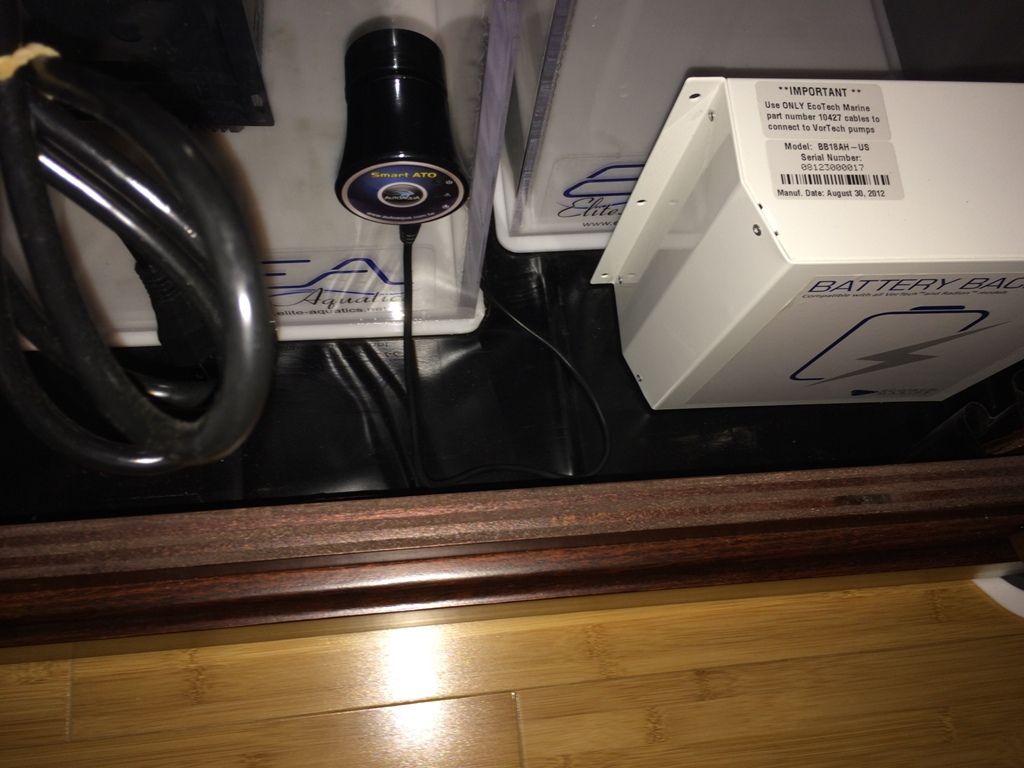
__________________
Click my name and then "visit toddrtrex's homepage" for tank pictures Current Tank Info: 210g reef and 65g reef |
|
|
|
|
09/29/2014, 04:36 AM
|
#37 |
|
Registered Member
Join Date: Jan 2010
Location: Canadia
Posts: 4,276
|
Just a small suggestion, not world-shaking or anything, but down the road you will really appreciate it if the entire interior of your cabinet is white, including your liner. Trying to see anything inside a small, enclosed space full of running equipment becomes a real chore, and enhancing viewability will be much appreciated when you're working on the system.
Dave.M
__________________
My Gawd! It's full of corals! Current Tank Info: None. Nil. Zip. Nada. |
|
|
|
|
09/29/2014, 12:58 PM
|
#38 | |
|
Registered Member
Join Date: Feb 2004
Location: Carol Stream, IL
Posts: 23,162
|
Quote:
At least I plan on adding some lights to the stand, to help me see what I am doing. Thanks.
__________________
Click my name and then "visit toddrtrex's homepage" for tank pictures Current Tank Info: 210g reef and 65g reef |
|
|
|
|
|
09/29/2014, 01:51 PM
|
#39 |
|
Registered Member
Join Date: Apr 2014
Location: Bronx, NY
Posts: 23
|
your tank looks beautiful!
question where did you got the overflow covers ?? thank you.. |
|
|
|
|
09/29/2014, 02:03 PM
|
#40 | |
|
Registered Member
Join Date: Feb 2004
Location: Carol Stream, IL
Posts: 23,162
|
Quote:
I got them here; http://www.limpitsreef.com/D-Shaped-Overflow-Cover.html Shipping was pretty quick too, was shocked when the box was sitting at the front door.
__________________
Click my name and then "visit toddrtrex's homepage" for tank pictures Current Tank Info: 210g reef and 65g reef |
|
|
|
|
|
09/29/2014, 02:08 PM
|
#41 | |
|
Registered Member
Join Date: Apr 2014
Location: Bronx, NY
Posts: 23
|
Quote:
I'm ordering 2 right now I'm setting up the same tank but the 180G one |
|
|
|
|
|
09/29/2014, 06:28 PM
|
#42 |
|
Registered Member
Join Date: Apr 2005
Location: Lorain, Ohio
Posts: 1,811
|
Subscribed. I just had the Xenia conversation with my wife yesterday. I told her I'd be more than happy to setup a separate tank for her, but the pink weeds weren't going in my new setup.
|
|
|
|
|
09/29/2014, 07:28 PM
|
#43 | |
|
Registered Member
Join Date: Oct 2002
Location: Wash. D.C.
Posts: 637
|
Quote:
|
|
|
|
|
|
09/29/2014, 08:39 PM
|
#44 | |||
|
Registered Member
Join Date: Feb 2004
Location: Carol Stream, IL
Posts: 23,162
|
Quote:
Quote:
Quote:
Another order came today, which I had forgotten about, wire duct channels to help hide and organize all the power cords. Need to pick up some 1*6 wood boards to mount the wires and controllers to --- though want to get the plumbing done first. Just checked the tracking on the pieces of PVC that I needed for the 1" holes should be here on Wednesday. Hope to get all the plumbing dry fitted this weekend.
__________________
Click my name and then "visit toddrtrex's homepage" for tank pictures Current Tank Info: 210g reef and 65g reef |
|||
|
|
|
|
09/30/2014, 06:14 AM
|
#45 |
|
Thread Ender
Join Date: Sep 2009
Location: new jersey
Posts: 915
|
Looks amazing Todd! Your previous tank was great & you set the bar high, lol. Can't wait to see the new tank come together!
|
|
|
|
|
10/01/2014, 09:45 AM
|
#46 | |
|
Registered Member
Join Date: Feb 2004
Location: Carol Stream, IL
Posts: 23,162
|
Quote:
The final (( I hope )) plumbing pieces should come today. Not sure how much I will be able to get done tonight, but I will at least get started. Hopefully will get a lot of work done on Sunday -- have a college football game to go to on Saturday, so that day is shot.
__________________
Click my name and then "visit toddrtrex's homepage" for tank pictures Current Tank Info: 210g reef and 65g reef |
|
|
|
|
|
10/17/2014, 02:23 PM
|
#47 |
|
Registered Member
Join Date: Feb 2005
Location: Indiana
Posts: 982
|
Any updates.
|
|
|
|
|
10/17/2014, 02:37 PM
|
#48 | |
|
Registered Member
Join Date: Feb 2004
Location: Carol Stream, IL
Posts: 23,162
|
Quote:
One of the bulkheads leaked during a leak test --- it had a high point that I filed down, but that only slowed the leak. New bulkheads came a couple of weeks ago. I had jacked up my back (( have had 6 surgeries on it, including a fusion )), so I haven't touched the tank in a couple of weeks. However, last night I installed the new bulkhead and it is holding great. Have most of the overflow plumbing done (( just need to do the emergency drains for the "Herbie" )), but need a couple more unions (( screwed up a few times last night. Was using the 1" mark of the tape measure, since the metal lip has some play in it, but forgot to add that 1" back into the measurement. A 7.25 inch piece ended up being 6.25, and I stupidly glued the unions on )) before I can finish that. I still need to finish the return plumbing, which should be easier since I am going over the back of the tank. This weekend is booked, so I hope to do this on Monday. After I finish the return I will order the unions, in case there is something else I need. Also, decided that the ATO container and the Vortech battery back up need to be outside of the stand -- the sump is "too" big. Going to see if the stand maker can make something that matches to hold them. If the $$ is too much I will attempt to make something myself. A bit disappointed in the lack of progress, but the numbness down my leg to my foot and pain in my back was too much to be messing around with plumbing, would have ended up going too fast and screwing this up. Thanks for asking.
__________________
Click my name and then "visit toddrtrex's homepage" for tank pictures Current Tank Info: 210g reef and 65g reef |
|
|
|
|
|
11/15/2014, 12:48 PM
|
#49 |
|
Registered Member
Join Date: Feb 2004
Location: Carol Stream, IL
Posts: 23,162
|
Time for a very overdue update on this project, which is taking a lot longer than I wanted --- but at least I am doing things the way I wanted.
Couple of reasons for the delay; went up to MN for 5 days, took my sister and her husband to a Minnesota Wild came for their birthdays. Sprung for club level seats, was very nice. In addition we went to Minnehaha falls; The sister and myself,  It was a bit chilly out,  Way back when you used to be able to go behind the falls (( or my dad just didn't tell us about the signs )), but that seems to have changed now.  As for the other reasons for the delay, wicked sinus infection/bronchitis that took forever to get rid of, and lastly, I really really HATE threaded bulkheads. While I like the idea of them, I still have slow leaks from them. I had used the proper "paste" on the threads, as opposed to tape, but still wouldn't hold. Attempted a shortcut --- plumbers putty, but this still leaked. Ended up having to cut the bulkheads out with a hacksaw blade. Of course cutting them out jacked up my back for a few days. While I was letting that calm down ordered more PVC parts. This time went with slip bulkheads. Will be a pain when/if I even had to move, but moving a 210 will be a pain, so this won't add that much. I installed the drain pipes onto the bulkheads and let that sit overnight. The next evening I installed the bulkheads and leak tested that part -- PERFECT. Then I re-did the rest of the plumbing (( had used plenty of unions, do really didn't have to redo that much )). Let that sit a day, and did a finally leak test --- bone dry.  Now some pics, Making my life so much easier -- to get to the back of the tank, 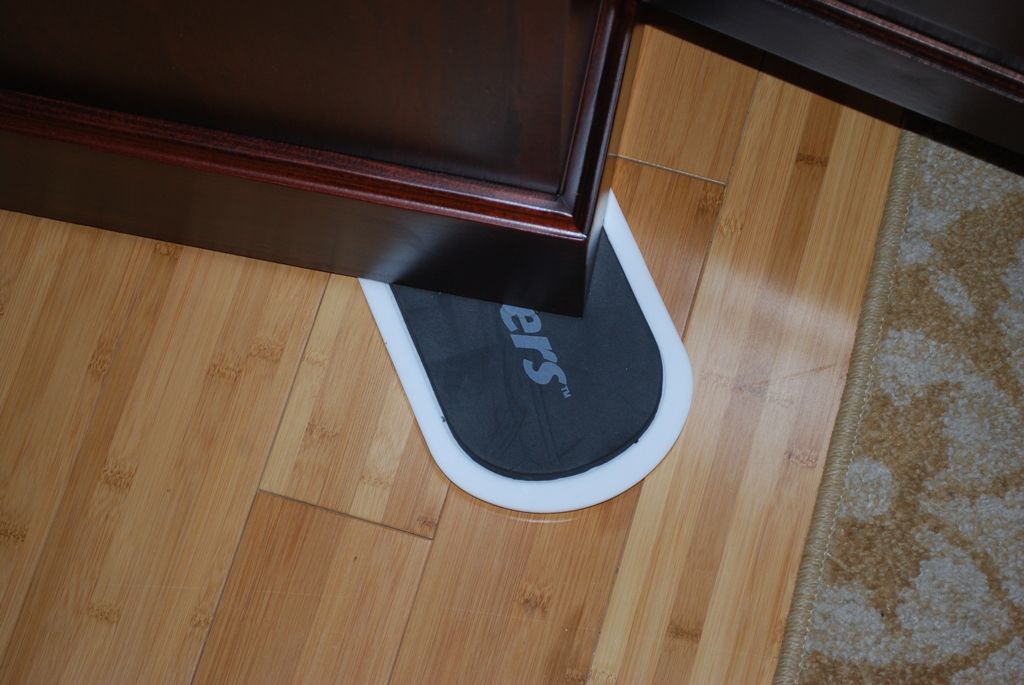 Part of the return plumbing, 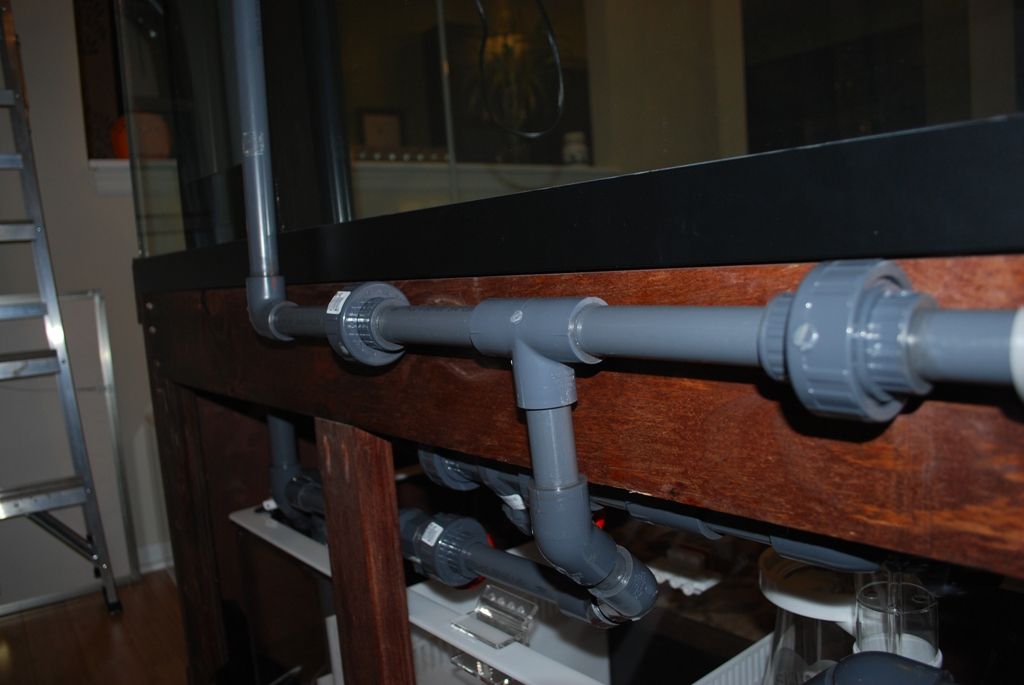 Took me a while to figure out how to get water into the return pluming with the sump being dry; 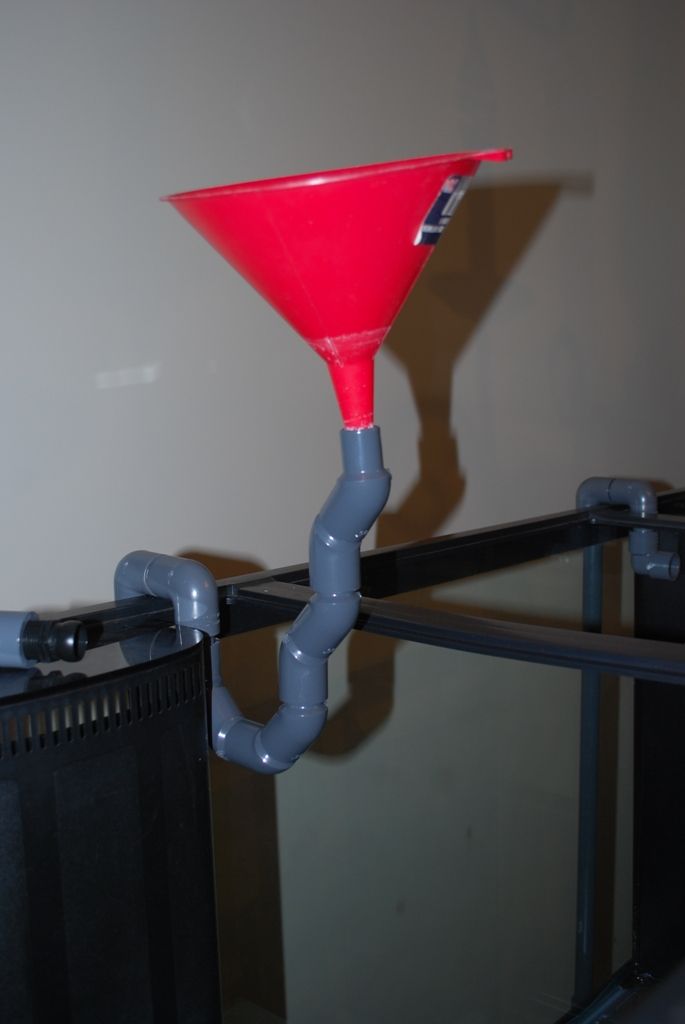 More return; 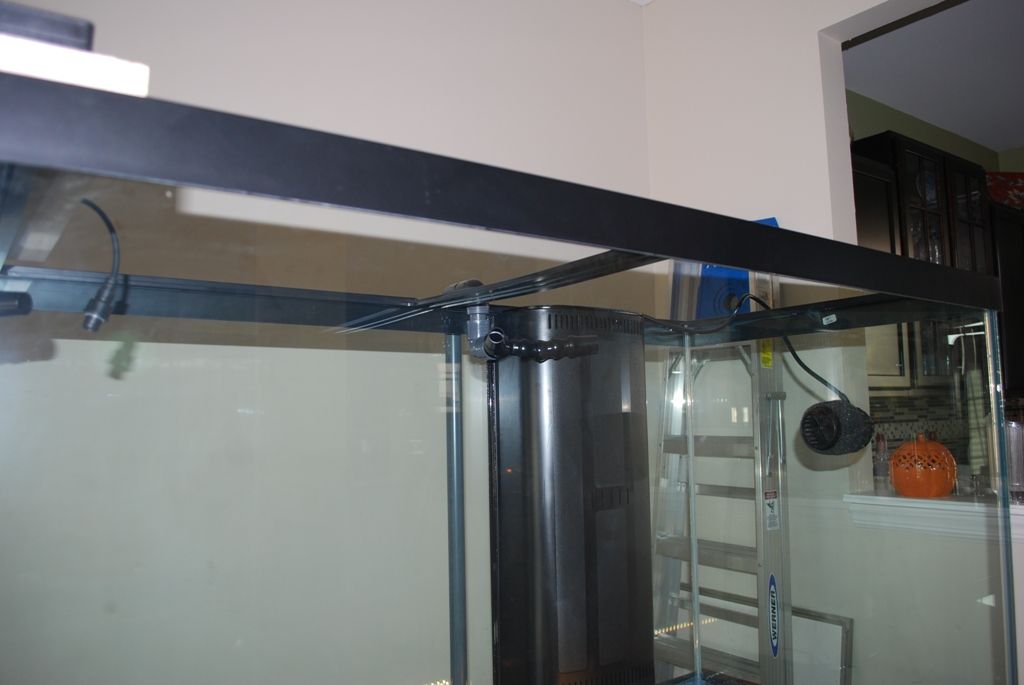 Con't.
__________________
Click my name and then "visit toddrtrex's homepage" for tank pictures Current Tank Info: 210g reef and 65g reef |
|
|
|
|
11/15/2014, 12:55 PM
|
#50 |
|
Registered Member
Join Date: Feb 2004
Location: Carol Stream, IL
Posts: 23,162
|
Right side of the inflow plumbing, through the glass,
 Underside, 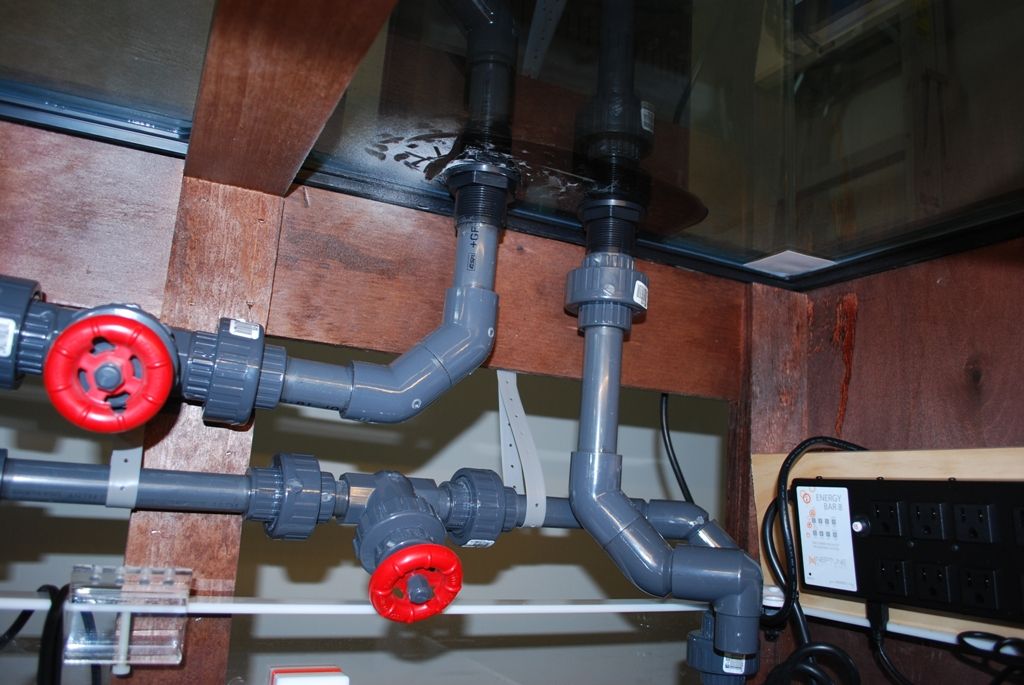 Emergency drain, right side; (( this part of the APEX will be mounted higher up against the stand, just placed it there to check the fit )) 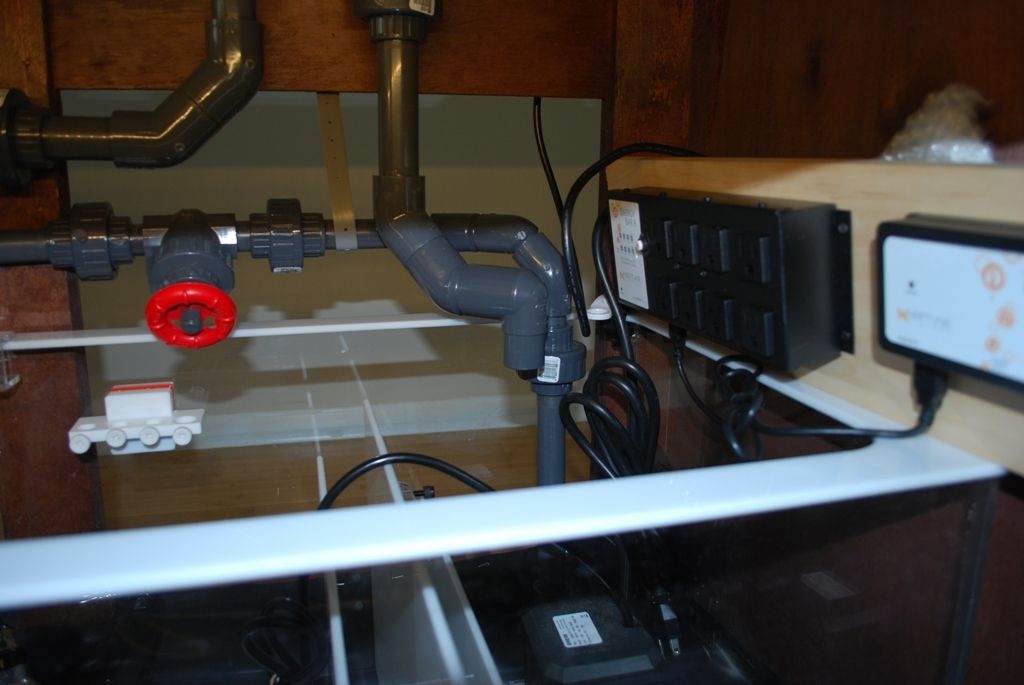 Gate valves for overflow and return (( Also show is an APEX probe holder that I will use to hold the reactor lines, and one for dosing lines. Sump has a built in probe holder )) 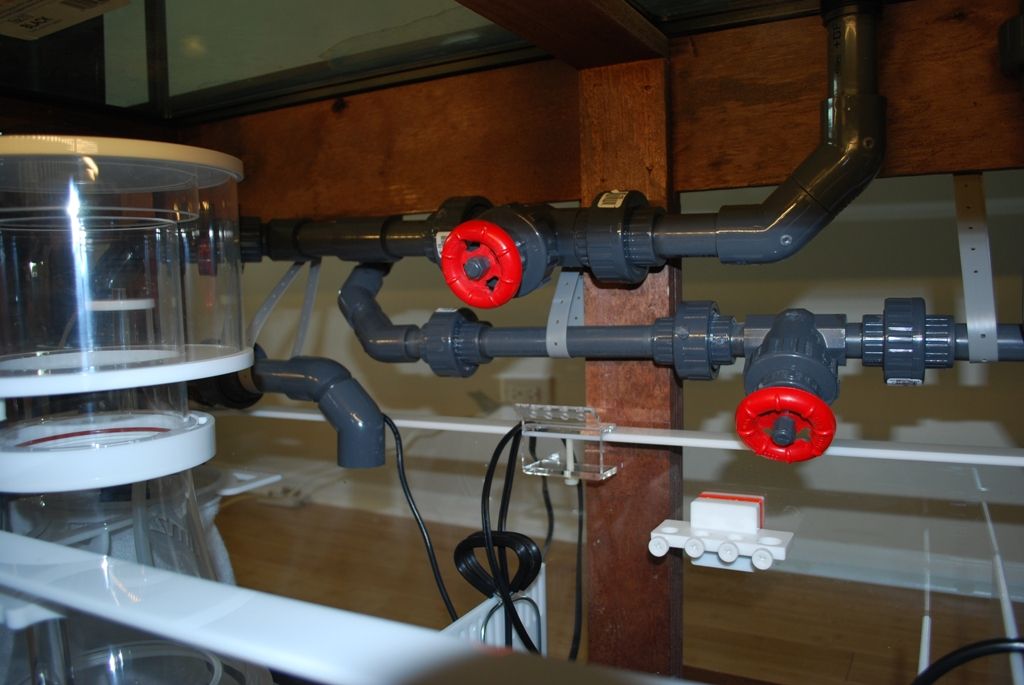 Left side from the top, 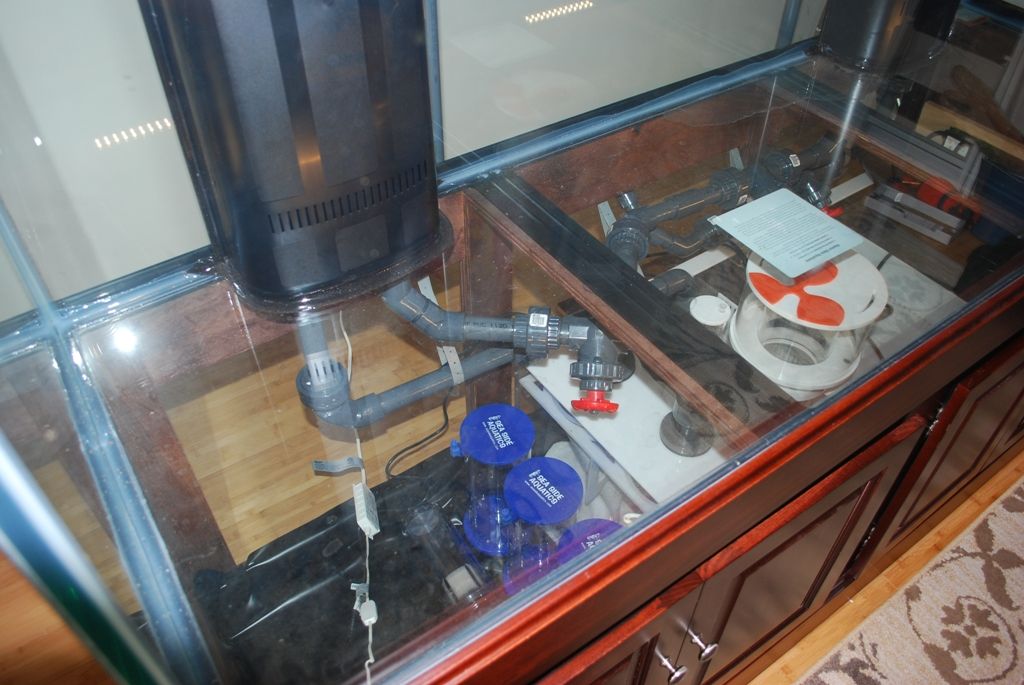 Underside, 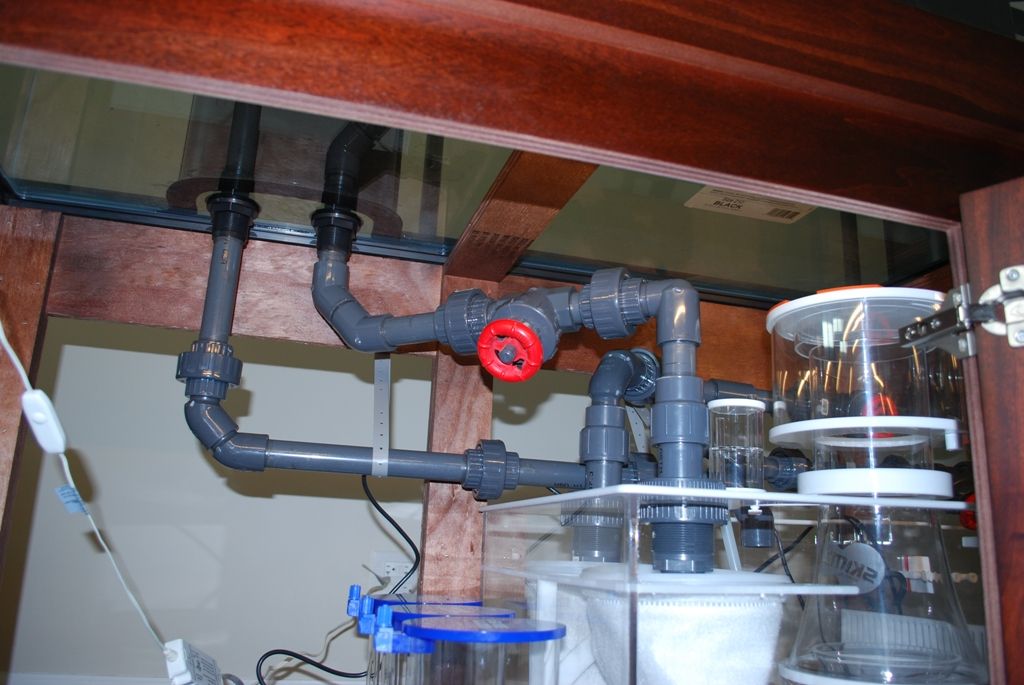 Con't
__________________
Click my name and then "visit toddrtrex's homepage" for tank pictures Current Tank Info: 210g reef and 65g reef |
|
|
|
 |
| Thread Tools | |
|
|


