
|
|
 03/29/2012, 12:48 PM
|
#1 |
|
Registered Member
Join Date: Jun 2007
Location: Phoenix, AZ
Posts: 1,605
|
Zibba's Reefs: Envision 100G & ADA 40G
Hi! Thanks for stopping in. I've been out of the hobby for almost 3-years and I wanted to document my adventure back in. I had a standard Oceanic 90-gallon set up from 2007 to mid-2009. Although I learned a lot with my 90-gallon over that 2.5 years (I'll share pictures), I learn something new with practically every thread I open! So any tips are greatly appreciated.
First thing I learned were to take my time in finding an aquarium with the dimensions I wanted. I wanted to do something different this time around and thought of doing one larger tank (60x36x20) but it just didn't look right after taping off those dimensions in the room. I also couldn't decide whether to go with starphire glass or acrylic on that bigger tank. So to calm my indecisiveness, I decided to go with two display tanks (in two different rooms) and a third grow out system, none of which are up and running yet. I sold off every piece of equipment when I got out of the hobby back in 2009 so I'm literally starting at ground zero. Anyway, enough background -- we'll talk more about that later -- on with the show. The Envision: I'll admit, I got lucky with this aquarium. A local reefer purchased it and never set it up because it was a bit too large for his space (don't worry, he ended up with a rockin' Elos 70). This aquarium is completely custom from head-to-toe: a rimless, coast-to-coast external overflow beauty. Dimensions are 36"x32"x22". The plan for this tank is quite a bit different. It will be predominately SPS and what many will consider to "old-school" due to the lighting choice. Several years ago, all the best aquariums I saw in person were lit with Radiums and VHOs. So this is going to have a single 250w Radium in a Lumenbright pendant with two UVL VHO Super Actinics built into a floating canopy that will hang 12-18" over the tank. One caveat with this tank is that there are a few light scratches that I'll need to deal with (I'll document that too) Lighting Lumenbright Pendant with 250w Radium Lumentek select-a-watt ballast (will run Radium on 250wHQI setting) 2x36"-UVL VHO Super Actinics on ARO Ballast Skimmer Still looking at options for this & thinking about the JNS Cone 3 (aka Aquamaxx cone 3), RO SROXP 2000 or ??? Flow This is where things get tricky on this build. The tank has 1" acrylic on the sides and the coast to coast overflow limits placement of vortechs on the back wall; so I may end up going with Tunze streams (I used the old 6100s and nanos on my old tank and experienced great customer service) but I remain undecided at this point. As the build progresses, I'll be researching more on this end. Return Pump Considering the Waterblaster 5000, Pan-world P50XX, or ??? Here are some sketch-up drawings from the previous owner: 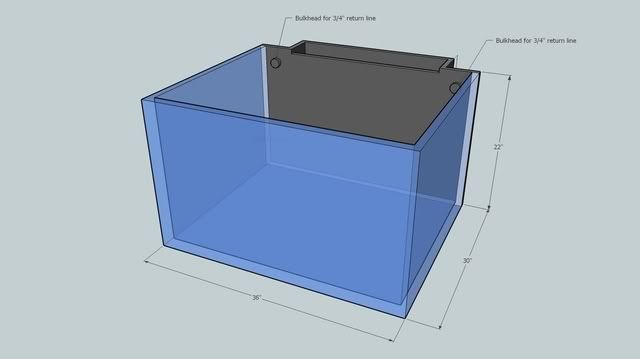 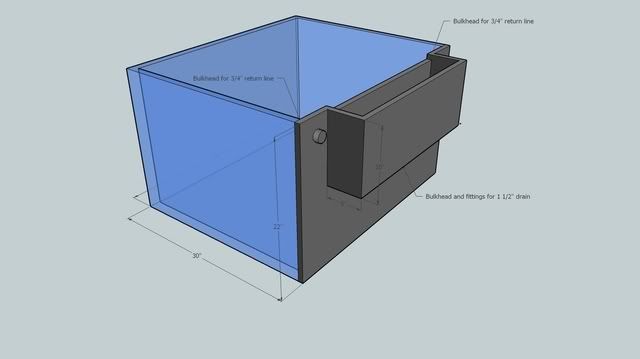 It's a little dusty here and not in it's final resting spot. Forgive the left over sticky glue from the paper that was attached to the acrylic. 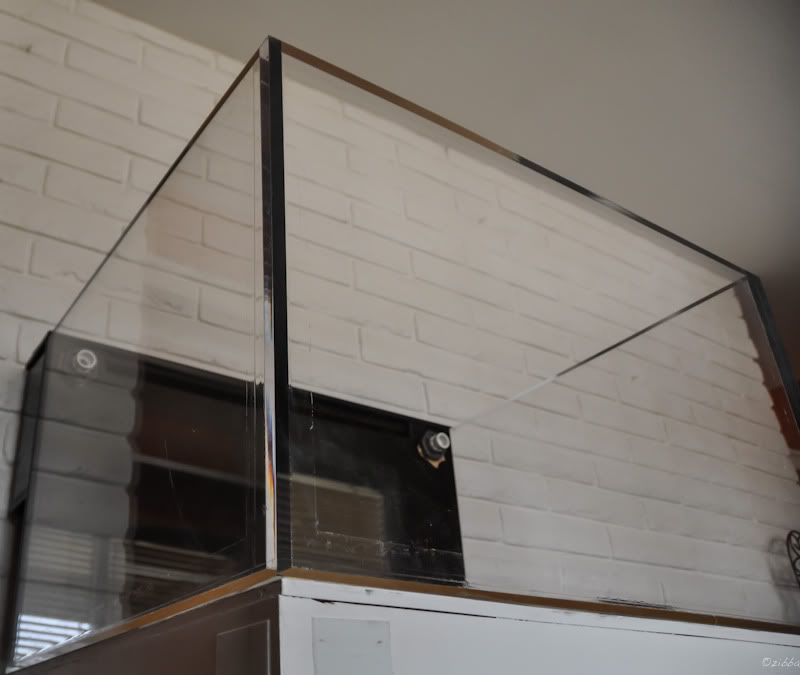 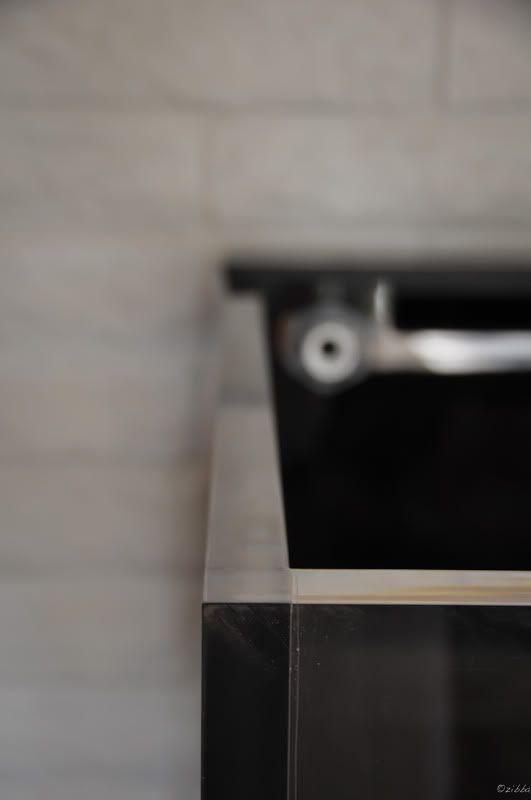  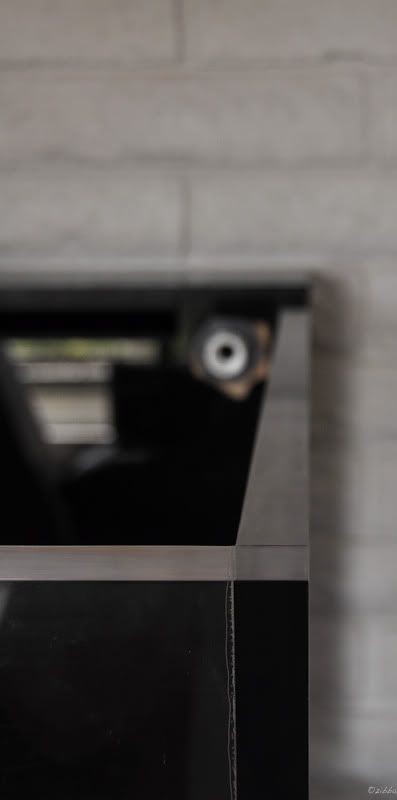 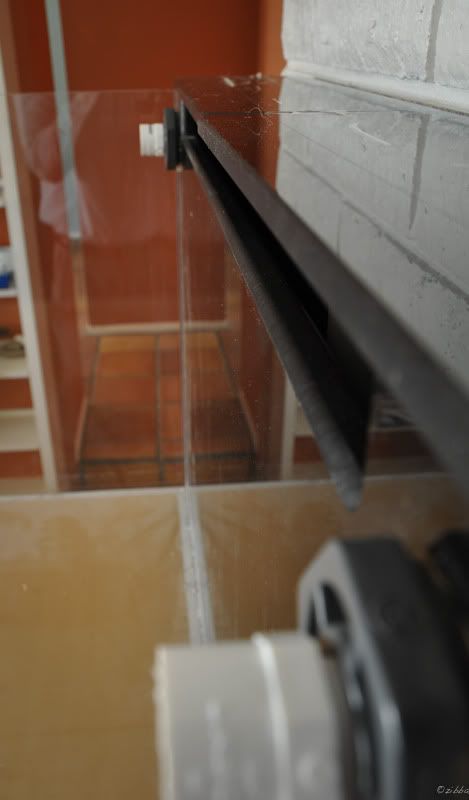 Quick look at the plumbing -- I'll go into detail on that later: 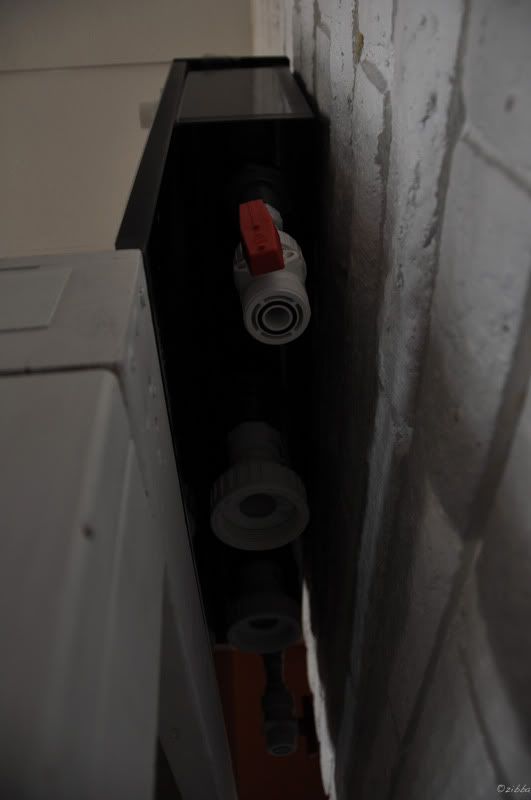
__________________
84x42x30 (~450g) A.G.E. and ADA 90-P (~45g). |

|

|
|
03/29/2012, 01:07 PM
|
#2 |
|
Registered Member
Join Date: Jun 2007
Location: Phoenix, AZ
Posts: 1,605
|
The ADA 90-P:
I've always appreciated the clean lines of ADA aquariums. The dimensions of this tank are 35.5"x17.75"x17.75" with a clear overflow. This is very unique to say the least. Actually, now that I've had it for awhile, I can't decide whether I want to paint back black or leave it. Seems sacrilegious to even think about modifying this tank. But I'd like everyone's opinion on that. This is going to be more a new-age, LPS dominated, techi-reef. The equipment list is still being modified and I'd like input going forward: Lighting Original plan was to do an Ecotech Radion, but I'm starting to have second thoughts and want to explore my options. Flow 1 x MP10wes or 1 x MP40wes or both; I just don't want to have the pumps ruin the overall ascetics. Skimmer JNS Cone 2 (aka Aquamaxx Cone 2) or RO SRO-XP1000 Return Pump Waterblaster 3000; 750 gph internal (T-off to manifold for carbon, gfo, uv, etc.) or Pan-world 50pxx; 1100 gph external (T-off to manifold for carbon, gfo, uv, etc.) Here are a few shots of the empty aquarium:  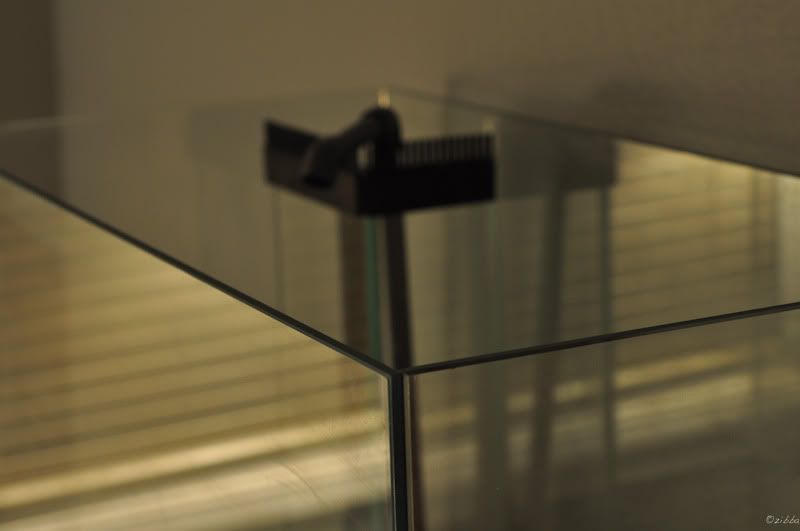  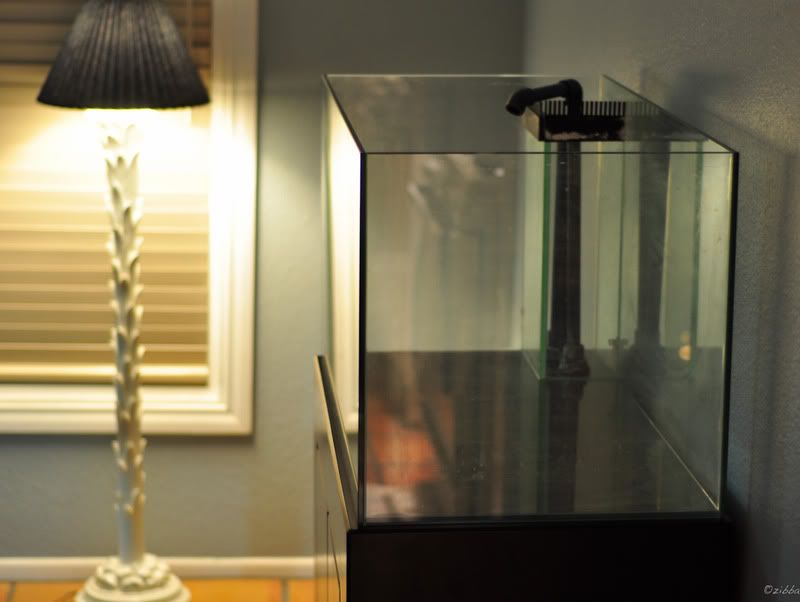 This one is actually in the room where the Envision will ultimately go.
__________________
84x42x30 (~450g) A.G.E. and ADA 90-P (~45g). |
|
|
|
|
03/29/2012, 01:15 PM
|
#3 |
|
Registered Member
Join Date: Jun 2007
Location: Phoenix, AZ
Posts: 1,605
|
I posted these pictures in a separate thread, so I might as well post them here too. I'm starting to think of aquascaping ideas for the Envision. Here are a few ideas:
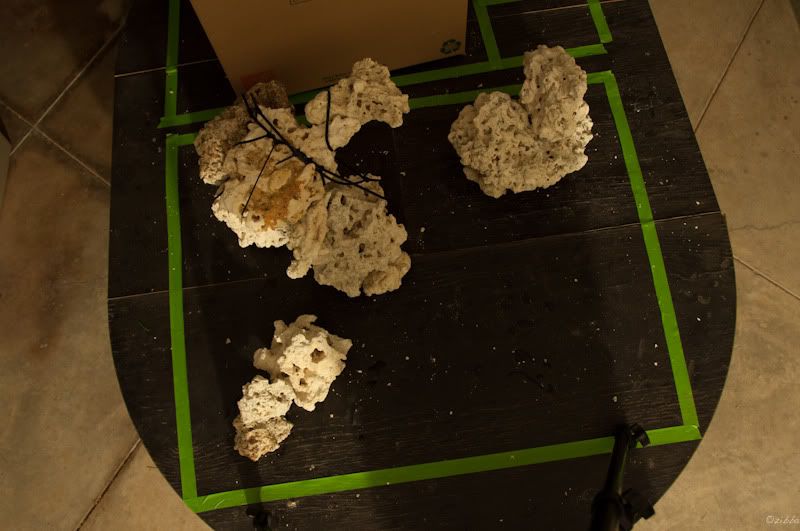  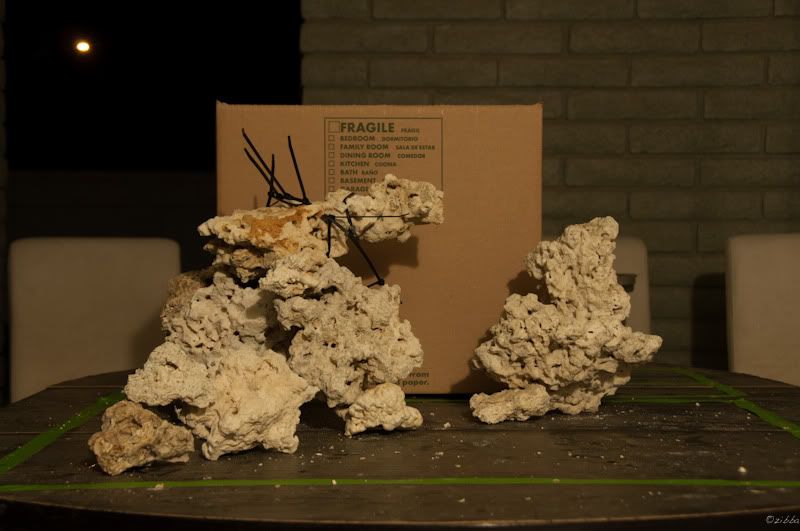   Although it's not much different, here's option #2: 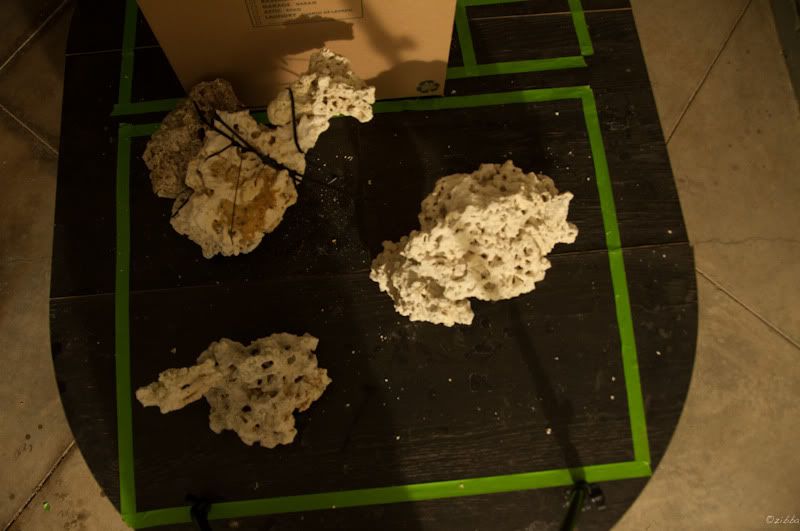 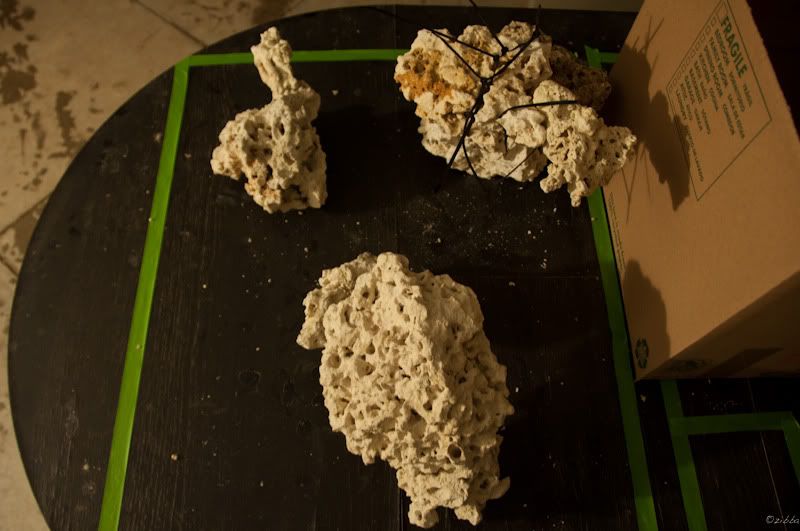 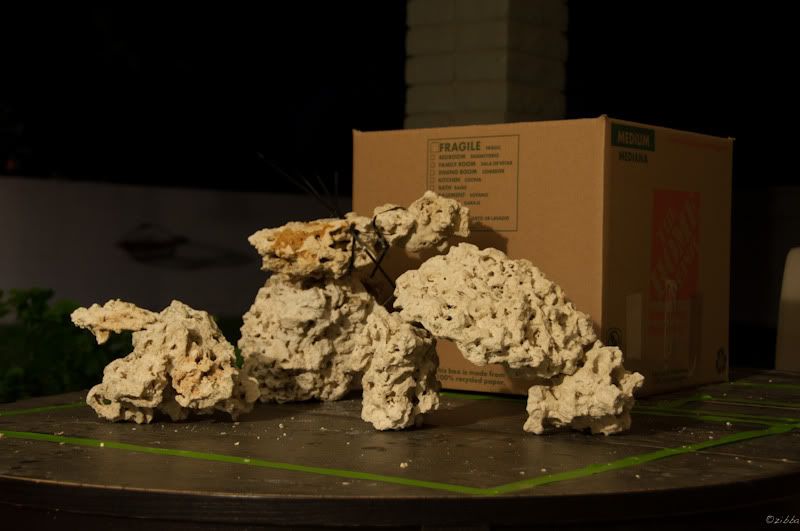  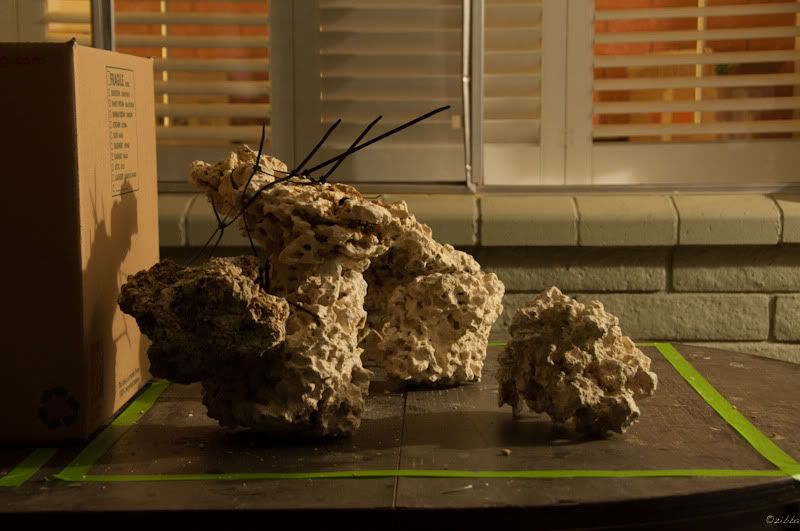
__________________
84x42x30 (~450g) A.G.E. and ADA 90-P (~45g). |
|
|
|
|
03/29/2012, 01:22 PM
|
#4 |
|
Registered Member
Join Date: May 2006
Location: Crescent City, CA
Posts: 60
|
Nice looking tanks! I am also in the planning process of getting back into the hobby after a few years off. Following along
|
|
|
|
|
03/29/2012, 01:58 PM
|
#5 |
|
Registered Member
Join Date: Jun 2007
Location: Phoenix, AZ
Posts: 1,605
|
Thanks marc. I'm very excited to start these two tanks.
__________________
84x42x30 (~450g) A.G.E. and ADA 90-P (~45g). |
|
|
|
|
03/29/2012, 05:49 PM
|
#6 |
|
Registered Member
|
Love both of the tanks, especially the first one with the external overflow. Just a thought on the aquascaping. Every time I've laid out aquascaping outside the tank it always looked much different once in the water. It's usually a combination of the spacial distortion caused by the tank and water and the way the light hits the rocks. I would thus avoid any 'permanent' construction before you look at it in the water. Frankly, I think my current tank is my best effort and the atoll on the right was pure accident as it fell into that position and I liked it.
What, if anything, are you planning for substrate? IMO, that also has a big impact on how the rock work looks when it's finally in place. Lastly, are you planning on all of the systems being run on the same water system (eg. a single remotely located sump) or will each be independent? I've always loved the idea of linking a few tanks across a couple of rooms and have that extra water volume would do wonders for stability.
__________________
I want to burn twice as bright and half as long. Oh, and a full tank crash is just an excuse for a new build. Current Tank Info: 125 Rimless Leemar, Apex, Trigger 30 Elite Sump, Vertex 180i Skimmer, 2 X Gen4 Radion XR30W, BM Doser, 2xMP40WES, 2xTunze 6095, Sicce Syncra 4.0. |
|
|
|
|
03/29/2012, 08:36 PM
|
#7 |
|
Registered Member
Join Date: Jun 2007
Location: Phoenix, AZ
Posts: 1,605
|
Thanks Stoli! I'm reconsidering how to do the aquascape. Originally I was going to use epoxy and super glue to make a few big pieces, but David Grigor reminded me that having the ability to pull apart the rock structure is really helpful. So, I'm looking around for some fiberglass rods locally. I already have the proper drill bit. I'm also going to try and find an acrylic shop around town to pick up some weld-on and scrap acrylic. Hopefully I can find a place tomorrow and work on it this weekend. Otherwise, I'm going to have to order it and I won't get to it for another week or so.
As far as substrate goes. I'm still debating BB vs. a shallow sand bed, but I'm most likely going to go with sand in both tanks because I'm just not a huge fan of BB tanks (or at least I can't pull them off like the pros on RC). I have pink figi sand on hand right now, however, I don't think I'm going to end up using it in the display. I'm going to go with Reefflakes if I decide to go with a SSB. The way my house is set up, I won't be able to run these two tanks into a community sump. I'd love to do that as it would definitely decrease the amount of equipment I'd have to buy, but it's just not in the cards. I am going to try and run the RO/DI unit directly to both aquariums though for top-off purposes.
__________________
84x42x30 (~450g) A.G.E. and ADA 90-P (~45g). |
|
|
|
|
03/29/2012, 09:20 PM
|
#8 |
|
Registered Member
Join Date: Jun 2007
Location: Phoenix, AZ
Posts: 1,605
|
Stand Issues
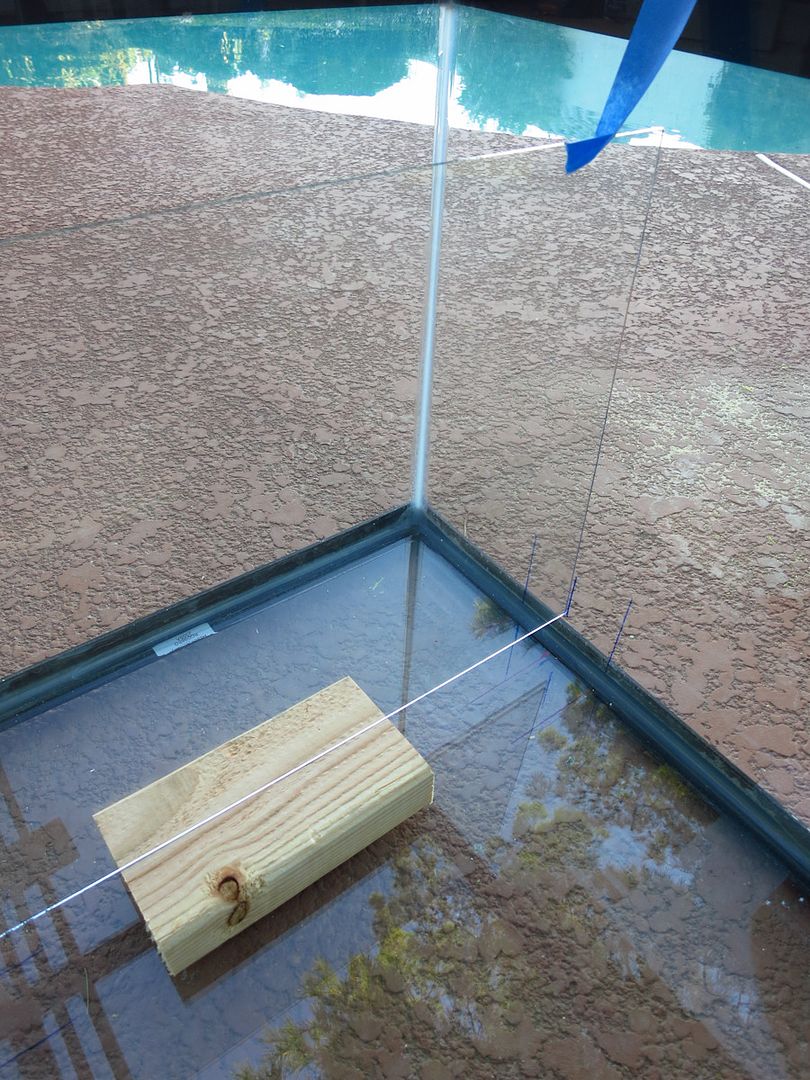
So the previous owner of the Envision built a great frame for this aquarium and all that needed to be done was finalize the skin of the stand. The dimensions of the stand were 36wx32dx36h Here's a picture:
 I ran into a major issue that I didn't take into consideration. Despite living in one of the most over built cities in the country and, in turn, one of the most impacted by the housing boom, I bought a house that was built in 1972. Why by a beautiful 2 year old house with a gorgeous open floor plan with granite X, Y, Z and stainless steal A, B, C when you can have a compartmentalized rambler, right? Well all that is to say, the doors into the room I want this 32" aquarium in are 28" wide. Crap! There are two big windows in the room, but they're 30" each. Crap! Also, I really want to fit a 40br under the tank for a sump and this one just doesn't accommodate it, so the only solution is to build a new stand. I need to emphasize, the current stand is solid -- screwed & glued -- it is not going to be deconstructed and reconstructed in the room. While I really enjoy DIY, I wanted a stand that I could disassemble at some point relatively easily, so I enlisted an expert. I also wanted something that would match the other cabinetry in the room. He's helping me build a stand that can be put together and taken apart in the room. I gave him the measurements and I pilfered about 10 different stand concepts and forwarded them along. Here are some pictures of the stand being built: 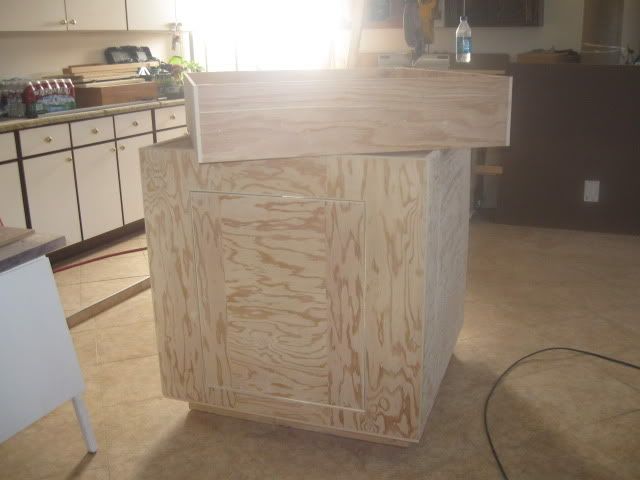 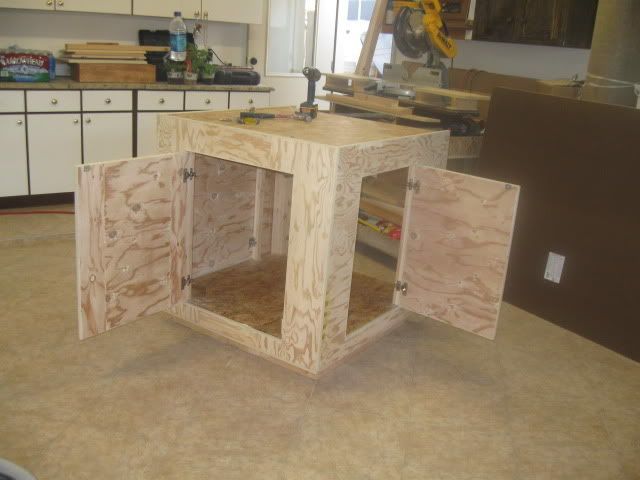 All the cabinets in the room are white, so the plan is to silicone any gaps (from the pictures it looks pretty good), put on a layer of kilz, then find a glossy white paint to finish it off. Would an oil-based paint or latex-based paint work better?
__________________
84x42x30 (~450g) A.G.E. and ADA 90-P (~45g). |
|
|
|
|
03/29/2012, 10:38 PM
|
#9 |
|
Registered Member
|
I'd definitely go oil base. Have used both on kitchen cabinets. Oil base dries like steel and wet hands won't bother it. A few years ago, Sherwin Williams had a great oil based kitchen paint that I used and it was amazing. Also, if using oil, add some penetrol to the paint. It will dry a bit slower and you'll get a really glassy finish. Don't use spray unless you have a dust free environment. I may repaint my entire stand for just that reason. Spray just doesn't dry smooth enough for my taste.
Oh, so how are you going to get a 32" tank through 28" doors? If you need a strong back and weak mind, call. But, I wouldn't use a recip saw on the tank.
__________________
I want to burn twice as bright and half as long. Oh, and a full tank crash is just an excuse for a new build. Current Tank Info: 125 Rimless Leemar, Apex, Trigger 30 Elite Sump, Vertex 180i Skimmer, 2 X Gen4 Radion XR30W, BM Doser, 2xMP40WES, 2xTunze 6095, Sicce Syncra 4.0. |
|
|
|
|
03/29/2012, 10:39 PM
|
#10 |
|
Registered Member
|
never mind last question. Just realized it's 22" high. Just a little tilting.
__________________
I want to burn twice as bright and half as long. Oh, and a full tank crash is just an excuse for a new build. Current Tank Info: 125 Rimless Leemar, Apex, Trigger 30 Elite Sump, Vertex 180i Skimmer, 2 X Gen4 Radion XR30W, BM Doser, 2xMP40WES, 2xTunze 6095, Sicce Syncra 4.0. |
|
|
|
|
03/30/2012, 07:56 AM
|
#11 |
|
Registered Member
 
Join Date: Dec 2009
Location: Albuquerque, New Mexico
Posts: 1,226
|
Zibba, just a suggestion, have you thought about Sea Swirls for your flow issue?
|
|
|
|
|
03/30/2012, 10:58 AM
|
#12 | ||
|
Registered Member
Join Date: Jun 2007
Location: Phoenix, AZ
Posts: 1,605
|
Quote:
Quote:
Side note: I found a local acrylic designer who said I could swing by and pick up scraps for free. Sounded like they had weld-on and acrylic rod too. That means I should be able to get started on the aquascaping this weekend. 
__________________
84x42x30 (~450g) A.G.E. and ADA 90-P (~45g). |
||
|
|
|
|
03/30/2012, 06:12 PM
|
#13 | |
|
Registered Member
Join Date: Dec 2009
Location: Albuquerque, New Mexico
Posts: 1,226
|
Quote:
|
|
|
|
|
|
03/30/2012, 10:09 PM
|
#14 | |
|
Registered Member
Join Date: Jun 2007
Location: Phoenix, AZ
Posts: 1,605
|
Quote:
For sure, thanks for the suggestion! I went to the acrylic dealer today but unfortunately they were just closing down by the time I got there and the "guys in back" weren't there to cut the acrylic rod. I told them I'd take all 6' and cut it myself, but they didn't know where it was. Long story short, I have a bunch of scrap acrylic that I can use for the base and weld-on, but no acrylic rods. For now I'm in a bit of a hold pattern. Stopped into the hardware store on the way home too. Picked up some more RO/DI tubing and some fittings so I can route directly to the tanks. Since I can't work on the aquascape yet, I'm going to be changing the outlets to GFCI tomorrow. I'll try to take pictures of how that goes (haven't done it before). I have a friend who's an electrician that might be stopping over to give me a hand upgrading the breaker panel. I definitely don't want to do that on my own -- nice to have good friends who will do favors for beer!
__________________
84x42x30 (~450g) A.G.E. and ADA 90-P (~45g). |
|
|
|
|
|
04/12/2012, 12:27 PM
|
#15 |
|
Registered Member
Join Date: Jun 2007
Location: Phoenix, AZ
Posts: 1,605
|
Mini-update: The stand for the Envision is finally being delivered tonight. I'm heading out of town for the weekend thought so I won't make any more progress until next week. Pictures to follow. Stay tuned.
__________________
84x42x30 (~450g) A.G.E. and ADA 90-P (~45g). |
|
|
|
|
04/12/2012, 03:50 PM
|
#16 |
|
Registered Member
|
I hate when I get a new toy and can't play with it immediately.
Were you ever able to get your acrylic rods? I was at HD a couple of days ago and they have them there.
__________________
I want to burn twice as bright and half as long. Oh, and a full tank crash is just an excuse for a new build. Current Tank Info: 125 Rimless Leemar, Apex, Trigger 30 Elite Sump, Vertex 180i Skimmer, 2 X Gen4 Radion XR30W, BM Doser, 2xMP40WES, 2xTunze 6095, Sicce Syncra 4.0. |
|
|
|
|
04/17/2012, 10:25 AM
|
#17 |
|
Registered Member
Join Date: Jun 2007
Location: Phoenix, AZ
Posts: 1,605
|
Missed your reply Stoli. It's definitely frustrating when things don't move as fast as you'd like, but I know it's going to take awhile for everything to fall into place. Which home depot did you find them at? I looked at the one closest to my house and they didn't carry them. I may just end up ordering them from amazon.
The stand came in yesterday. To be honest, I'm not 100% satisfied with how it turned out. There's going to be some modifications. It's about 3" deeper (front to back) so it's taking up more space in the room. Oh well, part of the process I guess. On the plus side, I think I can fit 2x40brs under the stand so I'll have some decisions to make going forward re: sump set up/equipment choices.
__________________
84x42x30 (~450g) A.G.E. and ADA 90-P (~45g). |
|
|
|
|
04/17/2012, 10:25 AM
|
#18 |
|
Registered Member
Join Date: Jun 2007
Location: Phoenix, AZ
Posts: 1,605
|
Missed your reply Stoli. It's definitely frustrating when things don't move as fast as you'd like, but I know it's going to take awhile for everything to fall into place. Which home depot did you find them at? I looked at the one closest to my house and they didn't carry them. I may just end up ordering them from amazon.
The stand came in yesterday. To be honest, I'm not 100% satisfied with how it turned out. There's going to be some modifications. It's about 3" deeper (front to back) so it's taking up more space in the room. Oh well, part of the process I guess. On the plus side, I think I can fit 2x40brs under the stand so I'll have some decisions to make going forward re: sump set up/equipment choices.
__________________
84x42x30 (~450g) A.G.E. and ADA 90-P (~45g). |
|
|
|
|
10/22/2012, 12:01 AM
|
#19 |
|
Registered Member
Join Date: Jun 2007
Location: Phoenix, AZ
Posts: 1,605
|
I'm back...
I apologize for the delay, I had a crazy busy late-spring/summer and decided it would be best to hold off on starting the build until things settled down a bit. The last thing I wanted was to start the tank, neglect it and just have to start over at ground zero. Well, things finally settled down and I had a chance to make some progress over the weekend.
I'm actually glad I took the break before setting up this tank. I decided that I wanted to have the Envision in the main living room rather than in a side office/hobby room because there's more air flow, more room to take pictures and the living room gets a lot more traffic than the rest of the rooms in the house. But before I moved the Envision into the living room, I wanted to change the color scheme in the room. Hence, further delay. Anyway, here's some of the progress that was made this weekend on the Envision. As I previously mentioned, the stand was built so that it could be disassembled to fit through my narrow door ways. The disassemble process isn't extremely user friendly, but it's better than having to build a new stand. So, here's the new space: 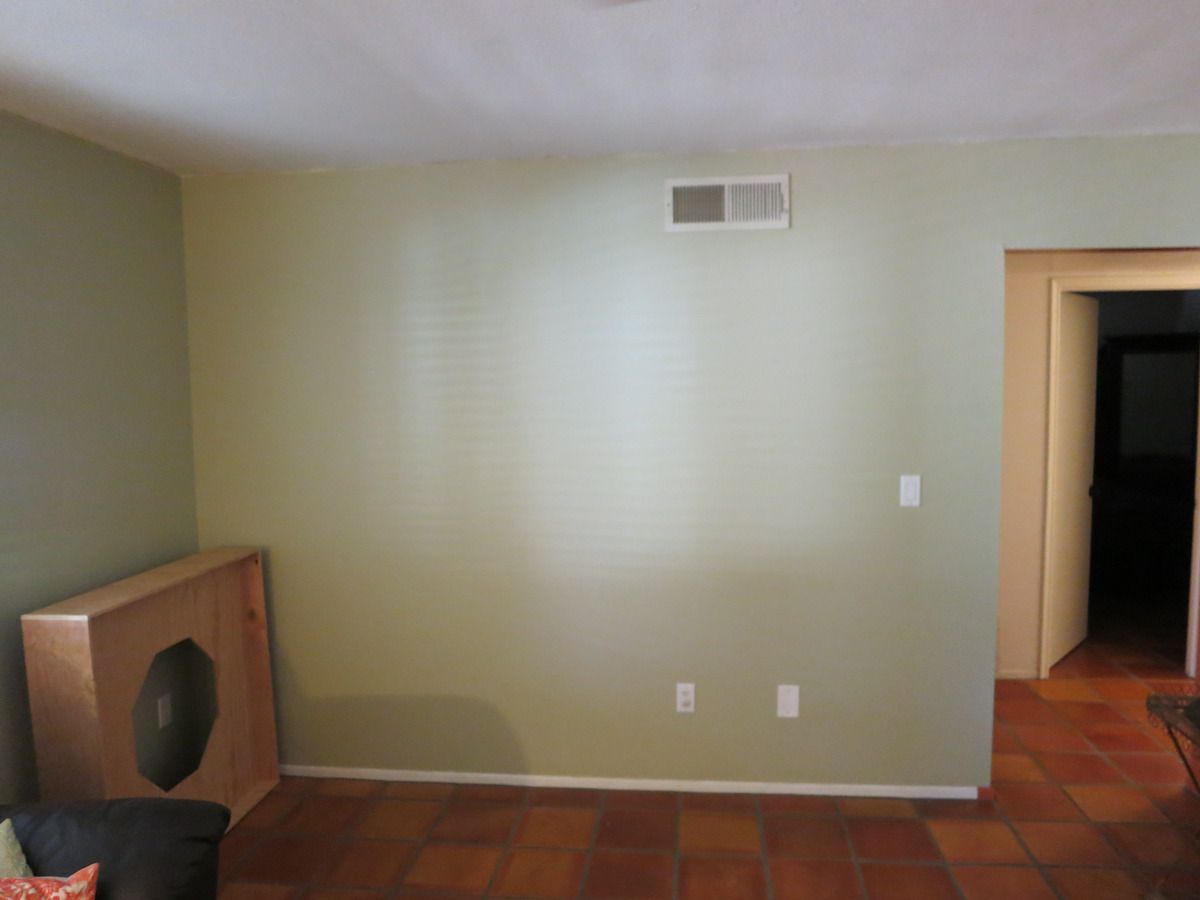 Starting to put the stand together after disassembling it: 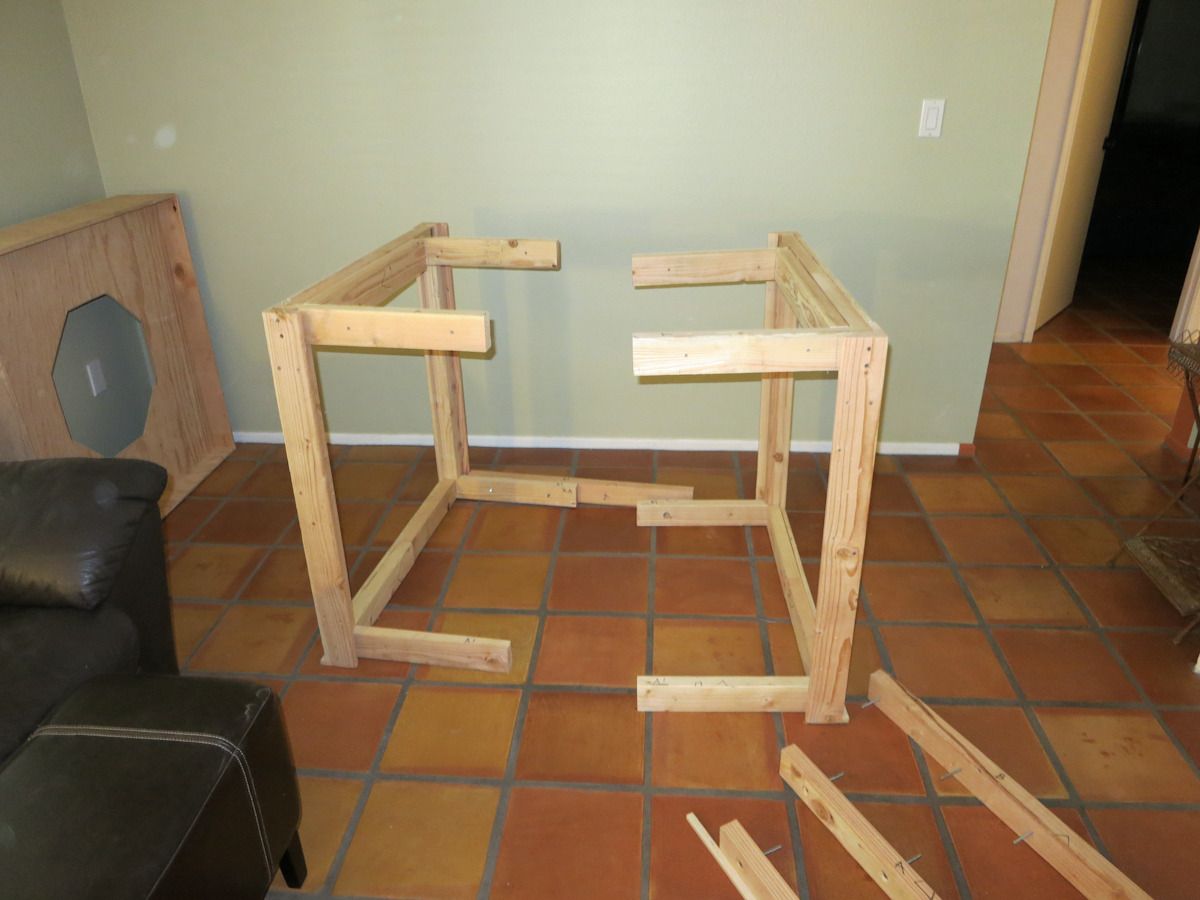 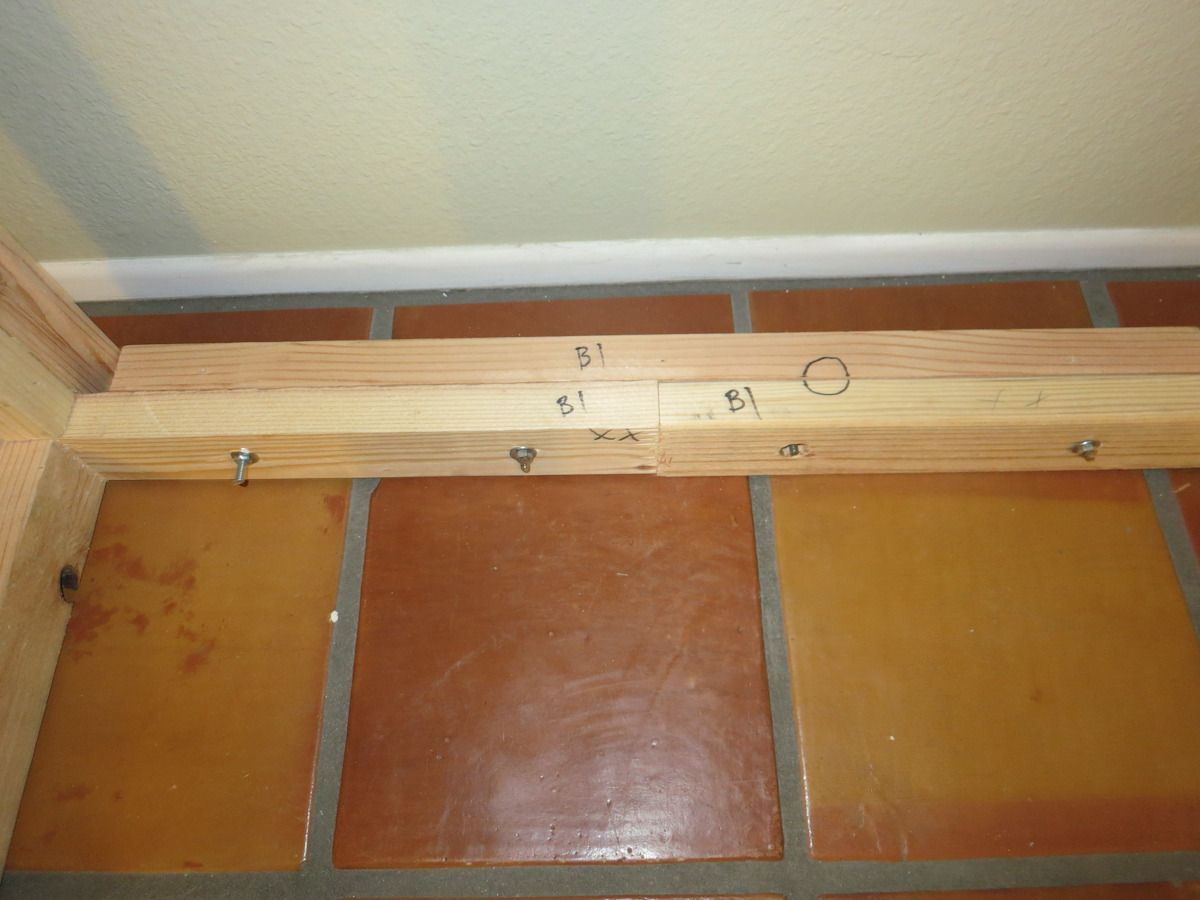 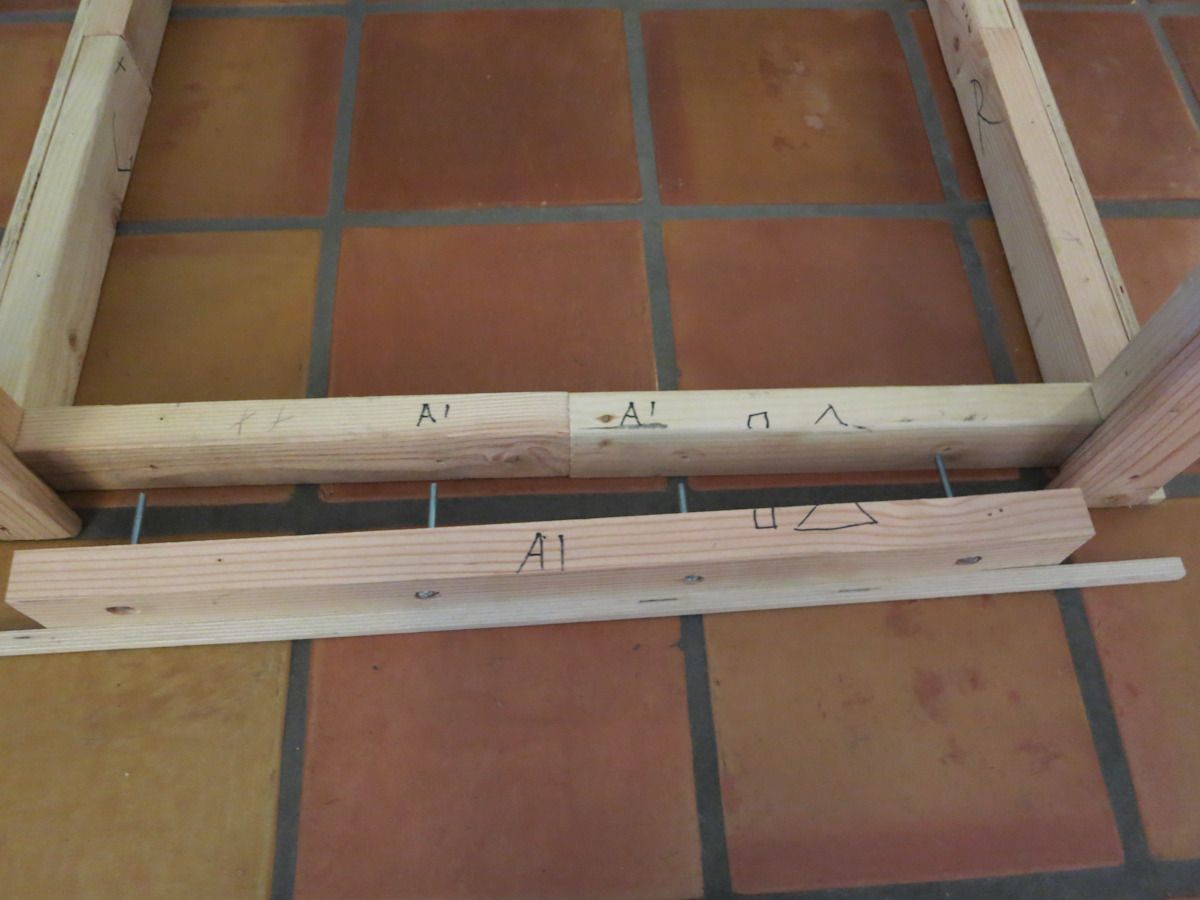 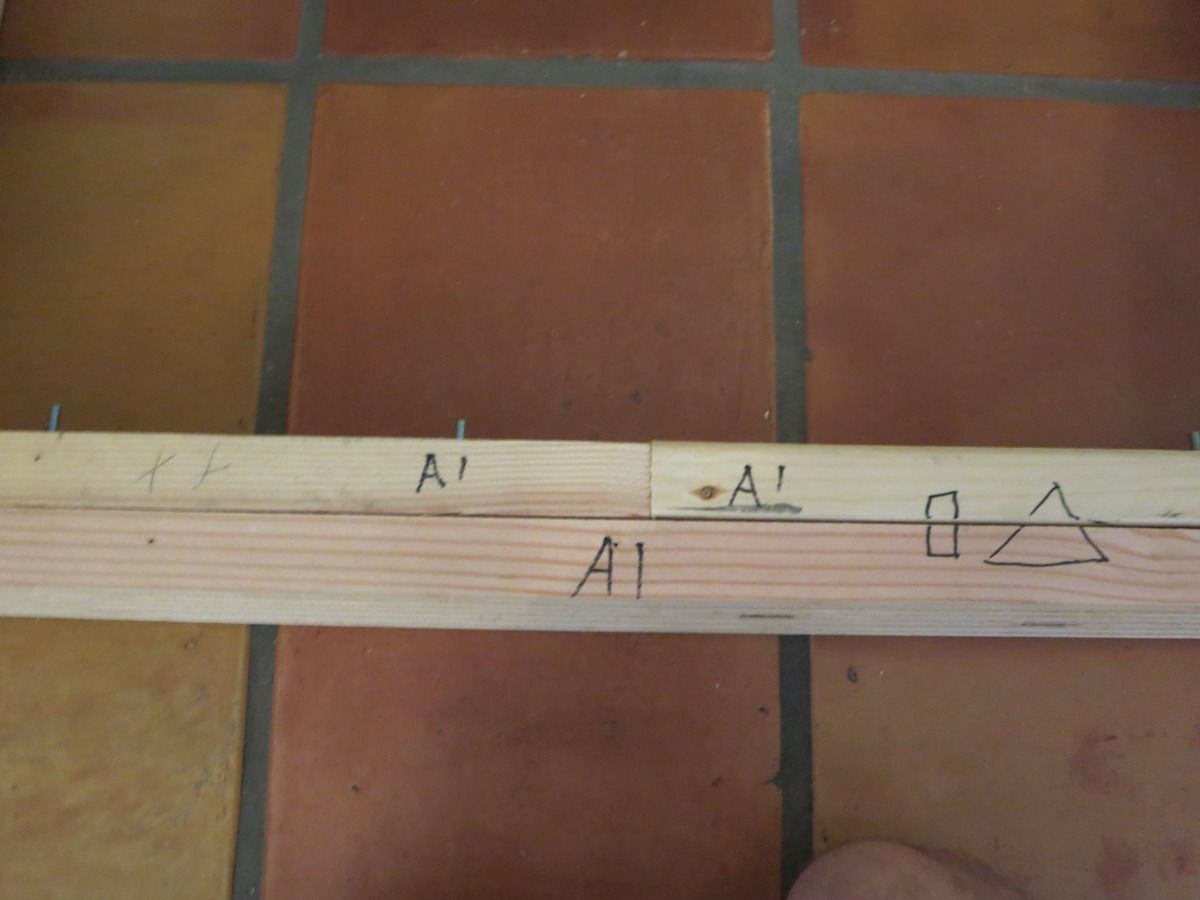
__________________
84x42x30 (~450g) A.G.E. and ADA 90-P (~45g). |
|
|
|
|
10/22/2012, 12:05 AM
|
#20 |
|
Registered Member
Join Date: Jun 2007
Location: Phoenix, AZ
Posts: 1,605
|
Here's a picture of the framed out stand:
 Skins on:  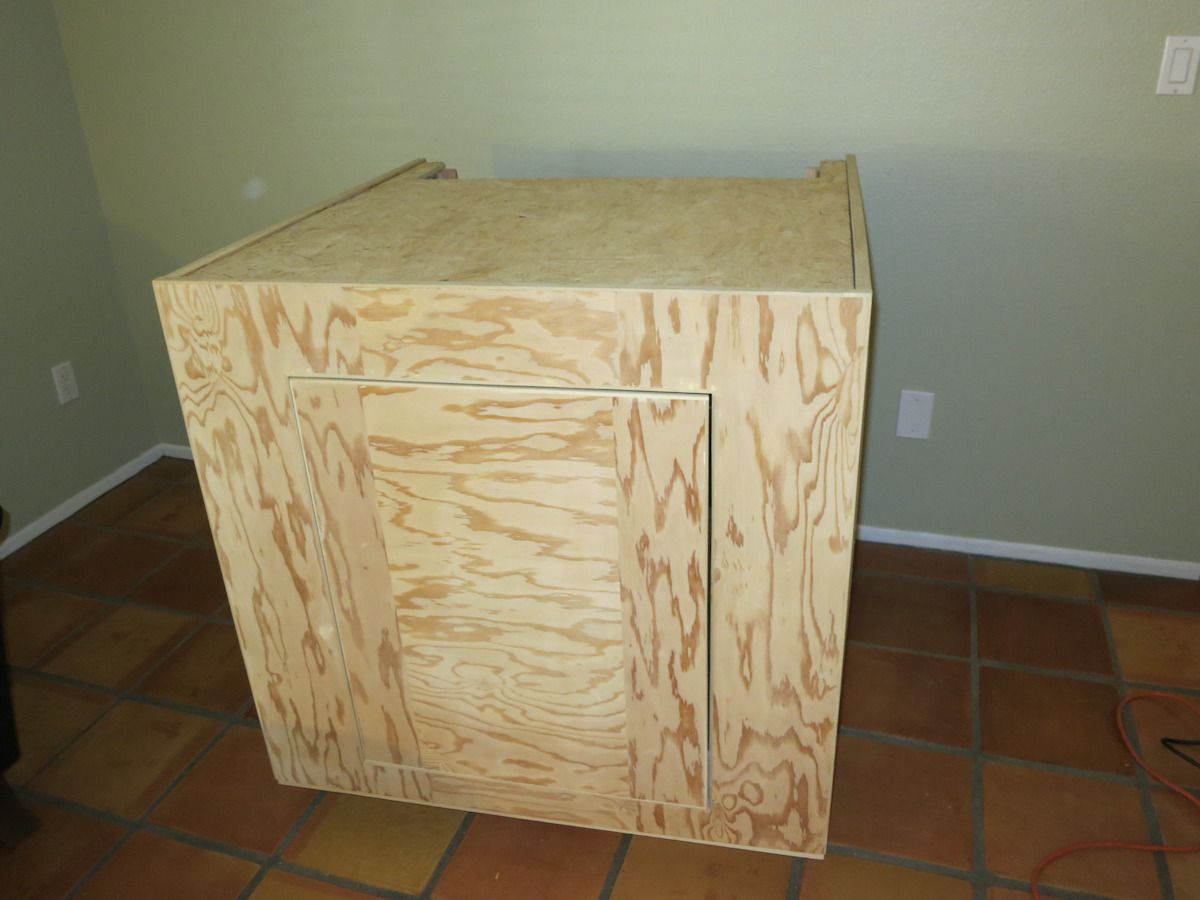 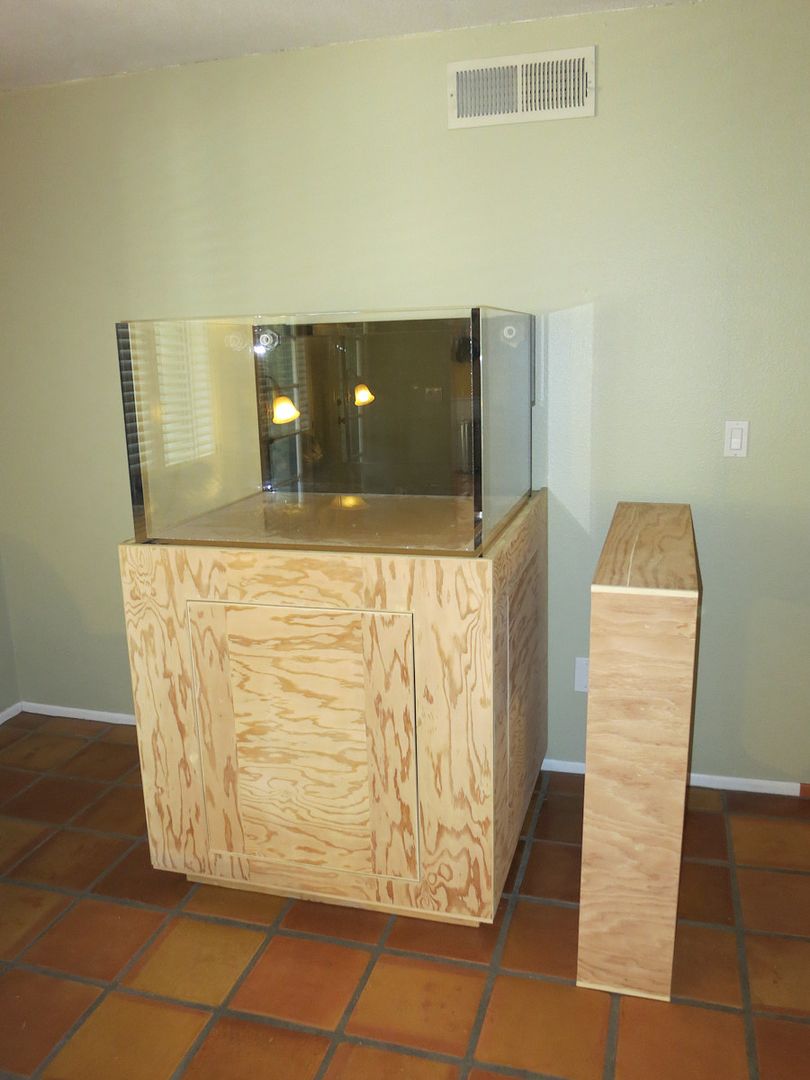
__________________
84x42x30 (~450g) A.G.E. and ADA 90-P (~45g). |
|
|
|
|
10/22/2012, 12:08 AM
|
#21 |
|
Registered Member
Join Date: Jun 2007
Location: Phoenix, AZ
Posts: 1,605
|
Started priming -- gave the entire stand and canopy two coats of Kilz:
__________________
84x42x30 (~450g) A.G.E. and ADA 90-P (~45g). |
|
|
|
|
10/22/2012, 12:10 AM
|
#22 |
|
Registered Member
Join Date: Jun 2007
Location: Phoenix, AZ
Posts: 1,605
|
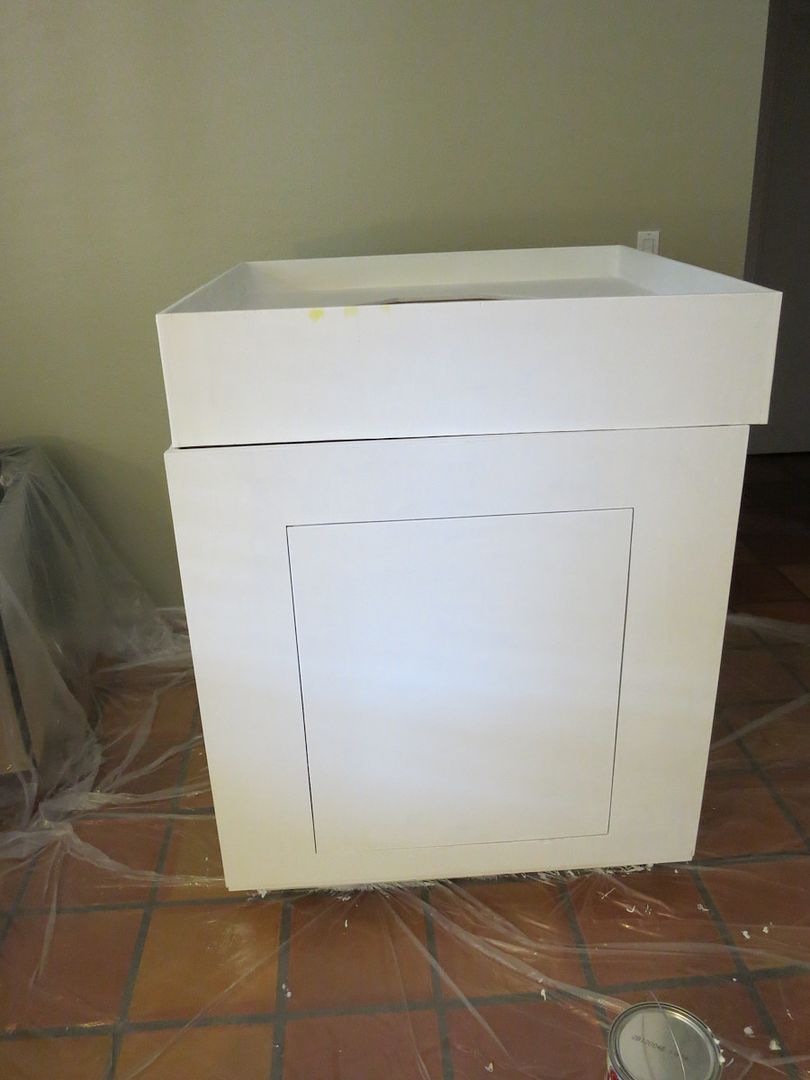
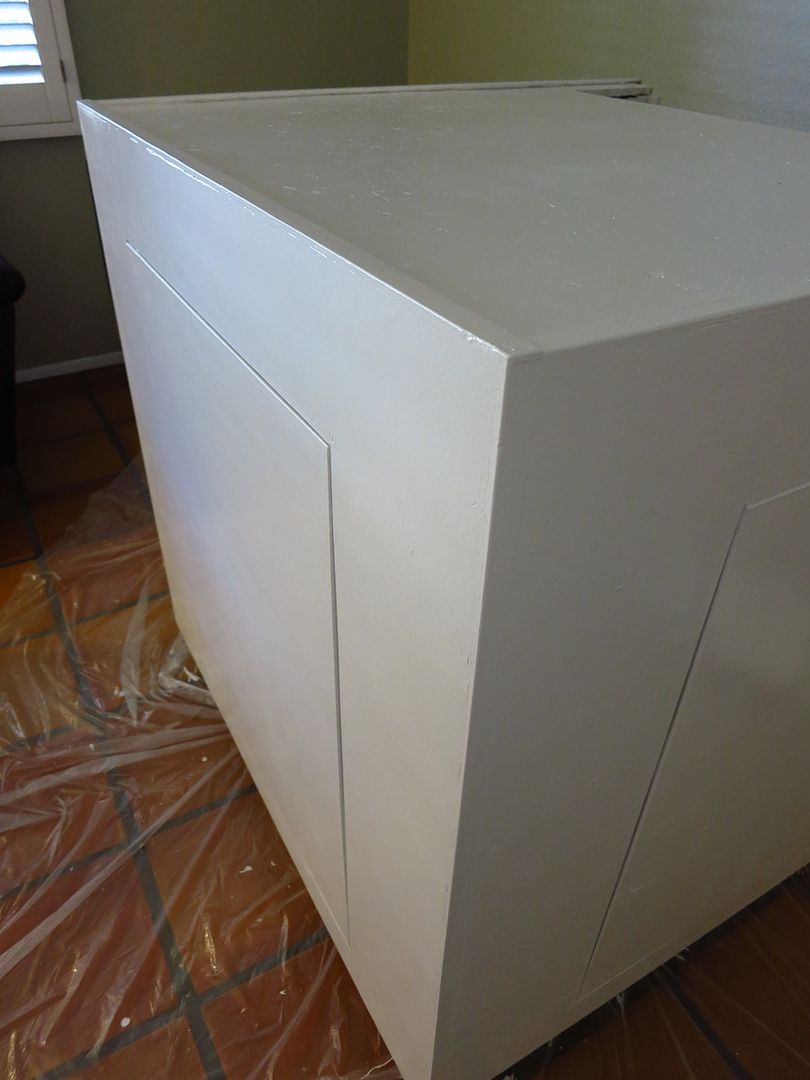
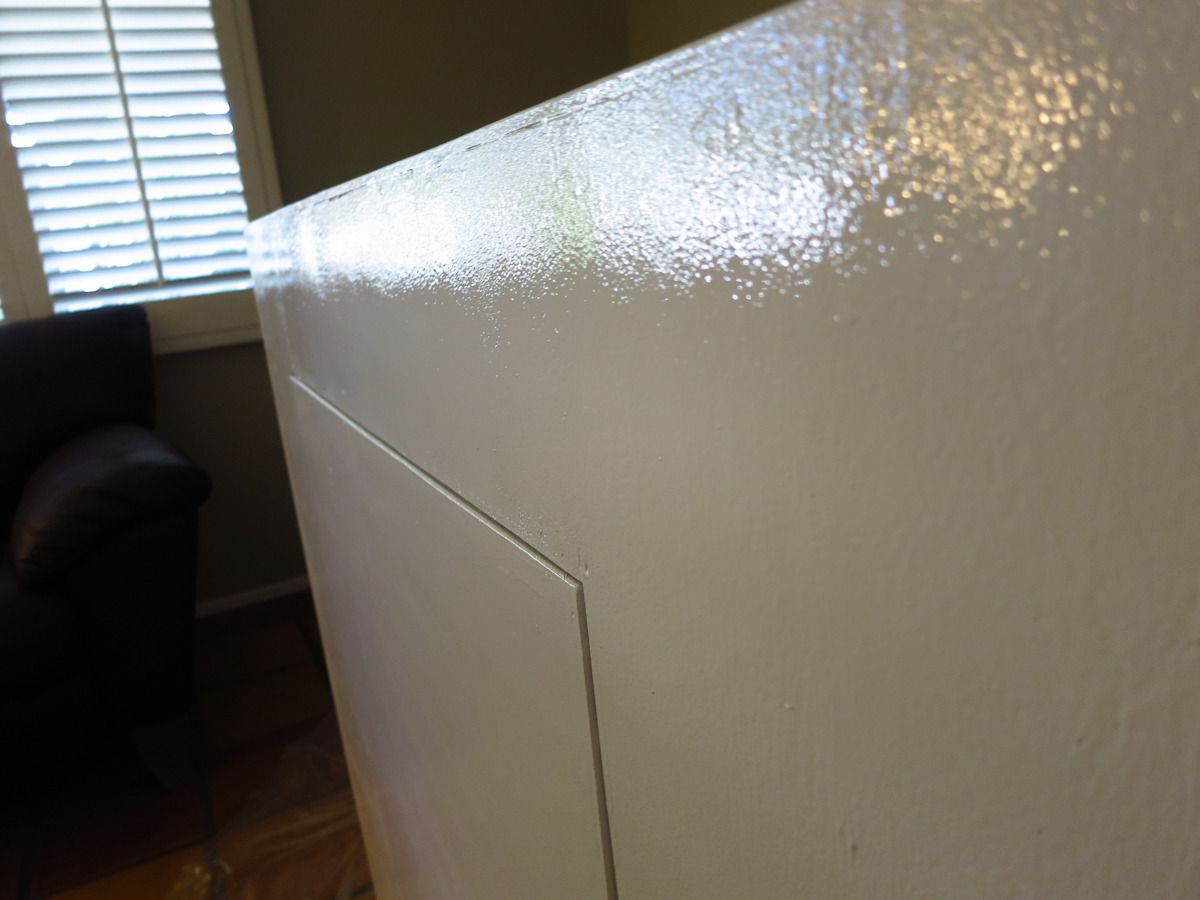
Then a few coats of an oil-based white gloss. I was actually hoping that it would come out a bit glossier and a bit smoother, but I think it turned out pretty good. Hard to have the gloss come through in pictures:
__________________
84x42x30 (~450g) A.G.E. and ADA 90-P (~45g). |
|
|
|
|
10/22/2012, 12:24 AM
|
#23 |
|
Registered Member
Join Date: Jun 2007
Location: Phoenix, AZ
Posts: 1,605
|
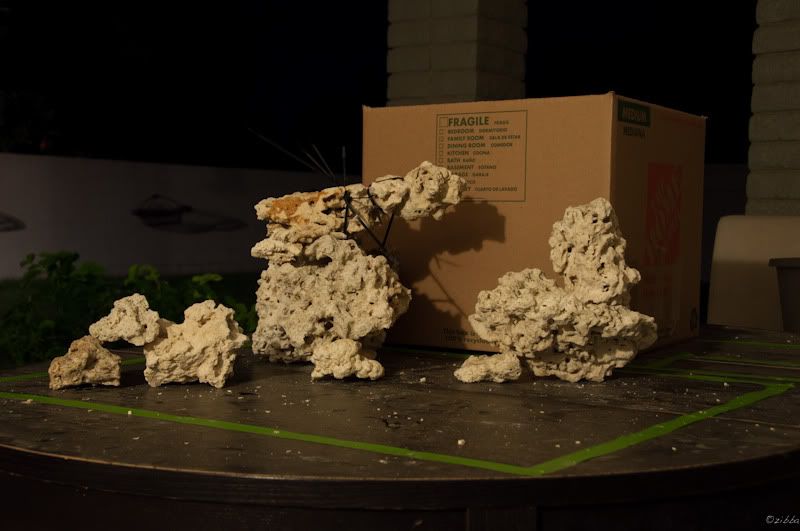
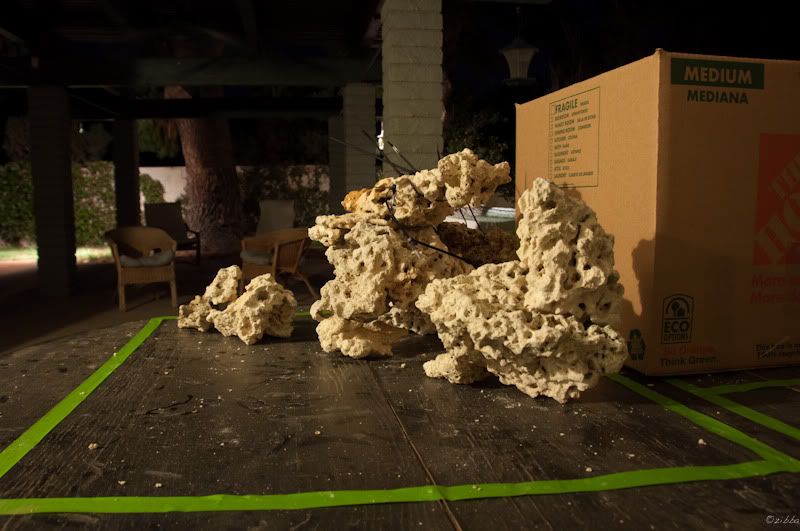
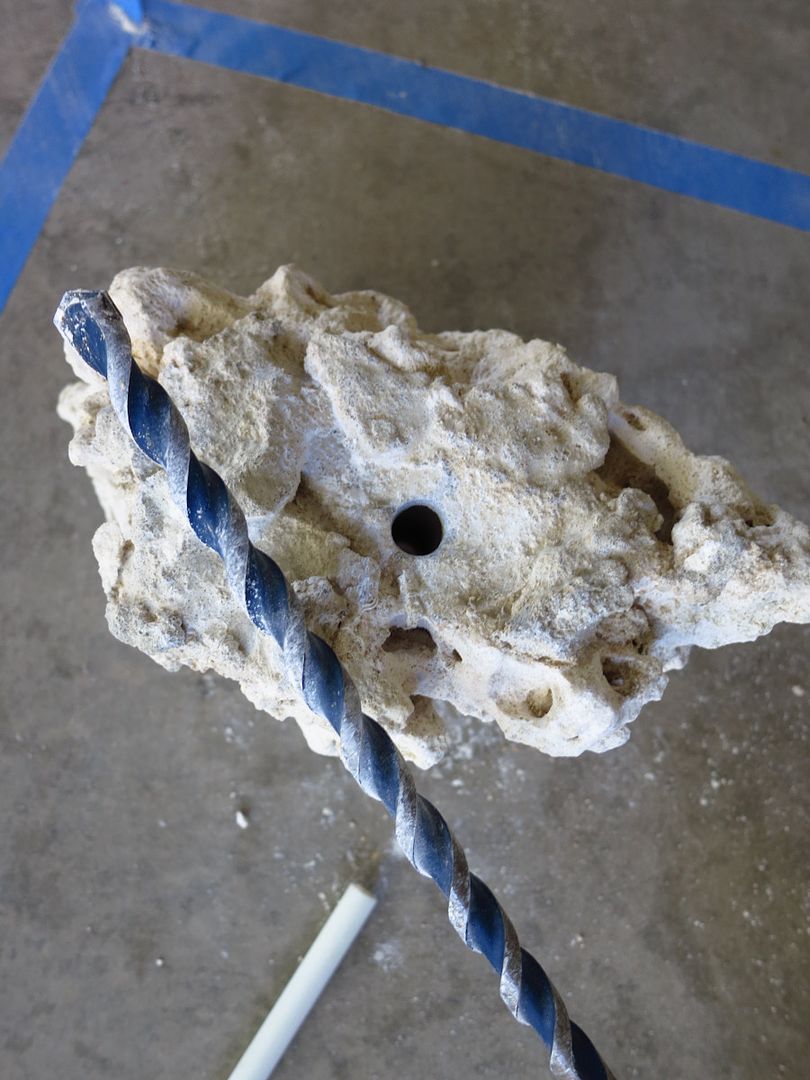
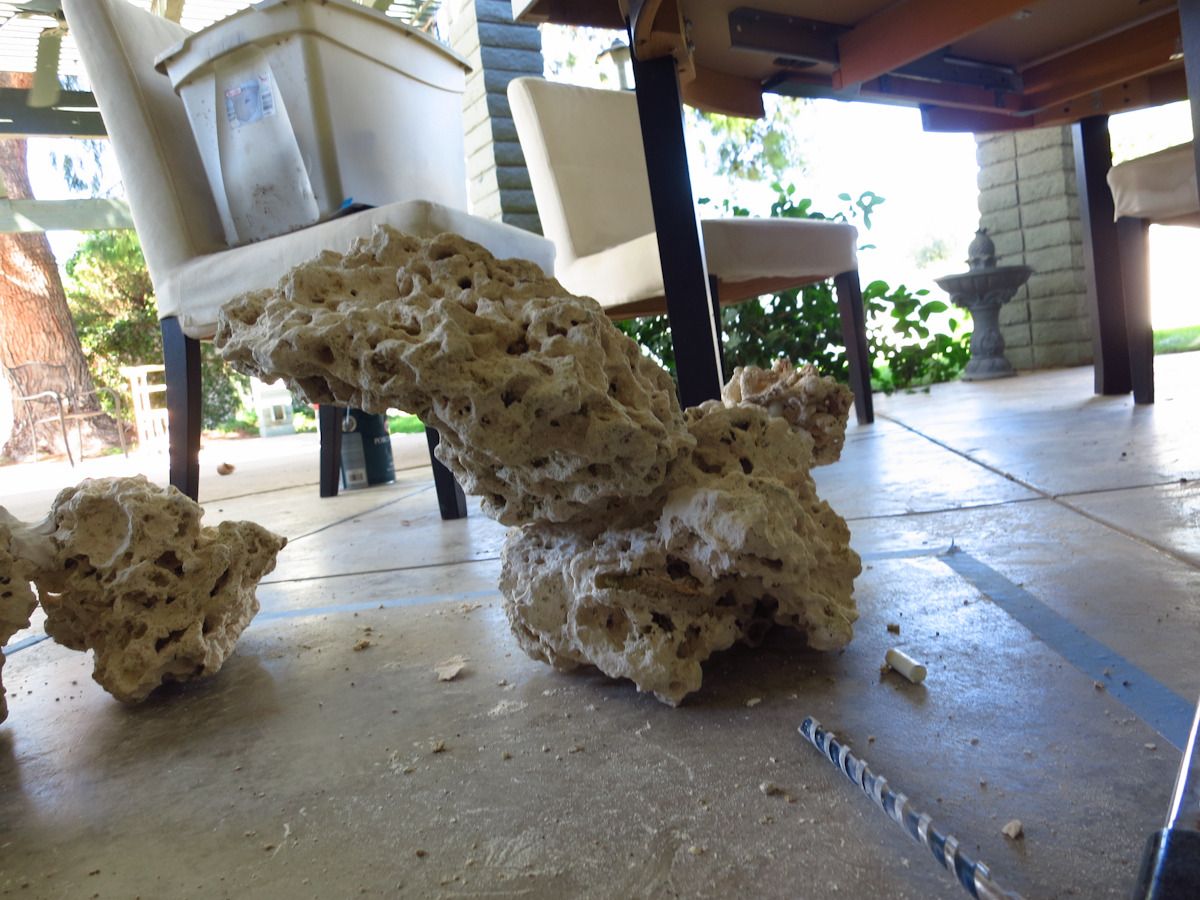
Started working on the aquascape. I posted a few pictures from back in the spring when I was considering what to do. I ended up finding some fiberglass rods at a Home Depot (thanks for the tip stoli) and I already had a masonry bit so I fired it up. Here's a quick pic of one of the rocks that was drilled and a picture of one of the structures:
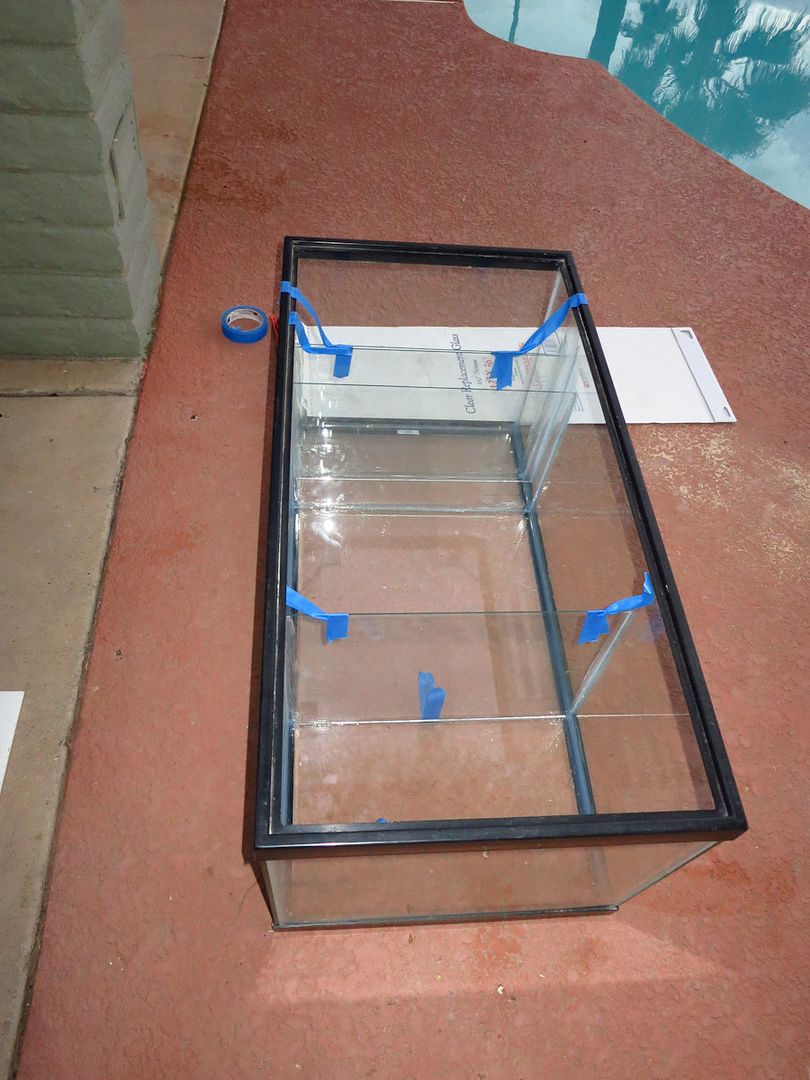
  Then turned to the sump. I bought a 40br display/40br sump off a local reefer who was getting out of the hobby with good intentions of setting it up as a frag tank. Instead, I decided to pilfer the hardware for the Envision/ADA and sell what I don't need. I was originally considering using this sump: 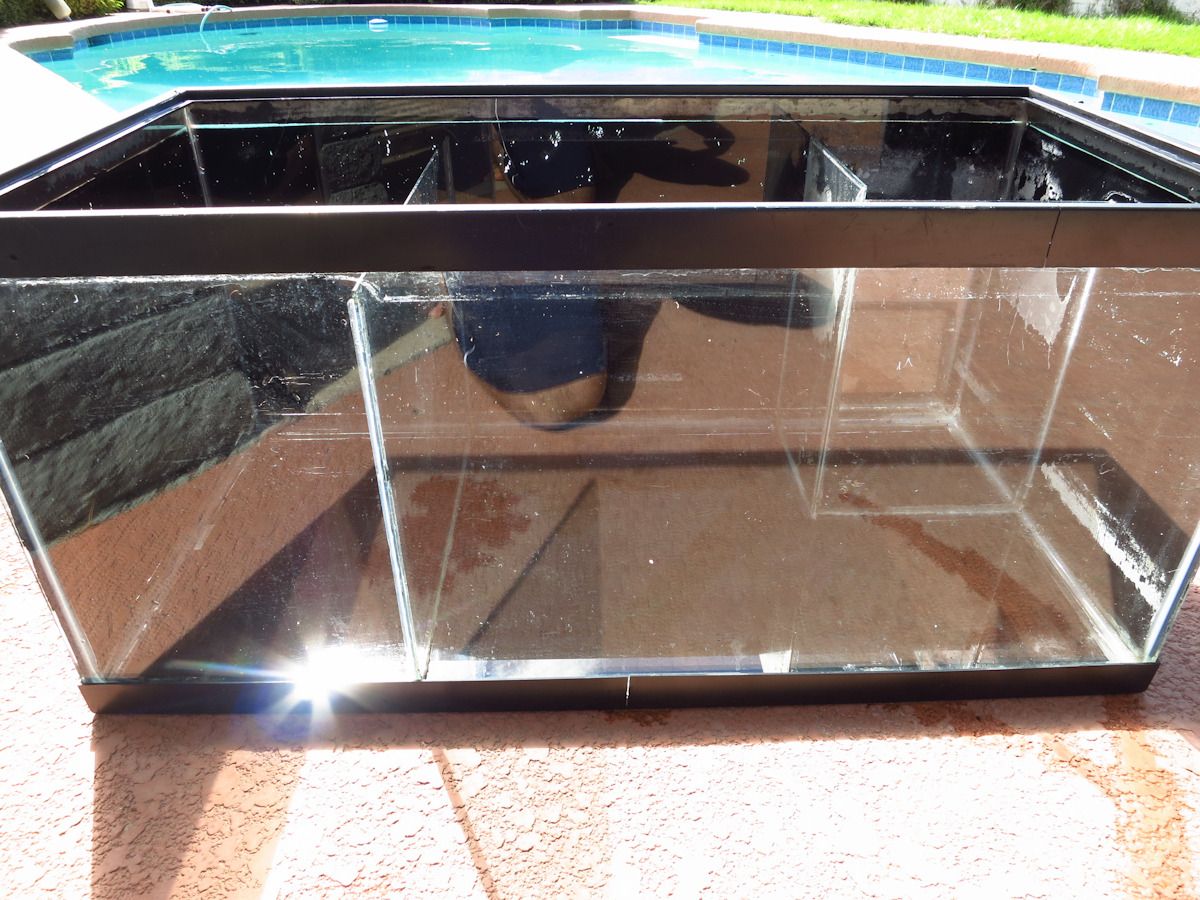 I really wanted to use it, but the more I thought about the overall design, I decided to make my own. The template: 40br -- 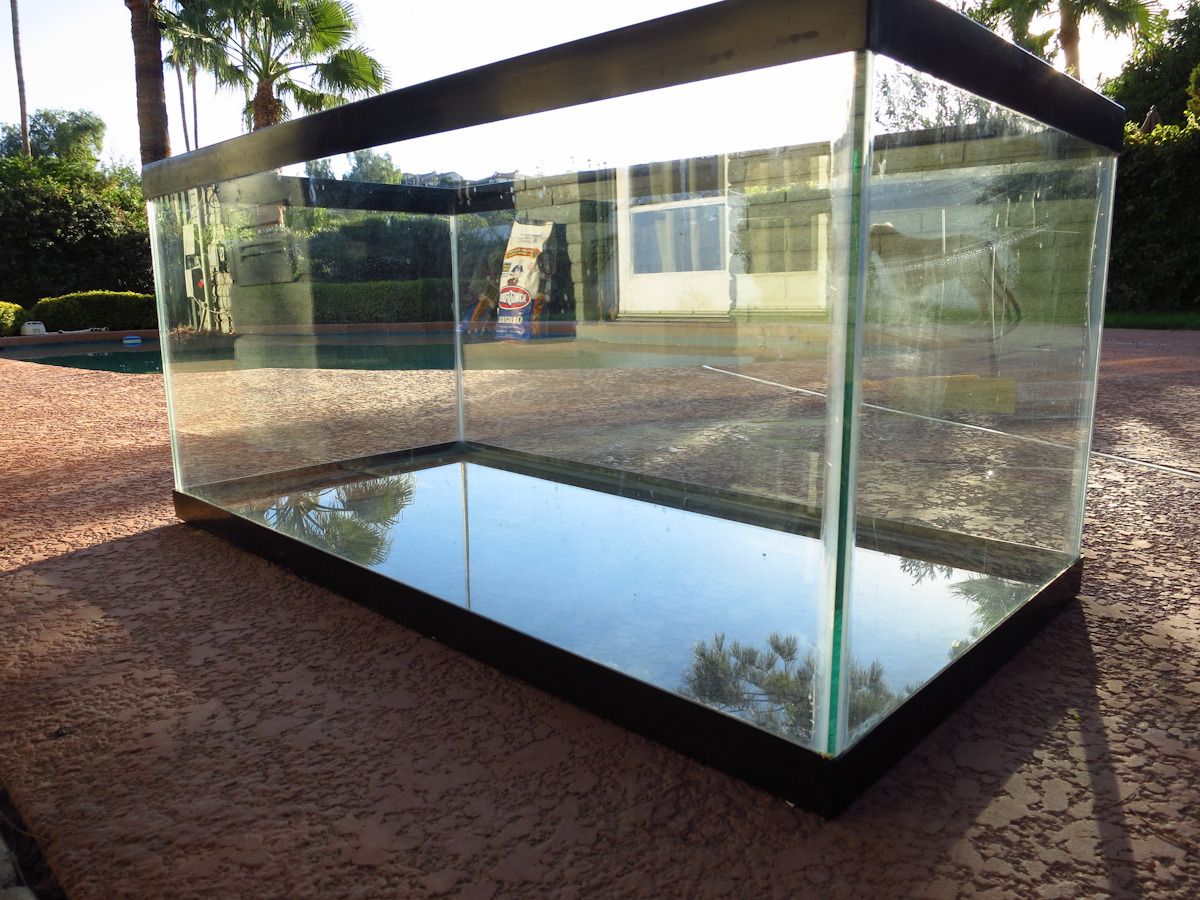 Found this at Home Depot:   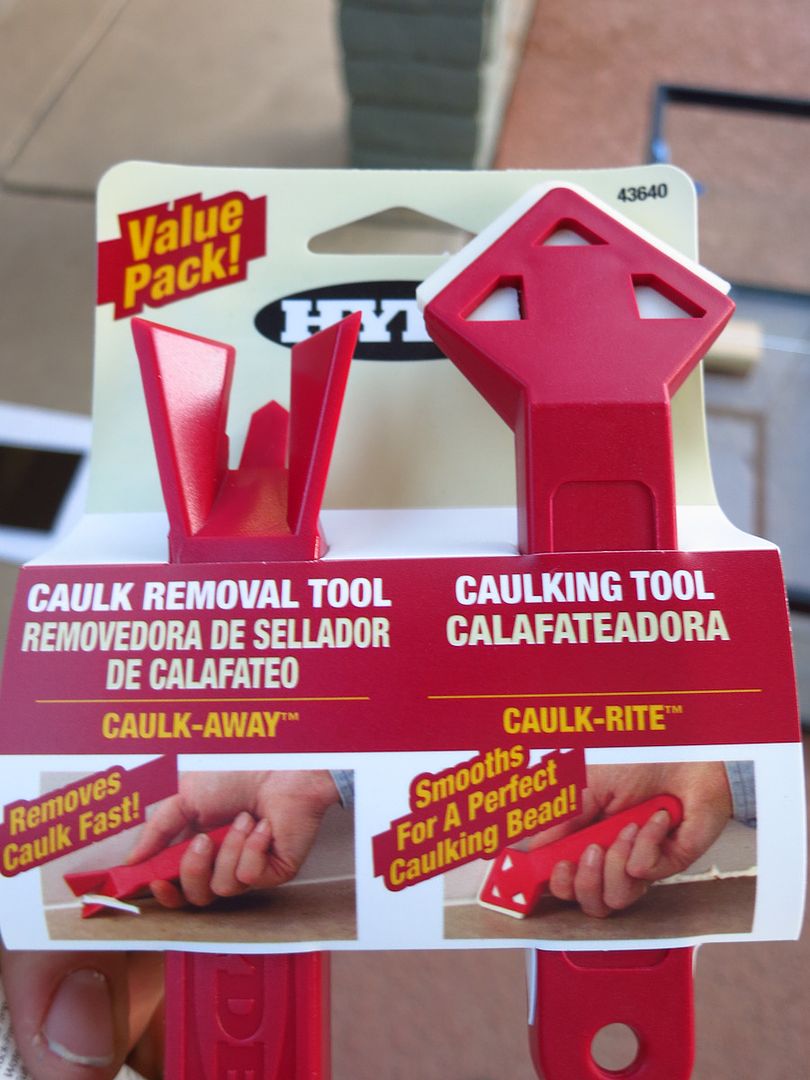 (FYI, these were a waste of money)
__________________
84x42x30 (~450g) A.G.E. and ADA 90-P (~45g). Last edited by zibba; 10/22/2012 at 12:37 AM. |
|
|
|
|
10/22/2012, 12:30 AM
|
#24 |
|
Registered Member
Join Date: Jun 2007
Location: Phoenix, AZ
Posts: 1,605
|
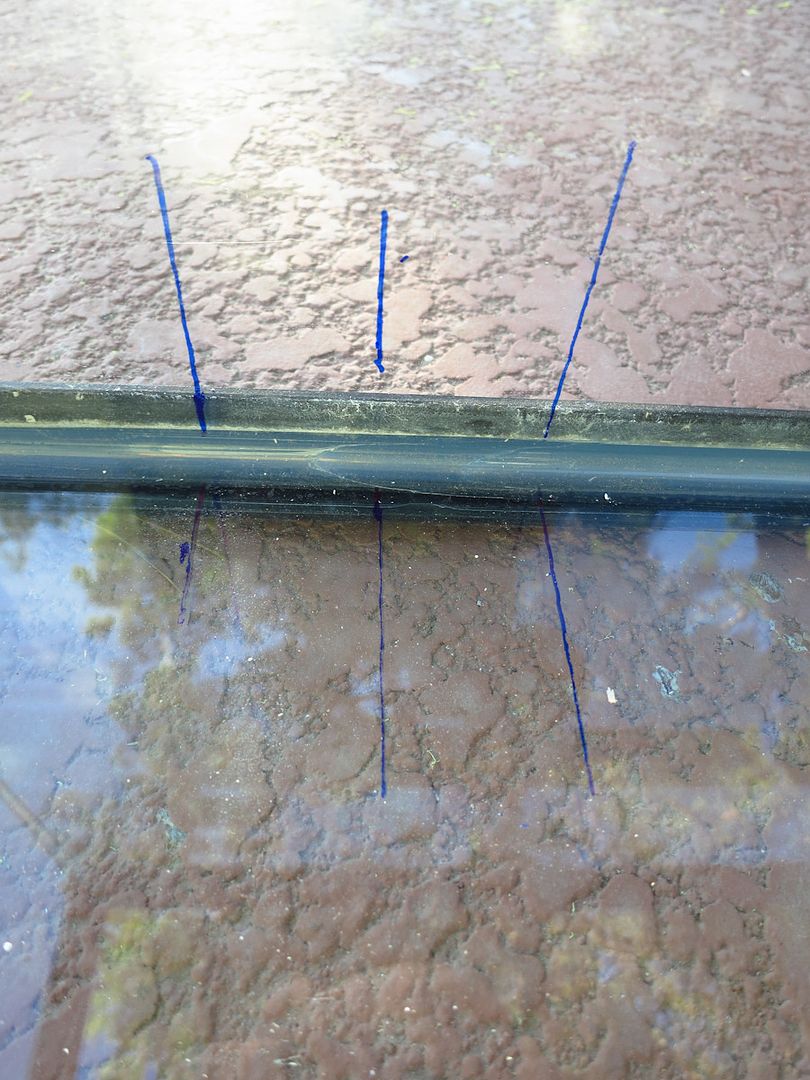
Next, I marked the sump for a bubble trap that allowed for a 5" gap (enough for my hand to fit into), a 16" skimmer/return section and a refugium.
    Please remember that this was my first time siliconing/making a sump. I'm letting the silicone cure overnight and will remove the (ridiculous amount of) silicone tomorrow and then leak test. Realistically, I'll get to plumbing next weekend.
__________________
84x42x30 (~450g) A.G.E. and ADA 90-P (~45g). |
|
|
|
|
10/22/2012, 12:34 AM
|
#25 |
|
Registered Member
Join Date: Jun 2007
Location: Phoenix, AZ
Posts: 1,605
|
Here's where I ended up after the weekend:
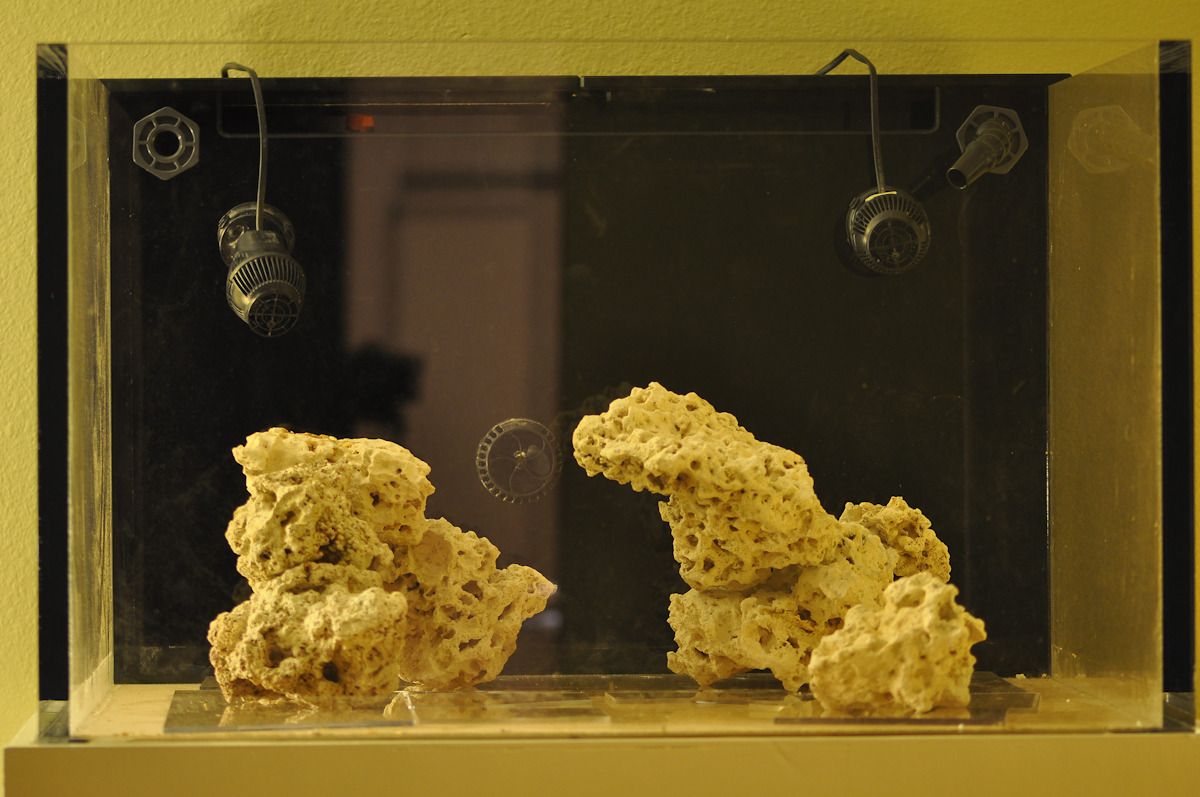 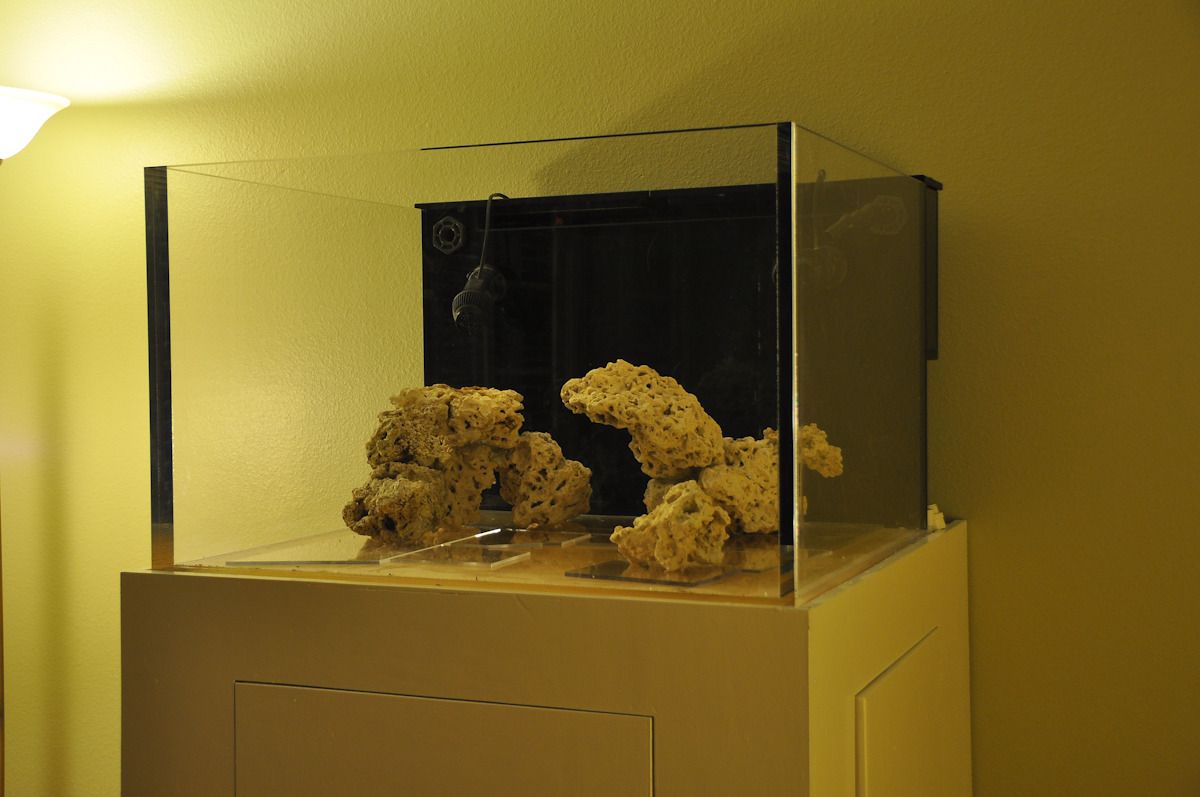 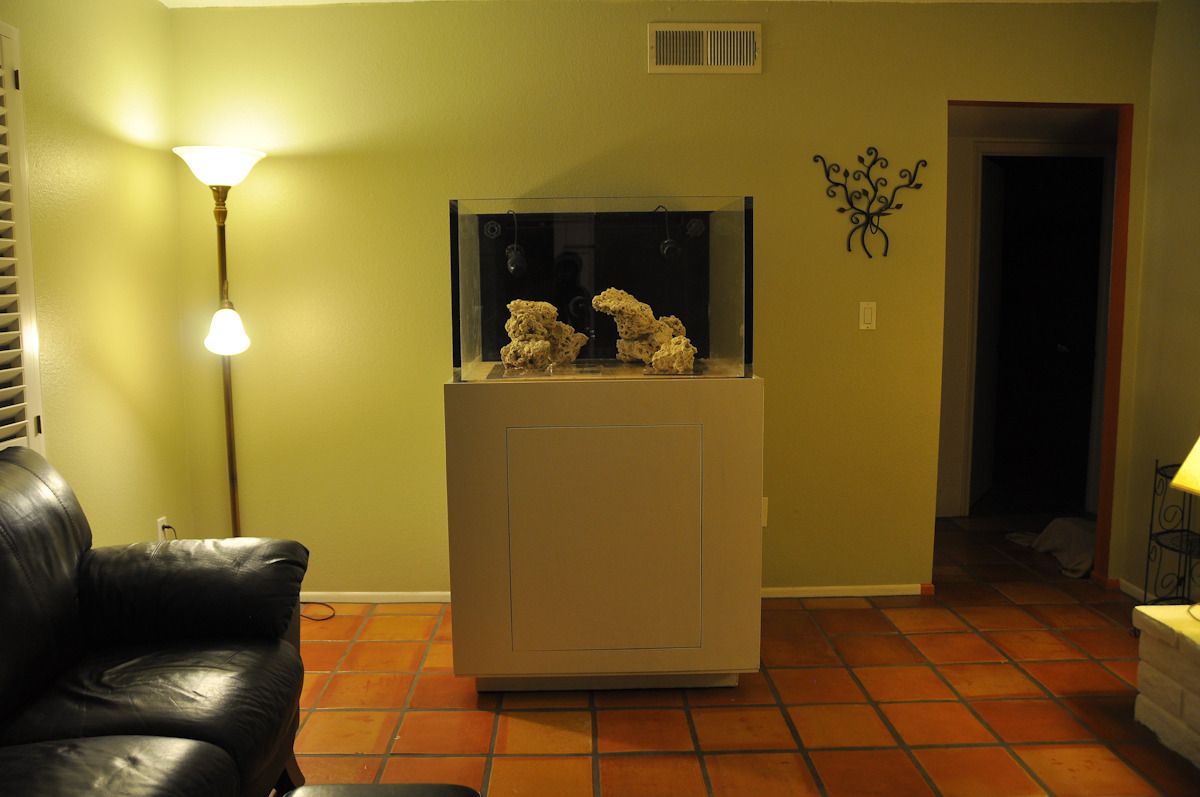 The light rack is painted and I'm pretty close to being able to hang it. Need to get up into the attic and pin-point the rafters and wire the LumenBright and VHOs. Neither of these are real priorities at the moment because it will take awhile for the dry live rock to cycle.
__________________
84x42x30 (~450g) A.G.E. and ADA 90-P (~45g). |
|
|
|
 |
| Thread Tools | |
|
|


