|
|
 07/01/2009, 07:11 AM
|
#26 |
|
Registered Member
Join Date: Jan 2009
Location: Charleston, SC
Posts: 971
|
Brett, The videos are great.
TurboGuru, Nice lay out. I wish I could have a fish room! Every thing will be under the stand so neat, organized plumbing is a must. |

|

|
|
07/01/2009, 03:16 PM
|
#27 |
|
TBRC Member
Join Date: Nov 2007
Location: Tampa, FL.
Posts: 991
|
Thanks everybody. Now i just have to finish it...!
__________________
Never do anything you don't want to have to explain to the Paramedics... Never drive faster than your guardian angel can fly.. "Panic will save your life, provided you are the first to panic and are headed in the right direction." Brannigan Click on my username and go to my homepage to see my build thread. Current Tank Info: Soon to Finish (yeah right!) my 90G SPS build. |
|
|
|
|
07/01/2009, 09:57 PM
|
#28 |
|
Registered Member
Join Date: Nov 2006
Location: Deming,N.M.
Posts: 1,919
|
kentrob11, I hope this is clean enough to qualify for your thread.
Might I ask where your shots are? Just seems like the person that wants to see clean plumbing installs would share with all of us as well. I can see that I need to ditch the plumbers tape for some of them plastic PVC hangers, they look so much cleaner. 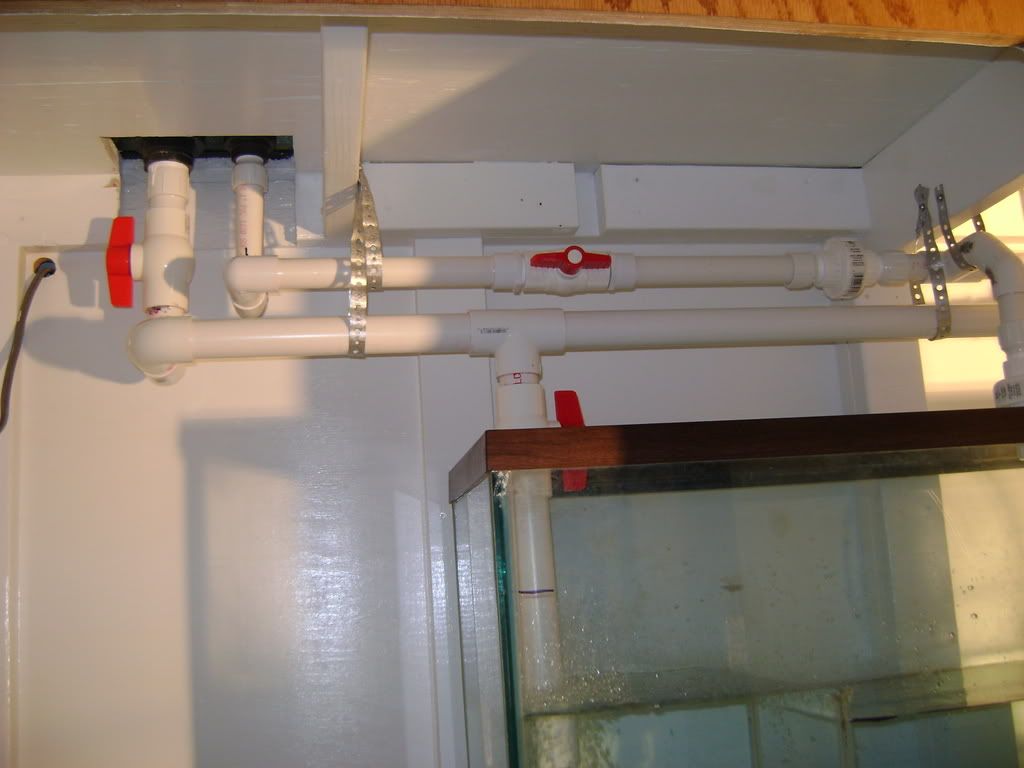 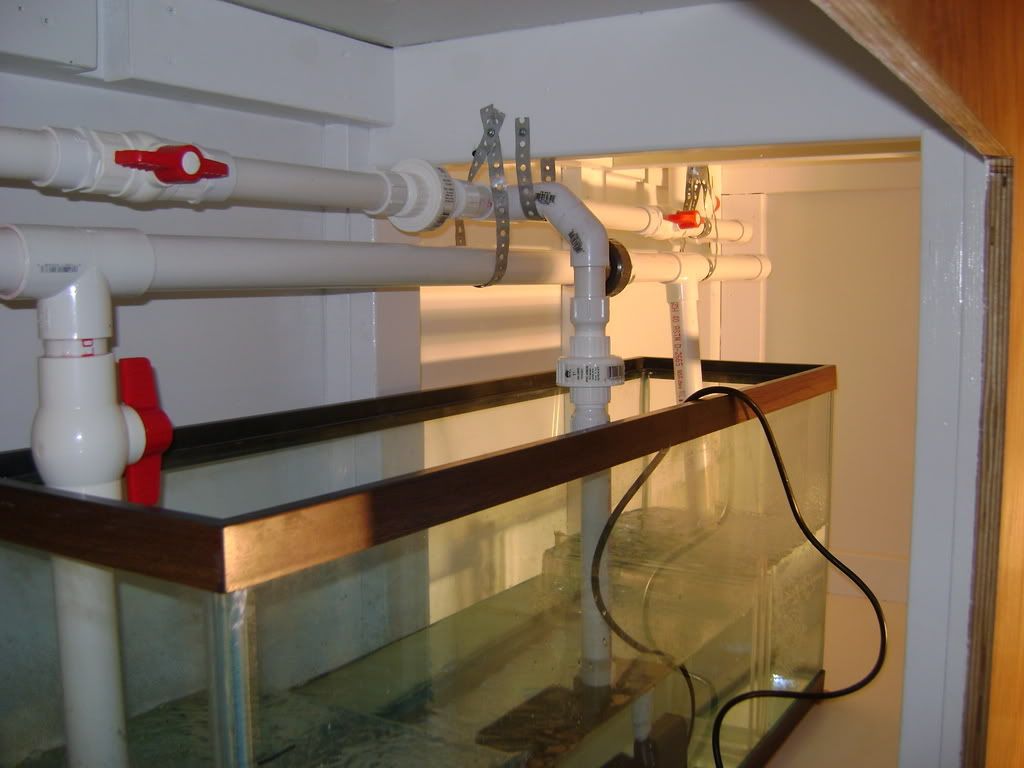 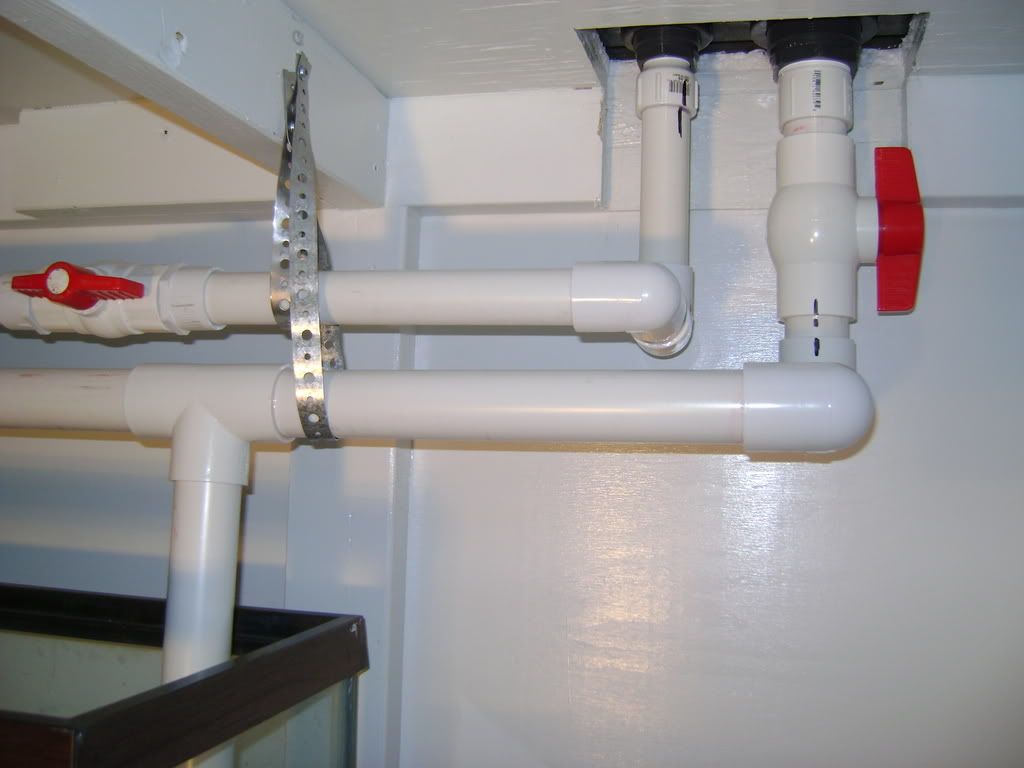 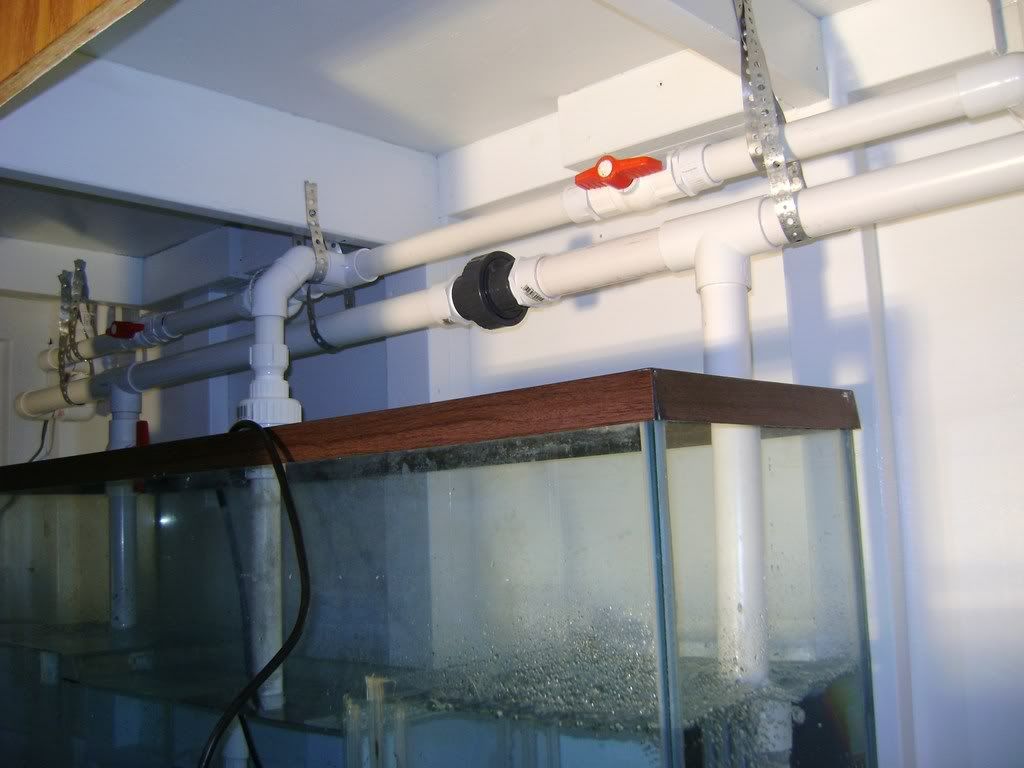
|
|
|
|
|
07/02/2009, 06:44 PM
|
#29 |
|
Registered Member

Join Date: Jun 2006
Location: Pasadena, Texas
Posts: 8,422
|
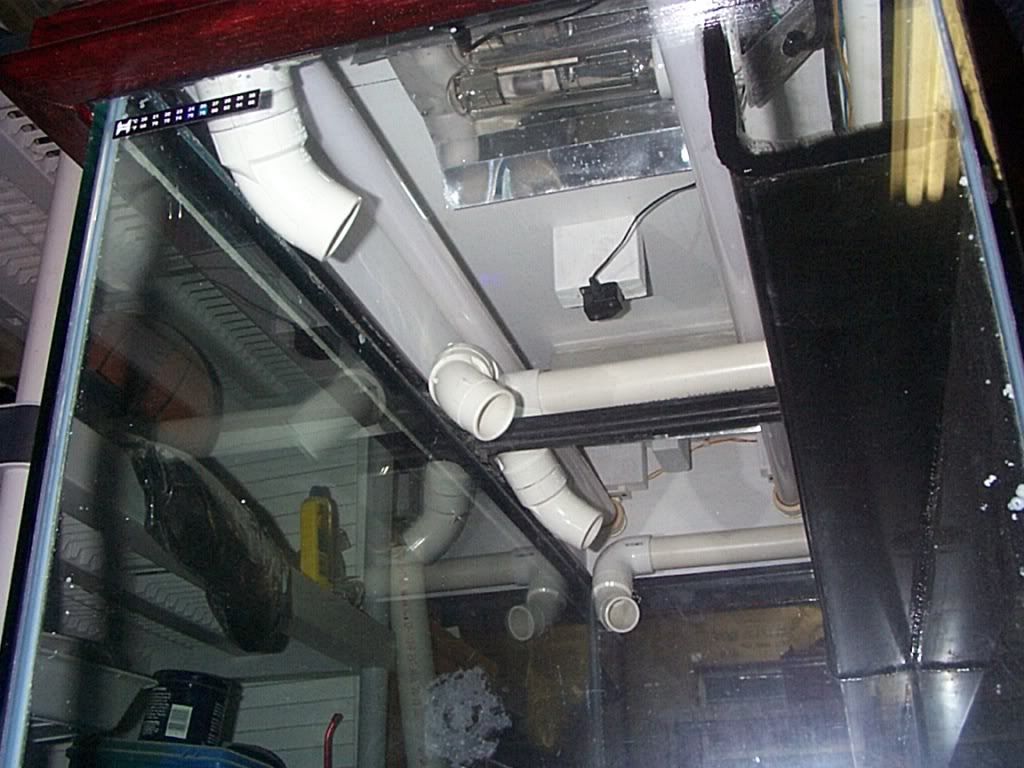
From the 390.
__________________
Click on my red house to see my 390 and 300 build thread. Those are my last 2 tanks in Tampa. Now in Pasadena waiting to buy a house to set up my next tank....anemones and clowns...probably a 3x3 150 gallon. |
|
|
|
|
07/02/2009, 07:33 PM
|
#30 |
|
Premium Member
 Join Date: Oct 2002
Location: Chandler, AZ.
Posts: 523
|
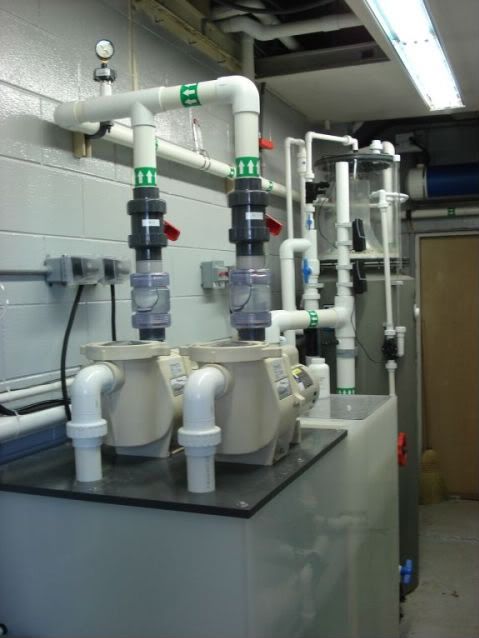
Here's a few my friend has done...
|
|
|
|
|
07/02/2009, 09:42 PM
|
#31 |
|
Registered Member
Join Date: Oct 2005
Location: Charleston,SC
Posts: 766
|
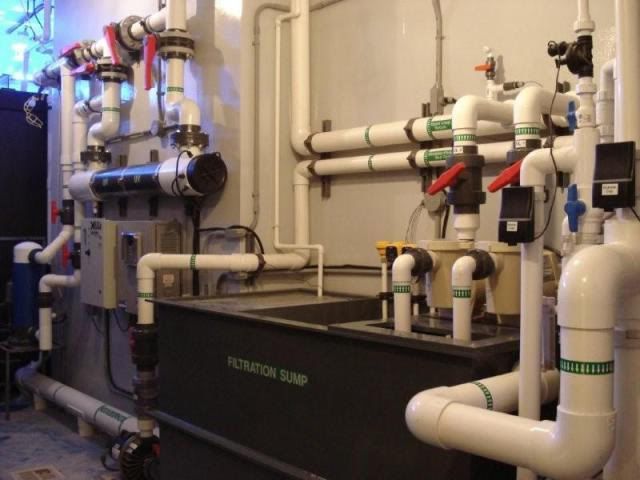
Thanks for sharing these azreefer, in the second picture down, center back wall with the four fittings in the square, what are they? and are the butterfly valves in the same picture stainless steel?
Thanks again, tell your friend he does some wonderful work 
|
|
|
|
|
07/02/2009, 10:13 PM
|
#32 |
|
Premium Member
Join Date: Oct 2002
Location: Chandler, AZ.
Posts: 523
|
Those are flow meters. The valves are not stainless. The only stainless we ever use is in drum filters like these...
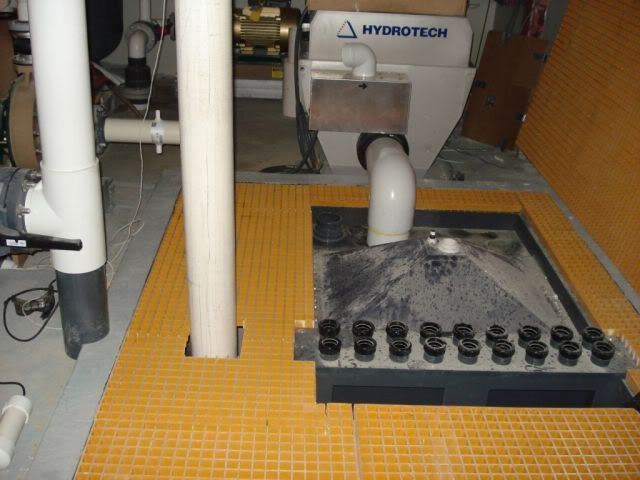 The stainless has problems after a while too. That's an 18 bulb flow through UV in front of the drum filter. |
|
|
|
|
07/03/2009, 09:15 AM
|
#33 |
|
Registered Member
Join Date: Jul 2008
Location: Calgary Alberta
Posts: 9
|
Thats Amazing!!! +++++ A to your Friend
|
|
|
|
|
07/03/2009, 11:51 AM
|
#34 |
|
Registered Member
Join Date: Oct 2005
Location: Charleston,SC
Posts: 766
|
Thanks for the response azreefer
|
|
|
|
|
07/03/2009, 04:08 PM
|
#35 |
|
Registered Member
Join Date: Jan 2008
Posts: 228
|
more pictures please

|
|
|
|
|
07/03/2009, 04:22 PM
|
#36 |
|
Registered Member
Join Date: Nov 2008
Location: Evansville, Indiana
Posts: 79
|
Holy SMOKES AZ!!! What is the tank size?
|
|
|
|
|
07/03/2009, 04:36 PM
|
#37 |
|
Premium Member
Join Date: Oct 2002
Location: Chandler, AZ.
Posts: 523
|
approx. 800, 5,000, and 25,000 gallon tanks.
|
|
|
|
|
07/04/2009, 04:48 PM
|
#38 |
|
Registered Member
Join Date: Aug 2006
Location: Tustin, CA
Posts: 712
|
Nice plumbing everyone. This will give me ideas for my upgrade.
|
|
|
|
|
07/05/2009, 12:48 PM
|
#39 | |
|
Registered Member
Join Date: Jul 2004
Location: AWOL
Posts: 12,013
|
Quote:
Jim
__________________
"Things should be made as simple as possible, but not simpler." (oft attributed to Einstein; most likely paraphrasing by Roger Sessions; compactly articulates the principle of Occam's Razor) Current Tank Info: 325 6' wide Reef |
|
|
|
|
|
07/07/2009, 11:42 AM
|
#40 | |
|
Team RC Member
Join Date: Jul 2006
Location: STL
Posts: 14,754
|
Quote:

__________________
-Brett 180g Marineland Starfire In-Wall 278 gallon system |
|
|
|
|
|
07/07/2009, 12:43 PM
|
#41 |
|
Tangaroa to 500 gallons
Join Date: Jul 2007
Location: Edmond, OK
Posts: 5,855
|
Pristine?
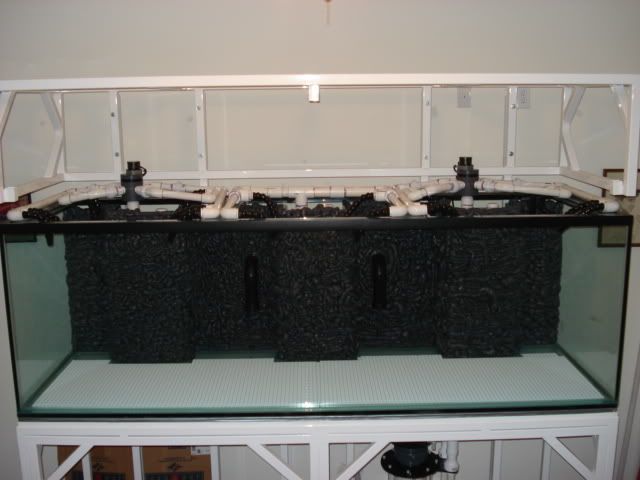
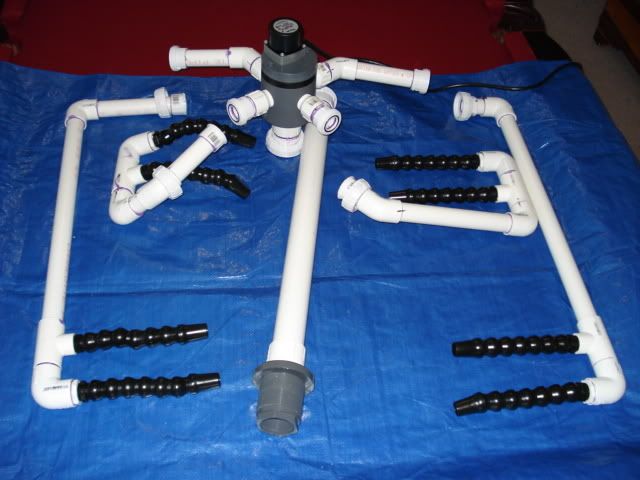
Not pristine, but I'm pretty happy everything works in our first serious PVC plumbing effort...
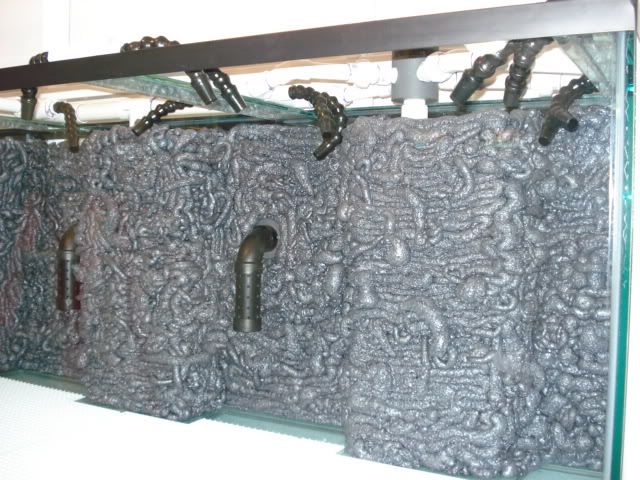
Raw materials: 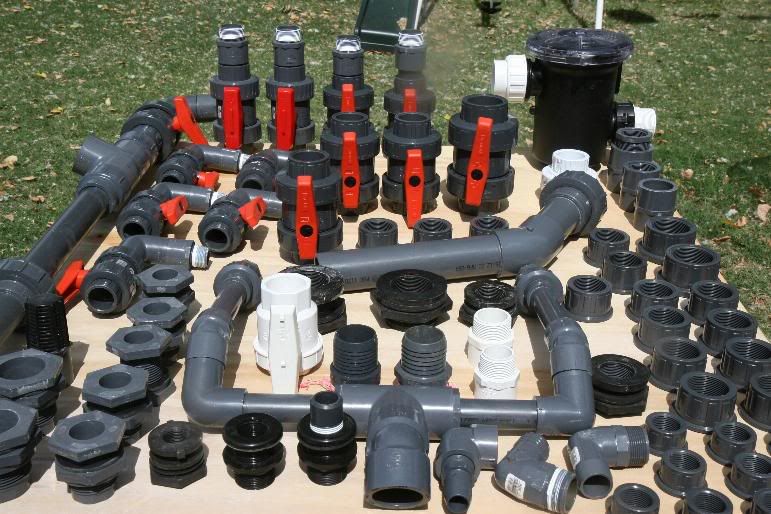 Overflow & Returns: 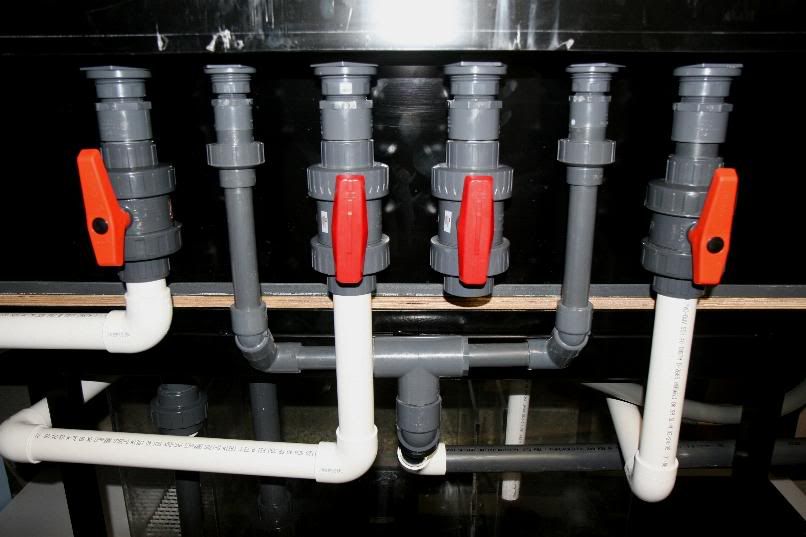 The closed loop "harness" of 1" gray flexible PVC: 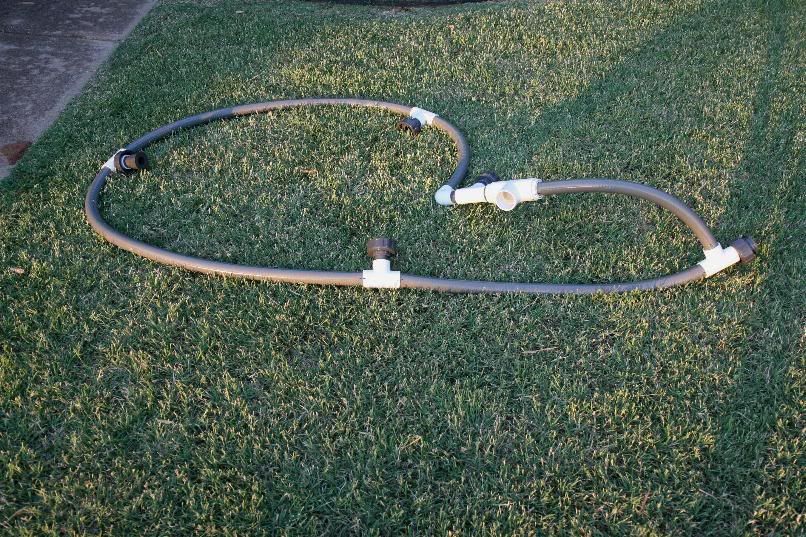 The above harness attaches to the five closed loop returns drilled in the tank's PVC bottom, like so: 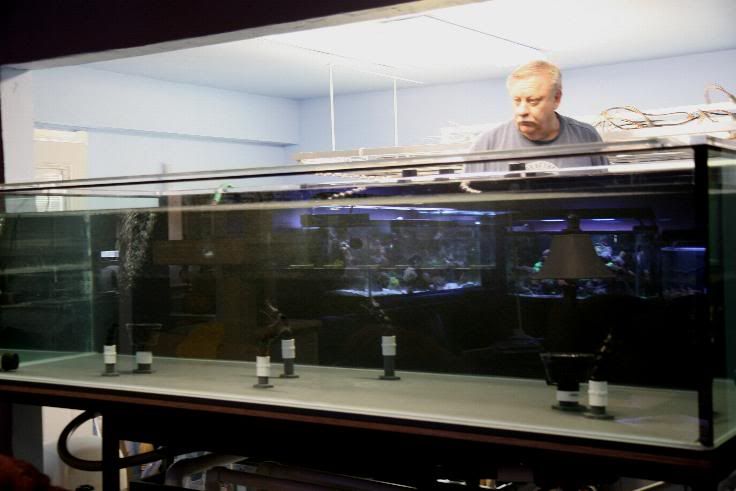 More of the return and overflow system -  
__________________
Click on my username and select "Lightsluvr's Home Page" for a recap of our build thread - AGE Hybrid Tank in a 500G system with dedicated fish room. (Takes a few minutes for photos to load) Leave a note if you stop by... Current Tank Info: 350G AGE Hybrid reef tank. 500G+ total water volume. Three sumps for filtration. Barracuda Gold return and Hammerhead Gold closed loop pumps. DIY T5 light system on rails. MP40W x3 to supplement closed loop. 130G Water management system. |
|
|
|
|
07/07/2009, 05:06 PM
|
#42 |
|
Pro builder/aquarist hack

Join Date: Jul 2002
Location: NORCAL (Vacaville, CA)
Posts: 5,125
|
AZ,
Is that a Rainforest Cafe? Looks familiar
|
|
|
|
|
07/07/2009, 05:21 PM
|
#43 |
|
Premium Member
Join Date: Oct 2002
Location: Chandler, AZ.
Posts: 523
|
no...but 2 commercial and one residential.
|
|
|
|
|
07/07/2009, 05:24 PM
|
#44 |
|
Pro builder/aquarist hack
Join Date: Jul 2002
Location: NORCAL (Vacaville, CA)
Posts: 5,125
|
Nice work. Thats the kind of jobs I love to get!! Nothing better than FRP strut, clamps, and grating, but get your (their
 ) wallet out!! ) wallet out!!
|
|
|
|
|
07/07/2009, 06:39 PM
|
#45 |
|
Premium Member
Join Date: Oct 2002
Location: Chandler, AZ.
Posts: 523
|
me too...those aren't cheap but a lot of fun.
|
|
|
|
|
07/07/2009, 07:39 PM
|
#46 |
|
Registered Member
Join Date: Apr 2008
Location: Chesapeake, VA
Posts: 32
|
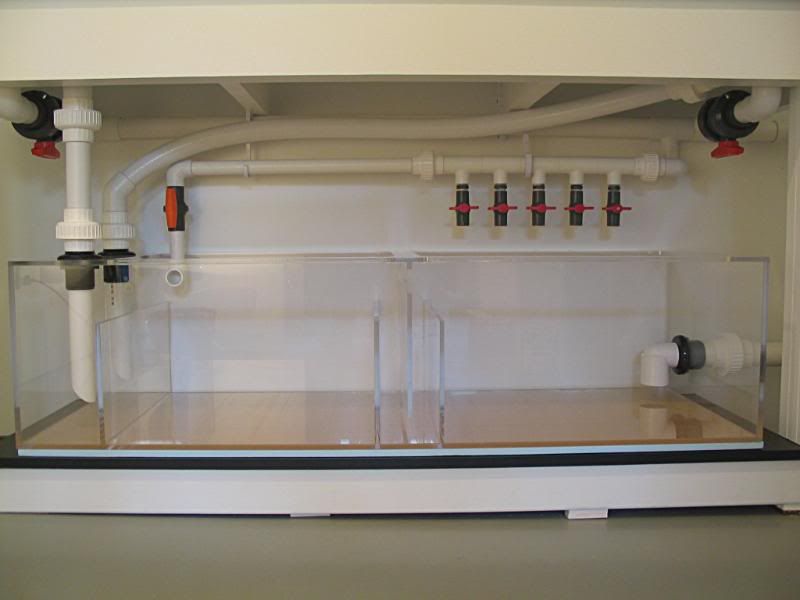
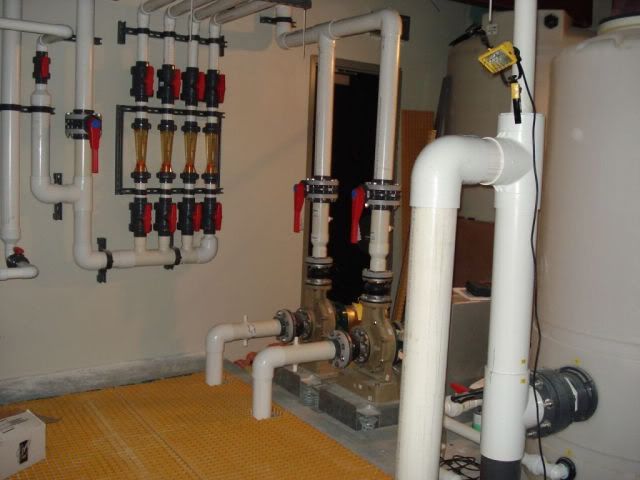
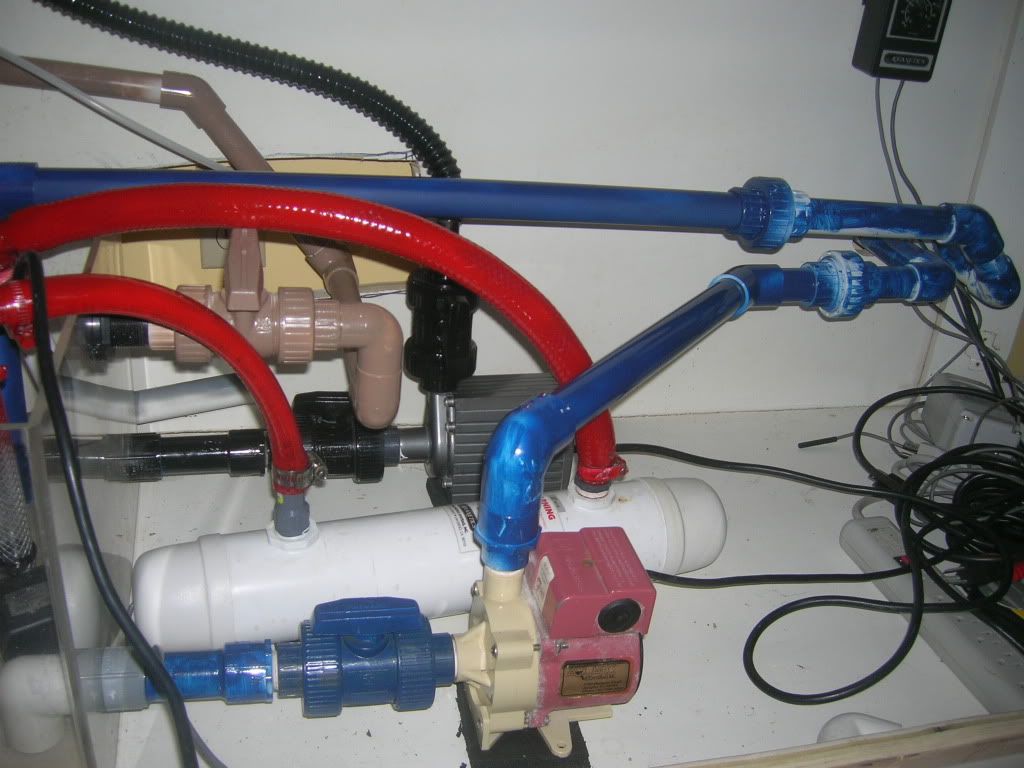
Here you go. Almost complete. Every system gets its own color code and valve number series. (Filter is black and 100's, Chiller is blue and 200's, Red is U/V sterilizer, Tan is drain and 300's, Closed loop is Gray and 400's). This is being setup for my new 340g and needs to be very user friendly as I'll be deploying soon and need my wife and kids to be able to operate/understand it. Will be working on the operating instructions soon. (To dump water, turn off switch P1, open Tan Valve 301 and 302, close tan valve 303, verify water is exiting the pipe outside, etc)
|
|
|
|
|
07/07/2009, 07:52 PM
|
#47 | |
|
Registered Member
Join Date: Dec 2005
Location: Mississauga
Posts: 505
|
what was the plan for the 5 small valves.
Just to confirm that they are being fed by the return line correct? Quote:
|
|
|
|
|
|
07/07/2009, 08:33 PM
|
#48 | |
|
TBRC Member
Join Date: Nov 2007
Location: Tampa, FL.
Posts: 991
|
Quote:
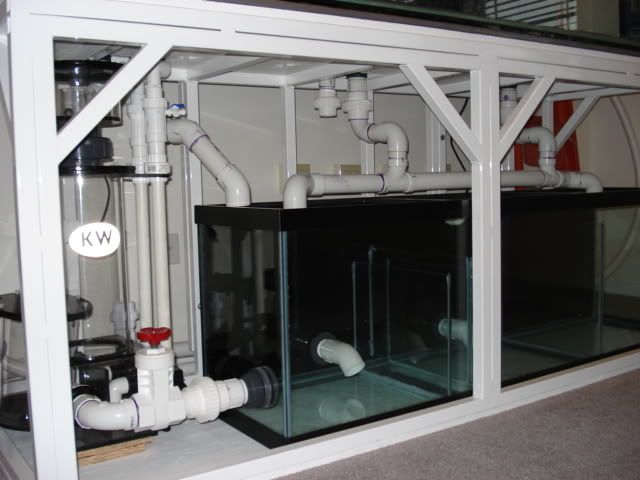
Hey Jim, did you notice I changed the drain plumbing back to original design (each drain separate) and changed the manifold design for a more compact layout. And I upgraded the Dart to a Baracuda for more flow. Nice to see you on here again, I hope to get a new camera soon to update my build. I hope to see you there. Joe
__________________
Never do anything you don't want to have to explain to the Paramedics... Never drive faster than your guardian angel can fly.. "Panic will save your life, provided you are the first to panic and are headed in the right direction." Brannigan Click on my username and go to my homepage to see my build thread. Current Tank Info: Soon to Finish (yeah right!) my 90G SPS build. |
|
|
|
|
|
07/07/2009, 09:35 PM
|
#49 | |
|
Registered Member
Join Date: Aug 2008
Location: Oxnard, CA
Posts: 1,588
|
very cool! reminds me of my days in the navy rigging the ship for dive(was on a submarine) and doing other lineups for stuff!
Quote:
|
|
|
|
|
|
07/07/2009, 11:14 PM
|
#50 | |
|
Team RC Member
Join Date: Jul 2006
Location: STL
Posts: 14,754
|
Quote:
__________________
-Brett 180g Marineland Starfire In-Wall 278 gallon system |
|
|
|
|
 |
|
|