
|
|
 08/29/2011, 06:10 AM
|
#101 | |
|
Registered Member
Join Date: Jan 2010
Location: Canadia
Posts: 4,276
|
Quote:
Dave.M
__________________
My Gawd! It's full of corals! Current Tank Info: None. Nil. Zip. Nada. |
|

|

|
|
08/29/2011, 06:25 AM
|
#102 |
|
Registered Member
Join Date: Apr 2001
Location: Lebanon
Posts: 6,111
|
We did go with thicker glass than needed and the braces are doubled on top of each other.
There are many tanks this size with only Eurobracing right?
__________________
390 G mixed reef build Current Tank Info: 390G mixed reef |
|
|
|
|
08/29/2011, 06:32 AM
|
#103 |
|
Registered Member
Join Date: Apr 2001
Location: Lebanon
Posts: 6,111
|
And plumbing finsihed for the drains:
Returns will be over the top from the right side of the tank and will be made later on. 2 x 1.5" drains (one for backup) 1x 1 inch drain supplying fuge and water change tank. 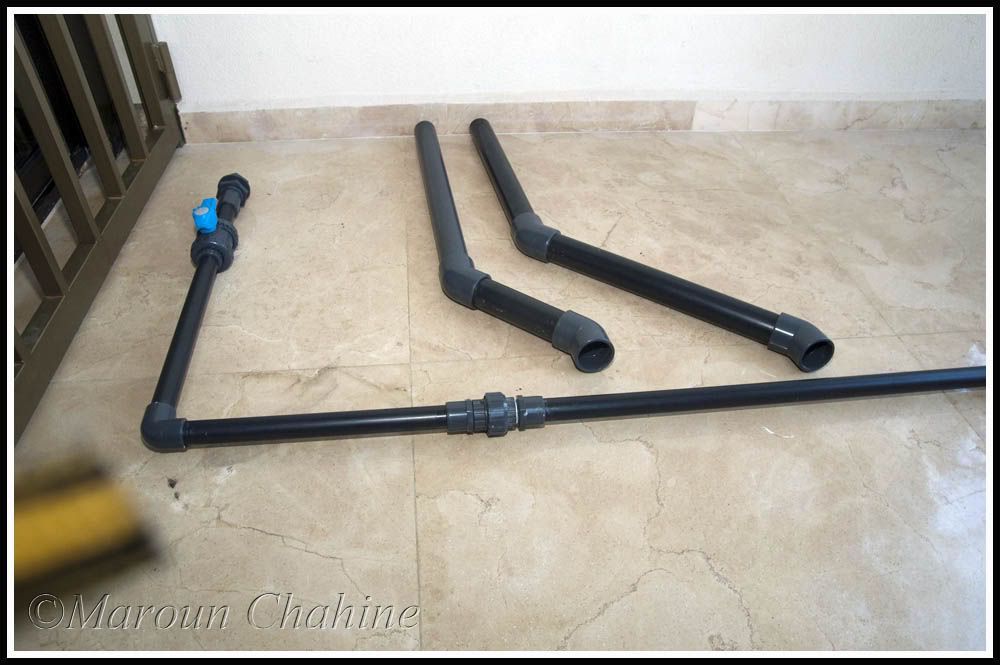 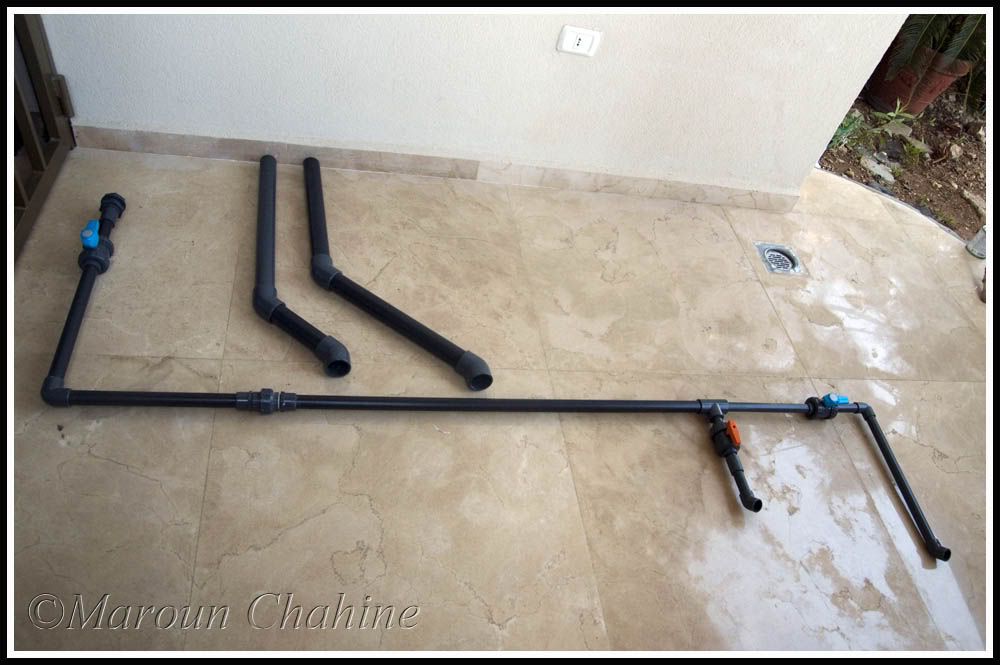 Side view of the external overflow and plumbing to sump 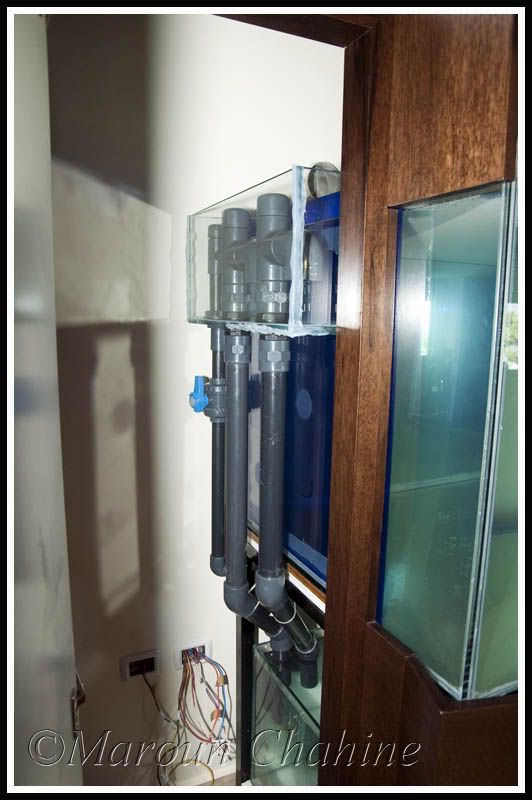 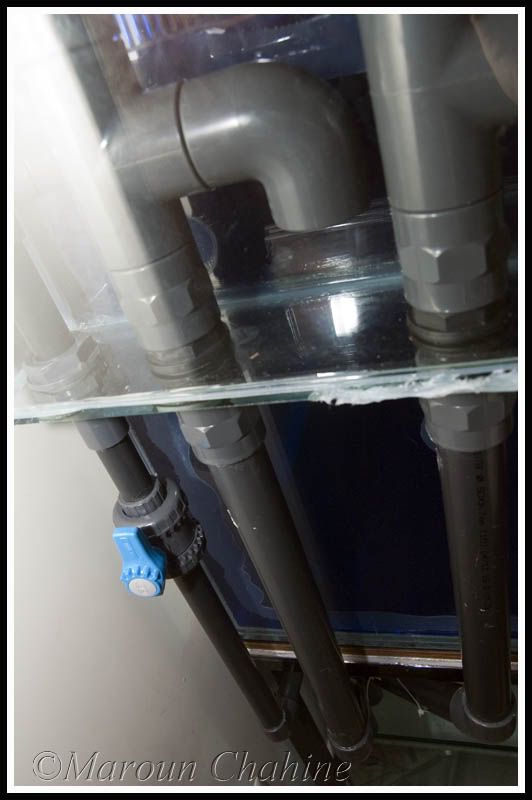 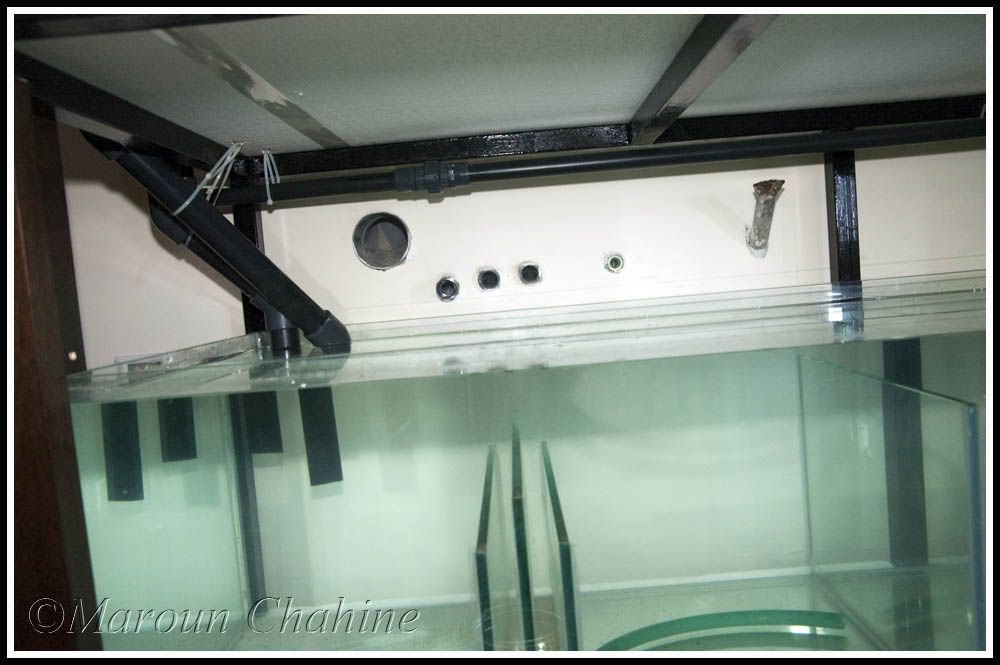 Stand view 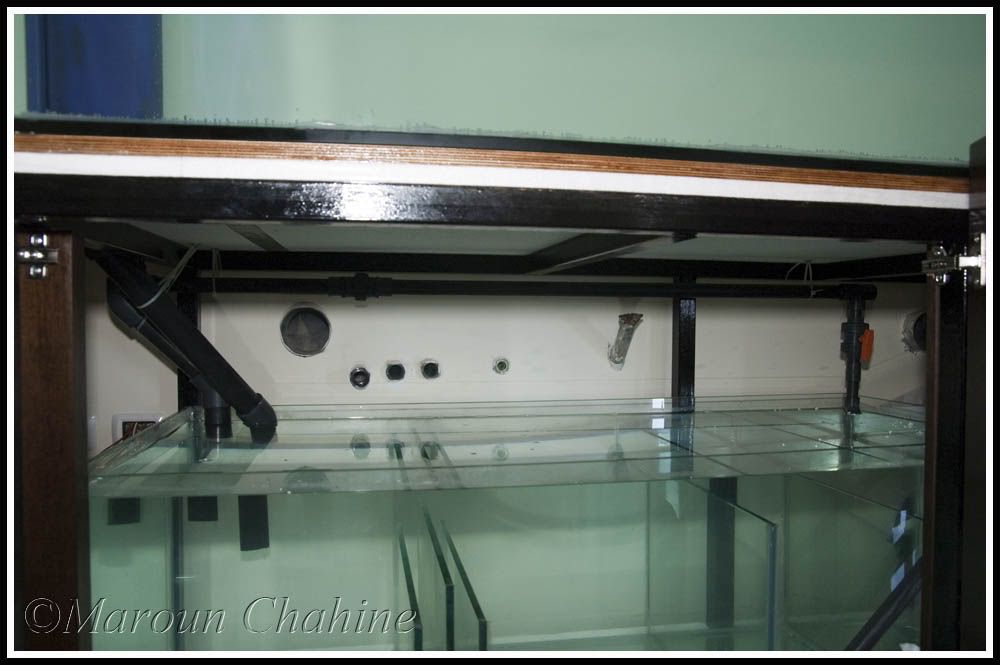 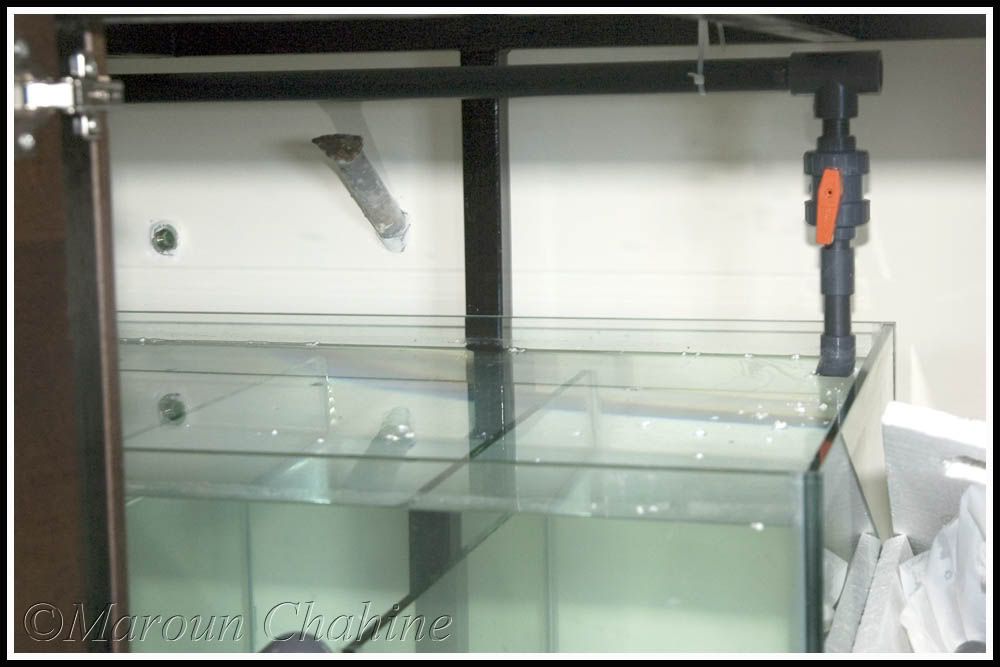 Still have to continue the plumbing to the water change tank when its done.
__________________
390 G mixed reef build Current Tank Info: 390G mixed reef |
|
|
|
|
08/29/2011, 07:06 AM
|
#104 | |
|
Registered Member
Join Date: Jan 2010
Location: Canadia
Posts: 4,276
|
Quote:
Dave.M
__________________
My Gawd! It's full of corals! Current Tank Info: None. Nil. Zip. Nada. |
|
|
|
|
|
08/29/2011, 01:53 PM
|
#105 | |
|
Premium Member
Join Date: Jan 2010
Location: Riyadh, Saudi Arabia
Posts: 271
|
Will be waiting for your call before you come to Riyadh. How is your old tank doing?
PM sent with the latest video of my tank Quote:
__________________
Adnan Mumtaz Current Tank Info: 150g Mixed Reef Tank, Hamilton Technology Cebu Sun HQI 250w x 2 + 54w x 4 T5, 100+ lbs Fiji Live Rocks, 150 NW Reef Octopus Skimmer, Filter Sock, Vortech MP40w x 2 on, Tunze Osmolator, American Marine Pinpoint PH Monitor, GFO & GAC Reactors |
|
|
|
|
|
08/30/2011, 12:35 AM
|
#106 | |
|
Registered Member
Join Date: Apr 2001
Location: Lebanon
Posts: 6,111
|
Quote:
It was fixed by doubling the braces.
__________________
390 G mixed reef build Current Tank Info: 390G mixed reef |
|
|
|
|
|
08/30/2011, 12:57 PM
|
#107 | |
|
Registered Member
Join Date: Apr 2001
Location: Lebanon
Posts: 6,111
|
Quote:
__________________
390 G mixed reef build Current Tank Info: 390G mixed reef |
|
|
|
|
|
08/31/2011, 06:41 AM
|
#108 |
|
Registered Member
Join Date: Aug 2007
Posts: 203
|
Sorry to hear about the Ceramic rocks.
Hope it will be easy to fix. It will definitly give the tank a really nice look. Any idea if it will cause Algea blooms or Cyano? Plumbing looks neat as well. Hope things will progress fast now. |
|
|
|
|
09/01/2011, 10:54 AM
|
#109 | |
|
Registered Member
Join Date: Apr 2001
Location: Lebanon
Posts: 6,111
|
Quote:
I'm hoping plumbing won't become a mess when the additional plumbing from and to fishroom is added in a following step.
__________________
390 G mixed reef build Current Tank Info: 390G mixed reef |
|
|
|
|
|
09/25/2011, 09:48 AM
|
#110 |
|
Registered Member
Join Date: Apr 2001
Location: Lebanon
Posts: 6,111
|
Time for some updates.
Build is still delayed by some woodwork on the cabinets from the inside that requires being in the tank so filling it is not possible yet. As well as some work on the ceiling with drilling holes for bolts to support the light rack which I still have to finalize as well. Another DIY was finished and that is the reservoir for water changes. 28x16x23” (70x40x57 cm) holding around 43G (160L) so a bit more than 10% display water volume which will be the weekly or biweekly water to change. 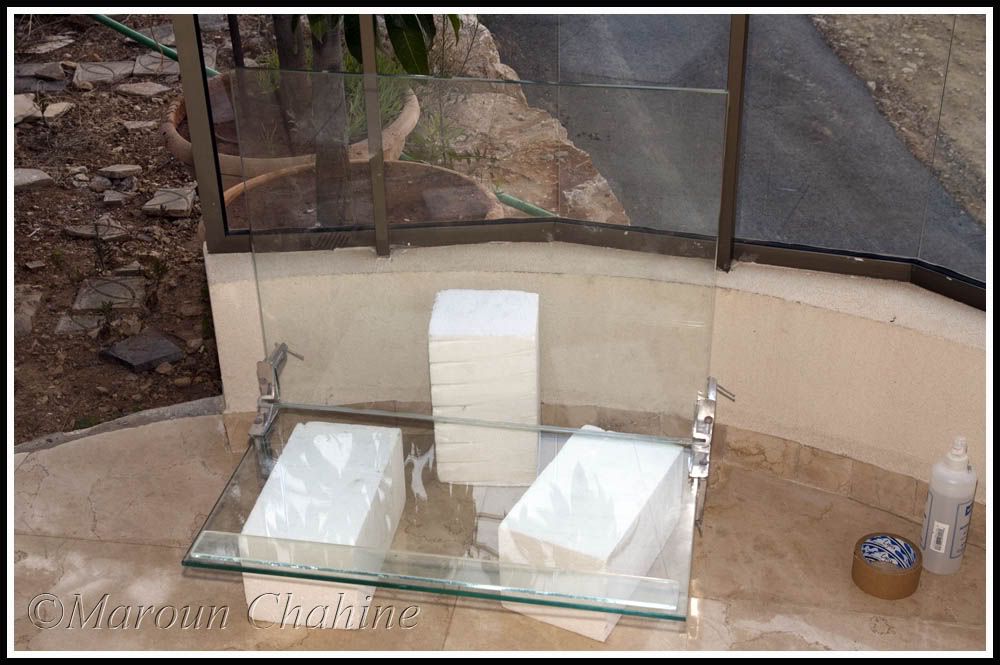 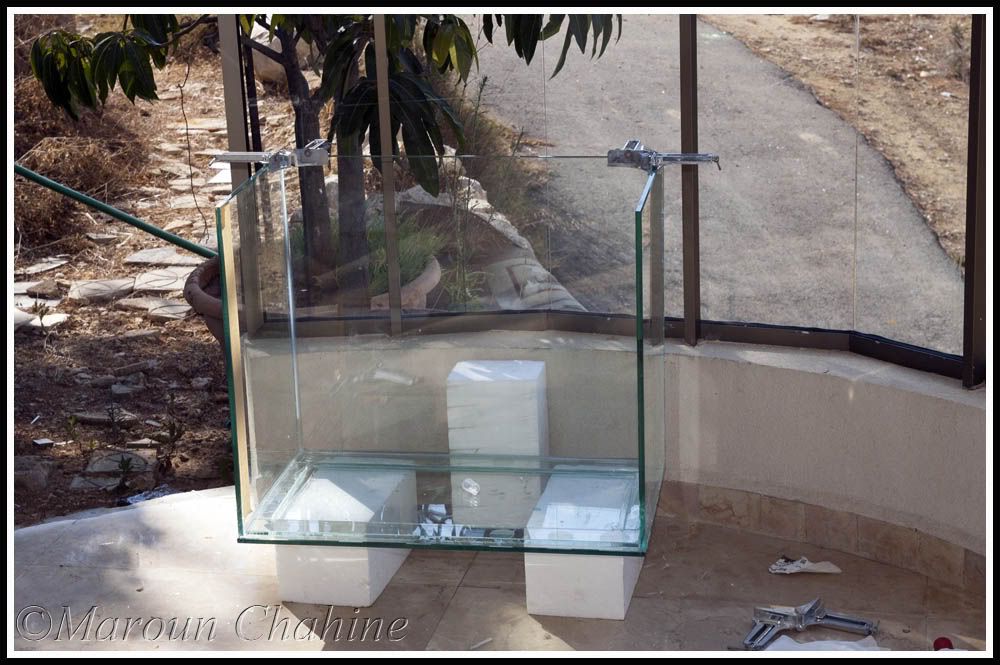 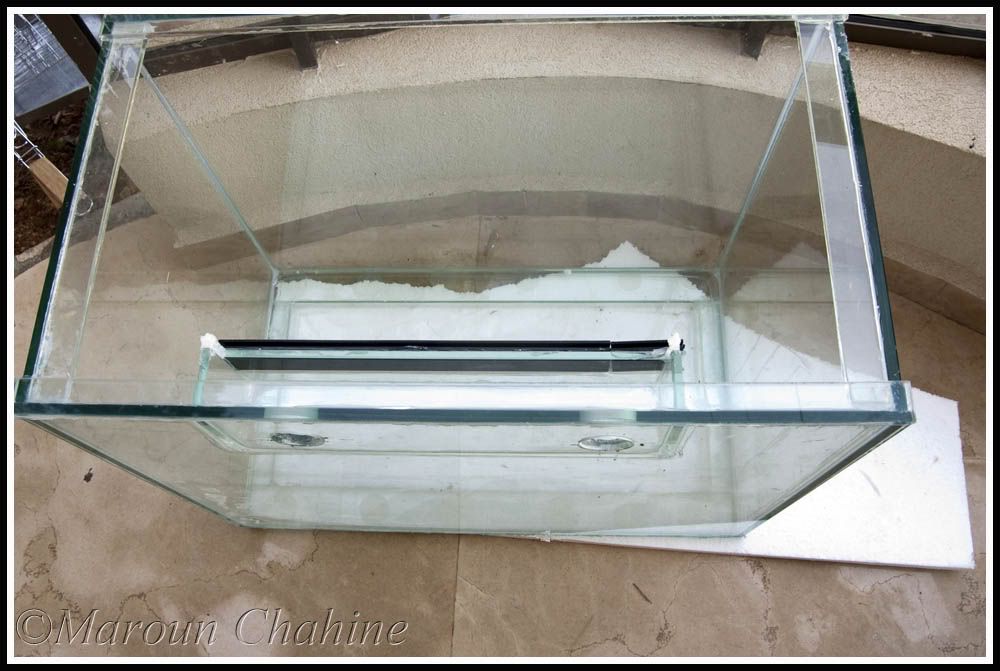  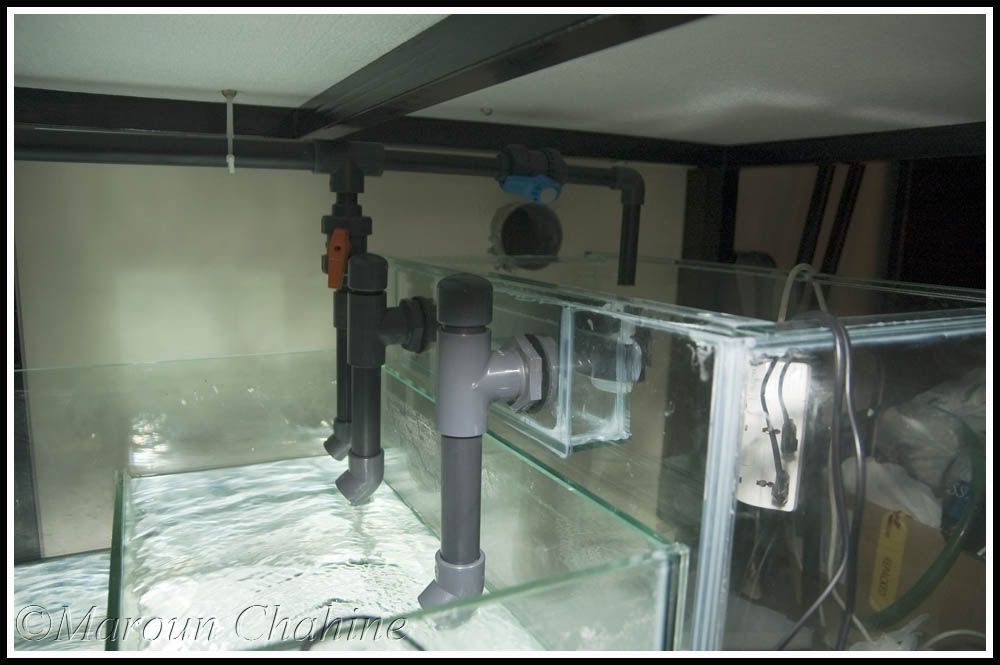
__________________
390 G mixed reef build Current Tank Info: 390G mixed reef |
|
|
|
|
09/25/2011, 09:57 AM
|
#111 |
|
Registered Member
Join Date: Apr 2001
Location: Lebanon
Posts: 6,111
|
Back to the Ceramics I received a while ago which had a few pieces break in shipping despite the excellent packing the had. Luckily with the amazing support of Suzanne and Wolfgang from Riff Ssytem this was solved. They even took the trouble to check my thread to see if I was able to fix the rocks and sent me emails to make sure all went well.
An important factor was the amazing quality ceramic cement they sent with the shipping which cured in around 5 min and was able to support floating structures in that limited time. The bridge: was the mot difficult one to find out where each piece went as there was no clear line of break. 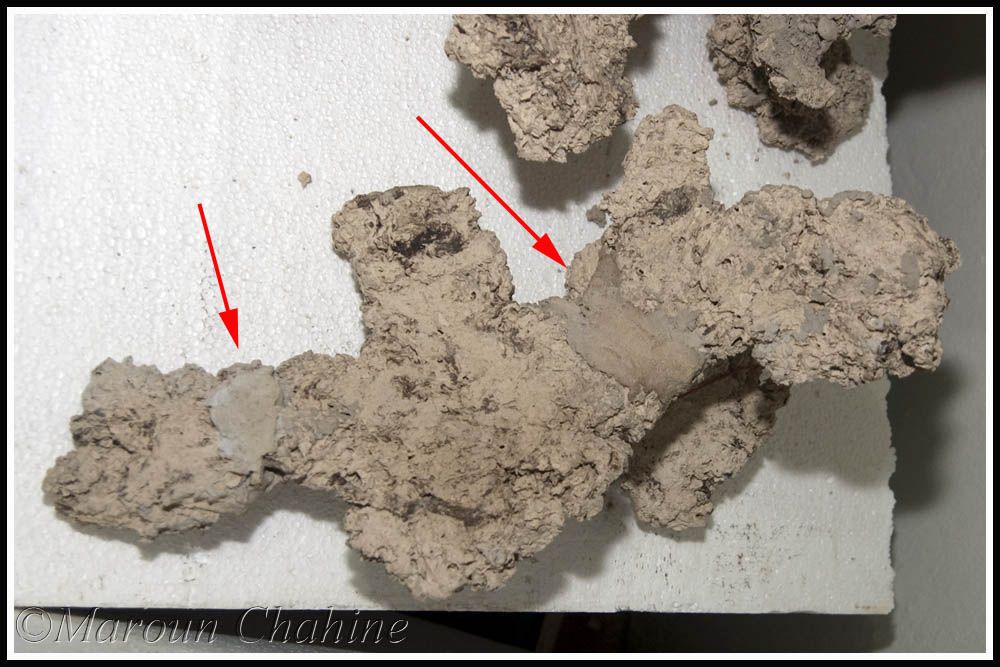 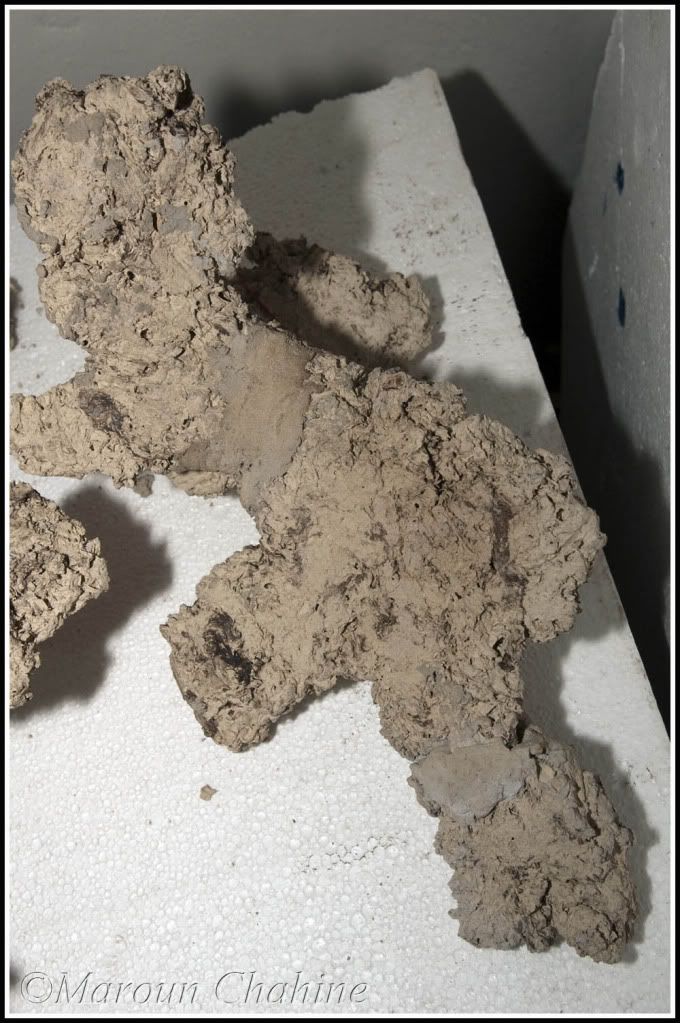 The largest structure had a broken edge and a broken foot. had to support the floating edge for around 7-8 min before I was sure the cement was hard enough to hold it. the foot was an easy fix. 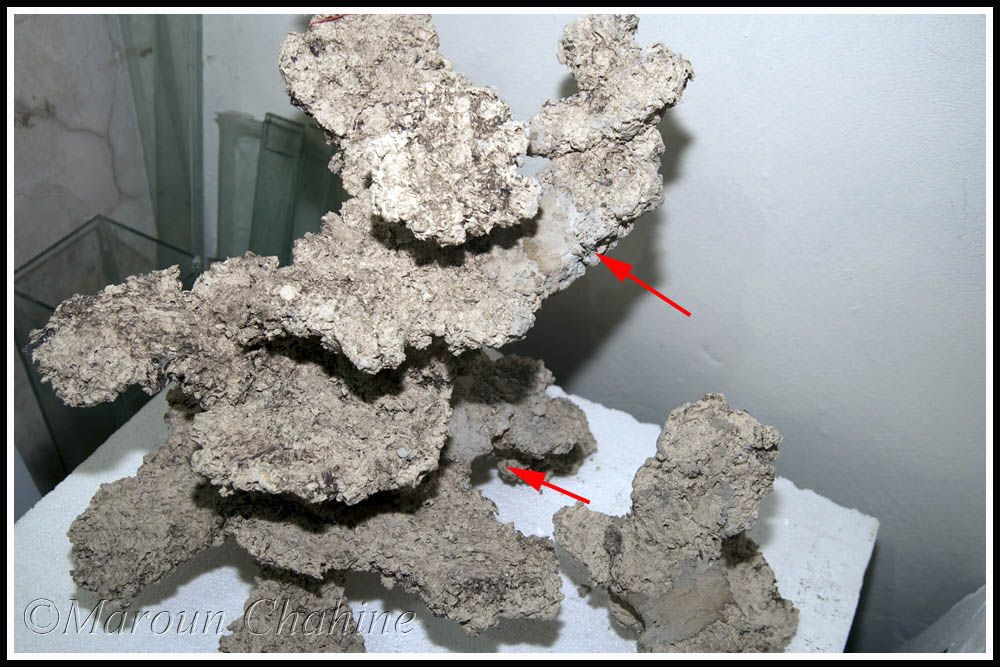 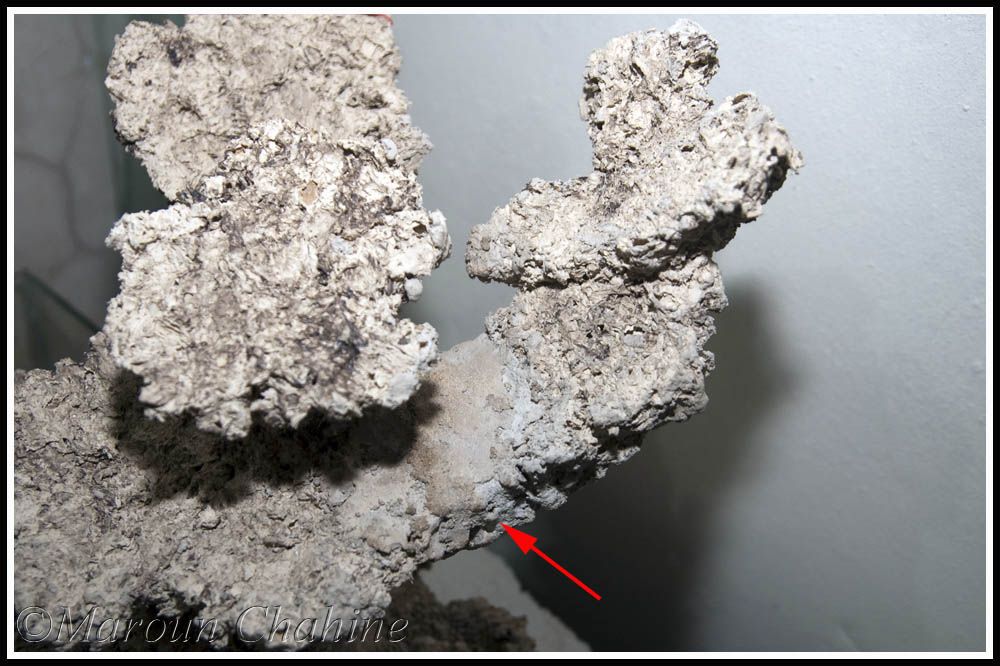 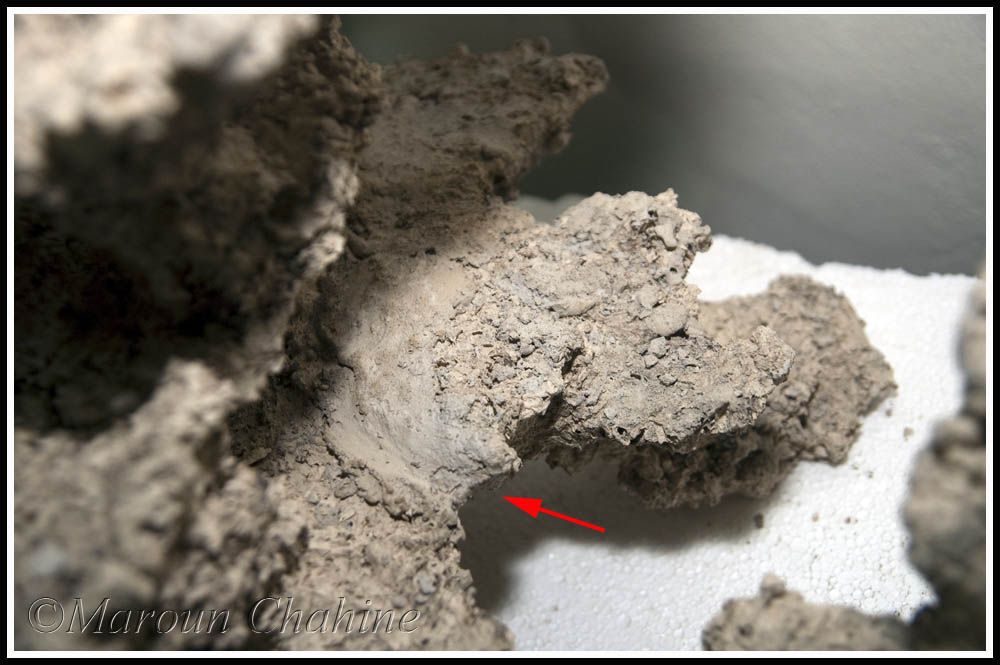 and another broken foot of a smaller rock 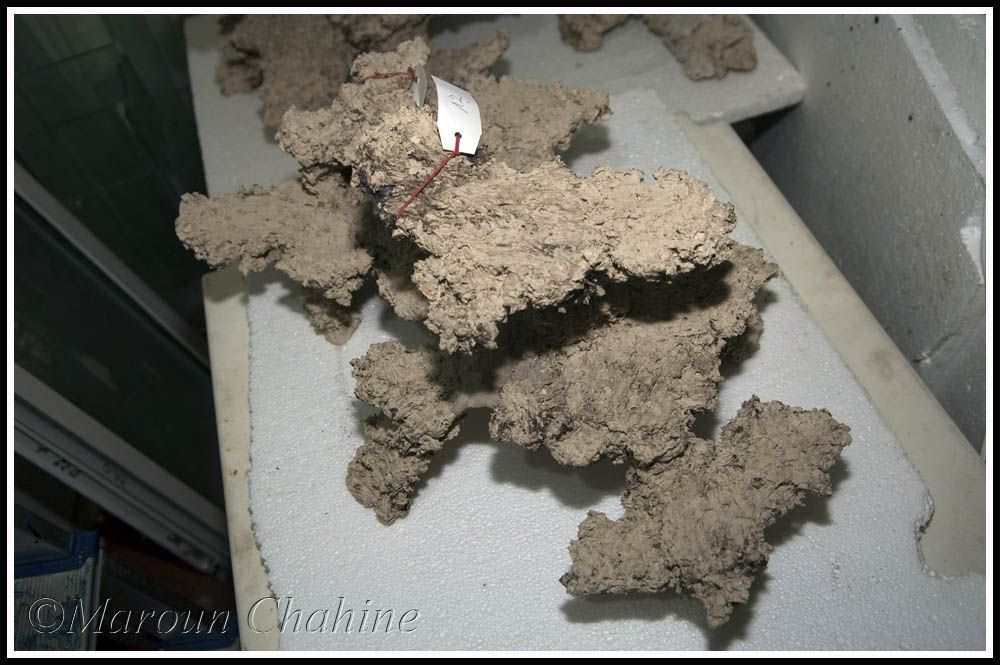 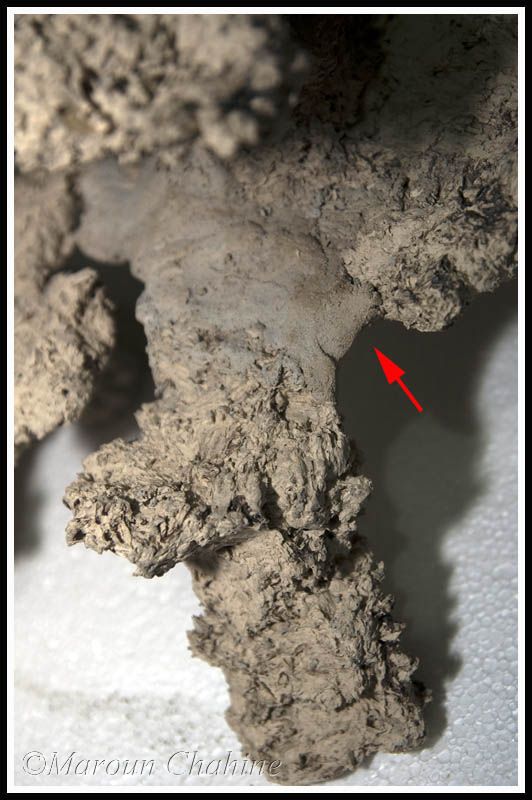 Must admit that it gave me a real feel of how hard those structures were to construct... All fixed 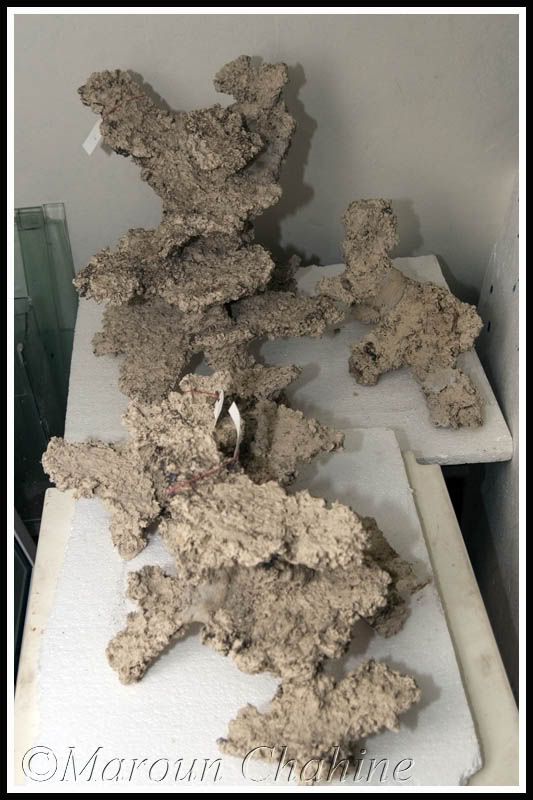 And finally the small ones went for some curing in my to be fish Q tank. Still looking for a container that can fit the large one to cure it in and then can't wait to see how they'll look in my tank. 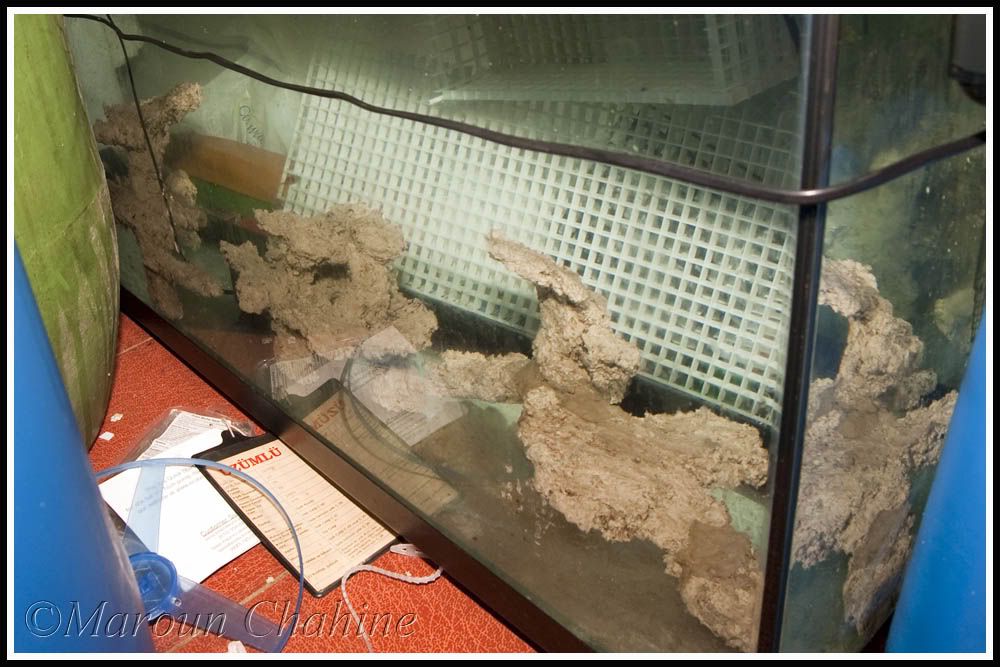
__________________
390 G mixed reef build Current Tank Info: 390G mixed reef |
|
|
|
|
09/25/2011, 11:22 PM
|
#112 |
|
Registered Member
Join Date: Aug 2007
Posts: 203
|
Can you please elaborate on how the water change system works?
Glad to see you fixed the ceramics. I'm sure these would look amazing and give your tank a very unique look. what is the epoxy you used to fix them with and can you use it for LR? Would be nice to have something that hardens in 5 min... Nice to have good support from the makers. |
|
|
|
|
09/26/2011, 07:41 AM
|
#113 | |
|
Registered Member
Join Date: Apr 2001
Location: Lebanon
Posts: 6,111
|
Quote:
Couple more things: I still have to verify that detritus should accumulate in the water change tank having the least water turbulence so then agitating it with a pump before drainign the water is good enough. once every few water changes I would stirr up the sand and blow water on the rocks to stirr detritus out and then drain water directly from the tank to avoid having detritus collection there... If this proves to be too much wasted space or causes detritus collection in the tank due to insufficient syphoning I can always stir the sand and blow on the rocks hoping the strong flow will lead the detritus out till it settles in the water change tank. worst case scenario i just use it as an additional fuge, introduction tank or an inline frag tank. I remember that the box of the ceramics cement they sent mentioned it works fine on rocks and ceramics. Still not sure if you can use it underwater as it's just like cement. Not sure of the name or type of cement but if I remember correctly it was called Ceramics Kleb in german.I can verify that when I fly back home. on Thursday. Yes very satisfied with the friendly customer service I got.
__________________
390 G mixed reef build Current Tank Info: 390G mixed reef |
|
|
|
|
|
09/26/2011, 10:07 PM
|
#114 |
|
Registered Member
Join Date: Aug 2007
Posts: 203
|
Thanks for the info.
Any plans/ways to automate it? Why would you need to cure the ceramics? Many use ceramic tiles to place their frags without any curing I assume? do you have to filter the water you use as well? |
|
|
|
|
09/27/2011, 07:51 AM
|
#115 |
|
Registered Member
Join Date: Apr 2001
Location: Lebanon
Posts: 6,111
|
I could automate the change but with my constant traveling I fear there are many aspects that could go wrong lwith teh controlers like the pump draining the WC tank getting stuck and draining more than I want, or the supplying pump dumping water after the drain pump fails to empty water in advance thus causing a flood. Or some mistake and having 40G of fresh water dumped in teh tank if for some reason salt is not added yet... I'd rather have my tank stay for 2-3 weeks without a water change than the risk involved.
As for the ceramics they're not the typical heavy ceramic like tiles are, I would say they're more porous and light weight than LR. They are baked in an oven in the production phase but still manufacturers recommend you cure it for few weeks with some GFO as it seems to leach phosphates initially. fI do run a filter on the water its curing in as it is old tank water which I'm using so basically I'm curing and seeding it at the same time.
__________________
390 G mixed reef build Current Tank Info: 390G mixed reef |
|
|
|
|
09/27/2011, 08:23 AM
|
#116 |
|
Moved On
Join Date: Sep 2011
Location: Midwest America
Posts: 57
|
very impressed w/ the build... can you explain the sump... what all the sections are for... maybe your already did...but i am in the process of doing my sump and need to decide on a few design ideas... thanks
|
|
|
|
|
09/27/2011, 08:31 AM
|
#117 |
|
Registered Member
Join Date: Apr 2001
Location: Lebanon
Posts: 6,111
|
Thanks Marc,
Heres the plan for the Sump, 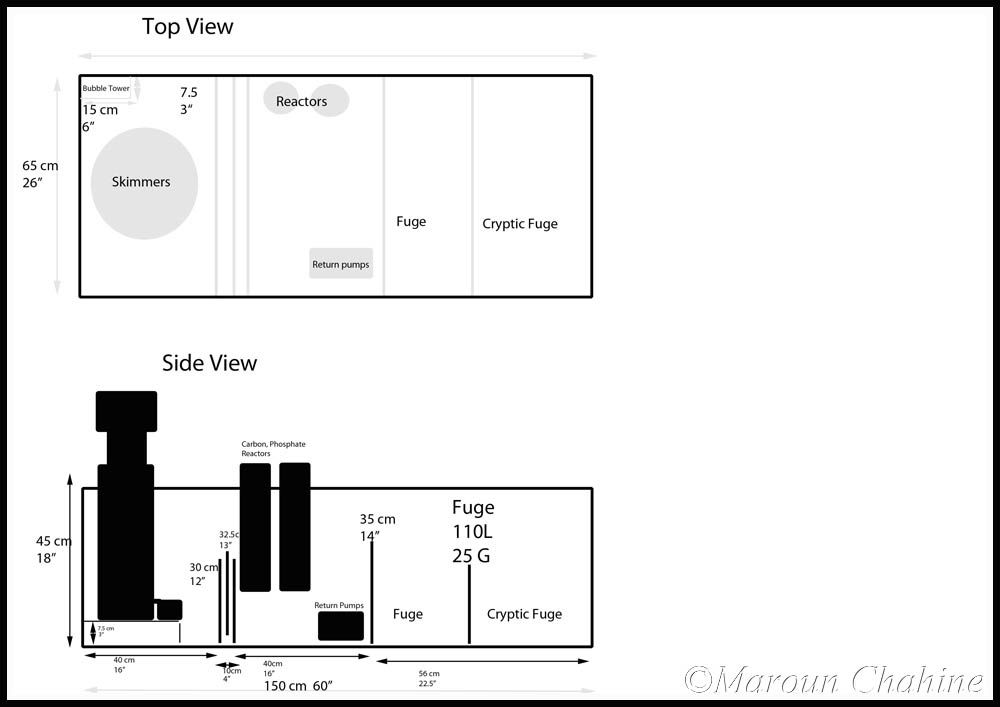 in short water drains from the left in the skimmers partition then to return area, some of the water will drain to the left in 2 consecutive fuges (one planned to be cryptic) and then back to the return area. if the cryptic fuge ends up being a detritus trap migh just switch back to a regular fuge...
__________________
390 G mixed reef build Current Tank Info: 390G mixed reef |
|
|
|
|
09/27/2011, 08:37 AM
|
#118 |
|
Registered Member
Join Date: Apr 2001
Location: Lebanon
Posts: 6,111
|
Couple of weeks ago it was time to break down the 150G in my parents place and move the fish and some of the rocks to my sump...
Was shocked to see the amount of detritus my sand and rocks trapped despite 50x tank volume flow. Another shock was to not find a single bristleworm or critter in my DSB. Could this be the cause of my nitrates struggle lately? tank was only moved (sand cleaned 1.5 years ago) Found 1 10 inches long Eunicid (sp?) worm in a big rock which could explain the multiple clams deaths.Decided to wash the sand with freshwater for a clean start in the 390 and placed the LR in a barrel with circulation after washing the rocks with aged tank water. Was a sad day to take this tank down althouh It only ran since 2008 when I upgraded from my 8 years old 80 G and was moved again in 2009 so never had the chance to really mature. The Start in 2008:  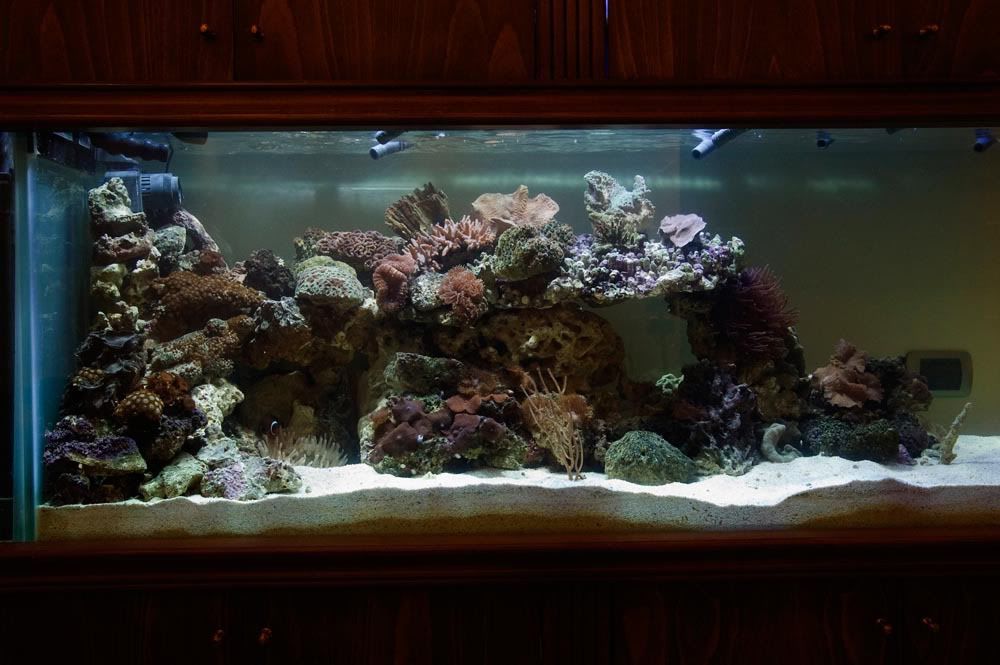 at its best around Jan 2011:  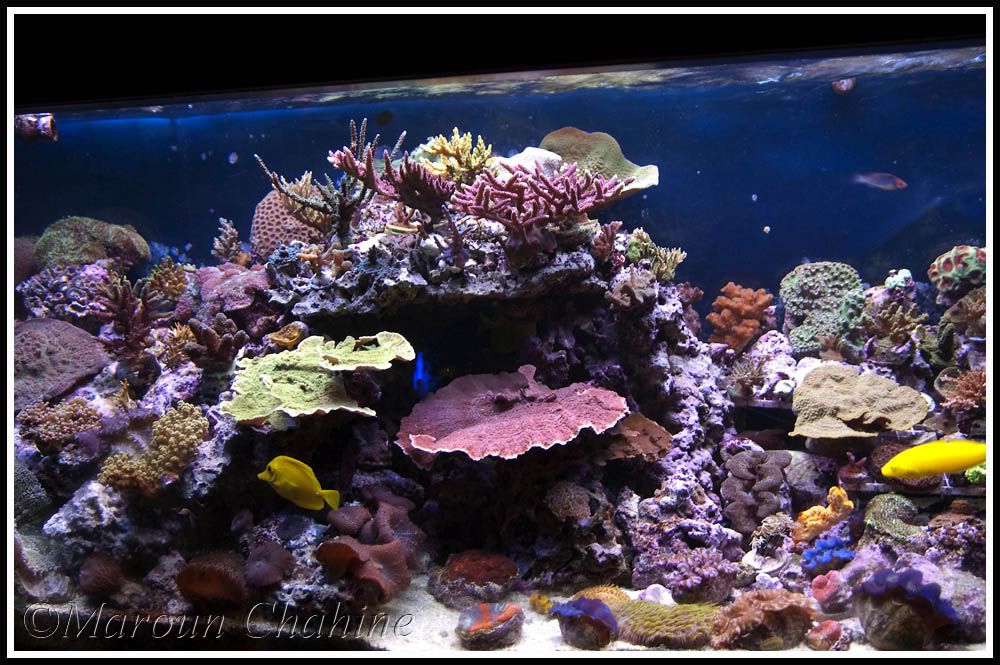 As of one week ago: 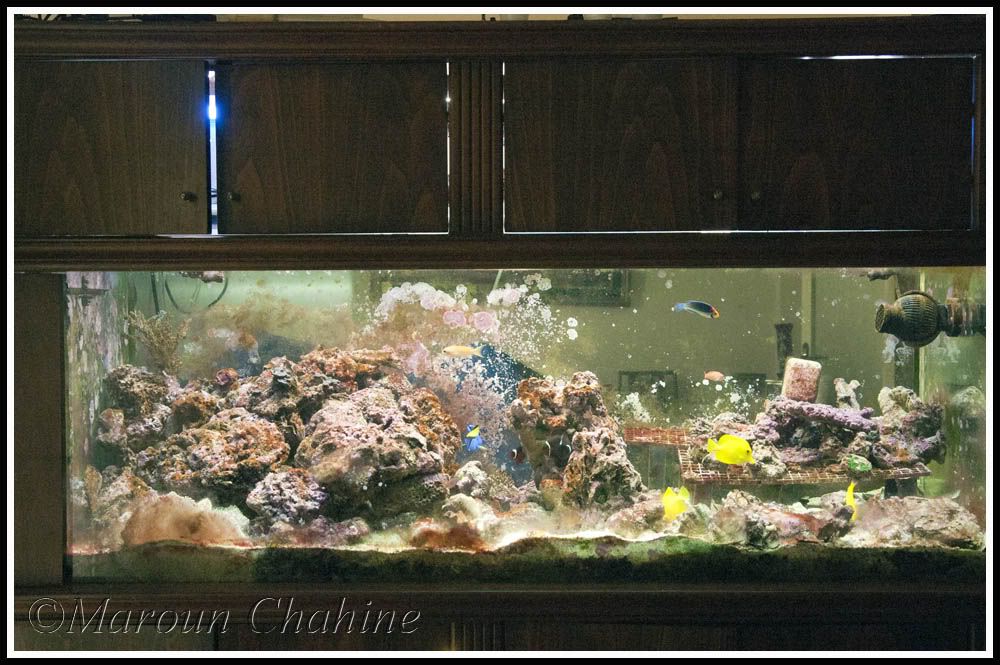
__________________
390 G mixed reef build Current Tank Info: 390G mixed reef |
|
|
|
|
09/27/2011, 04:17 PM
|
#119 |
|
Registered Member
Join Date: Apr 2001
Location: Lebanon
Posts: 6,111
|
Filled up my sump and the Waterchange tank connected to it and placed some LR and a Turbofloater 100multi SL (should be replacing it with my hurricone Cat 1 after it's cleaned) and a Carbon reactor and some pumps for flow.
only 1/3 was new water and used the rest from my frag tank and a friends tank water for more bacteria diversity... Watching the slow fill gave me nightmares of the the full tank fill to come 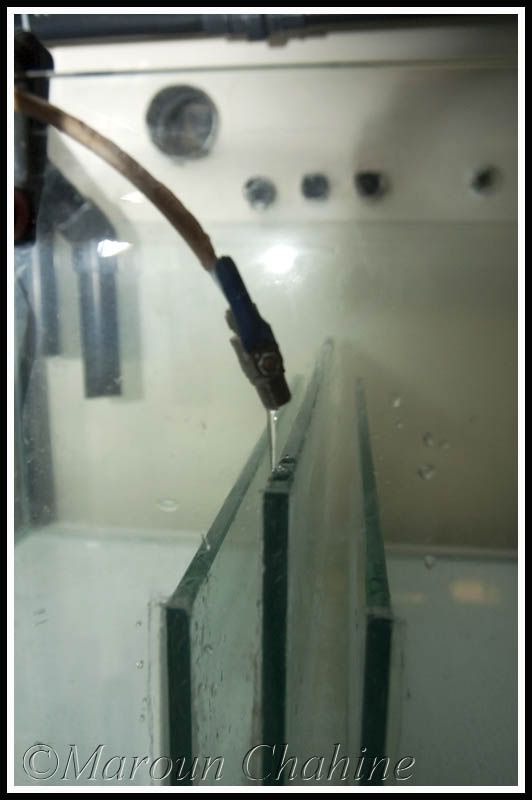 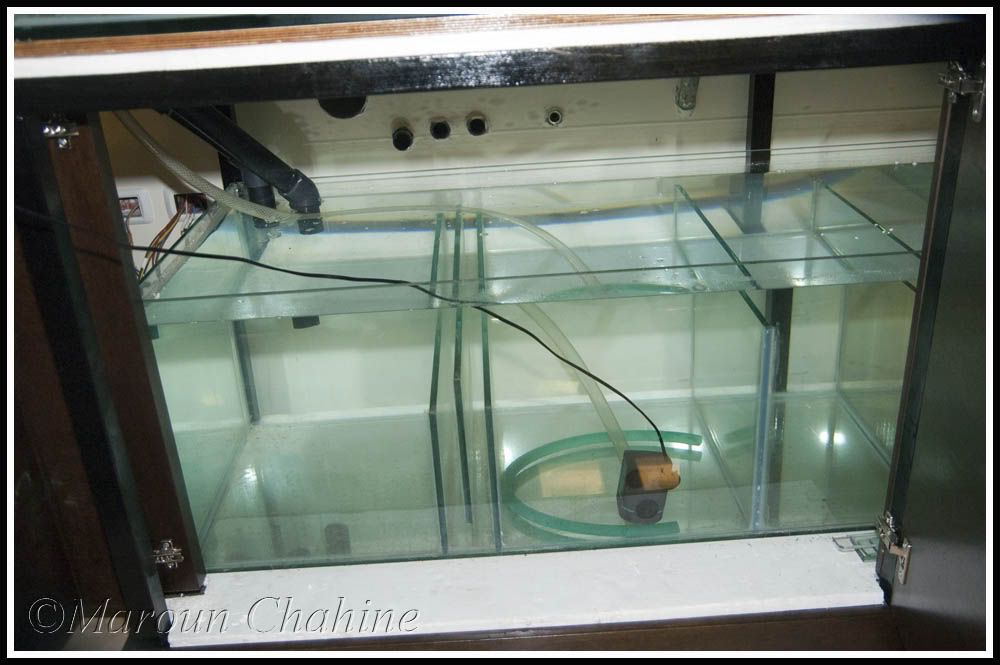 And all the fish went in. So far they look fine, had some aggression between the 2 yellow tangs so separated them in two partitions. Should replace them together once I add some more LR. 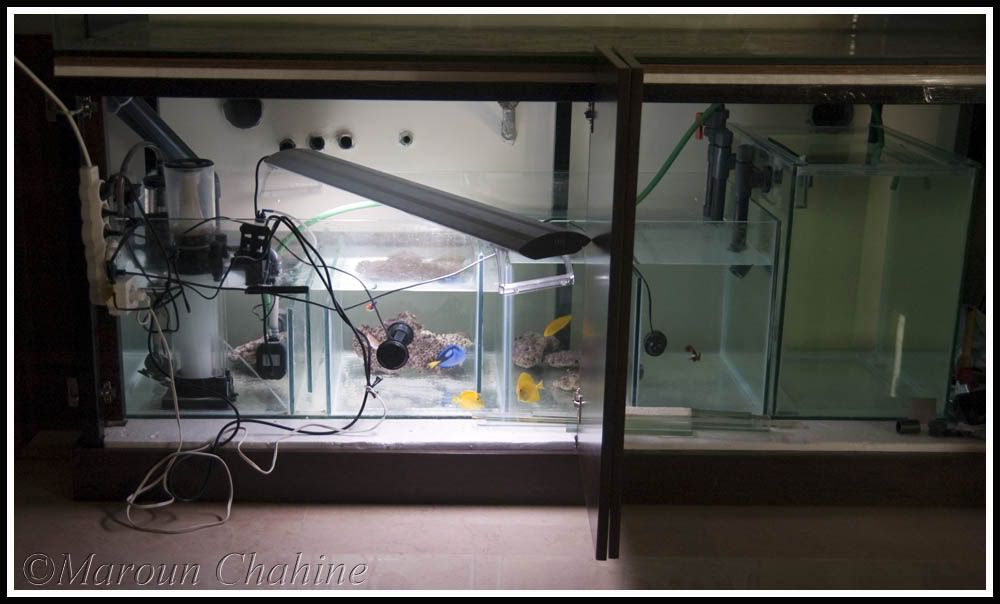 And a better picture of the plumbing with the Waterchange tank now connected to the sump. 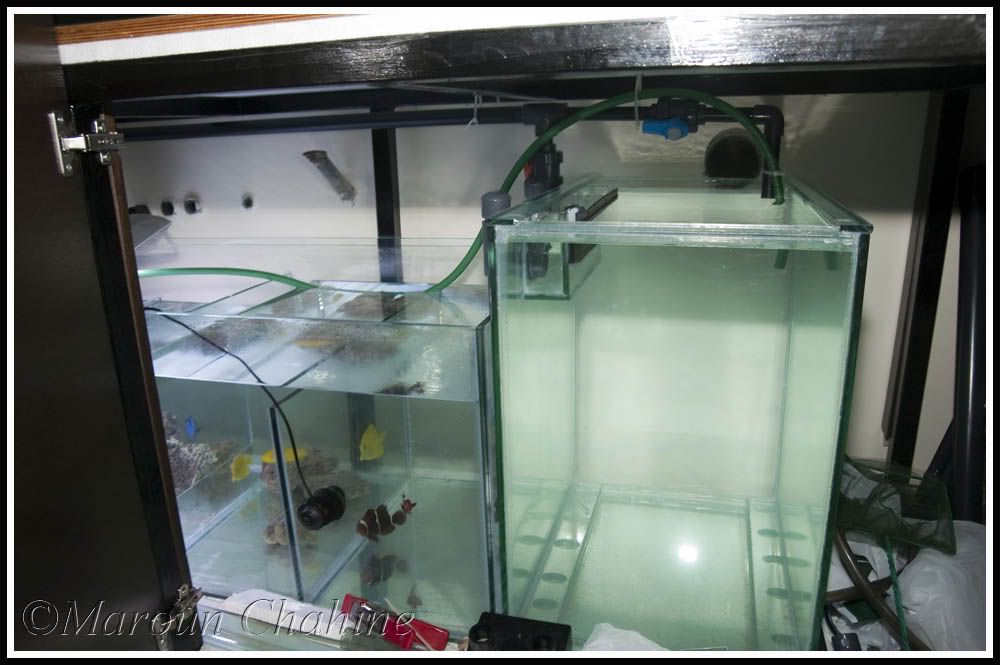
__________________
390 G mixed reef build Current Tank Info: 390G mixed reef |
|
|
|
|
09/27/2011, 04:38 PM
|
#120 |
|
Registered Member
Join Date: May 2011
Posts: 1,460
|
Wow excellent planning and superb execution!!
Very innovative idea on the water change system. "The no more hoses and buckets" water change plan is just great Do keep updating!! Waitin to see your final scape, which will be cool I'm sure Happy Reefing!!
__________________
If ya gonna do it...then do it right !! BUILDING A DREAM....SPS Dominated 105cm x 51cm x 54cm (Low Iron Belgian Glass)....Please visit my homepage for build thread. LED Lighting (CREE Main Unit 60w x2, T5 and T8 LED tubes), LED RGB-P Light bar, DIY Sump, Bubble King 180 Gen.2 Skimmer, TECO TR15 Chiller, Sicce Multi Return pump, X-Wave Rotary Device, Vortech MP40 ES, Hydor Korallia Wavemakers(2800 x2, 4000 x2), RR Wavemaker, 2x Nano Wavemakers, SIAM Ocean Media Reactor, Kent Phosphate Reactor, 6 Stage RO/DI unit, Ginko Sea Auto-top System. Current Tank Info: DREAM 1.0 is up and running..,DREAM 2.0 build is underway (Read on from Page 25) |
|
|
|
|
09/27/2011, 06:04 PM
|
#121 |
|
Registered Member
Join Date: Jan 2011
Location: st joseph Missouri
Posts: 2,341
|
your going to love the auto water change
|
|
|
|
|
09/27/2011, 06:49 PM
|
#122 |
|
GET OFF MY LAWN
Join Date: Jul 2007
Location: Globally
Posts: 5,863
|
Fantastic build. very artistic! Will be watching!!!
__________________
No great genius has ever existed without some touch of madness ~ Aristotle If we knew what it was we were doing, it would not be called research, would it? ~ Albert Einstein I'm just as bent as ever. Hellishly so ~ Captain Jack Sparrow Current Tank Info: Systems and goodies by Lee-Mar / Coralvue / Neptune Systems / Jager / Spectrapure / Cree / Meanwell + more! Last edited by Garage1217; 09/27/2011 at 06:55 PM. |
|
|
|
|
09/27/2011, 11:22 PM
|
#123 | |
|
Registered Member
Join Date: Apr 2001
Location: Lebanon
Posts: 6,111
|
Quote:
The water change system should make my life much easier... Still got a few things to finsih with the wood cabinets and installing bolts in the ceiling for the light rack... which require standing in the tank so scaping will have to wait.
__________________
390 G mixed reef build Current Tank Info: 390G mixed reef |
|
|
|
|
|
09/27/2011, 11:24 PM
|
#124 | |
|
Registered Member
Join Date: Apr 2001
Location: Lebanon
Posts: 6,111
|
Quote:
 as I'm still hesitating to go with an automated water change system as I just wouldn't trust it while I'm traveling... as I'm still hesitating to go with an automated water change system as I just wouldn't trust it while I'm traveling...
__________________
390 G mixed reef build Current Tank Info: 390G mixed reef |
|
|
|
|
|
09/27/2011, 11:26 PM
|
#125 | |
|
Registered Member
Join Date: Apr 2001
Location: Lebanon
Posts: 6,111
|
Quote:
__________________
390 G mixed reef build Current Tank Info: 390G mixed reef |
|
|
|
|
 |
| Thread Tools | |
|
|
 Similar Threads
|
||||
| Thread | Thread Starter | Forum | Replies | Last Post |
| Fishdisease's 180 Gallon In-Wall Build | Fishdisease | Reef Discussion | 28 | 12/18/2017 10:02 PM |
| Mo's first 95g DIY build thread - Egypt ! | Mounda | Reef Discussion | 29 | 03/18/2014 01:37 AM |
| Pheonix 185 Build Thread | orthokardia | Nashville Area Reefers | 79 | 04/08/2011 03:53 PM |
| 20H build thread. | jtgordon20 | Nano Reefs | 0 | 07/23/2010 03:57 PM |
| My 390 build thread...finally started!!! | mflamb | Tampa Bay Reef Club | 39 | 01/01/2007 04:21 PM |


