
|
|
 11/04/2011, 05:10 PM
|
#126 |
|
Reefing is my middle name
Join Date: Mar 2009
Location: Clearwater, FL
Posts: 5,796
|
I buffed the first side of the tank. I had to start with 600 grit and worked all the way up to 1200 grit. Now I have to buff it until it becomes clear.
Before 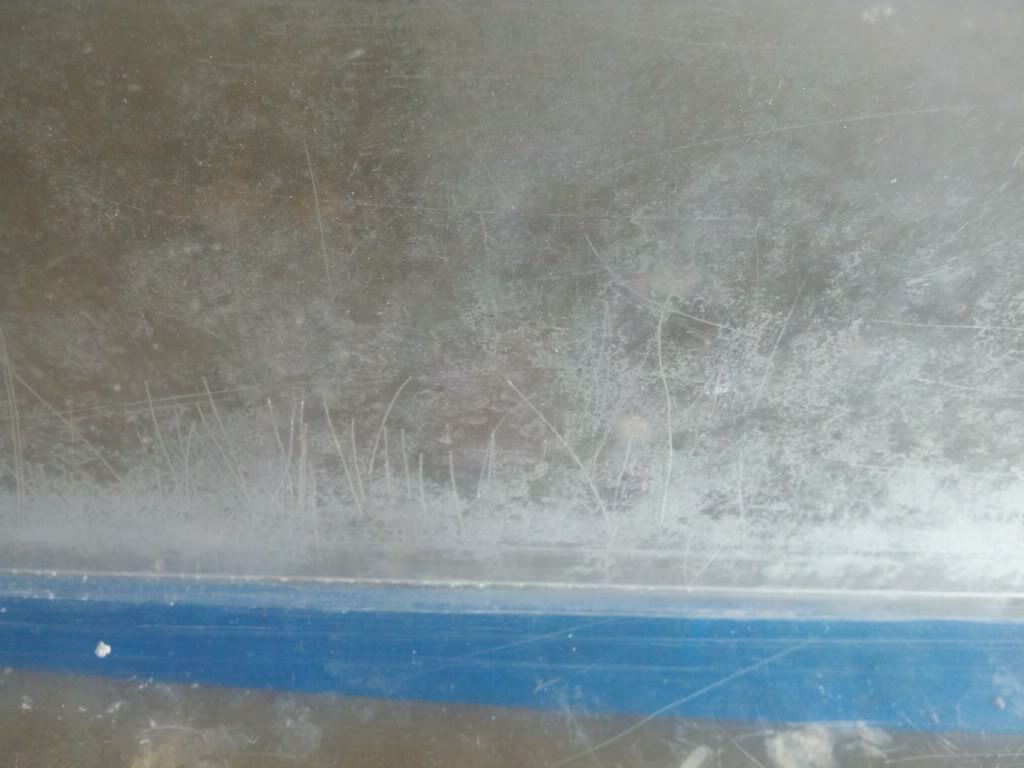 After 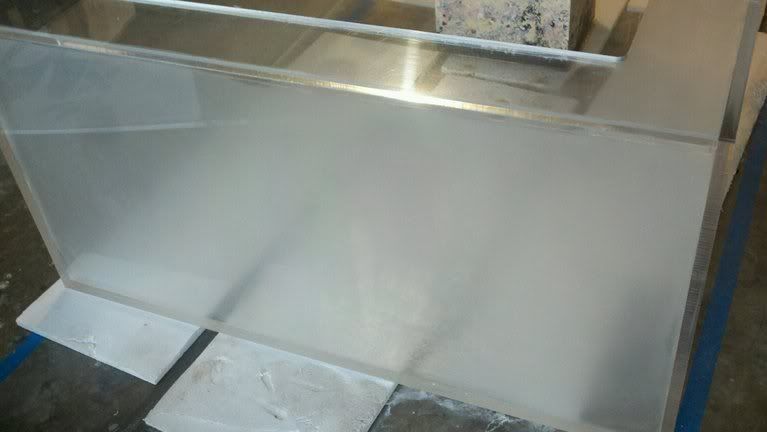 Three more sides to go. |

|

|
|
11/04/2011, 05:16 PM
|
#127 | |
|
Reefing is my middle name
Join Date: Mar 2009
Location: Clearwater, FL
Posts: 5,796
|
Quote:
|
|
|
|
|
|
11/08/2011, 07:19 PM
|
#128 |
|
Reefing is my middle name
Join Date: Mar 2009
Location: Clearwater, FL
Posts: 5,796
|
The first eight foot side is done. A lot of sand paper was used on that side.
 It its what it is and how it should be. |
|
|
|
|
11/10/2011, 05:57 PM
|
#129 |
|
Reefing is my middle name
Join Date: Mar 2009
Location: Clearwater, FL
Posts: 5,796
|
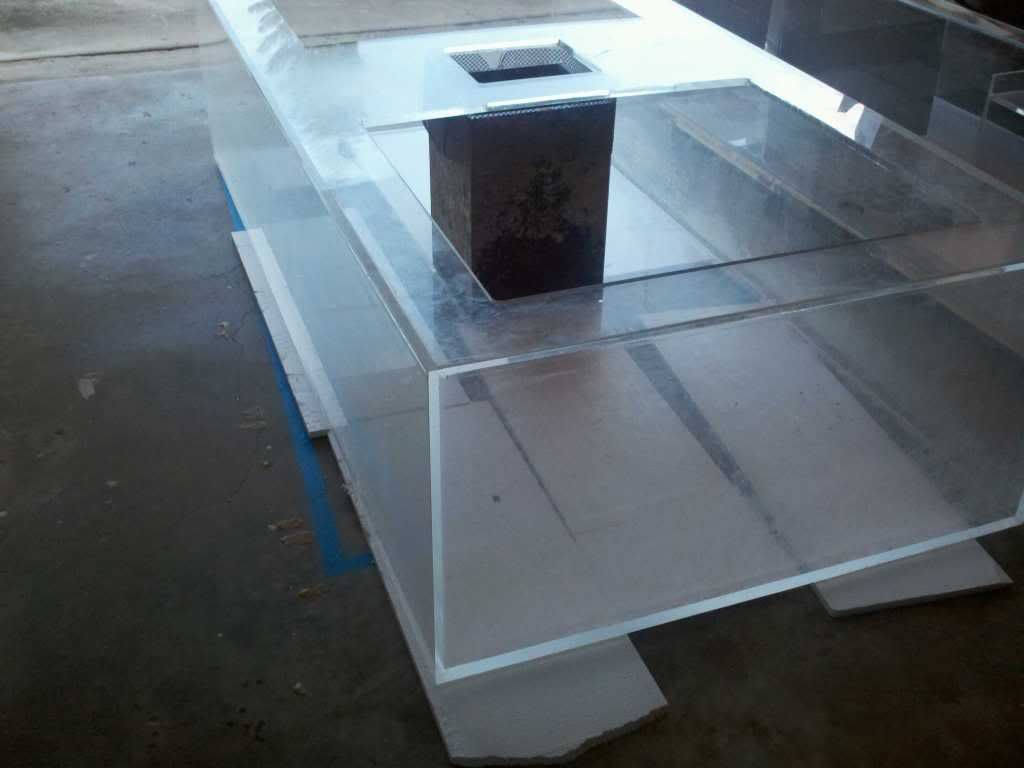
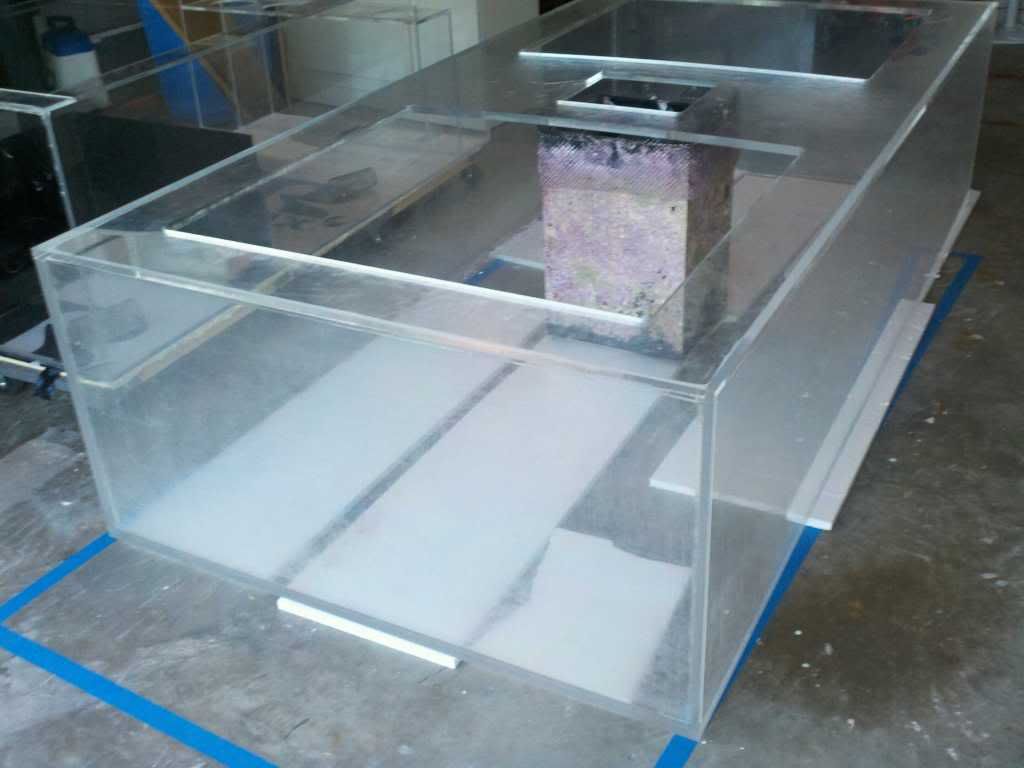
Update
I finally got the inside of the tank sanded and finished. Taking the rest of the weekend of to party tribute to my fellow and fallen comrades. Will buff the inside out next week.
It its what it is and how it should be. |
|
|
|
|
11/14/2011, 07:44 PM
|
#130 |
|
Reefing is my middle name
Join Date: Mar 2009
Location: Clearwater, FL
Posts: 5,796
|
Before:
  After:     What am I doing wrong? |
|
|
|
|
11/14/2011, 07:45 PM
|
#131 |
|
Reefing is my middle name
Join Date: Mar 2009
Location: Clearwater, FL
Posts: 5,796
|
I sanded and buffed the tank and pretty much removed all the scratches. Then I polished.
Before: After: What am I doing wrong? |
|
|
|
|
11/15/2011, 05:03 PM
|
#132 |
|
Reefing is my middle name
Join Date: Mar 2009
Location: Clearwater, FL
Posts: 5,796
|
LED DIY Heatsink
I'm going to take a break from the tank. The bending and sanding has caught up with me. So to take my mind off I decided to get the heatsinks made for my LEDs. The heatsink is 28"L x 10"W and will hold 45 LEDs. I will give you the quick version.
This:  Plus this:  Equals this:    One down, five more to go. |
|
|
|
|
11/16/2011, 10:42 AM
|
#133 |
|
Reefing is my middle name
Join Date: Mar 2009
Location: Clearwater, FL
Posts: 5,796
|
All the heat sinks are done. Just have to get the LEDs, wire, solder, and flux.
 6 of these heatsinks from Heatsink USA would have cost me $513.78. My total cost for the project, $187.00. It its what it is and how it should be. Last edited by Newbie Aquarist; 11/16/2011 at 10:50 AM. |
|
|
|
|
11/16/2011, 03:11 PM
|
#134 | |
|
Registered Member
Join Date: Oct 2010
Location: Orlando, Florida
Posts: 225
|
where did you get your heat sinks from
Quote:
|
|
|
|
|
|
11/16/2011, 06:35 PM
|
#135 |
|
Registered Member.
Join Date: Jun 2011
Posts: 26
|
Great build I love the center overflow. It's good to see someone using some elbow grease to clean that tank up instead of buying new,we all can't go out and spend that kind of money. Good job can't wait to see it finished.
|
|
|
|
|
11/16/2011, 09:09 PM
|
#136 | |
|
Reefing is my middle name
Join Date: Mar 2009
Location: Clearwater, FL
Posts: 5,796
|
Quote:
It its what it is and how it should be. |
|
|
|
|
|
11/17/2011, 02:31 PM
|
#137 |
|
Registered Member
Join Date: Nov 2010
Location: Fort Wayne
Posts: 104
|
When I sanded and polished mine I realized it was hard to tell when the scratches were out from the previous paper. If you jump from say 600 too 1000 it is difficult to sand out the 600 grit scratches. It's hard to tell in the pics but the hazy look leads me to believe you may have done what I did the first time. Just my 2 cents. Good to see you are still working at it.
|
|
|
|
|
11/17/2011, 02:41 PM
|
#138 | |
|
Reefing is my middle name
Join Date: Mar 2009
Location: Clearwater, FL
Posts: 5,796
|
Quote:
It its what it is and how it should be. |
|
|
|
|
|
11/18/2011, 08:03 AM
|
#139 | |
|
Reefing is my middle name
Join Date: Mar 2009
Location: Clearwater, FL
Posts: 5,796
|
Quote:
|
|
|
|
|
|
11/18/2011, 08:05 AM
|
#140 |
|
Reefing is my middle name
Join Date: Mar 2009
Location: Clearwater, FL
Posts: 5,796
|
Protein Skimmers
I am looking at these skimmers for my setup.
http://www.aquacave.com/skimz-sm-251...mmer-3324.html http://www.reefspecialty.com/virtuem...n-skimmer.html http://www.aquacave.com/skimz-sm-302...mmer-3329.html Unless you have other suggestions. |
|
|
|
|
11/18/2011, 11:57 AM
|
#141 |
|
Registered Member
Join Date: Jan 2010
Location: Oklahoma
Posts: 482
|
Here's my suggestion.
http://www.aquacave.com/turboflotor-...edic-1059.html Have you gotten the scratches out? I wet sand with 800-1000 by hand with a block, depending on the size of the scratch, the use a DA sander with foam pads using Novus 3. Works great! HTH.
__________________
Scott Current tank info: 34 gal Solana and a 400 gal FOWLR with 4-250 watt MH's, Aquamedic Turboflotor 5000, Korralin sulphur denitrator, 4-Koralia 7's. 120 gal LED sps reef in the works. Currently raising true Perc's. |
|
|
|
|
11/18/2011, 12:07 PM
|
#142 | |
|
Reefing is my middle name
Join Date: Mar 2009
Location: Clearwater, FL
Posts: 5,796
|
Quote:
It its what it is and how it should be. |
|
|
|
|
|
11/18/2011, 04:33 PM
|
#143 |
|
Reefing is my middle name
Join Date: Mar 2009
Location: Clearwater, FL
Posts: 5,796
|
Sanding is Done, Finished, Terminar, Finition, Kivitelben, Chríochnú, Wykończenie
After making the rookie mistake on my tank. I started all over from scratch and sanded the inside and outside of the tank. All the way from 600 - 800 grit with an orbital sander, and hand sanded it from 1000 - 2000 grit. Next move is to clean and move tank inside of house. I would take pics but its nothing but a light to medium haze inside and out. I will post pictures once the tank is inside the house.
|
|
|
|
|
11/18/2011, 04:47 PM
|
#144 |
|
Registered Member
Join Date: Sep 2011
Location: Michigan
Posts: 72
|
I don't see your homemade heatsinks being efficient enough to cool your led's.
|
|
|
|
|
11/18/2011, 04:54 PM
|
#145 |
|
Registered Member
Join Date: Jan 2010
Location: Oklahoma
Posts: 482
|
I have used the Novus 3 with my Porter Cable DA w/ foam pads for the past 2yrs to polish the wetsanding marks out with great success. The key to my success is the DA machine, you wouldn't get the same results doing it by hand. Also I wouldn't use a wool pad. I know Five 0 recommended it, and for someone with a lot of experience using one, they can be great, but for the novice, you can get into a lot of trouble quickly if you don't know what you're doing.
__________________
Scott Current tank info: 34 gal Solana and a 400 gal FOWLR with 4-250 watt MH's, Aquamedic Turboflotor 5000, Korralin sulphur denitrator, 4-Koralia 7's. 120 gal LED sps reef in the works. Currently raising true Perc's. |
|
|
|
|
11/18/2011, 05:55 PM
|
#146 |
|
Registered Member
Join Date: Dec 2009
Posts: 13
|
Looks awesome!
|
|
|
|
|
11/18/2011, 06:12 PM
|
#147 | |
|
Reefing is my middle name
Join Date: Mar 2009
Location: Clearwater, FL
Posts: 5,796
|
Quote:
|
|
|
|
|
|
11/18/2011, 06:14 PM
|
#148 | |
|
Reefing is my middle name
Join Date: Mar 2009
Location: Clearwater, FL
Posts: 5,796
|
Quote:
|
|
|
|
|
|
11/19/2011, 04:59 PM
|
#149 |
|
Registered Member
Join Date: Jan 2010
Location: Oklahoma
Posts: 482
|
Yes, use the novus 2, then 1. If your final sanding is with 2000 grit paper, you will have a flawless finish.
__________________
Scott Current tank info: 34 gal Solana and a 400 gal FOWLR with 4-250 watt MH's, Aquamedic Turboflotor 5000, Korralin sulphur denitrator, 4-Koralia 7's. 120 gal LED sps reef in the works. Currently raising true Perc's. |
|
|
|
|
11/20/2011, 01:35 PM
|
#150 | |
|
Reefing is my middle name
Join Date: Mar 2009
Location: Clearwater, FL
Posts: 5,796
|
Quote:
|
|
|
|
|
 |
| Thread Tools | |
|
|
 Similar Threads
|
||||
| Thread | Thread Starter | Forum | Replies | Last Post |
| New to forum!!! 150 gallon +40 Gallon sump Build!!!!! | curryb15 | Large Reef Tanks | 15 | 04/30/2012 09:01 AM |
| 56 Gallon Column Build, Movin on UP | jjmill1980 | Reef Discussion | 15 | 06/06/2011 12:16 PM |
| 90 Gal Build | BradMugs | Do It Yourself |
15 | 12/08/2010 07:49 PM |
| 600 gallon Tank build... | eisaiasjr | Large Reef Tanks | 6 | 07/31/2008 03:32 PM |
| Try this again-My 600 gallon tank build | blfuller123 | Large Reef Tanks | 99 | 01/23/2008 10:33 AM |


