
|
|
 10/05/2016, 07:52 AM
|
#51 |
|
Registered Member
Join Date: Jul 2002
Location: Wylie, TX
Posts: 473
|
I didn't have a lot of time over the weekend, but I did get the booster pump for the RODI mounted. I also installed a better electrical box in the 'outhouse' where the RODI and the pool cleaner lives. I didn't like the fact all I really had in there was the end of an extension cord that I plugged stuff in to, so I cut the end off and wired up two switches with outlets and mounted it all in a waterproof enclosure.
With the booster pump on, I'm getting about 90psi to the RO membrane and it's producing much more water now. The hope for this weekend is to get the water storage shed built. I'm thinking about building a 4'x8' shed that's about a foot taller than the storage containers. I'll put hinges on the roof and two doors on the front so I can open the whole thing up. This should give me enough room for all 4 storage containers and hopefully for the pool cleaner too. We'll see. |

|

|
|
10/16/2016, 02:33 PM
|
#52 |
|
Registered Member
Join Date: Jul 2002
Location: Wylie, TX
Posts: 473
|
Building the canopy
I decided not to use the TV stand to hang the canopy on the wall. After some testing, I didn't like how much weight was levered out over the top of the tank. The TV stand might have worked on a rectangle tank where I could use two of them, but one just wasn't enough for my taste.
I spent a few hours knocking together a basic canopy. I need to get another sheet of plywood and some hinges to finish it up, but here it is without the reflector on it. The canopy is mostly open to the top except for where the lights are, so I shouldn't have any issues with the canopy causing too much heat into the tank. The little double relay in the back of the canopy is for the arduino controlled lights. I'm using a standard network cable to send the signal, 5v and GND up to the relay, so the lights will have two cables going up to it... power and networking. 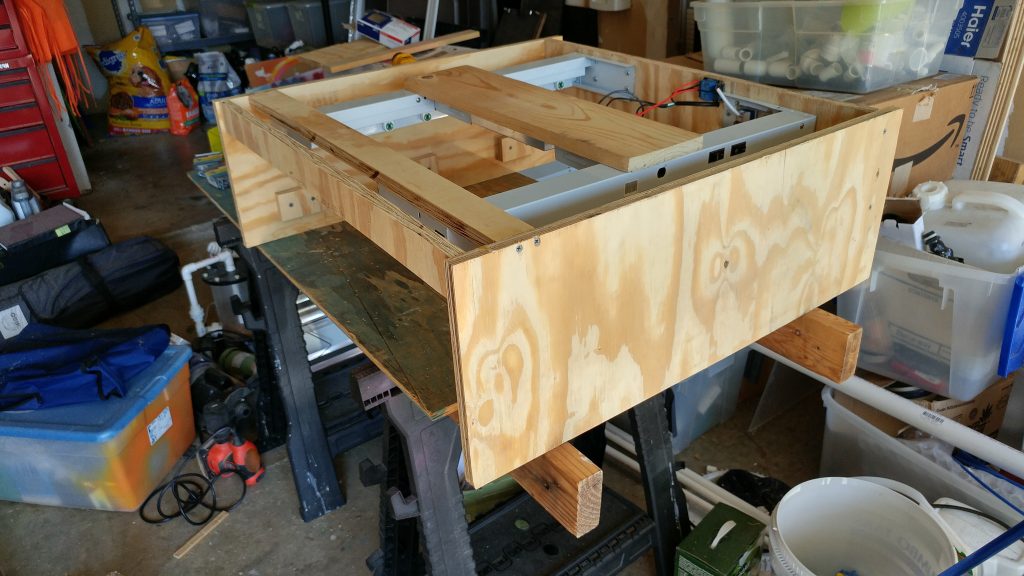
|
|
|
|
|
10/24/2016, 06:36 AM
|
#53 |
|
Registered Member
Join Date: Jul 2002
Location: Wylie, TX
Posts: 473
|
We have paint!
I managed to get all of the wooden bits painted over the weekend. I also got the stand primed and one can of paint on it. I only bought one can of color because I wasn't sure if it was what I wanted. I went back to get more and they were out. I didn't bother driving to other stores (not enough time). I'll have to finish painting it throughout this week. I still need to finish the canopy and paint the controller case. I also still need to build a frame for the water storage to go on. I'm hoping to finish painting the stand this week and get it all moved into the house this weekend. 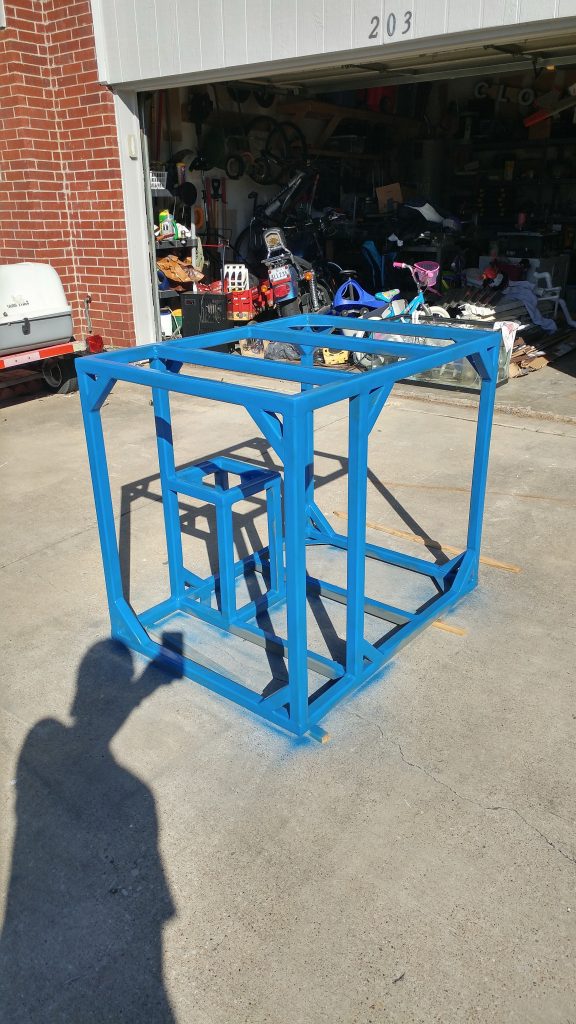
|
|
|
|
|
10/24/2016, 11:33 AM
|
#54 |
|
Registered Member
Join Date: Aug 2016
Location: Massapequa, NY
Posts: 225
|
Getting back in--- deep
[QUOTE=BigDave;24707091]
https://youtu.be/9TZUDr8cXig Good lord is that just the Jebao dct 12000? Sent from my iPhone using Tapatalk |
|
|
|
|
10/24/2016, 11:58 AM
|
#55 |
|
Registered Member
Join Date: Sep 2006
Location: Lawrenceville, Georgia
Posts: 94
|
Closer every day!
|
|
|
|
|
10/24/2016, 12:02 PM
|
#56 | |
|
Registered Member
Join Date: Jul 2002
Location: Wylie, TX
Posts: 473
|
[QUOTE=Bluefish9;24790555]
Quote:
That's a mdminc 80880. It's an older Sequence model that puts out 3600GPH at 0ft head and is in a closed loop for just the wave maker. The Jabao I have is only the 9000 and is the main return/equipment pump. |
|
|
|
|
|
10/24/2016, 12:04 PM
|
#57 |
|
Registered Member
Join Date: Aug 2016
Location: Massapequa, NY
Posts: 225
|
Getting back in--- deep
Oh ok. I bought the dct12000 return pump for my 150 build and thought after seeing this, that I was in for a typhoon of a surprise lol
Sent from my iPhone using Tapatalk |
|
|
|
|
10/24/2016, 12:05 PM
|
#58 |
|
Registered Member
Join Date: Jul 2002
Location: Wylie, TX
Posts: 473
|
The nice thing about the DCT pumps is you can easily slow them down. I'm running my 9000 at 80%.
|
|
|
|
|
10/24/2016, 12:13 PM
|
#59 | |
|
Registered Member
Join Date: Aug 2016
Location: Massapequa, NY
Posts: 225
|
Quote:
Yes exactly. Do you have any idea as to how many gph you're pushing at 80% with the 9000? Sent from my iPhone using Tapatalk |
|
|
|
|
|
10/24/2016, 12:18 PM
|
#60 |
|
Registered Member
Join Date: Jul 2002
Location: Wylie, TX
Posts: 473
|
I'm sorry, but I don't. I'm going through 3 90* and 1 45* elbow to get to the tank.
I'm also T-ing off of the return line with two ball valves to send water to all the equipment. I'm using a 1.5" beananimal overflow setup and my primary siphon is only slightly closed down to maintain the siphon... You might be able to calculate return flow based on that. |
|
|
|
|
10/25/2016, 11:32 AM
|
#61 |
|
Registered Member
Join Date: Jul 2002
Location: Wylie, TX
Posts: 473
|
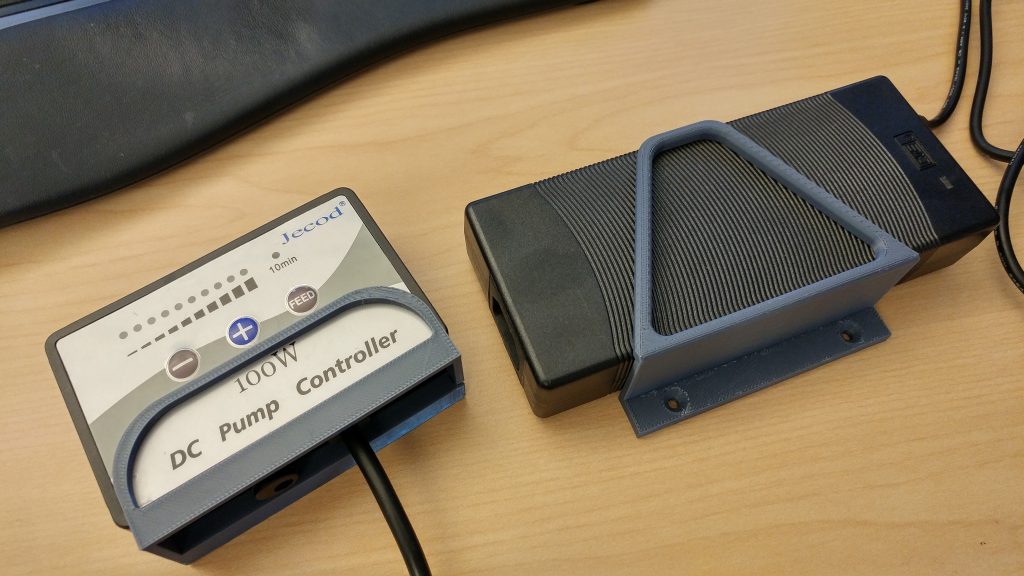
I created a few 3d prints. Both of these are just simple mounts for holding the power supply and the controller for the DC Pump. I'm still working on getting the designs onto Thingiverse.
|
|
|
|
|
10/25/2016, 01:16 PM
|
#62 |
|
Registered Member
Join Date: Aug 2016
Location: Massapequa, NY
Posts: 225
|
Getting back in--- deep
Great job!
That's exactly what I want for the jebao rw- controllers. They are going to be mounted up in the canopy and I could TOTALLY see the sticky pads failing and the controller falling right in the tank. Hey, if you'd ever consider it, I would def throw a few bucks your way to make me two. No hard feelings if not. Sent from my iPhone using Tapatalk |
|
|
|
|
10/25/2016, 01:51 PM
|
#63 |
|
Registered Member
Join Date: Sep 2006
Location: Lawrenceville, Georgia
Posts: 94
|
OK - I need a 3D printer now!
|
|
|
|
|
10/25/2016, 02:05 PM
|
#64 |
|
Registered Member
Join Date: Jul 2002
Location: Wylie, TX
Posts: 473
|
I'll get the designs up onto thingiverse, but I can't provide finished prints. I don't have direct access to a printer. I have to ask a coworker to print stuff for me, so I'd feel weird asking him to print something for someone else.
|
|
|
|
|
10/25/2016, 02:07 PM
|
#65 |
|
Registered Member
Join Date: Jul 2002
Location: Wylie, TX
Posts: 473
|
Oh. And the controller mount came out just a tad loose. you'll need to use a bit of mounting tape to hold the controller to the mount. It should be a lot sturdier than just the sticky tape alone as the mount will hold a majority of the weight. The sticky tape will just be used to keep it from sliding side to side inside the mount.
The powersupply mount should work pretty good. There's quite a bit of stress on one of the corners. My plan is to also use two cable ties screwed to the wood to help support a good chunk of the weight. |
|
|
|
|
10/25/2016, 02:22 PM
|
#66 |
|
Registered Member
Join Date: Sep 2006
Location: Lawrenceville, Georgia
Posts: 94
|
What type of 3D printer is being used? I really could make so many things for around the house, the aquarium, the bicycles...
|
|
|
|
|
10/25/2016, 02:59 PM
|
#67 |
|
Registered Member
Join Date: Jul 2002
Location: Wylie, TX
Posts: 473
|
One of the guys purchased an Up Mini 2 and brought it in to work, but I have a lot of coworkers with everything from full blown Makerbot's to home-built machines. I've been looking at getting the Geeetech Prusa i3 clone.
|
|
|
|
|
10/27/2016, 06:35 AM
|
#68 |
|
Registered Member
Join Date: Jul 2002
Location: Wylie, TX
Posts: 473
|
I had to wait 24 hours after opening my account before I could post it...
Here's the .stl files for the Jabao pump holders. http://www.thingiverse.com/thing:1850704 I'll get pictures uploaded once it's all installed. |
|
|
|
|
10/31/2016, 08:49 AM
|
#69 |
|
Registered Member
Join Date: Jul 2002
Location: Wylie, TX
Posts: 473
|
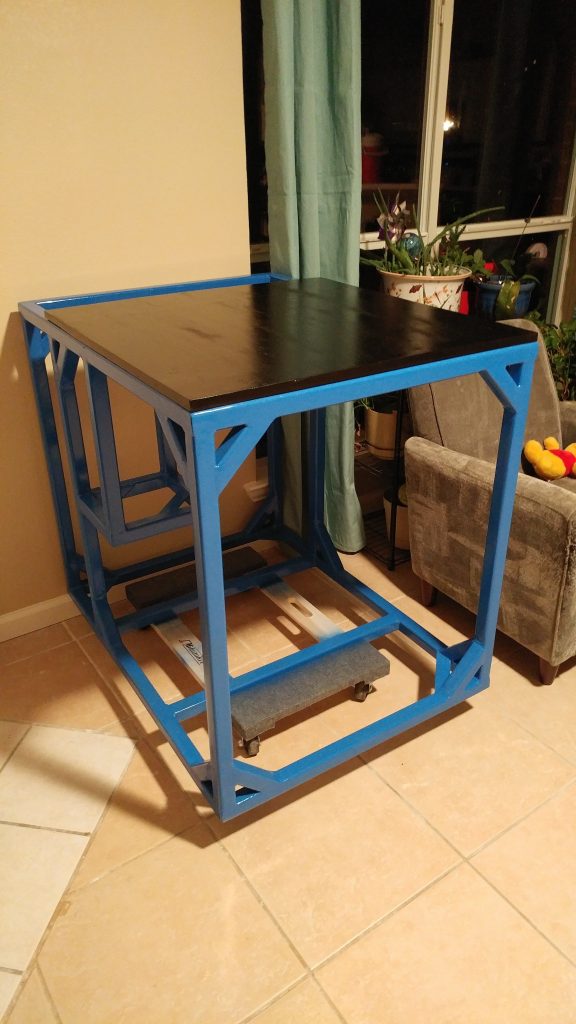
I had plans to get a bunch of the tank stuff done over the weekend, but ended up in bed with a stomach bug. I did manage to get the stand into the house. Here's to hoping this weekend is more productive. That chair is going to be a great viewing spot if you don't mind looking up into the lights. I'm going to put felt pads under the stand to keep from scratching the tile.
|
|
|
|
|
11/09/2016, 01:20 PM
|
#70 |
|
Registered Member
Join Date: Jul 2002
Location: Wylie, TX
Posts: 473
|
Finally some more progress.
Getting work done over the weekend fell through again as I ended up having to go out of town, but I got some good work done the last few evenings. All the PVC has been painted and I have two coats of paint on the back of the tank. It looks like I should only need one more. The stand is off of the rolling cart and I have most of the equipment re-installed into the bottom. I plan on lifting the tank onto the stand this weekend, then it's time to start filling it. I still have to finis the canopy, but should get that done this weekend too. |
|
|
|
|
11/09/2016, 02:37 PM
|
#71 |
|
Registered Member
Join Date: Sep 2006
Location: Lawrenceville, Georgia
Posts: 94
|
Glad to hear you're making progress. I've enjoyed following your build thread.
__________________
Zach's 120 Gallon Reef Resurgence: http://www.reefcentral.com/forums/showthread.php?t=2590557 Current Tank Info: 120 Gallon Display + 55 Gallon Sump/Fuge |
|
|
|
|
11/09/2016, 02:50 PM
|
#72 |
|
Moved On
Join Date: Mar 2011
Location: PSJ, FL
Posts: 2,235
|
Wow great build so far. Definitely following along.
|
|
|
|
|
11/09/2016, 03:14 PM
|
#73 | |
|
Registered Member
Join Date: Jul 2002
Location: Wylie, TX
Posts: 473
|
Quote:
Between the hail storm and everything else this year, it's been a heck of a ride! |
|
|
|
|
|
11/13/2016, 05:18 PM
|
#74 |
|
Registered Member
Join Date: Jul 2002
Location: Wylie, TX
Posts: 473
|
Got so close
I got so, so close to getting everything done this weekend that I was trying to do. My kids were surprisingly good on Saturday, so I was able to accomplish a lot. The wife watched the kids all day today, so I got a lot more done.
Unfortunately, I ran out of PVC glue and 2x6s, so I wasn't quite able to finish everything. I need to get 16 more feet of 2x6s so that I can make the spacers for the waste water storage, then I'm ready to start making water for the tank. I was able to get the tank back onto the stand inside the house and got all the electronics and plumbing re-ran. I'll start putting the sand in the bottom tomorrow. I also finished building the canopy and started painting it. I just need a few more coats to get it all finished. I'm not sure what all I'll get done this week. The wife is out of town all week, so it's just me and the kids. Worst case, I have to wait until next Saturday to finish the rest of the build. I need to flush the two clean water storage containers, but then I'm ready to start making my water for the tank. I was really wanting to get all the water storage finished this weekend and start making water tonight, but oh well. It also looks like the tank isn't quite level front to back. Left to right is perfect, but it's a bit low on the front. I'll get some shims when I pick up more 2x6s and get the tank shimmed. I plan on doing that before I start putting the sand into the tank. After putting the tank on the stand, the wife had quite the concerned look on her face. The aquarium looks significantly larger inside the house than what it did in the garage. It will definitely be the center of attention in the living room. 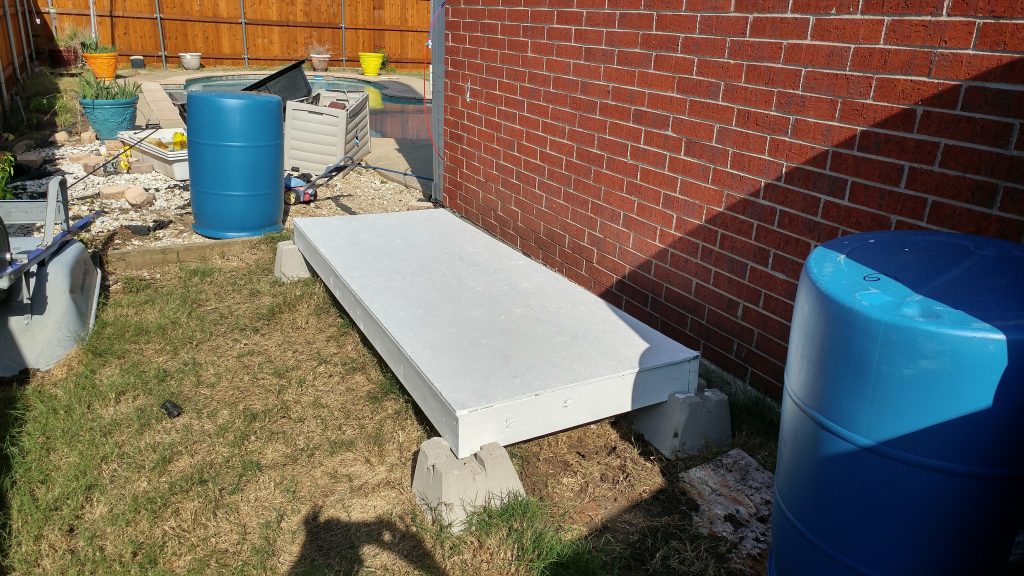 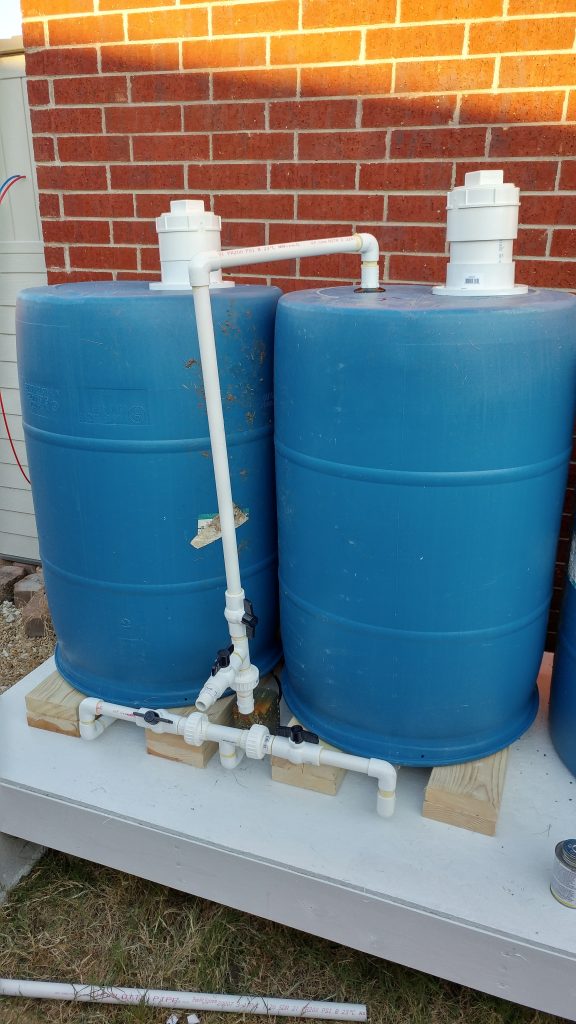 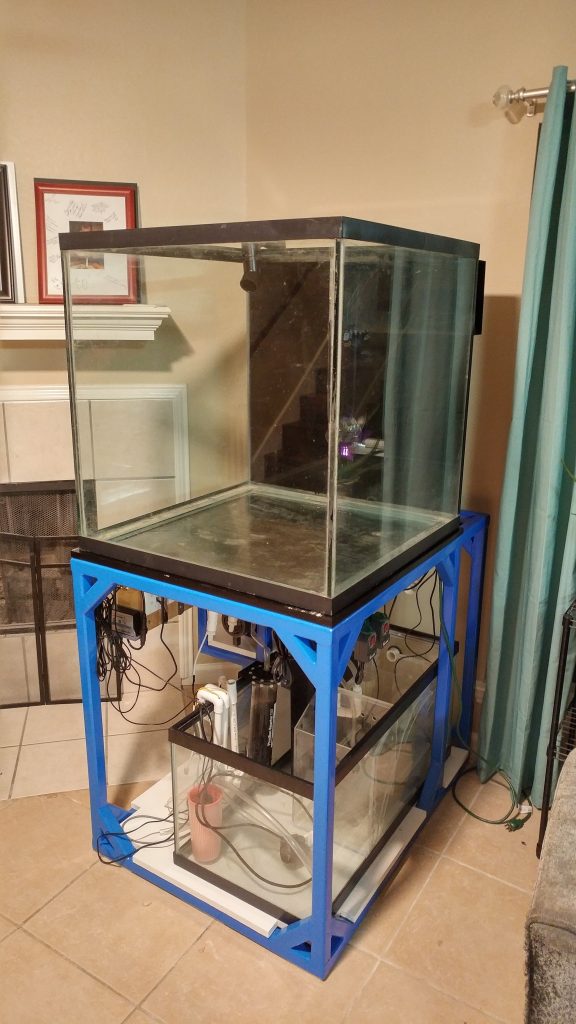
|
|
|
|
|
11/16/2016, 02:56 PM
|
#75 |
|
Registered Member
Join Date: Jul 2002
Location: Wylie, TX
Posts: 473
|
If anyone has been following my other threads, I started adding water to the storage containers and had leaks everywhere.
I put in a few forum posts about cleaning the tanks: http://www.reefcentral.com/forums/sh....php?t=2609336 I also put in a post about the leaky containers: http://www.reefcentral.com/forums/sh....php?t=2609427 After doing some more work today, it looks like the container issue might be resolved. We'll see if it holds through the night. I also had one last post about evaporation rate: http://www.reefcentral.com/forums/sh....php?t=2609576 I'm going to try to cram a 10 gallon tank into the stand and hope that that's all I need as fitting anything larger would mean no room for a CO2 tank for the future CA reactor. I think I'm still on target to get some water into the tank this weekend, but I'm sure something will come up. |
|
|
|
 |
|
|


