
|
|
 07/24/2017, 09:06 AM
|
#76 | |
|
Registered Member

Join Date: May 2004
Location: Staten Island, NY
Posts: 446
|
Quote:
Are the pipe holders (clamps) AI as well? Thanks in advance. |
|

|

|
|
07/24/2017, 09:09 AM
|
#77 |
|
Registered Member
Join Date: Mar 2011
Location: Golden, CO
Posts: 340
|
I got the aluminum strut channel from Grainger. The pipe clamps are stainless. I forget now, but I assume I couldn't find them in aluminum? Or, I didn't look hard enough.
|
|
|
|
|
07/24/2017, 01:37 PM
|
#78 | |
|
Registered Member
Join Date: May 2004
Location: Staten Island, NY
Posts: 446
|
Quote:
BTW. Keep us updated on the progress. Let the pictures speak for themselves. |
|
|
|
|
|
07/24/2017, 02:11 PM
|
#79 |
|
15& Over Club
 |
This is a very inspirational setup to say the least. I cannot wait to see this system mature. Thank you for sharing it.
__________________
Vince ______________________________ Current Tank Info: Frag tank at the moment, planning another |
|
|
|
|
07/24/2017, 03:43 PM
|
#80 |
|
Registered Member
Join Date: Mar 2011
Location: Golden, CO
Posts: 340
|
Xoomer- Grainger had to order it in for me like a lot of other things. Good luck sourcing it. It's a pretty handy material to work with.
mr9iron- Thanks for following. |
|
|
|
|
07/24/2017, 03:50 PM
|
#81 |
|
Registered Member
Join Date: Mar 2011
Location: Golden, CO
Posts: 340
|
I started off the weekend prepping for the Radions to arrive. I only have one right now to build and design from. The rest are on order. I built a wood jig to create some acrylic mounts off of. I trimmed all of the mounts to fit that jig.
I made 8 mounts. 4 over the display and 2 each over 2 frag tanks. I'm only mounting lights over a single frag tank for now. It will be a while before I need either of the frag tanks. Obviously. But, it's easier to build the mounts now while I already have everything set up. I mounted the brackets to 8020 rails and then mounted those rails to the hood. The final picture is the back end. I'm using cable carrier drag chain 2" x 1" like you might on a CNC. All of the power and control cabling will run through that to protect them while the hood moves in and out.  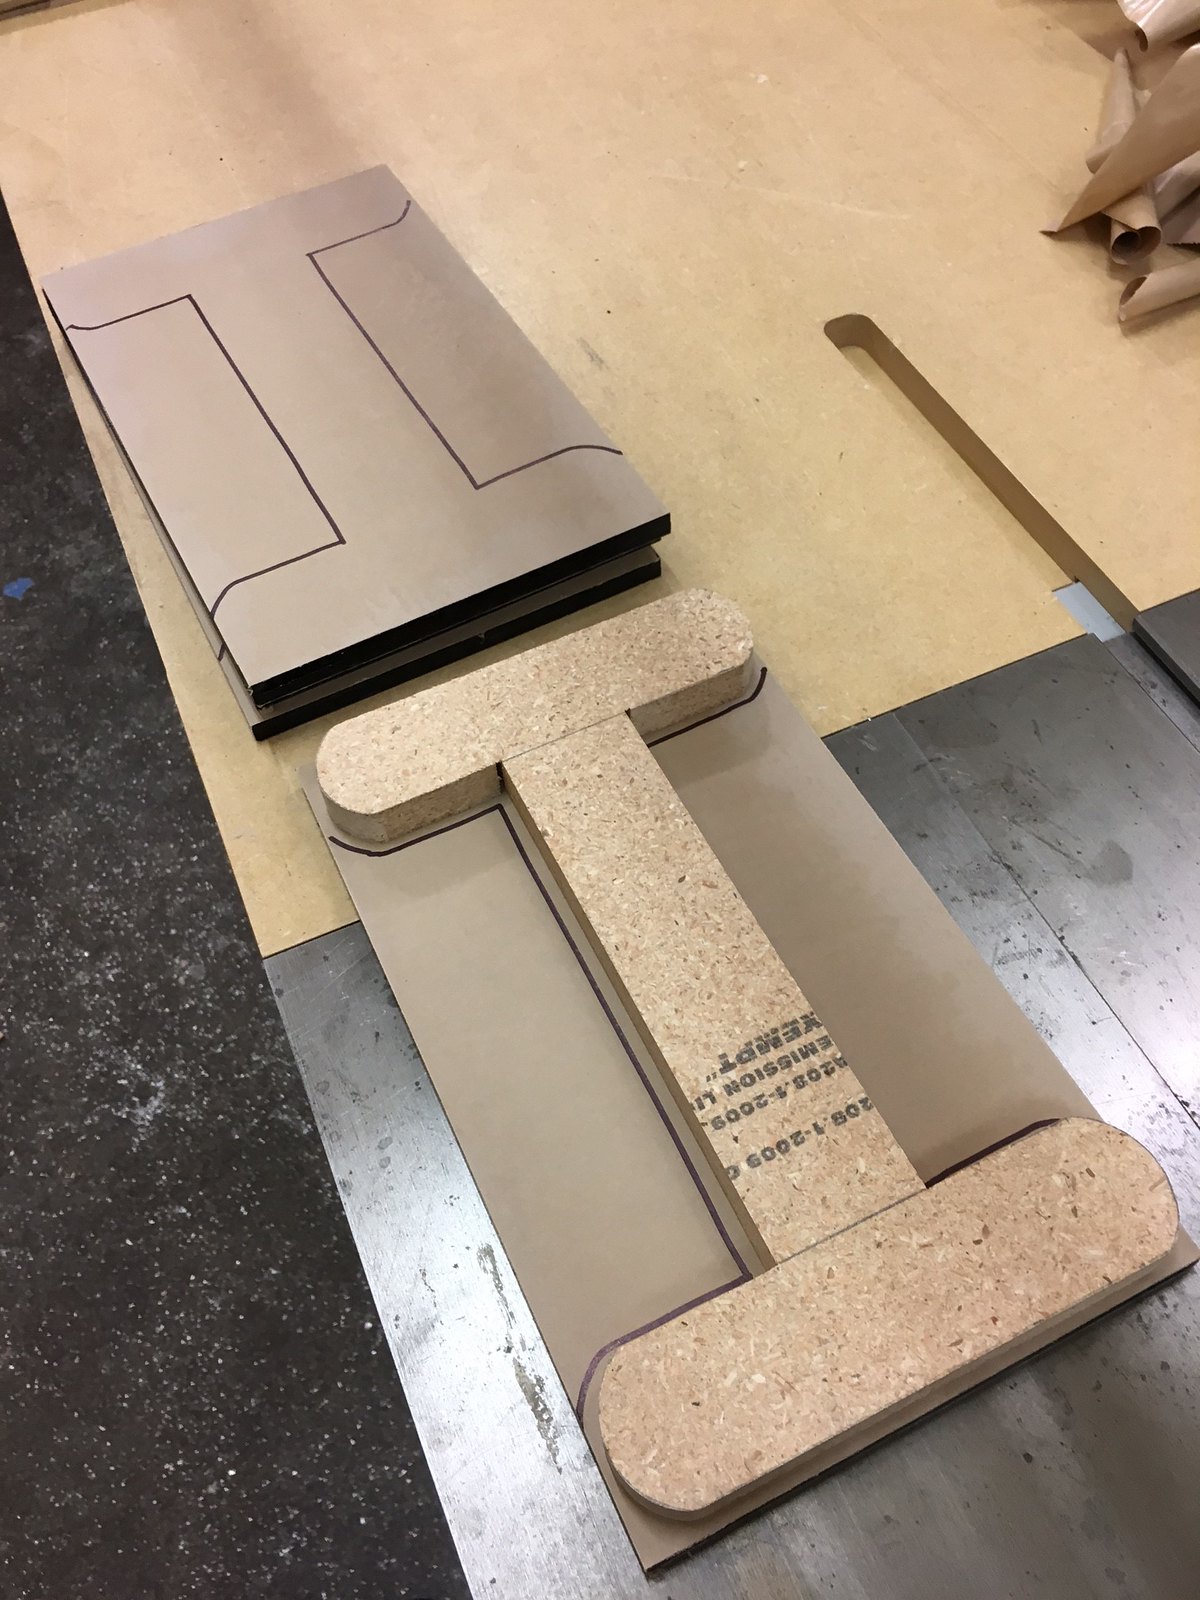 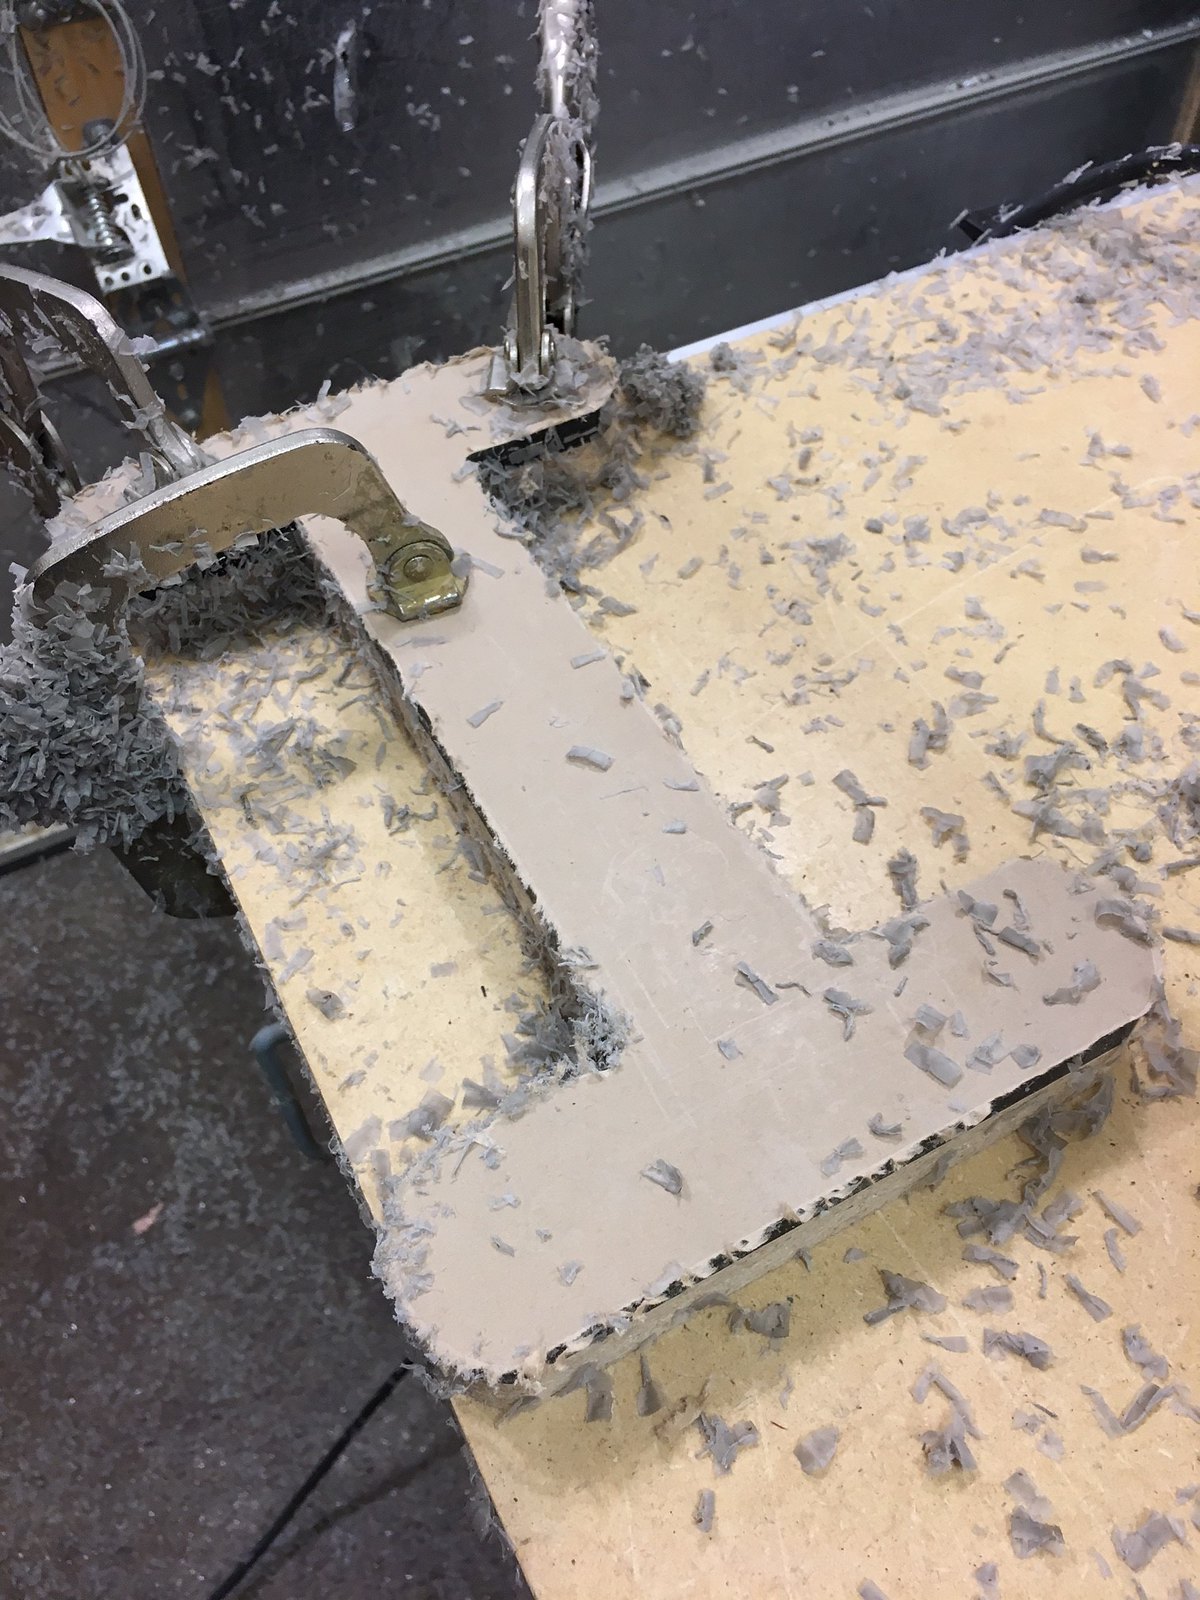 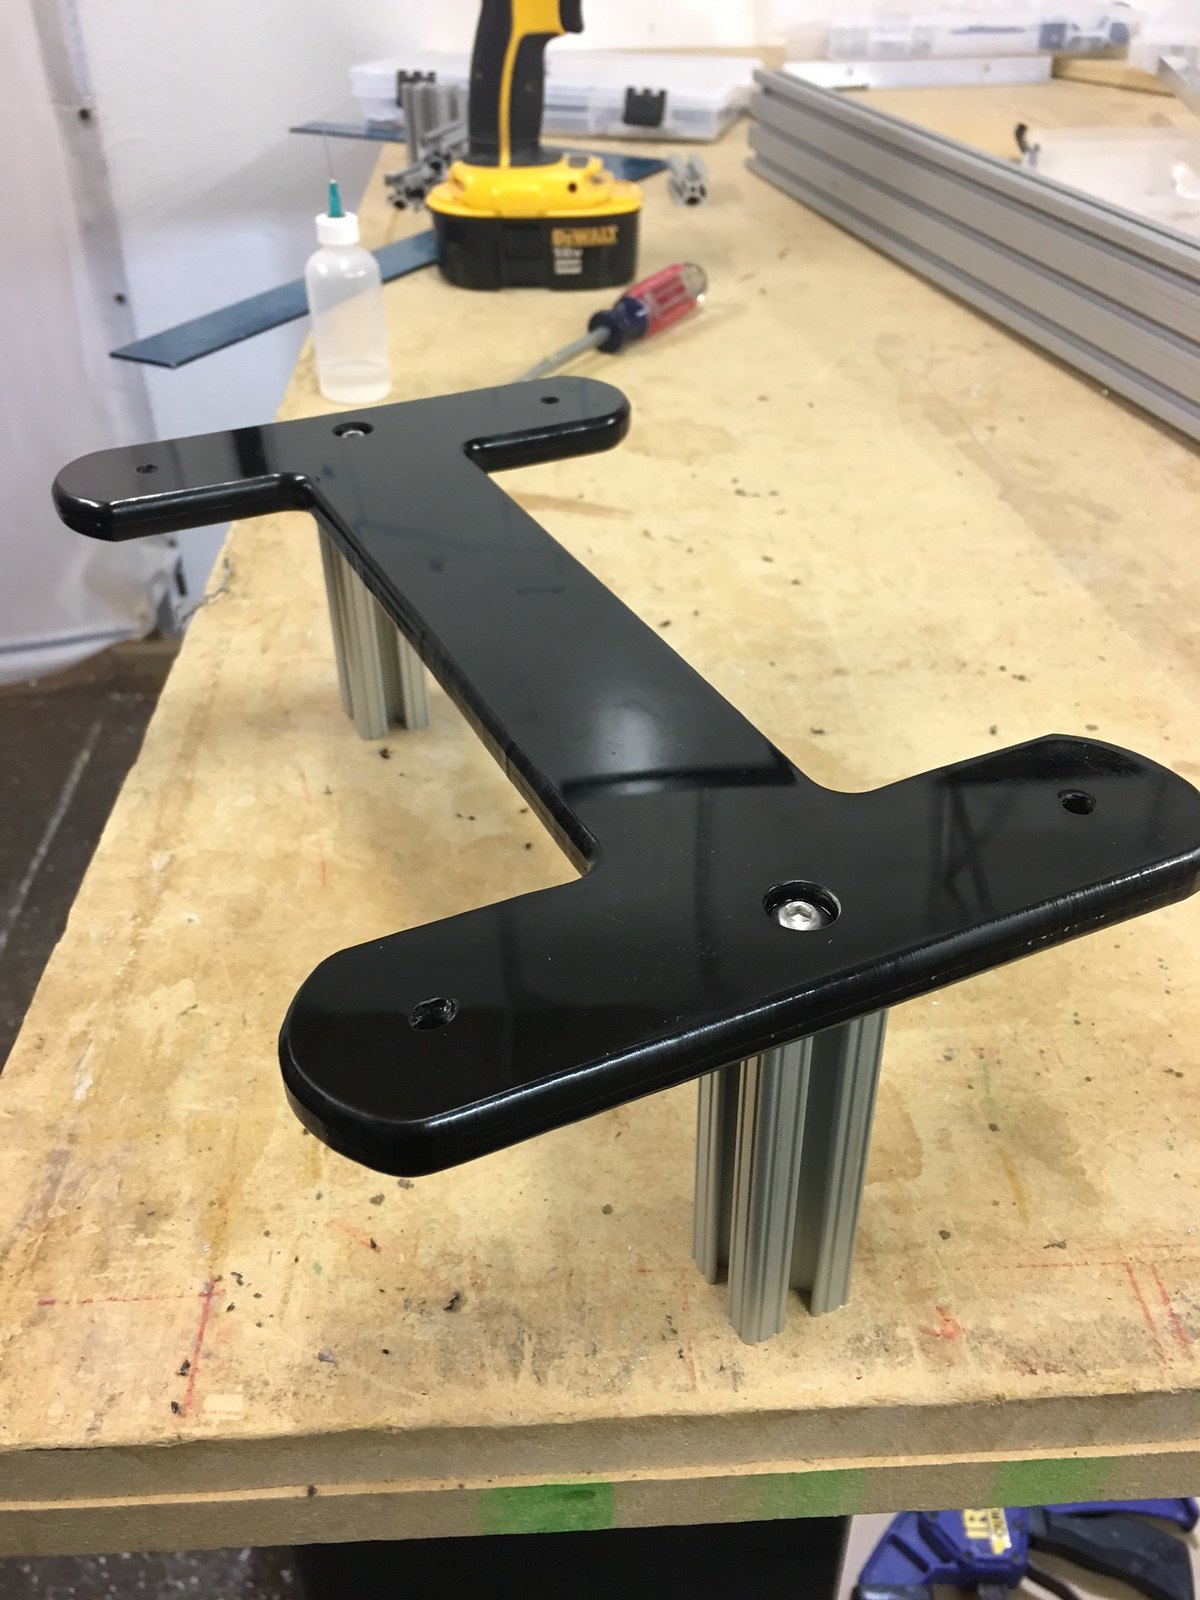 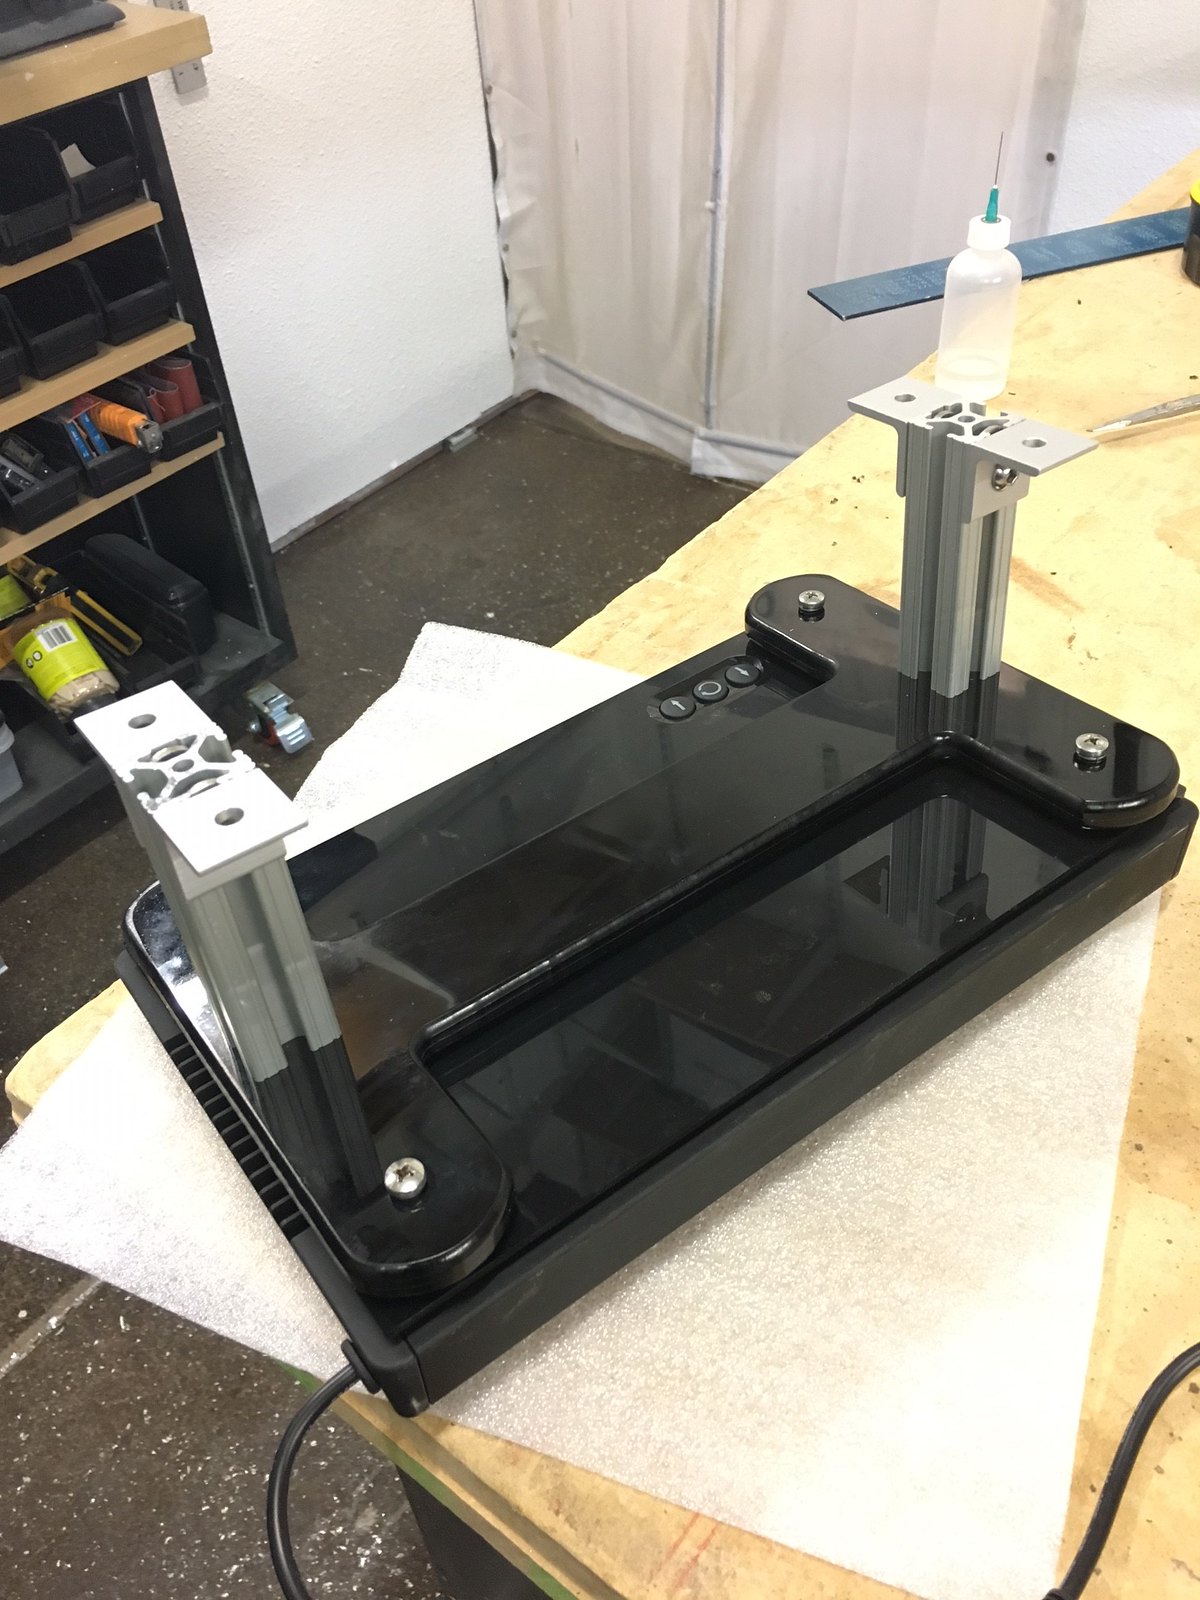 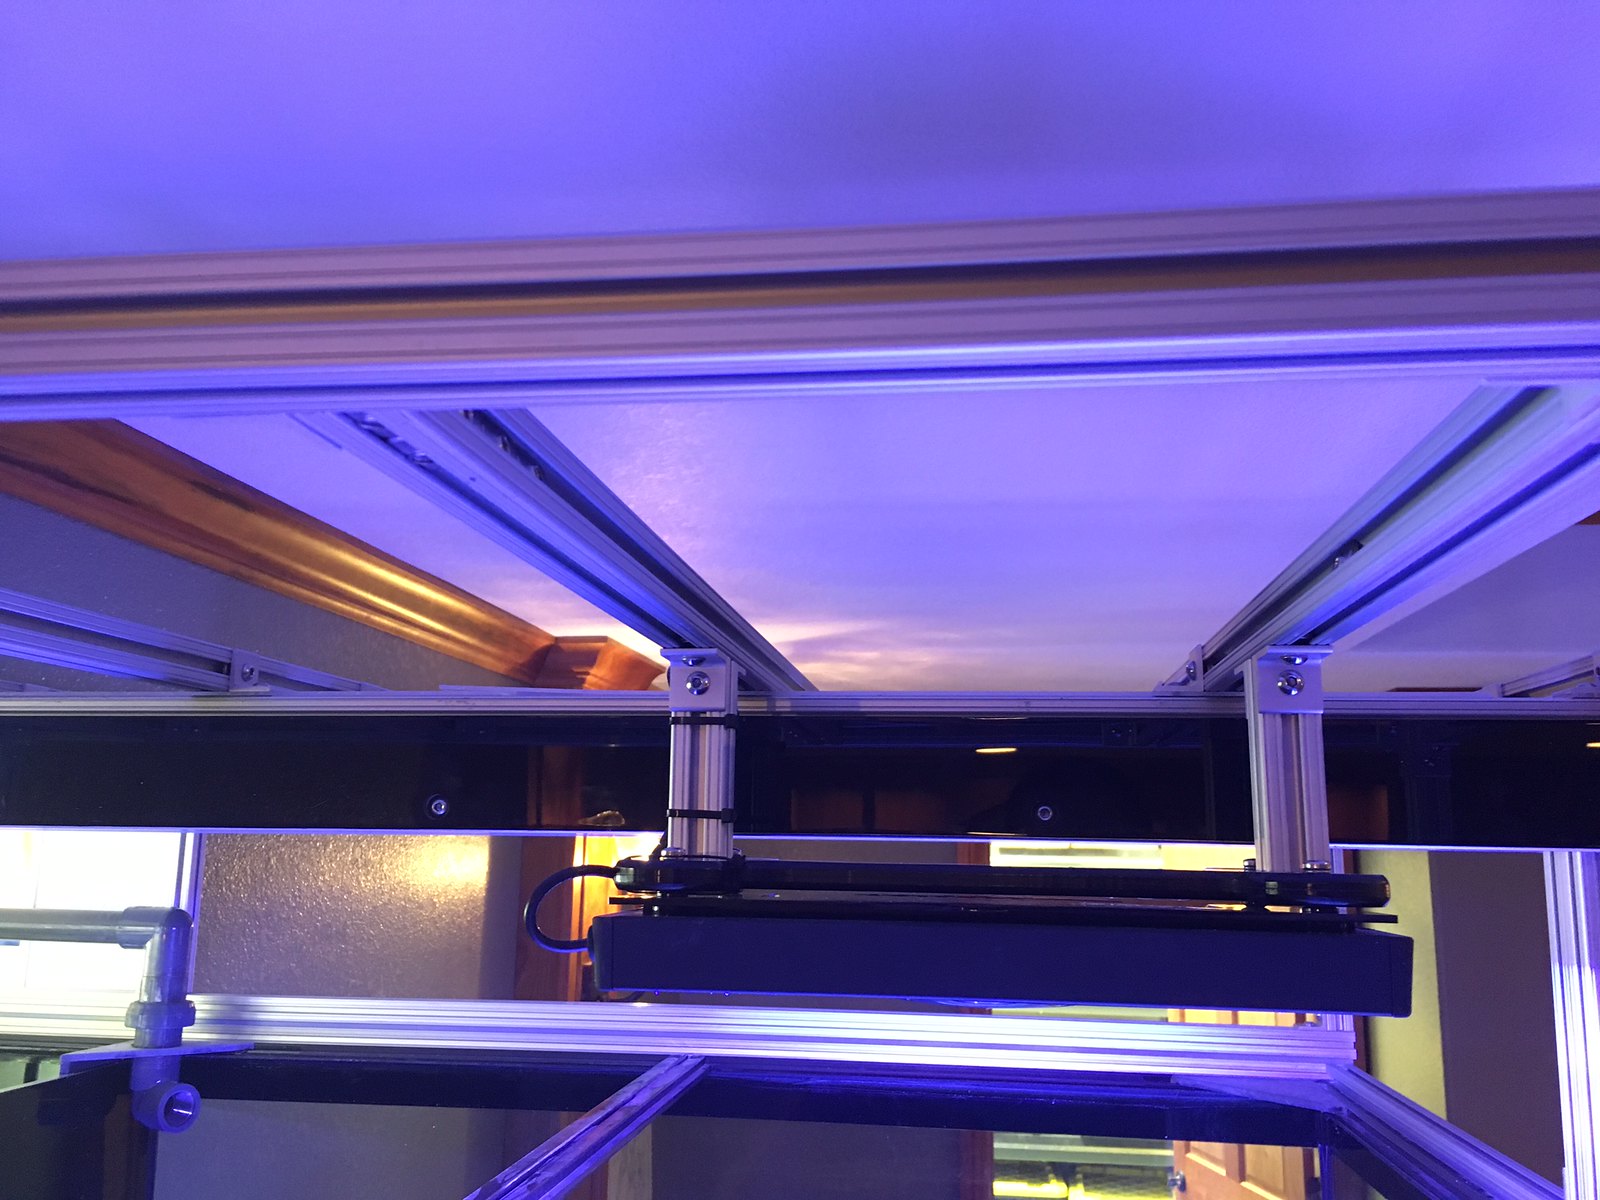 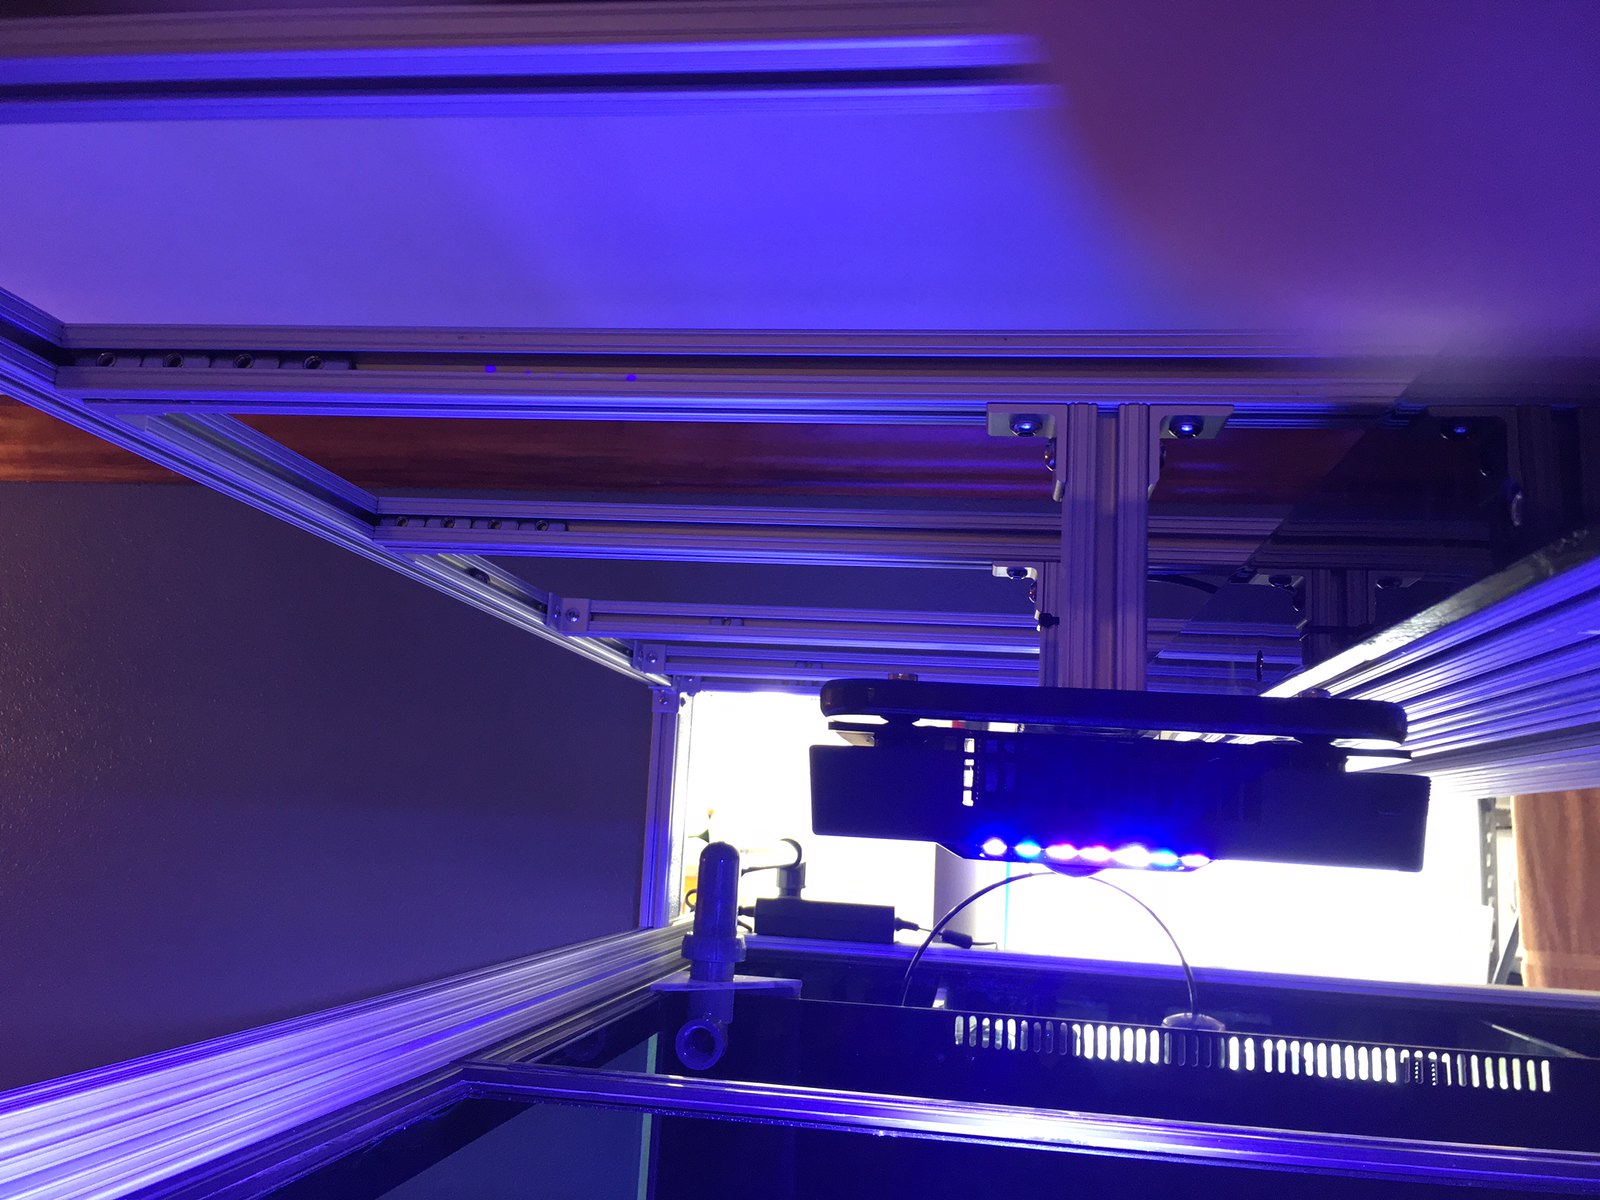 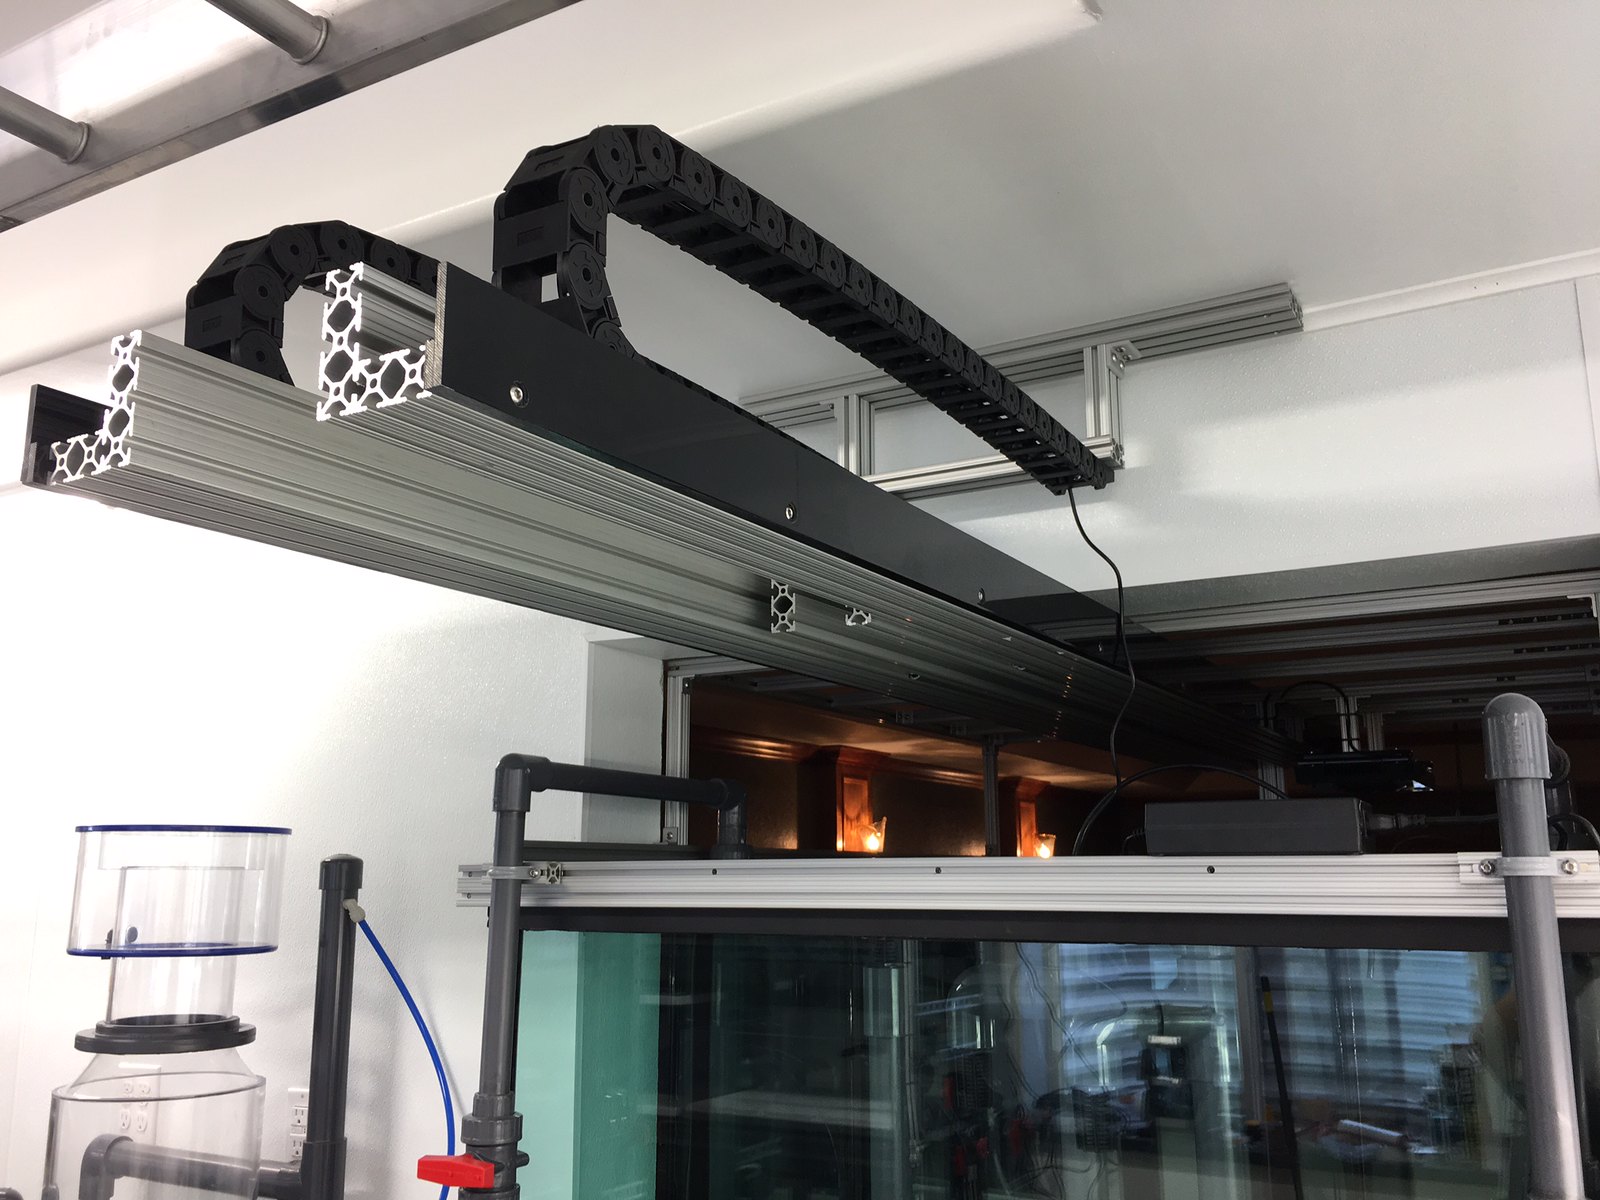
|
|
|
|
|
07/24/2017, 08:17 PM
|
#82 |
|
Registered Member
Join Date: Sep 2016
Posts: 18
|
Not to take away from the
 of the above photo, but where did you get that grey flooring? It looks sturdy and waterproof of the above photo, but where did you get that grey flooring? It looks sturdy and waterproof
|
|
|
|
|
07/24/2017, 08:40 PM
|
#83 |
|
Registered Member
Join Date: Mar 2011
Location: Golden, CO
Posts: 340
|
It is sturdy flooring. It's waterproof everywhere except the seams. I taped the seams underneath with the recommended tape but I doubt that it's an impervious joint. That doesn't matter with my build on a cement slab.
It's G-floor which I ordered in through Home Depot. |
|
|
|
|
07/25/2017, 02:42 PM
|
#84 |
|
Registered Member
Join Date: Jan 2010
Location: Canadia
Posts: 4,276
|
Just to mess with your head a bit further... I was thinking more about how your light rack protrudes into the living space. I understand the aesthetic concerns about minimizing the size of the hood, but what if the hood stayed in place and the light rack slid separately back into the fish room? That might give you the best of both worlds.
Sorry. Dave.M
__________________
My Gawd! It's full of corals! Current Tank Info: None. Nil. Zip. Nada. |
|
|
|
|
07/25/2017, 03:20 PM
|
#85 |
|
Premium Member
Join Date: Jan 2006
Location: Flagstaff, AZ
Posts: 81
|
This build is absolutely incredible!! I'm looking through the different threads here for ideas on my 180 gallon build, and now I just want to crawl into a hole and cry!!! Very impressive!!
Sent from my iPad using Tapatalk Pro
__________________
Bueller. Bueller. Bueller......... Current Tank Info: 28 gallon JBJ, new 160.... |
|
|
|
|
07/25/2017, 04:06 PM
|
#86 |
|
Registered Member
Join Date: Mar 2011
Location: Golden, CO
Posts: 340
|
Dave-
That's an interesting idea. It could have been doable. However, it still doesn't solve the issue that I'll need wide open access into the tank. The internal rack would slide backwards out of the way but the wood shell would still be in my way above the tank to gain access. That's the primary problem. Of course, the internals could slide out backwards and then I could man-handle the 4' x 4' x 12" wooden hood out from the tank. Either way, the system is in place. I'm too lazy or too anxious for progress to rebuild. Now, I'll be able to slide the wooden facade, light rack, and majority of lights out away from the tank to go snorkeling in a short period of time. A single T5 fixture will remain static over the tank center to provide light while I do maintenance. Hopefully it will make sense once everything's assembled and I post up a video. Thanks for the feedback! I appreciate the outside perspective. It makes me think twice or three times about the best path before committing. In this case, I've committed already and I'm ready to be wet! Well, my mind is ready. The tank isn't. |
|
|
|
|
07/25/2017, 06:55 PM
|
#87 |
|
Registered Member
Join Date: Mar 2011
Location: Golden, CO
Posts: 340
|
Lizard-
Thanks for checking it out and thank you for the compliments. Best of luck with your 180 build. |
|
|
|
|
07/31/2017, 10:08 AM
|
#88 |
|
Registered Member
Join Date: Mar 2011
Location: Golden, CO
Posts: 340
|
I'm not sure if this works for linking a video. Here's an early video of the hood sliding mechanism. I still need to go back and attach the motor, but everything internal is working as expected. I added limit sensors to both ends. I'll be using stepper motors with a microprocessor so the limit sensors will just be a safety backup in case the microprocessor looses track of where things are.
Otherwise, the MCU will count the number of steps from one end to the other, accelerate, decelerate, and interface to a remote. I'll also add physical switches inside the hood and in the back room in case I get tired of using a remote. For now, I have everything internal set. I'll be focusing on sealing off that section with acrylic to isolate it all from moisture. Then, I'll start hanging lights. Oh ya, the lights came in! https://www.youtube.com/watch?v=5QqoaI3Ug44 Last edited by halmus; 07/31/2017 at 10:09 AM. Reason: video didn't link |
|
|
|
|
07/31/2017, 02:58 PM
|
#89 |
|
Registered Member
Join Date: Jan 2010
Location: Canadia
Posts: 4,276
|
Have you tried getting up top and replicating working inside the tank with the light rack extended? Will you have enough room to move?
Dave.M
__________________
My Gawd! It's full of corals! Current Tank Info: None. Nil. Zip. Nada. |
|
|
|
|
07/31/2017, 03:08 PM
|
#90 |
|
Registered Member
Join Date: Sep 2016
Posts: 18
|
That is easily the coolest fish tank lighting on the planet!!
|
|
|
|
|
07/31/2017, 03:54 PM
|
#91 | ||
|
Registered Member
Join Date: Mar 2011
Location: Golden, CO
Posts: 340
|
Quote:
With the hood in place and the lights mounted, assuming a hood that can't move out of the way, I would only have about 9" max of vertical space on the side of the hood (typical side door access) to reach through and try to get to the middle of the tank and 36" down. The top will be covered entirely. By moving the entire hood out, I only have an 8" wide beam right in the center of the tank and an approximate 20" wide open gap and 24" to the ceiling. It's basically like not having any obstacles in the way other than the natural challenge of reaching to the bottom of a 36" tank. I'm standing on the counter to service the tank (part of the plan). So, imagine standing on the ground with a tank 36" deep reaching down into it. Quote:
|
||
|
|
|
|
09/17/2017, 07:20 AM
|
#92 |
|
Frustrated Stick Gardener
Join Date: Jan 2012
Location: near chicago,Ill.
Posts: 701
|
Any updates on this build? I'm in need of a fix!
__________________
Scott Current tank: 65 gal DSA rimless, mixed reef, 20 gal sump, T5 6bulb, big skimmer, 40B Fowler, 20 gal sump, 4 bulb T5 |
|
|
|
|
09/17/2017, 04:19 PM
|
#93 | |
|
Registered Member
Join Date: Mar 2011
Location: Golden, CO
Posts: 340
|
Quote:
|
|
|
|
|
|
09/17/2017, 04:23 PM
|
#94 |
|
Registered Member
Join Date: Mar 2011
Location: Golden, CO
Posts: 340
|
It's been a long time since an update. I've been working hard behind the scenes but it never seems like it's going fast enough. I've had a few minor setbacks that I've been working through. I won't mention them but I will
say that my local shop here in Denver, Aquatic Art, is awesome! So, since the last update my wife and I focused heavily on the rockwork. This might be the most challenging part of this build for me. I've watched videos, reviewed photos, other builds, read all of literature I could find on issues like "forced perspective, "rule of thirds", the fact that we'll appear to loose depth front to back by a factor due to refraction of light in wate. We tried very hard to keep the rockwork open and a good distance from the glass. Even with a 4' x 4' footprint, I found myself wishing I had a bigger tank. Here is the finished product for rockwork. We have independent boomies (spelling?) for the most part. The boomies or pillars could be removed. The arch in the rear is a little overwhelming and more bulky than I would have perfered but it's in place. It will be nice once it's grown over with sticks. https://www.youtube.com/watch?v=JKVnjWyeTtE This is the tank with water and only a single T5 fixture turned on in the center. 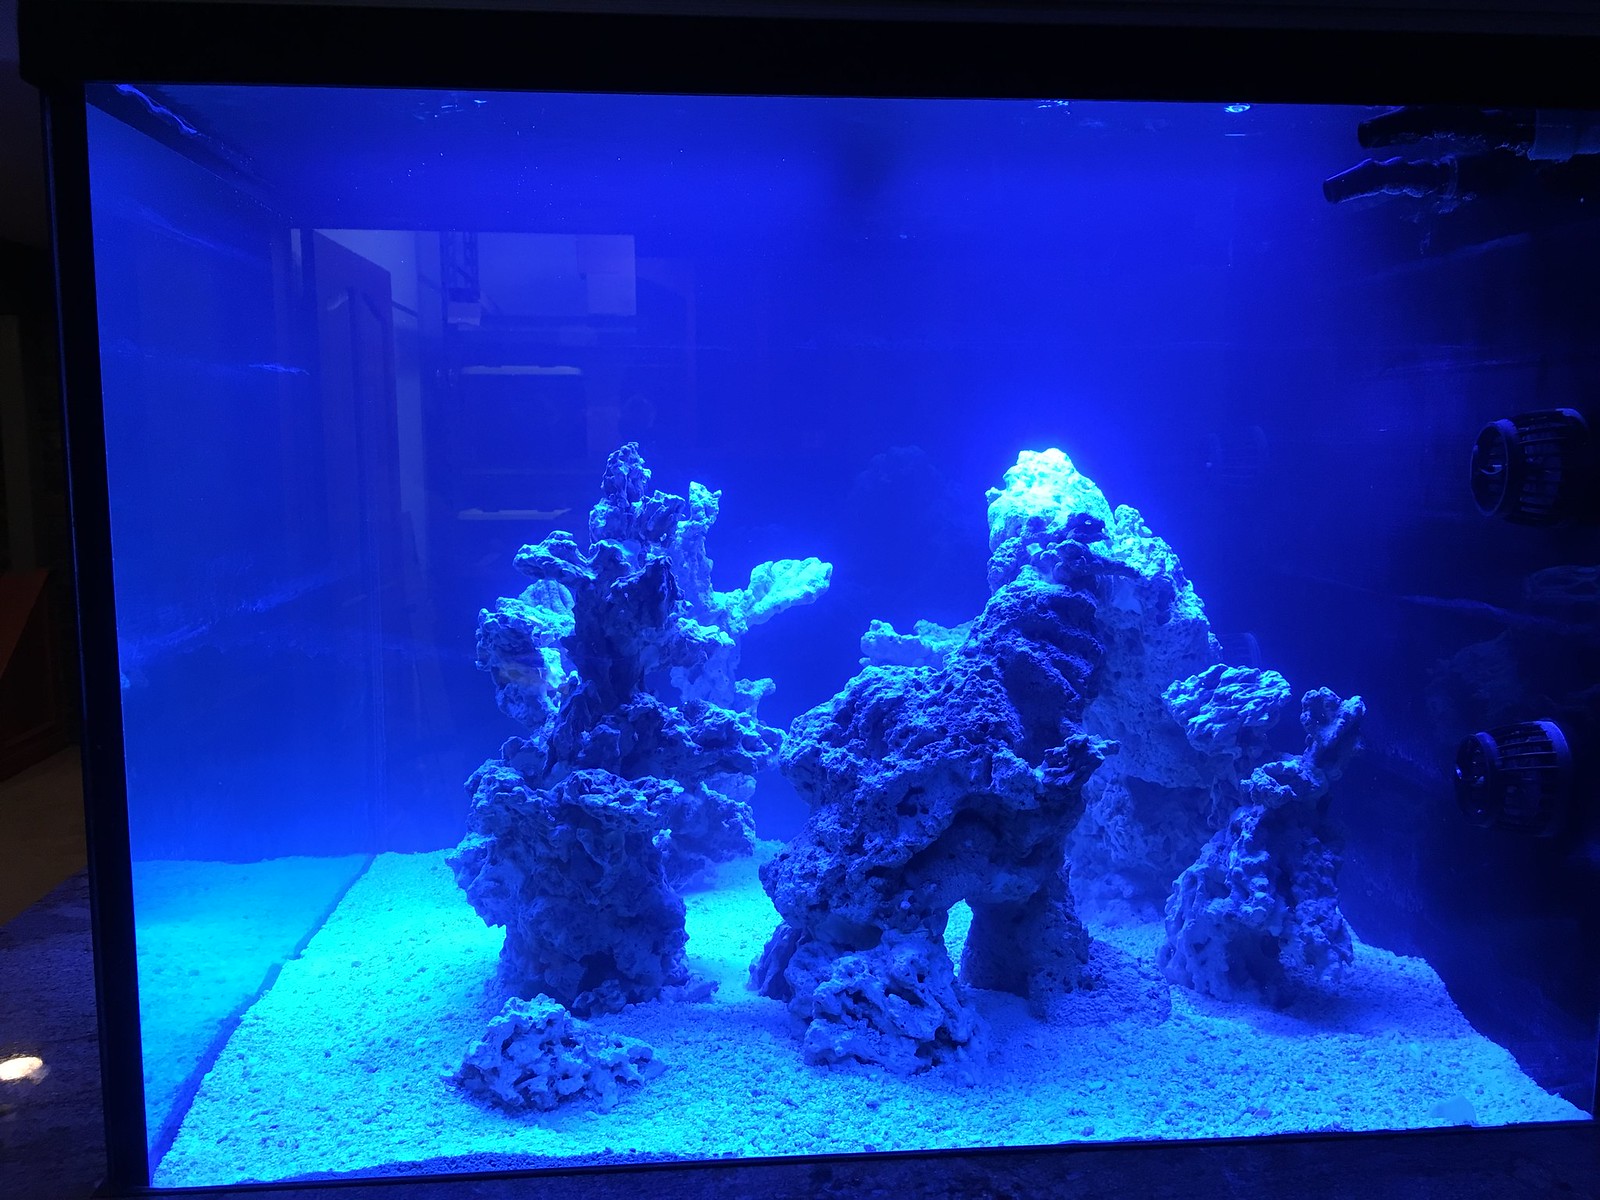 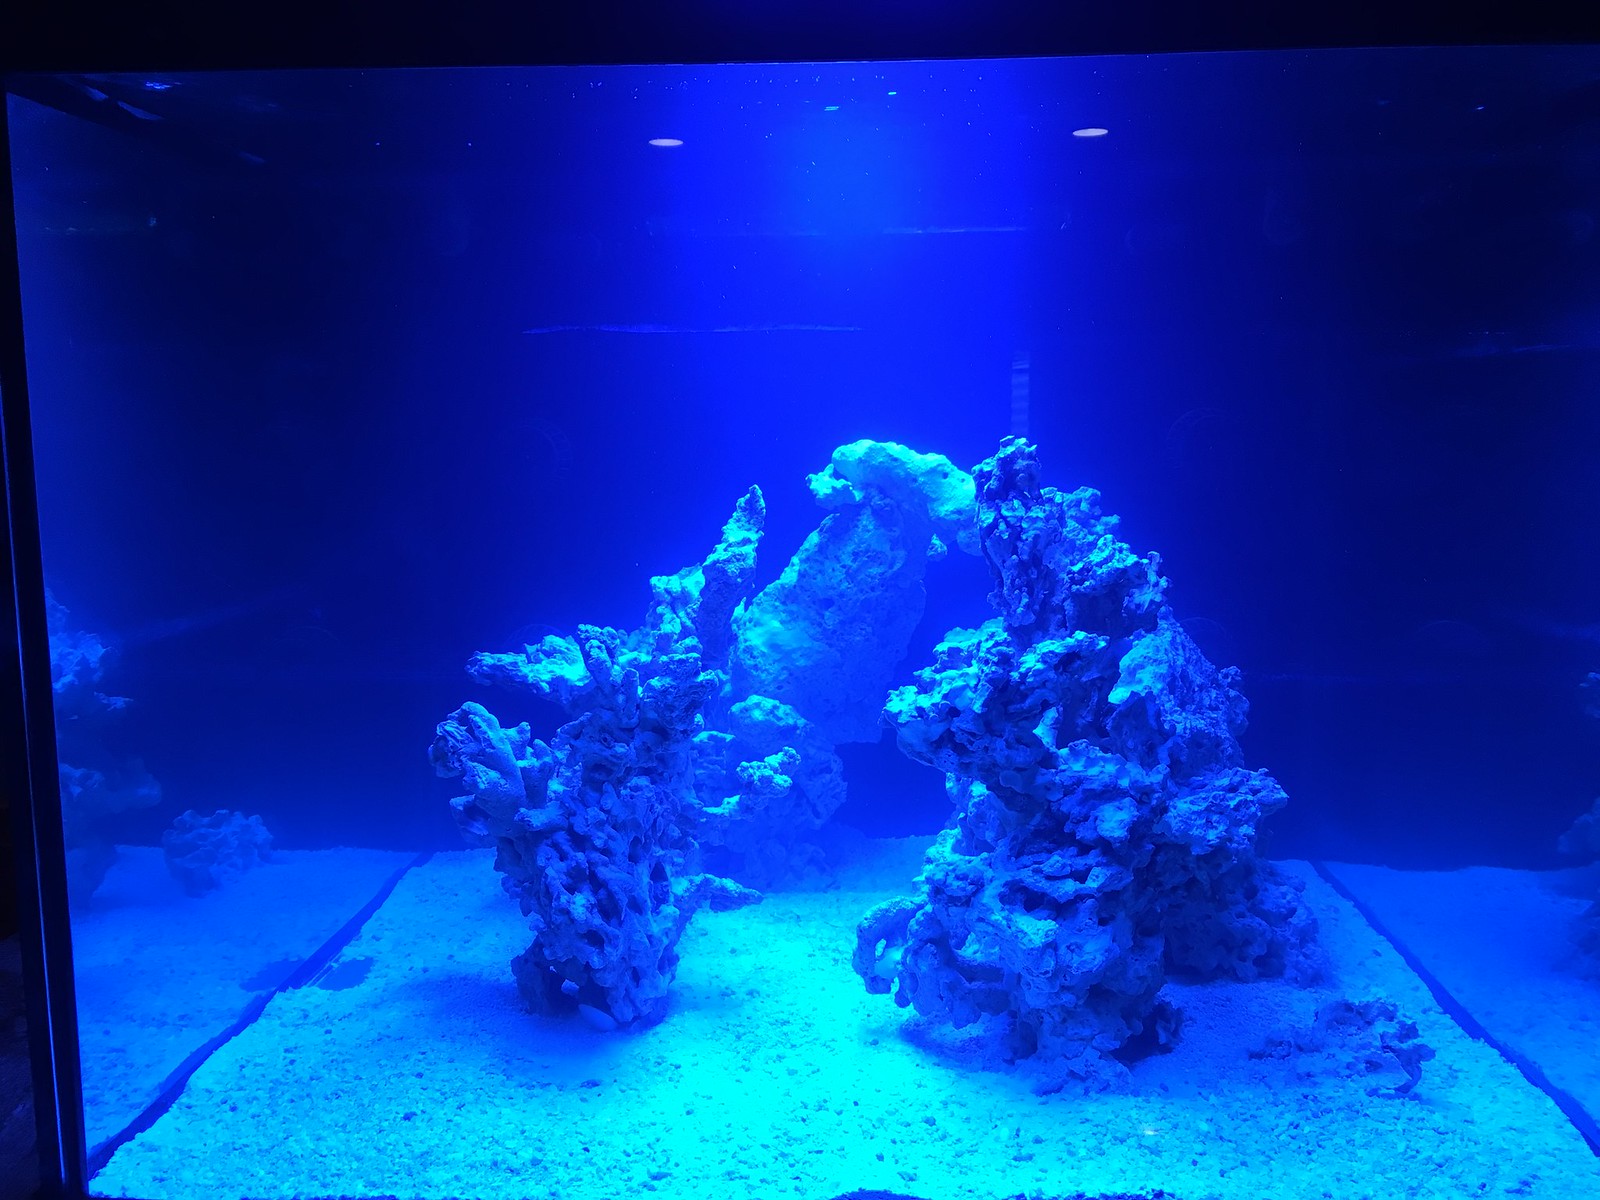
|
|
|
|
|
09/17/2017, 04:24 PM
|
#95 |
|
Registered Member
Join Date: Mar 2011
Location: Golden, CO
Posts: 340
|
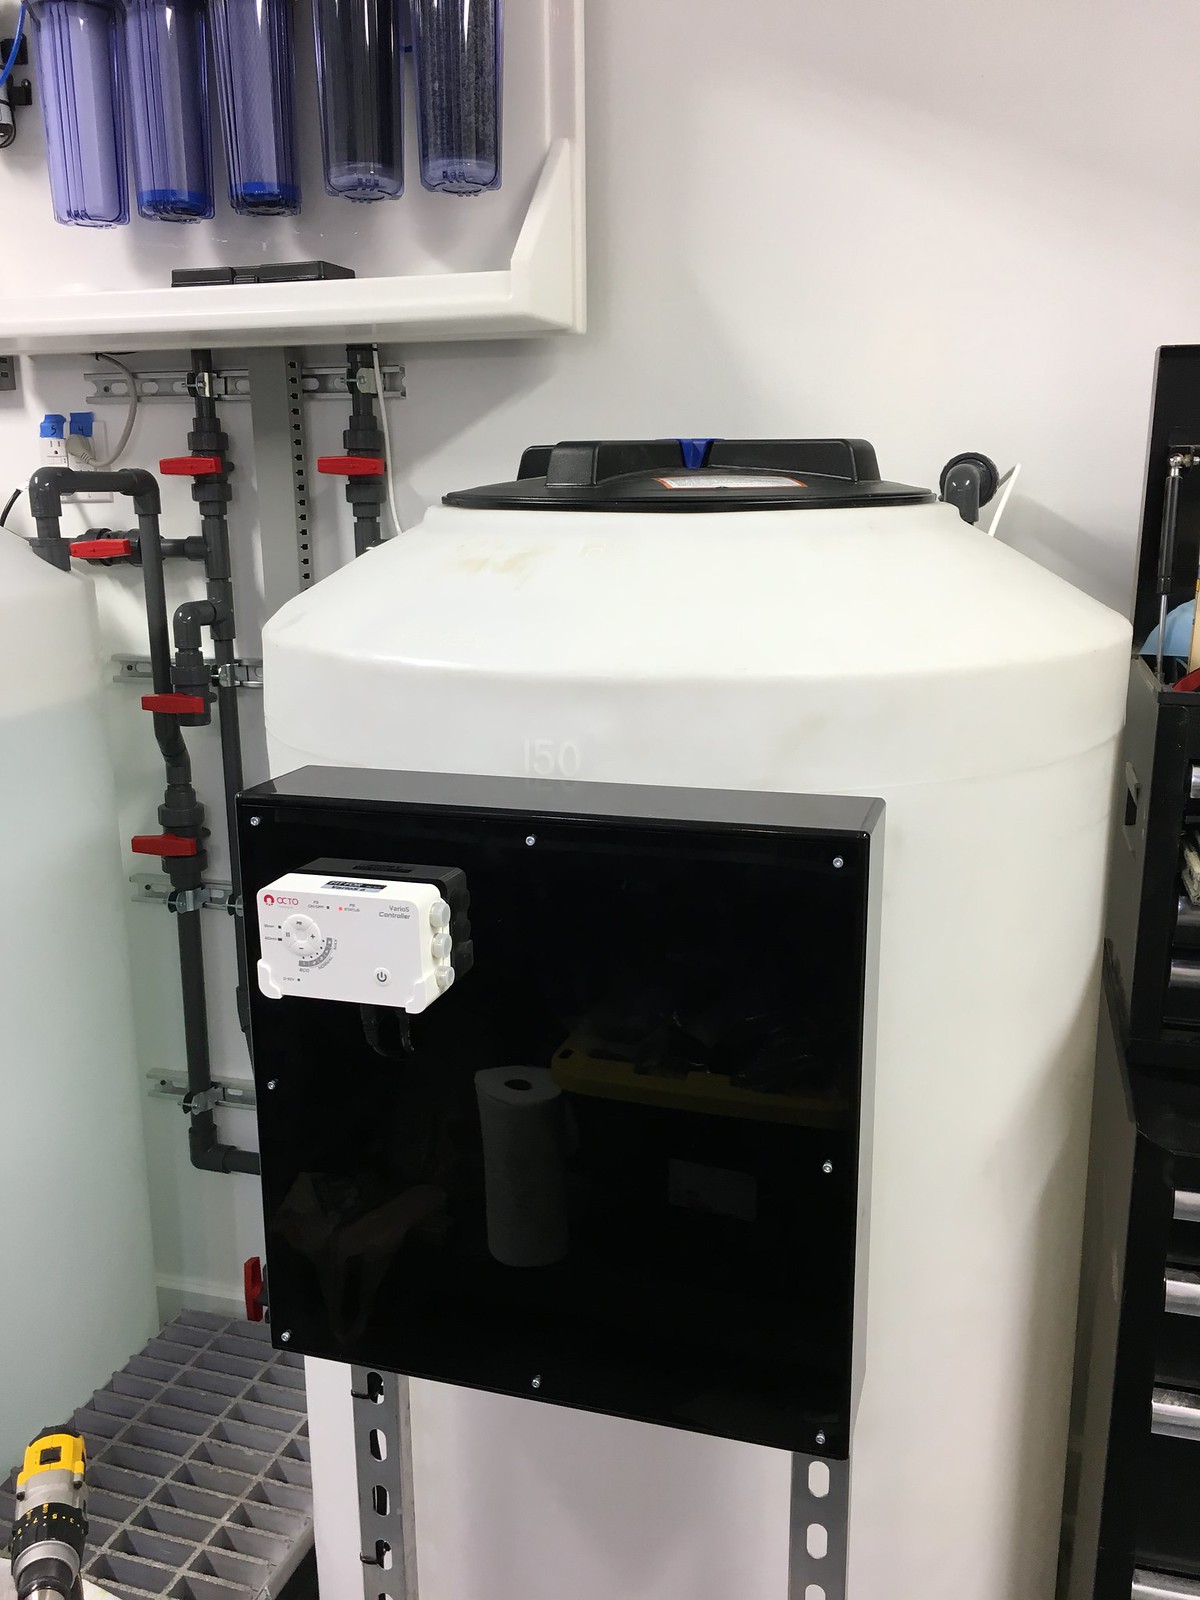
I finished the mixing station for now. I made acrylic boxes for the electronics and easy access to the pump controllers. Later on, I will be integrating more electronics into those boxes. For now, they're mostly empty.
|
|
|
|
|
09/17/2017, 04:26 PM
|
#96 |
|
Registered Member
Join Date: Mar 2011
Location: Golden, CO
Posts: 340
|
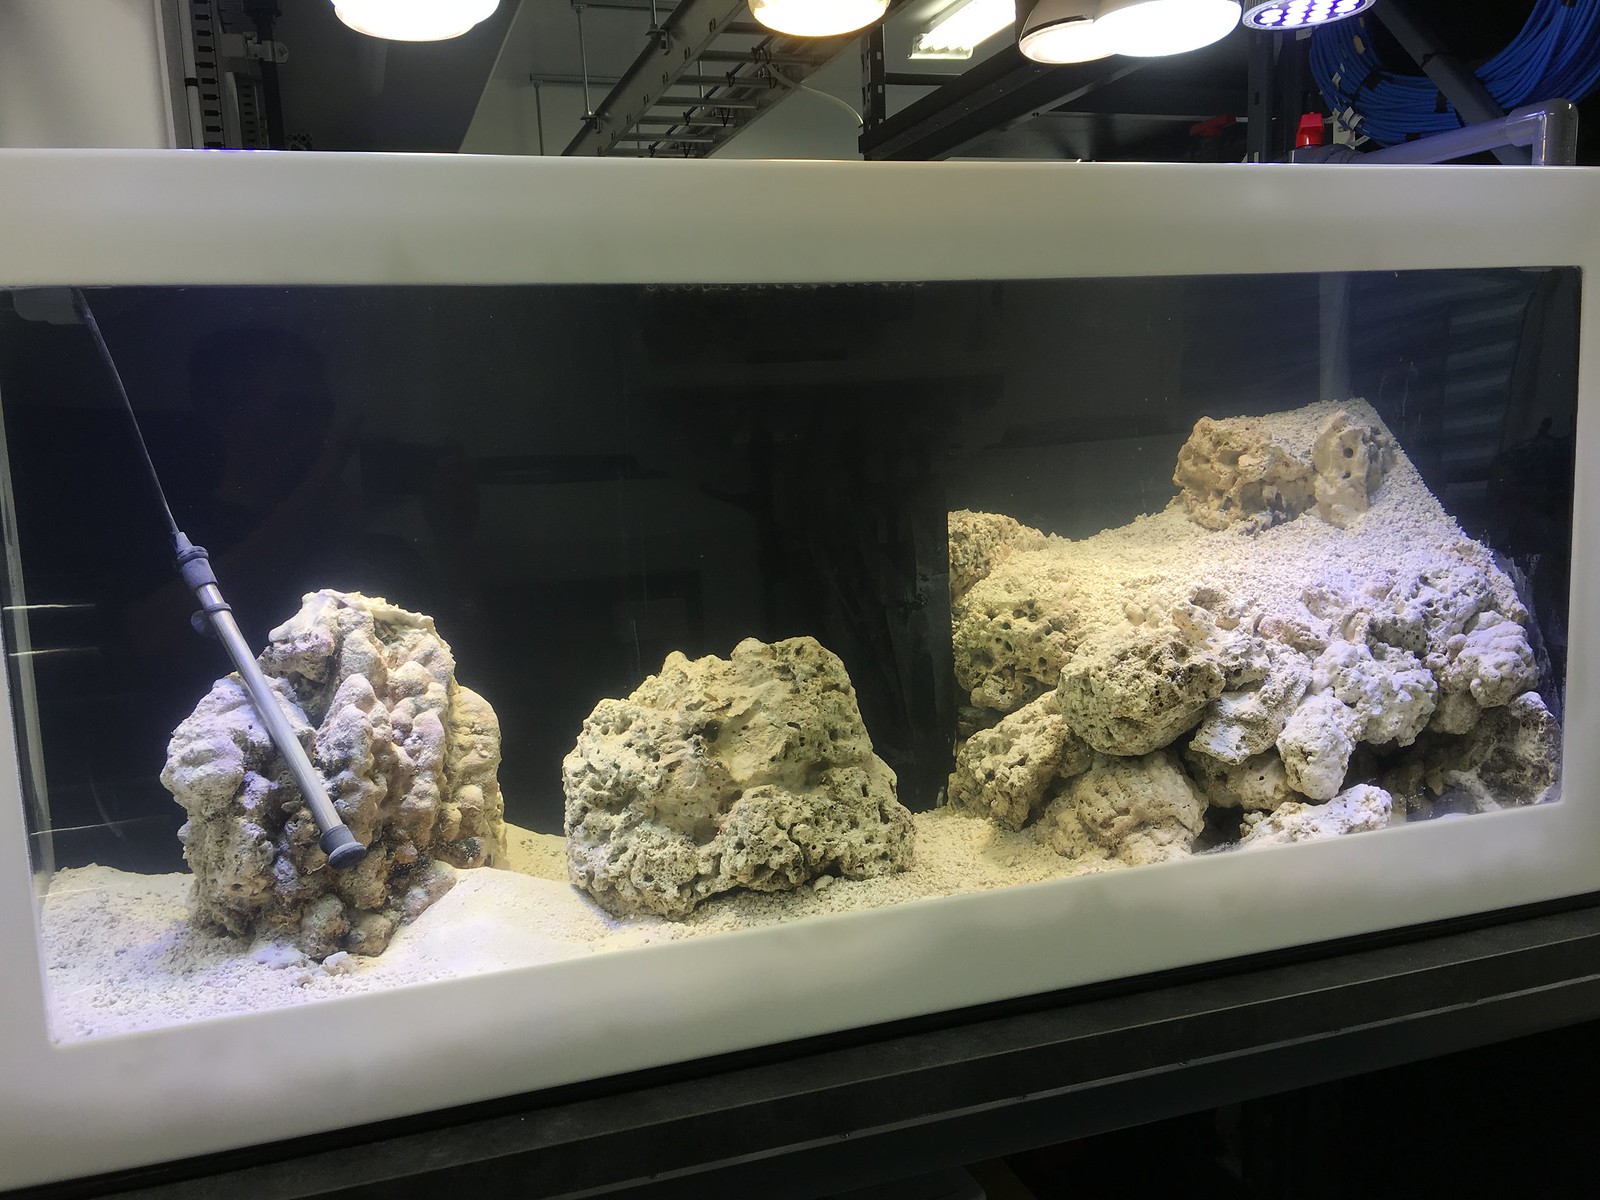
I added miracle mud, sand, and crushed coral to the refugium. The elevated portion on the right end has a deepish bed of mud covered with sand/gravel. That is intended for mangroves. The heater will be taken out and hidden later.
|
|
|
|
|
09/17/2017, 04:27 PM
|
#97 |
|
Registered Member
Join Date: Mar 2011
Location: Golden, CO
Posts: 340
|
I installed two Vectra M1's into the overflow box. They feed back up to independent sea-swirls. That's a modified closed loop. I have these set up obviously for the added flow, but also because these will be my go-to pumps
to transfer over in the event of a power outage. I didn't want a true closed loop because I didn't want the extra holes. These accomplish almost the same thing. 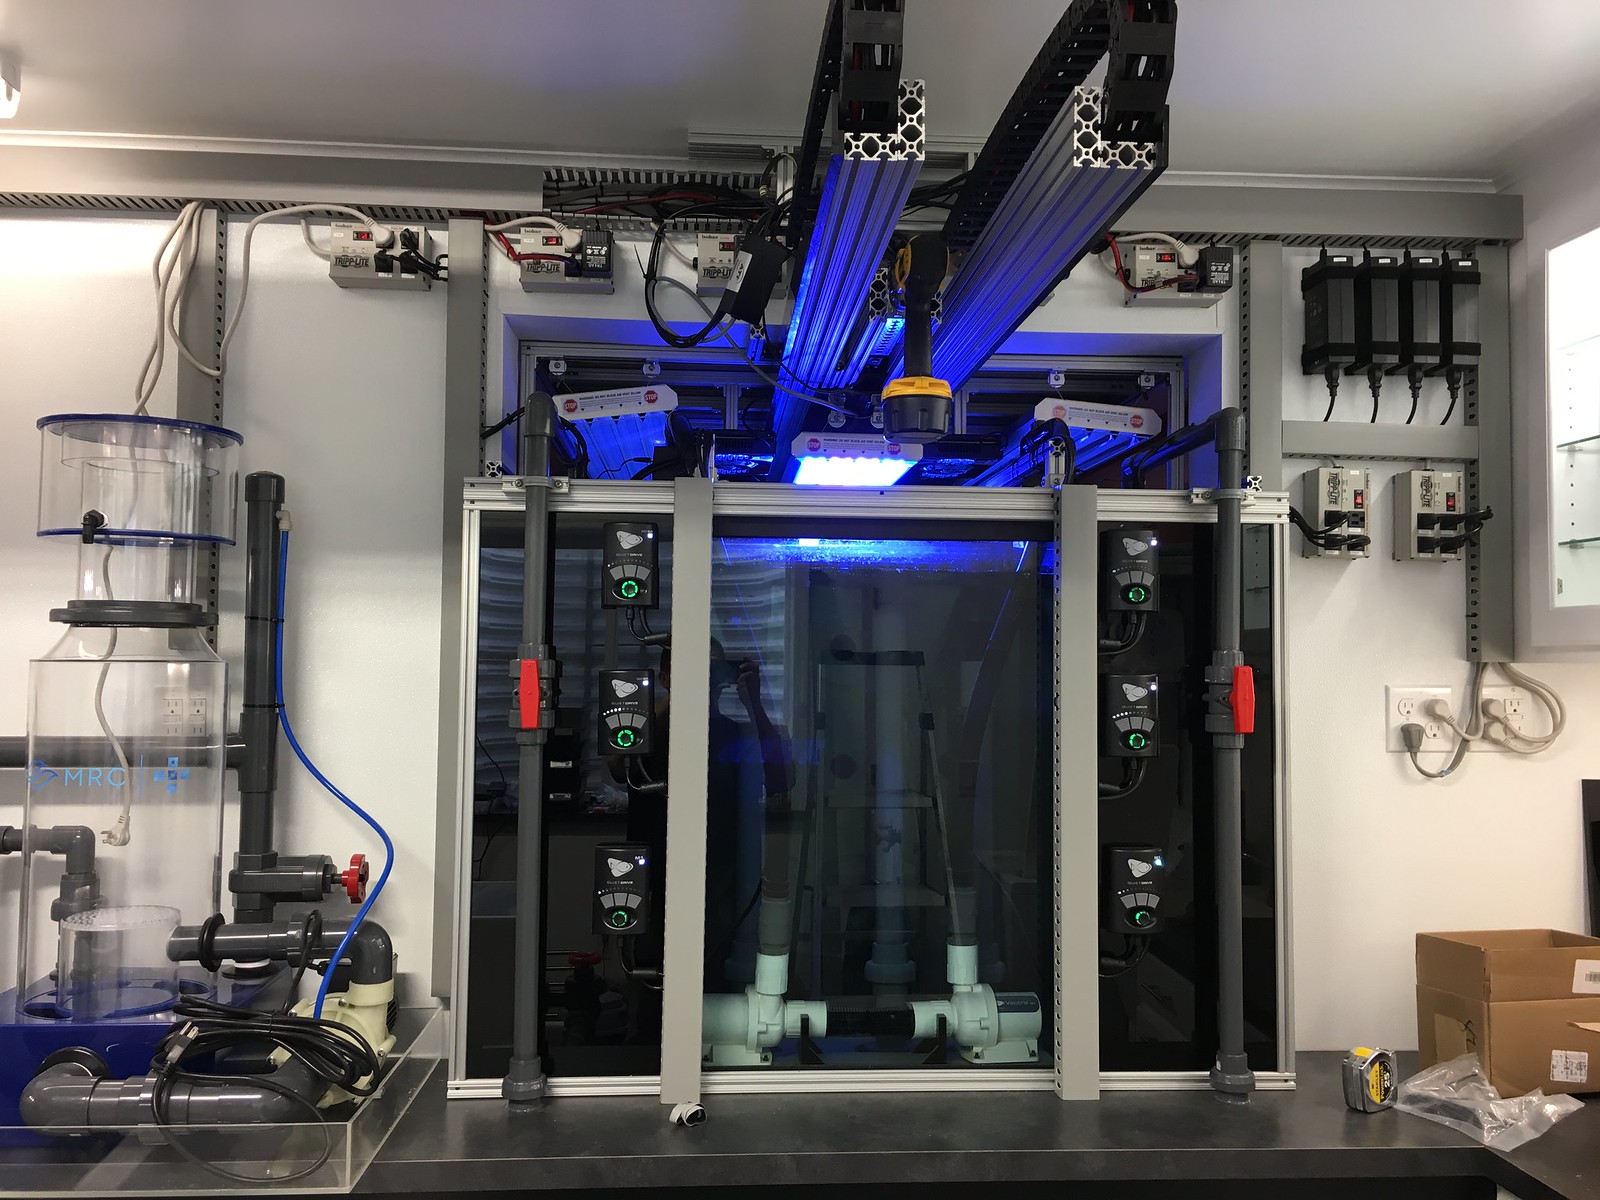 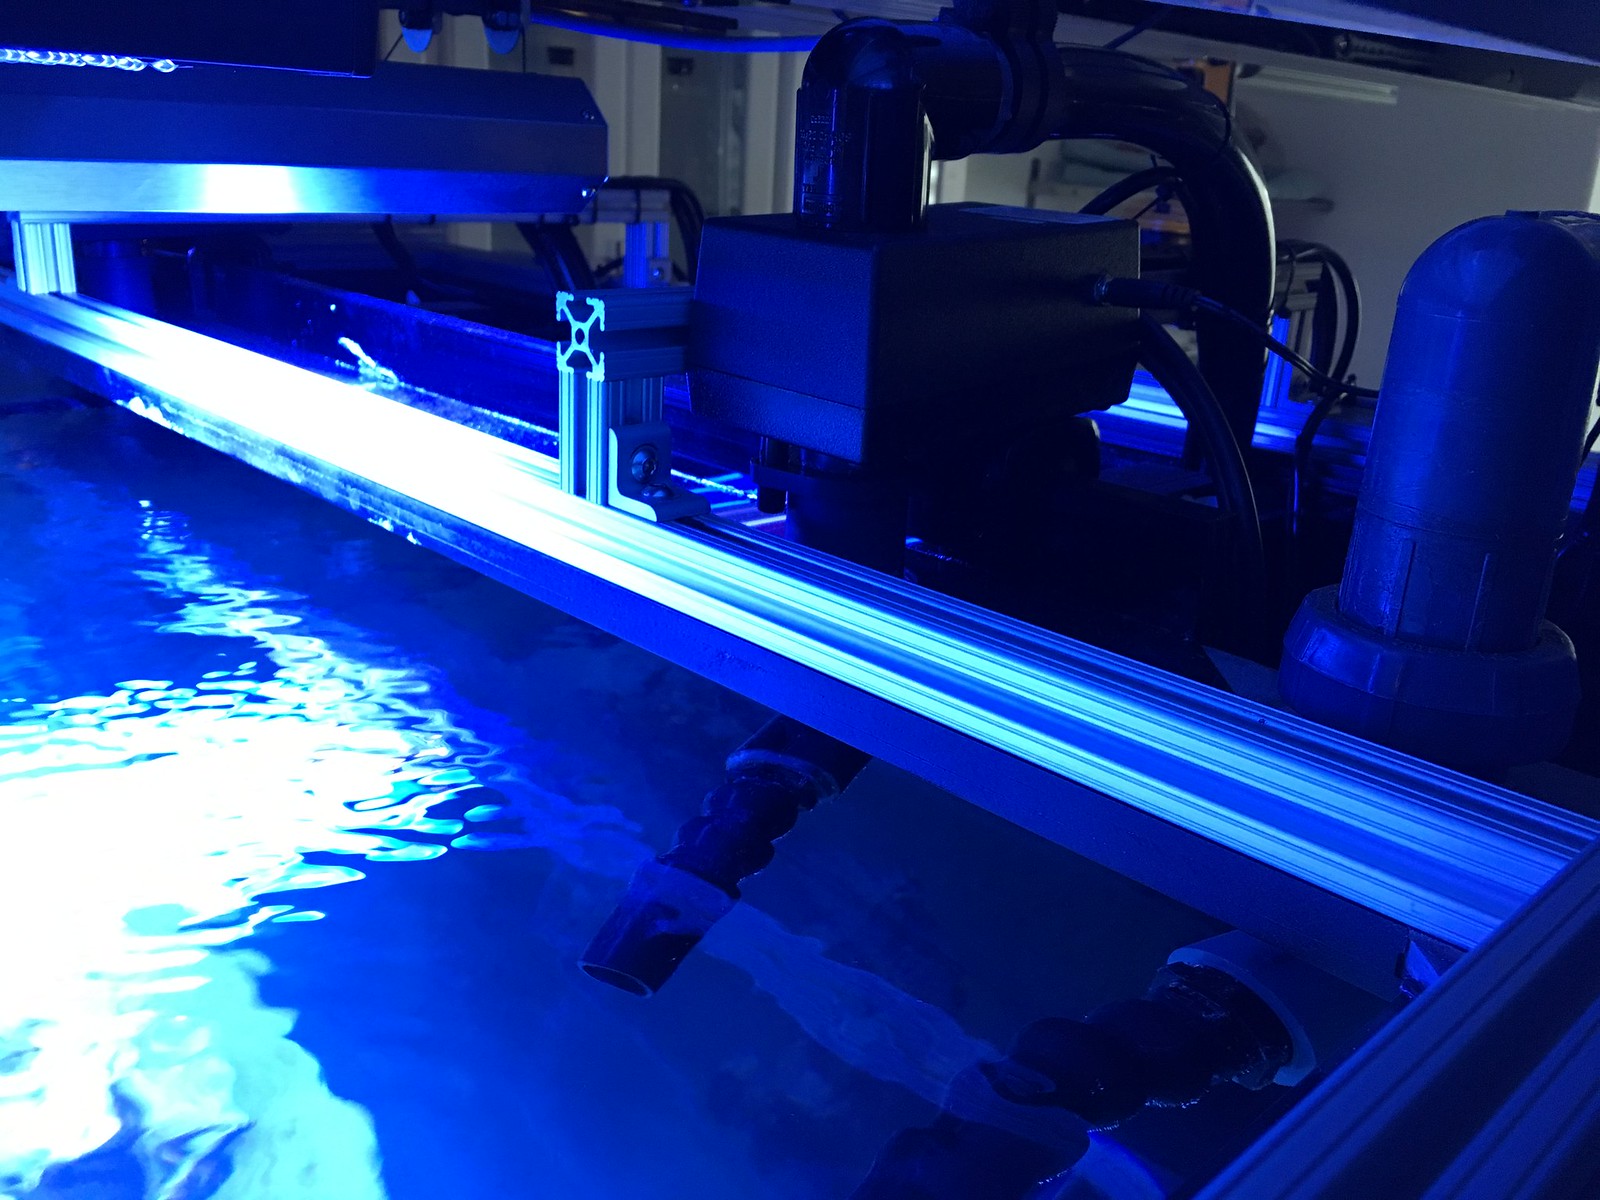
|
|
|
|
|
09/17/2017, 04:29 PM
|
#98 |
|
Registered Member
Join Date: Mar 2011
Location: Golden, CO
Posts: 340
|
I installed the four MP-60's in the dry boxes. Then, I spent a good amount of time organizing electronics. The cord management isn't complete. I'm still debating controllers and how much I'll actually run through a
controller. For now, everything that is running is plugged in directly to surge protectors. I'm labeling every single outlet and cord so that I have a good reference as to what exactly is plugged into what circuit. I'll probably write up some documentation for further reference. That will also allow me to start tracking dates for warrenty, service, and bulb replacement. I built an 8' tall rack that is a "corner" cabinet. It sits in the little corner where the refugium meets the frag rack. That will basically function as an IT rack. I'll have some UPS in there, the controller, and all of the switches, meters, displays, general electronics interface. I am installing doors tomorrow. The door panels are basically modular removeable panels that I can modify and replace as I start mounting the controller and switches. The doors themselves will only be opened when I need to modify something in the electronics. Otherwise, it is a sealed box to protect from splashing. I will probably need to vent it. That's the nice thing about having a modular face to the doors. I can add and remove things as needed without rebuilding the entire cabinet. 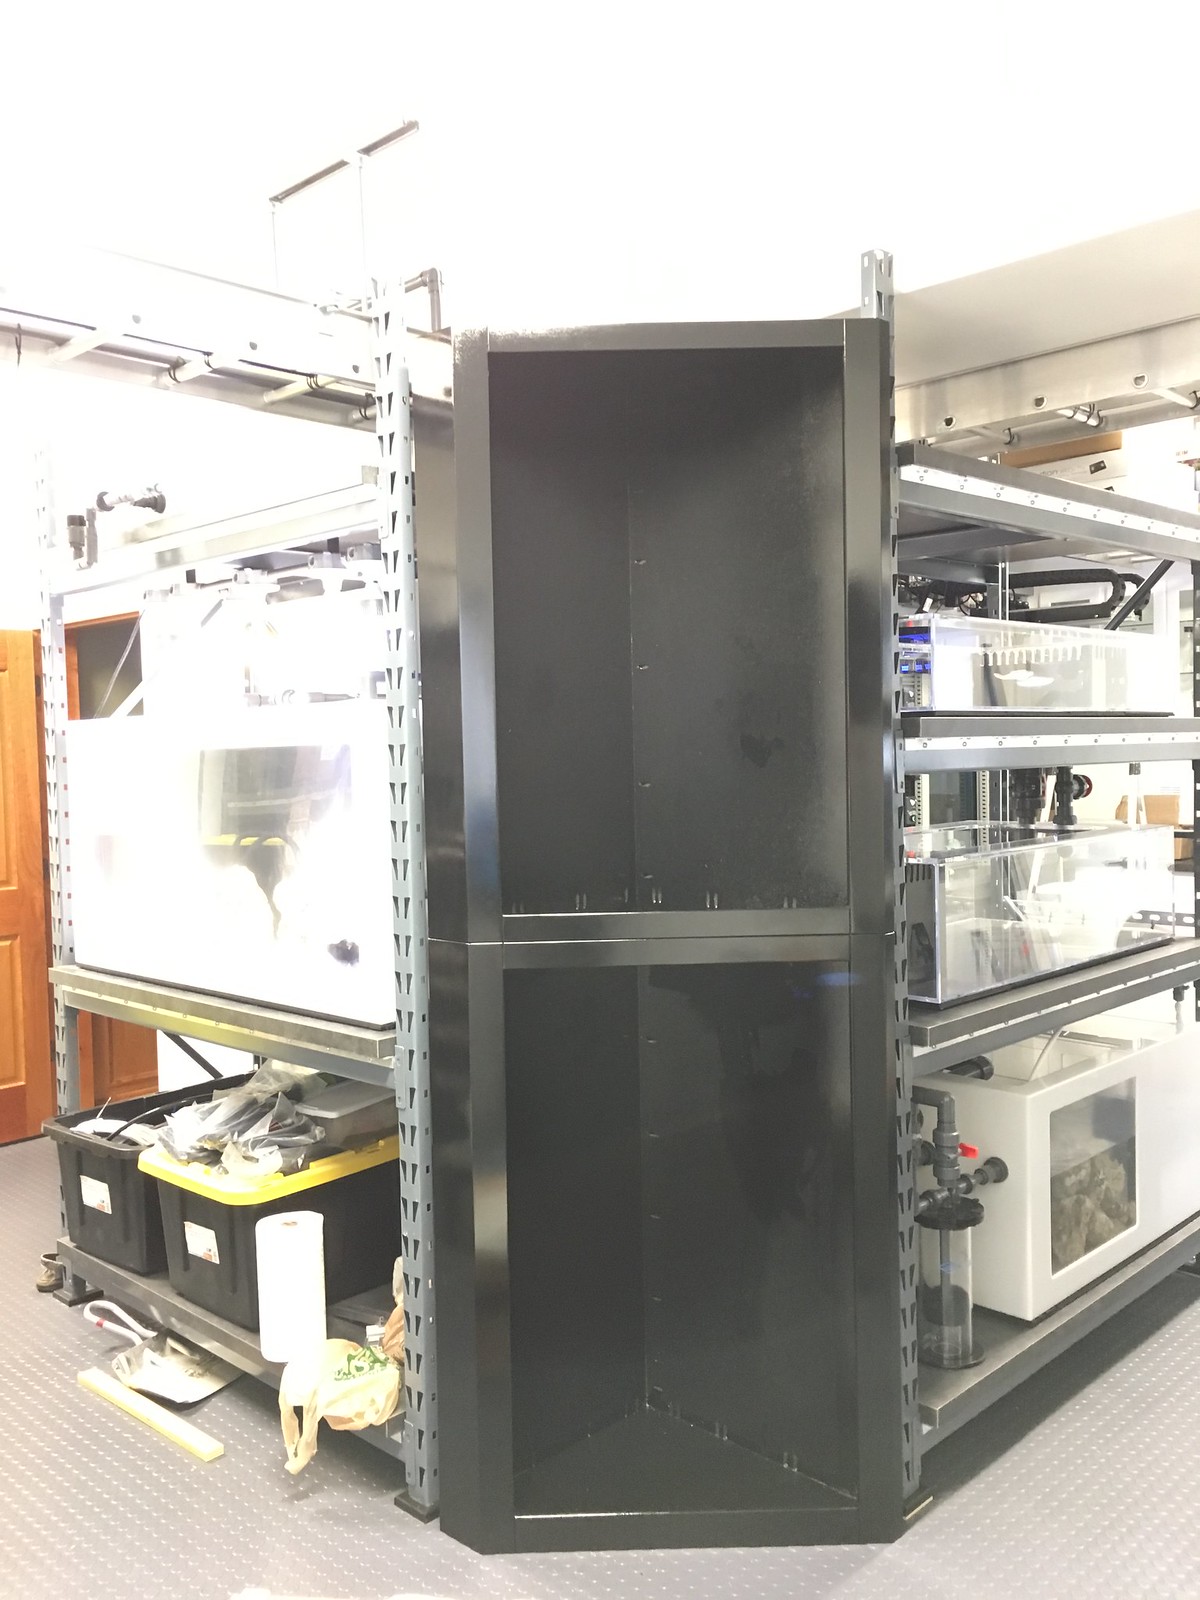
|
|
|
|
|
09/17/2017, 04:31 PM
|
#99 |
|
Registered Member
Join Date: Mar 2011
Location: Golden, CO
Posts: 340
|
I installed the four MP-60's in the dry boxes. Then, I spent a good amount of time organizing electronics. The cord management isn't complete. I'm still debating controllers and how much I'll actually run through a
controller. For now, everything that is running is plugged in directly to surge protectors. I'm labeling every single outlet and cord so that I have a good reference as to what exactly is plugged into what circuit. I'll probably write up some documentation for further reference. That will also allow me to start tracking dates for warrenty, service, and bulb replacement. I built an 8' tall rack that is a "corner" cabinet. It sits in the little corner where the refugium meets the frag rack. That will basically function as an IT rack. I'll have some UPS in there, the controller, and all of the switches, meters, displays, general electronics interface. I am installing doors tomorrow. The door panels are basically modular removeable panels that I can modify and replace as I start mounting the controller and switches. The doors themselves will only be opened when I need to modify something in the electronics. Otherwise, it is a sealed box to protect from splashing. I will probably need to vent it. That's the nice thing about having a modular face to the doors. I can add and remove things as needed without rebuilding the entire cabinet.
|
|
|
|
|
09/17/2017, 04:32 PM
|
#100 |
|
Registered Member
Join Date: Mar 2011
Location: Golden, CO
Posts: 340
|
Lastly, I've been making A LOT of water! Today, I finally did a final check on all of the true union valves and let the water run down into the sump. I initially had all valves turned off and then started opening one at a
time so that I could bring small sections online to monitor. Eventually, I got both return pumps running. I'm using matching Dolphin pumps as returns. One return feeds the display, the refugium, and the reactors. The other return feeds the display and the frag tank sump. I have just the sump to the frag tank tied in and cycling with the display's water for now. Once the rock in there is cured, I could potentially isolate that system and start running the frag tanks on their own. Or, I could turn on the frag tanks and allow the water to continue to mix with the display's for added stability. I filled the fresh water top-off tank and have that running with the main sump. It just tops off via gravity and the float valve. That has been a stable solution in the past and is working well again. I already conducted some power failure tests. My sump can hold the volume. I did identify one issue with the refugium during a power outage. I will need to address that later on. Overall, with the water running, I'm feeling pretty confident. I still need to install a more perminant heater solution. I pulled old heaters from the last tank for now. They're 300 Watt.  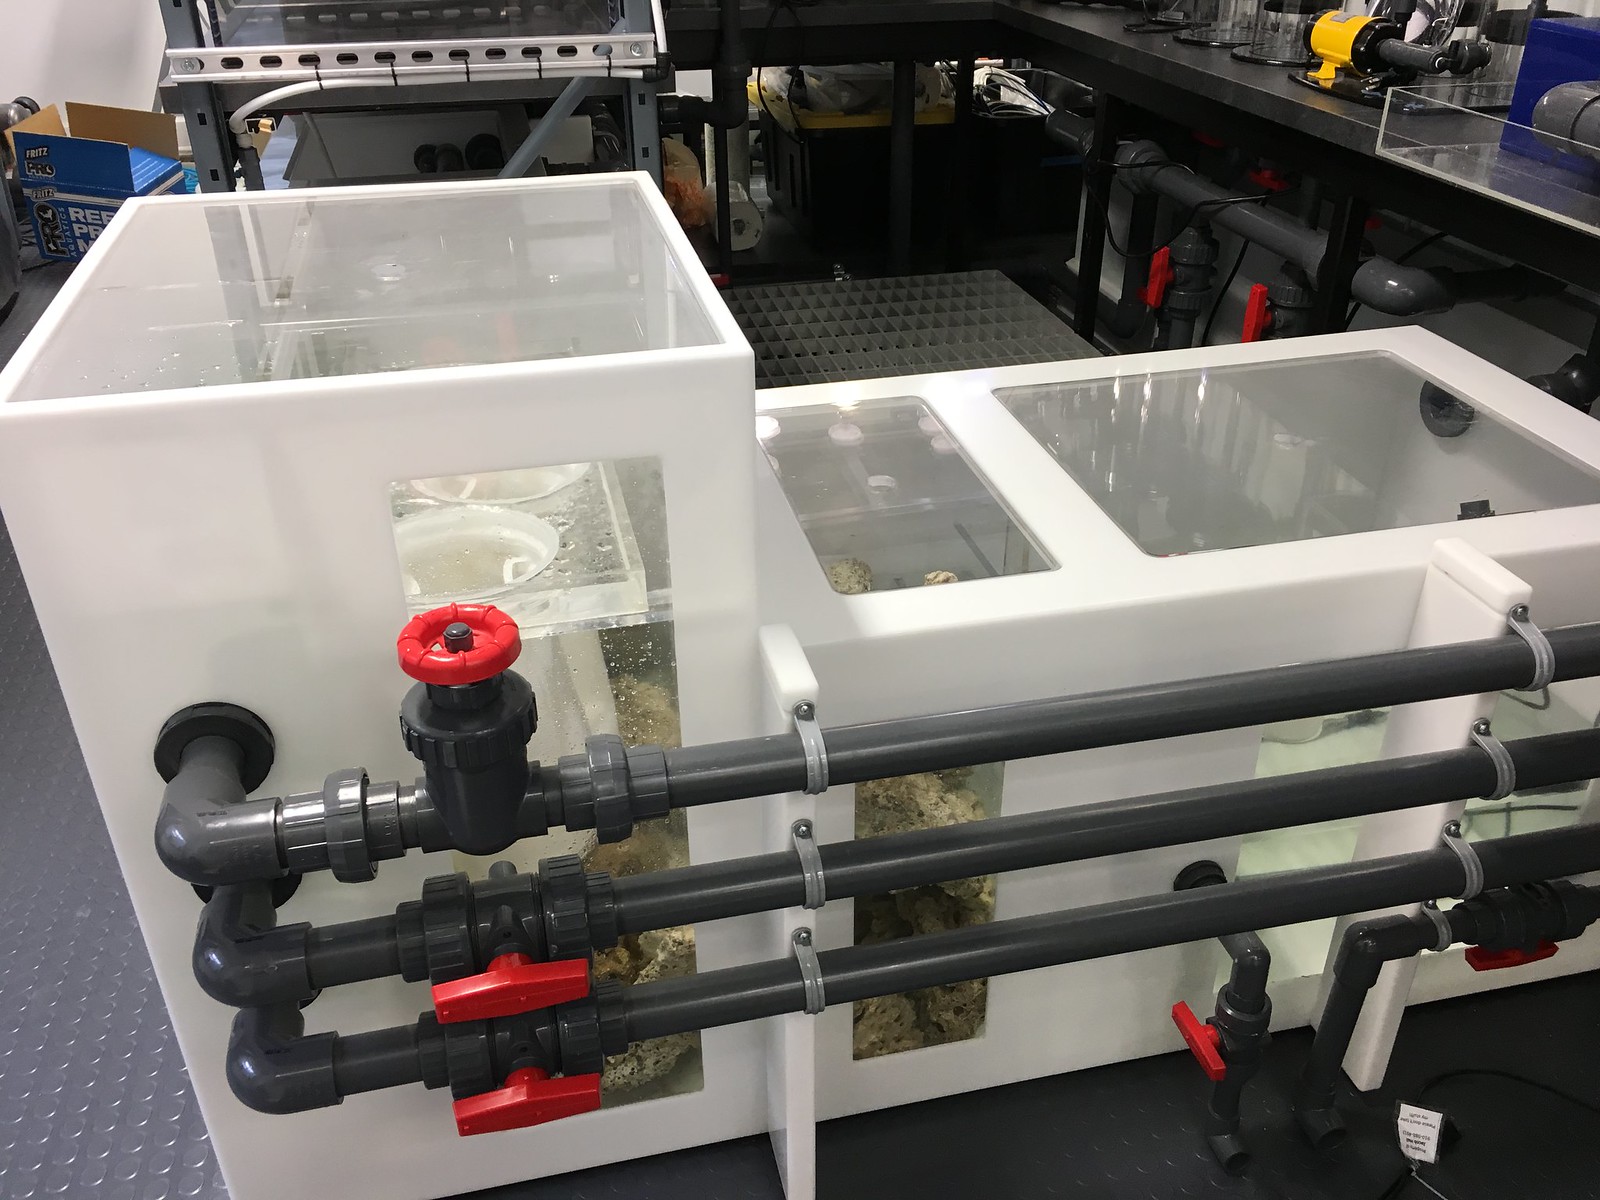 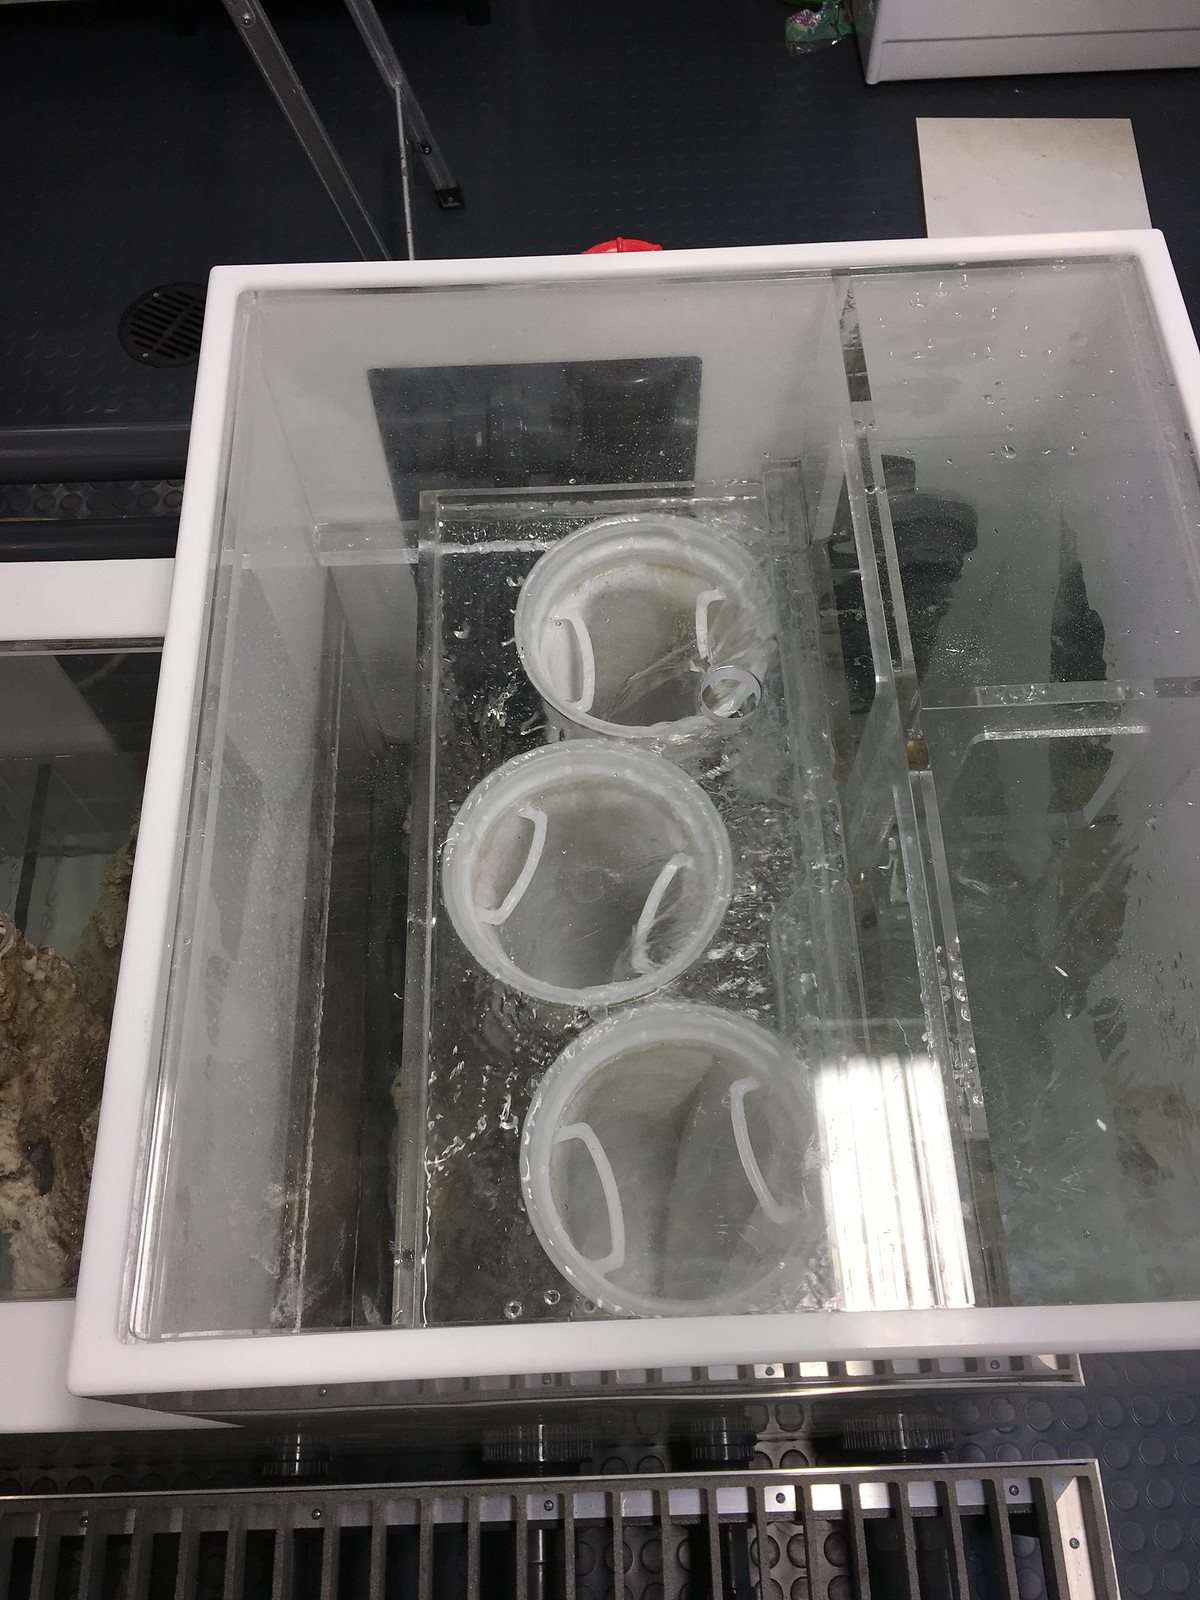 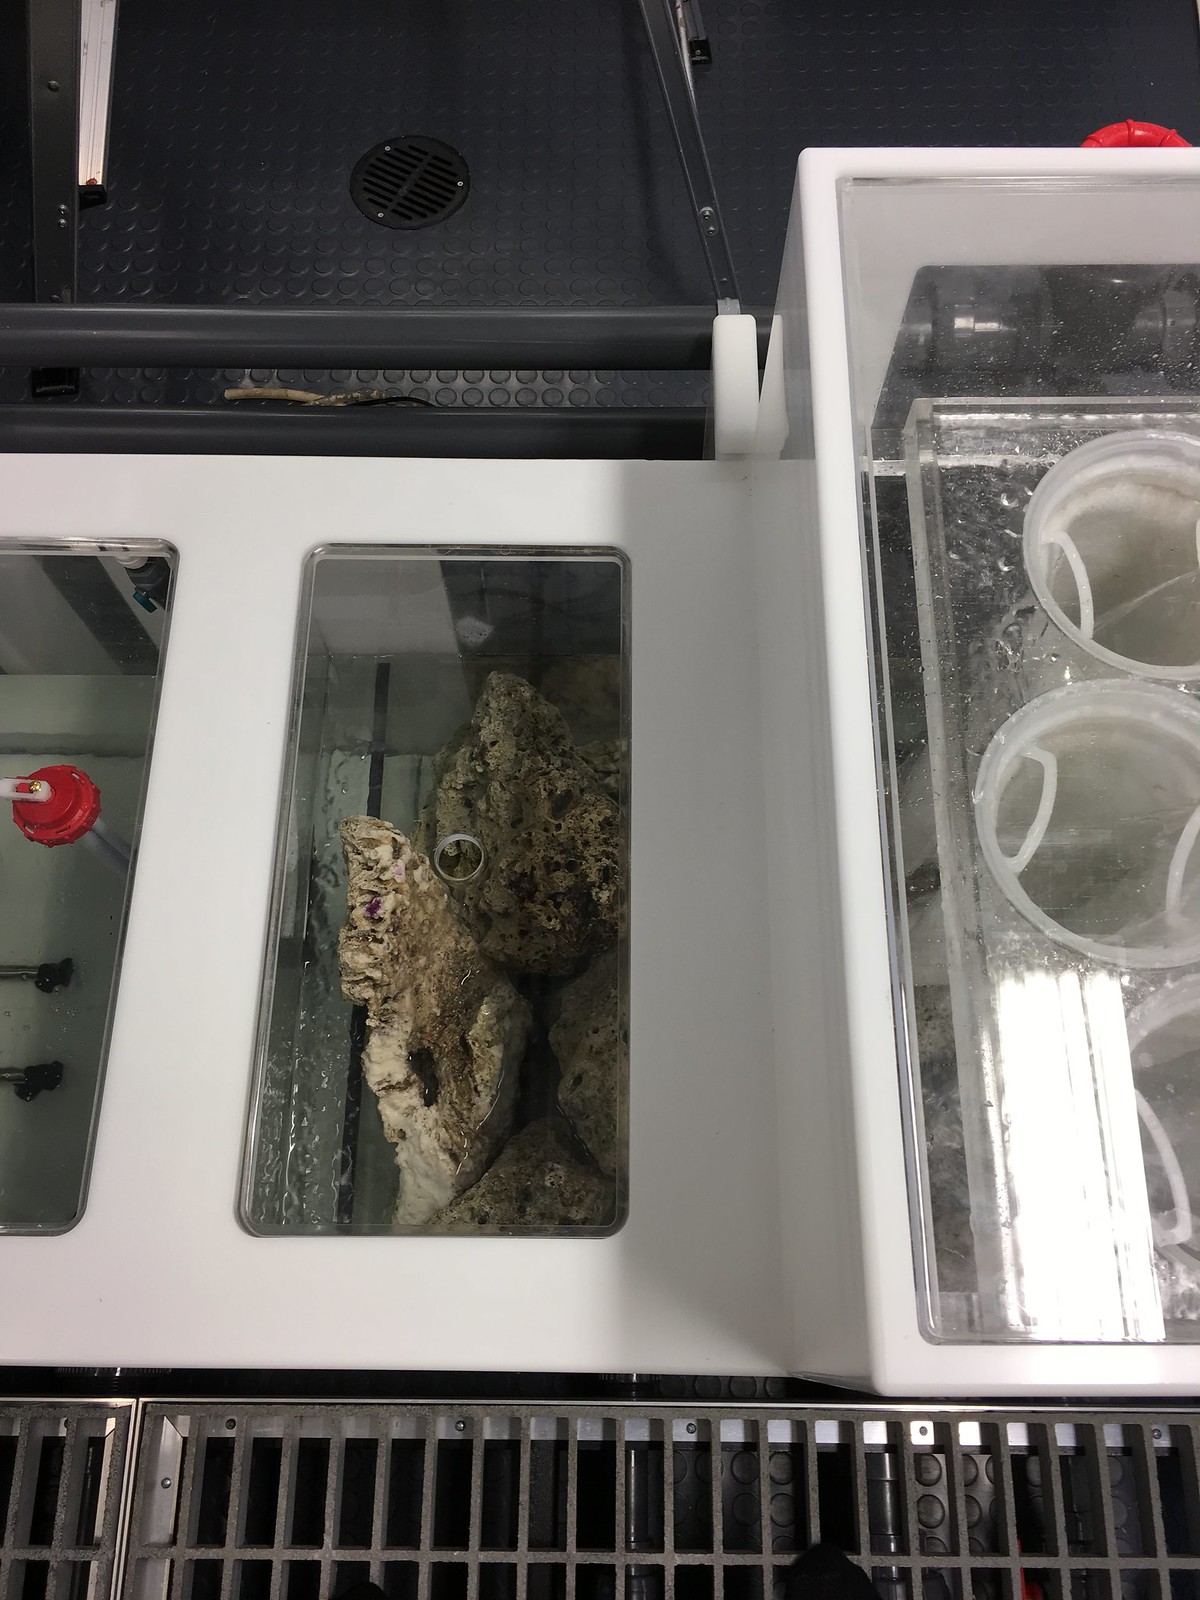 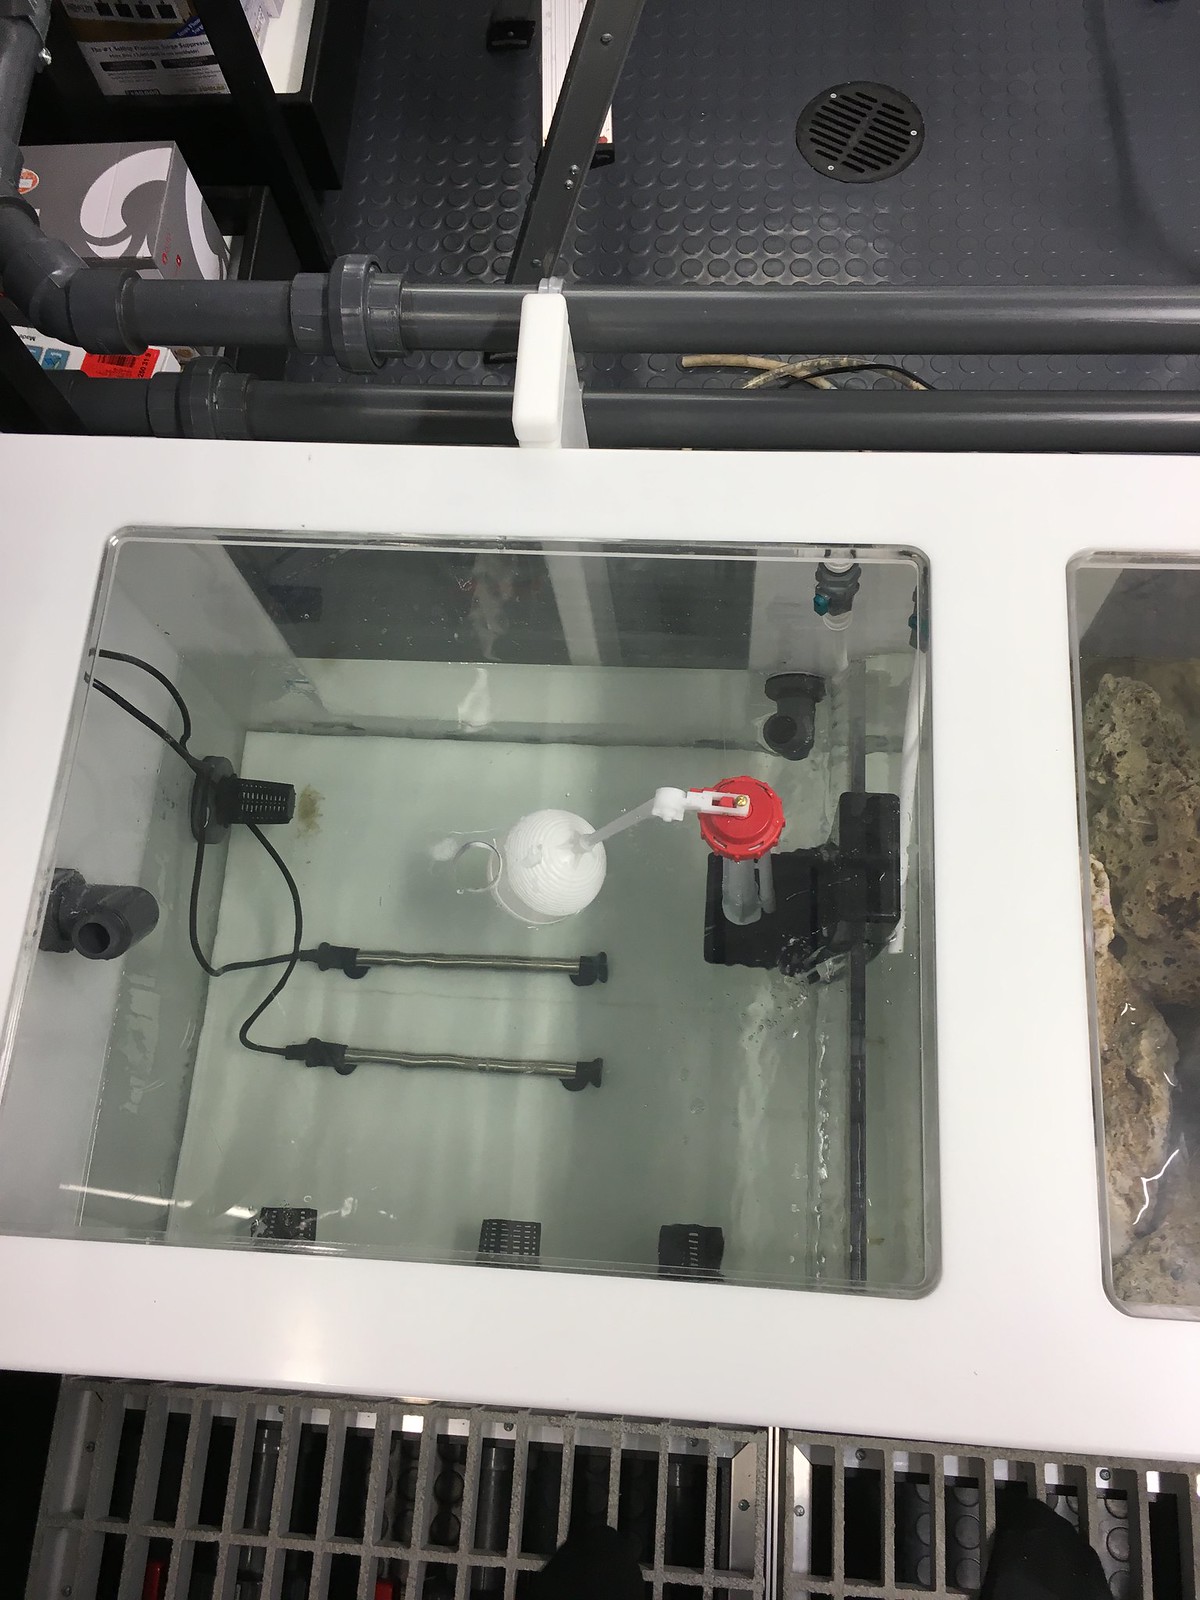 One major thing I haven't done yet is bringing the skimmer online. I will probably do that tomorrow or next weekend. I want to make sure I'm around to watch it for a full day in case something unexpected happens. Just getting this water running this much is enough for now. |
|
|
|
 |
| Thread Tools | |
|
|


