
|
|
 04/22/2017, 09:33 AM
|
#126 |
|
Registered Member
Join Date: Mar 2011
Location: Golden, CO
Posts: 340
|
Thanks for all of the support everyone. Good group of people here.
Everything back home is as resolved as it can be. I will still be fitting in time with the build between other life events. Building is my therapy. I grew up learning the cabinet trade from my dad. I've expanded my building skills beyond just woodworking but that was a good foundation. Luckily, I've been taking my time with things anyway. There's no reason things can't sit a little longer. |

|

|
|
04/22/2017, 12:24 PM
|
#127 |
|
Registered Member
Join Date: Mar 2017
Location: South Florida
Posts: 115
|
Sorry to hear about your loss. I am really not looking forward to that Day. You must be devastated.
Glad to see your build is here on RC. I kept going to RF looking for updates there. |
|
|
|
|
05/13/2017, 12:54 PM
|
#128 | |
|
Registered Member
Join Date: Mar 2011
Location: Golden, CO
Posts: 340
|
Quote:
|
|
|
|
|
|
05/13/2017, 12:56 PM
|
#129 |
|
Registered Member
Join Date: Mar 2011
Location: Golden, CO
Posts: 340
|
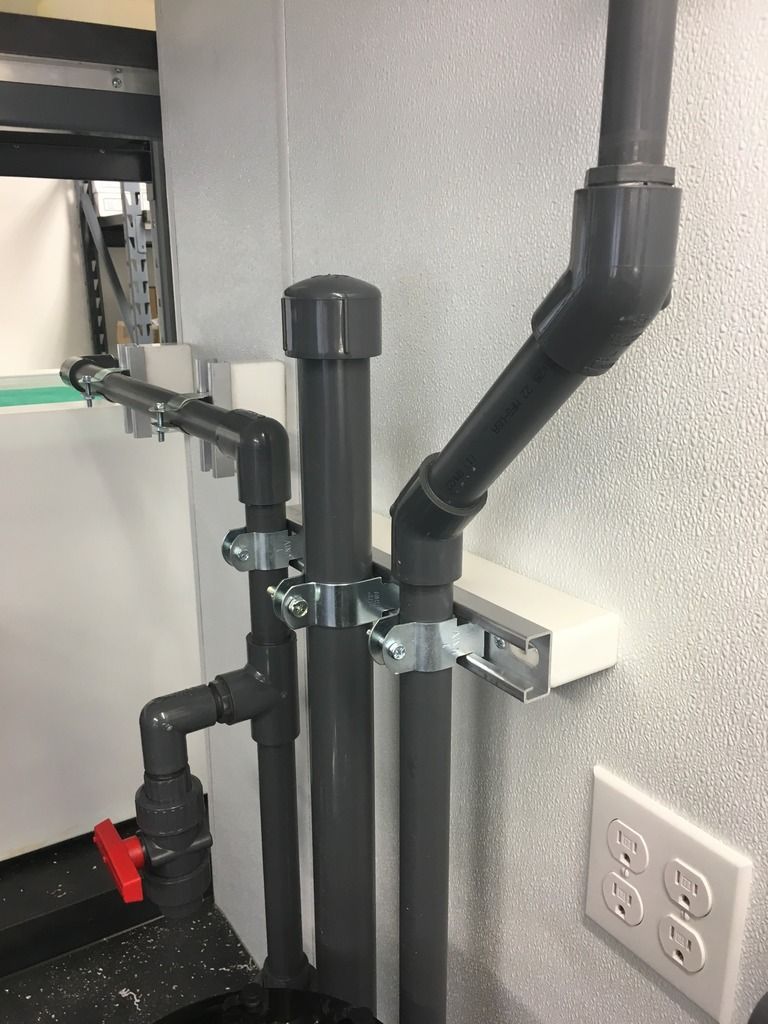
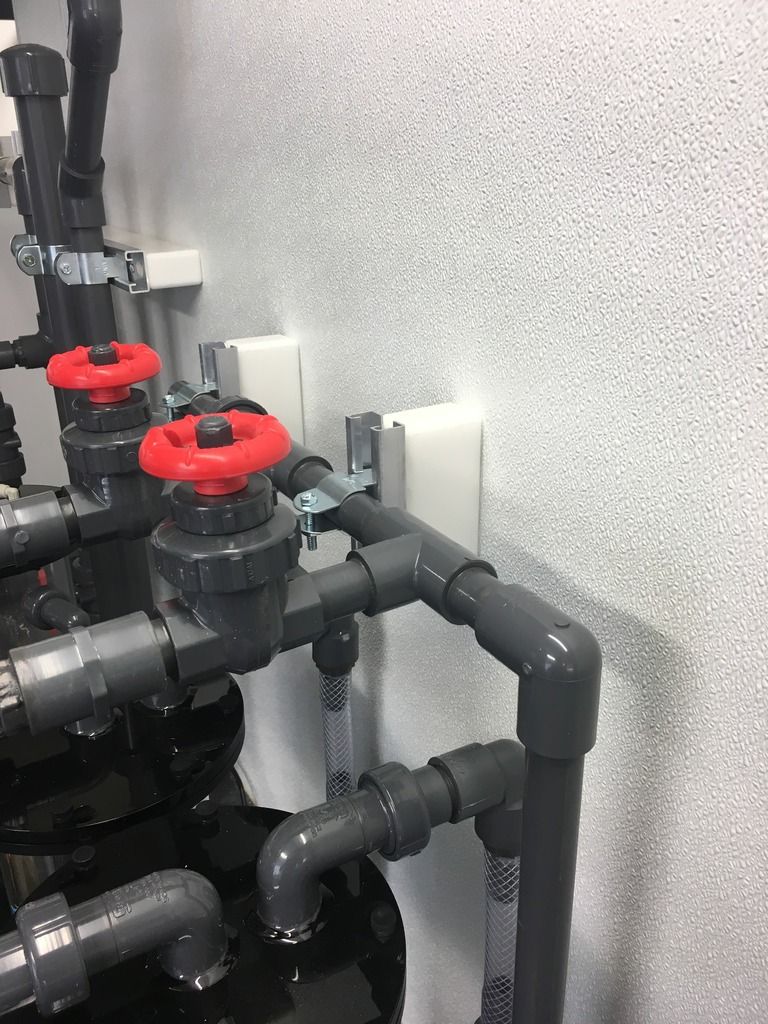
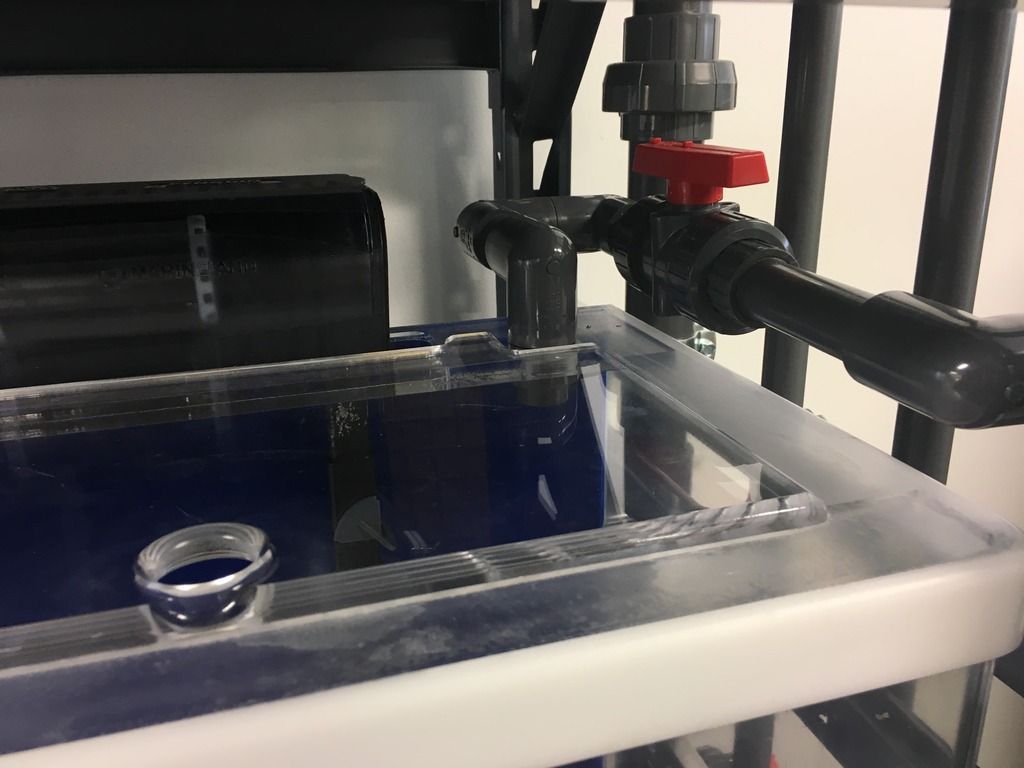
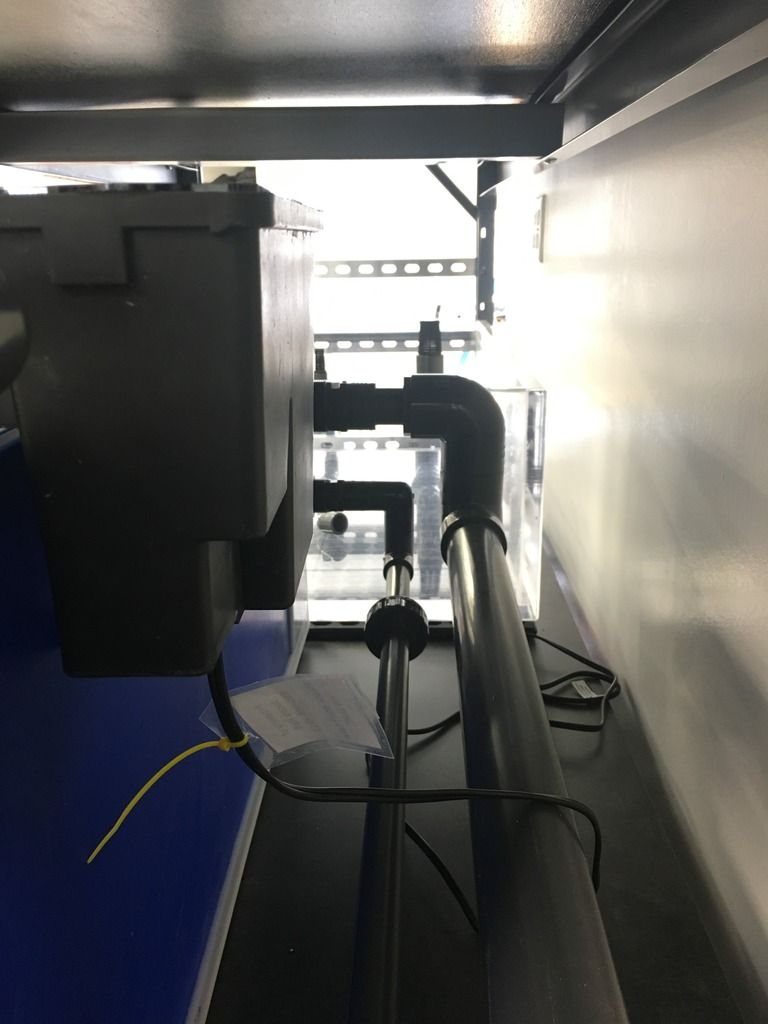
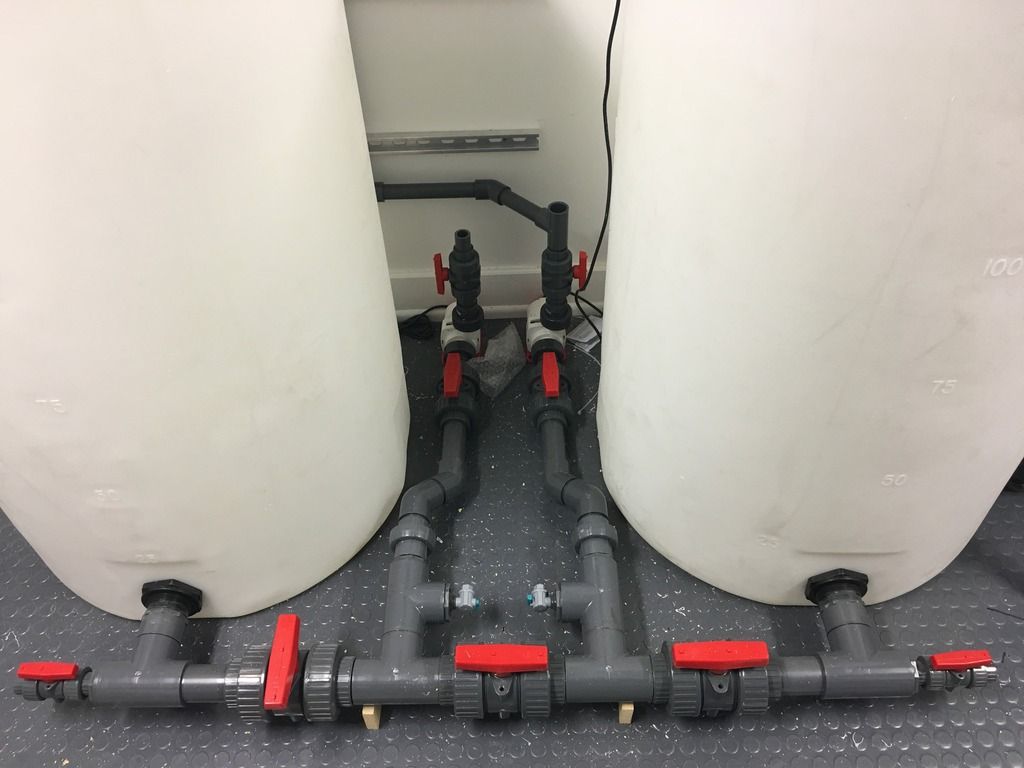
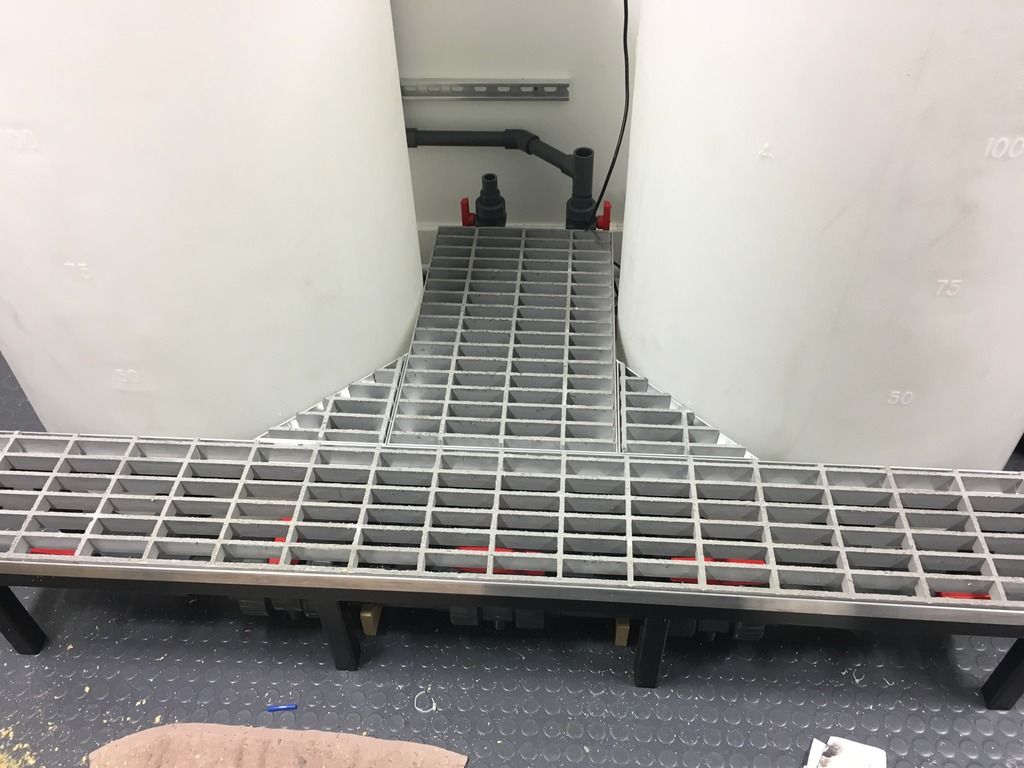
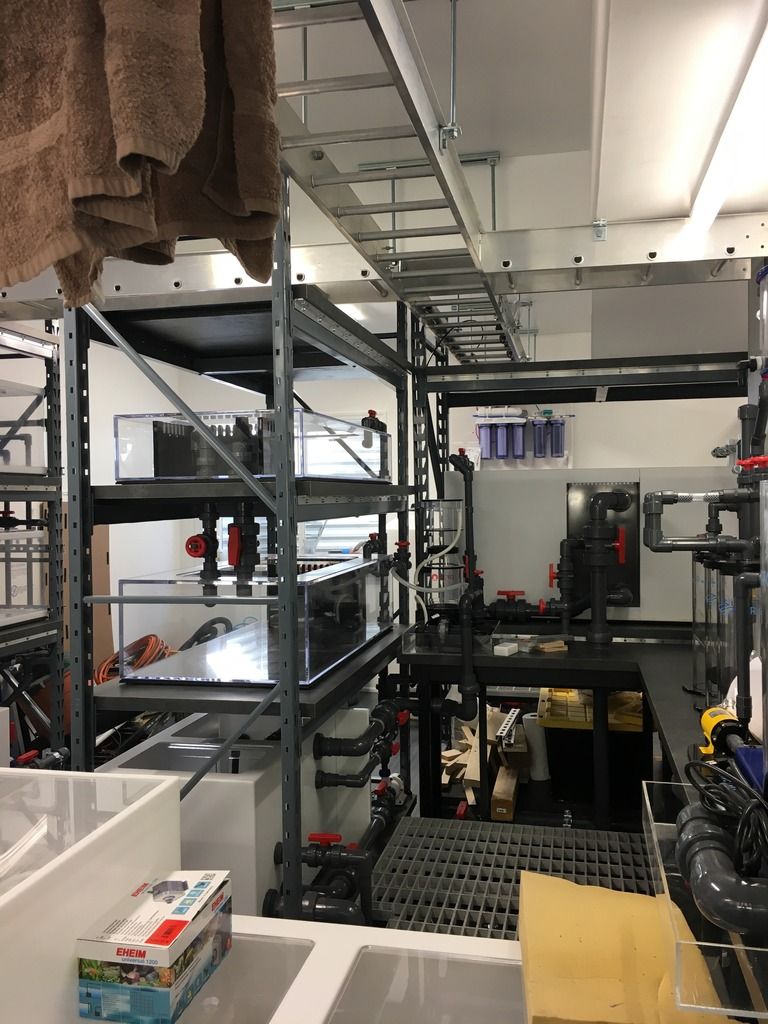
I made some supports for some of the plumbing along the wall by all of the reactors. Those have been installed.
|
|
|
|
|
05/13/2017, 01:08 PM
|
#130 |
|
Registered Member
Join Date: Mar 2011
Location: Golden, CO
Posts: 340
|
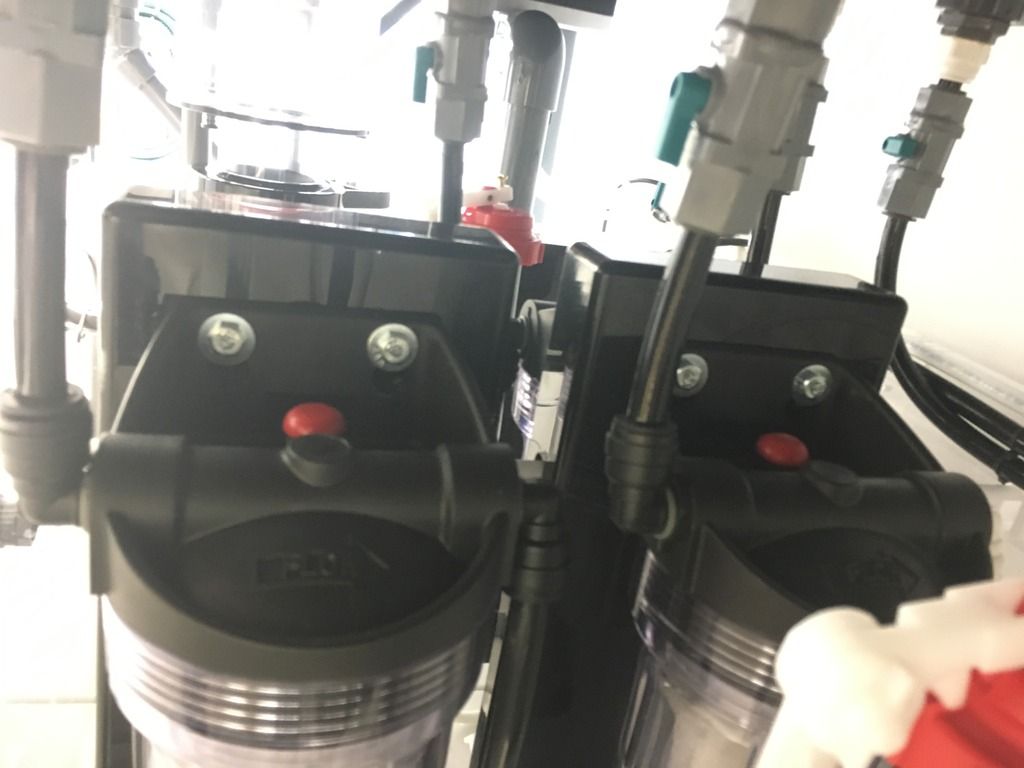
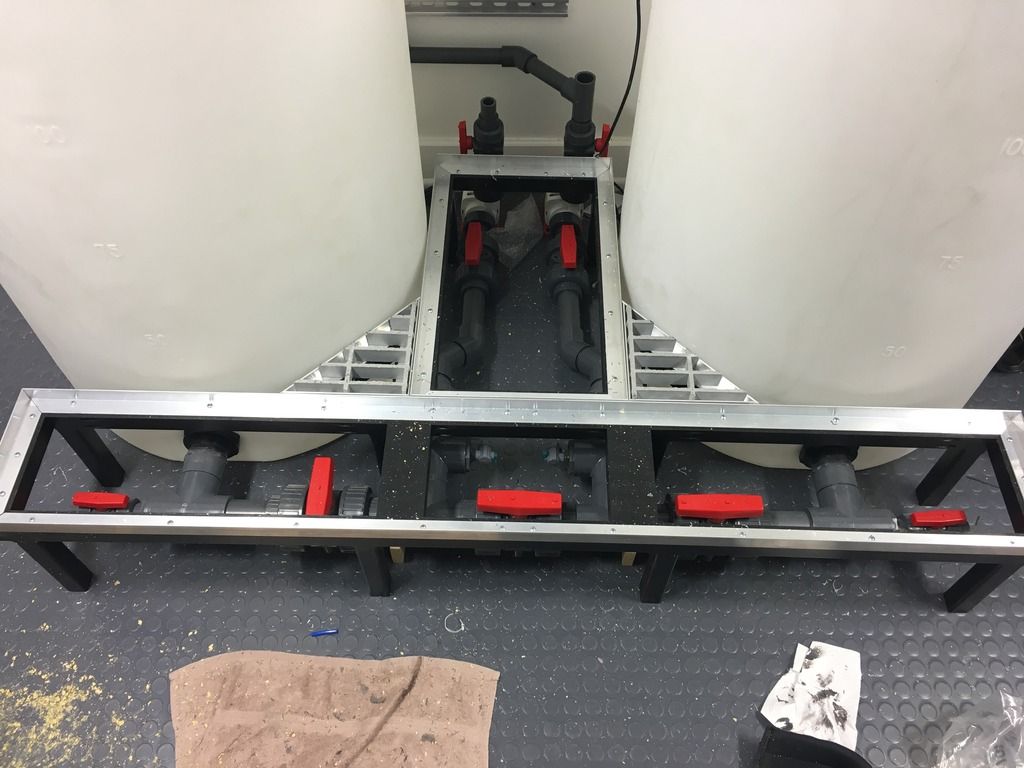
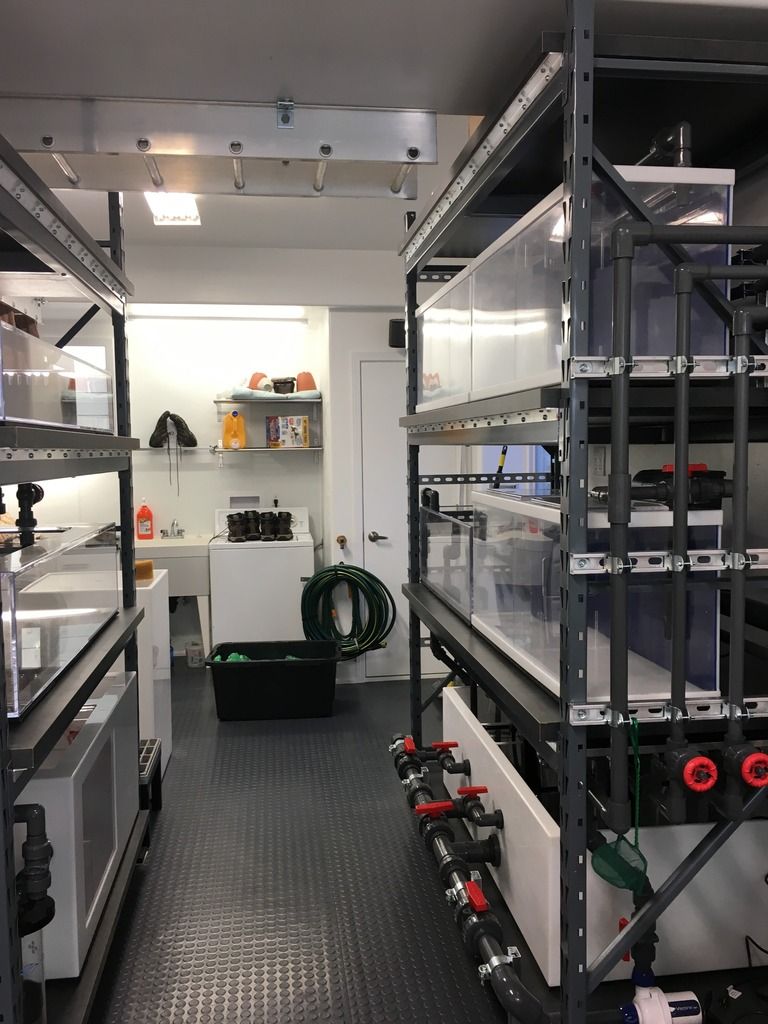
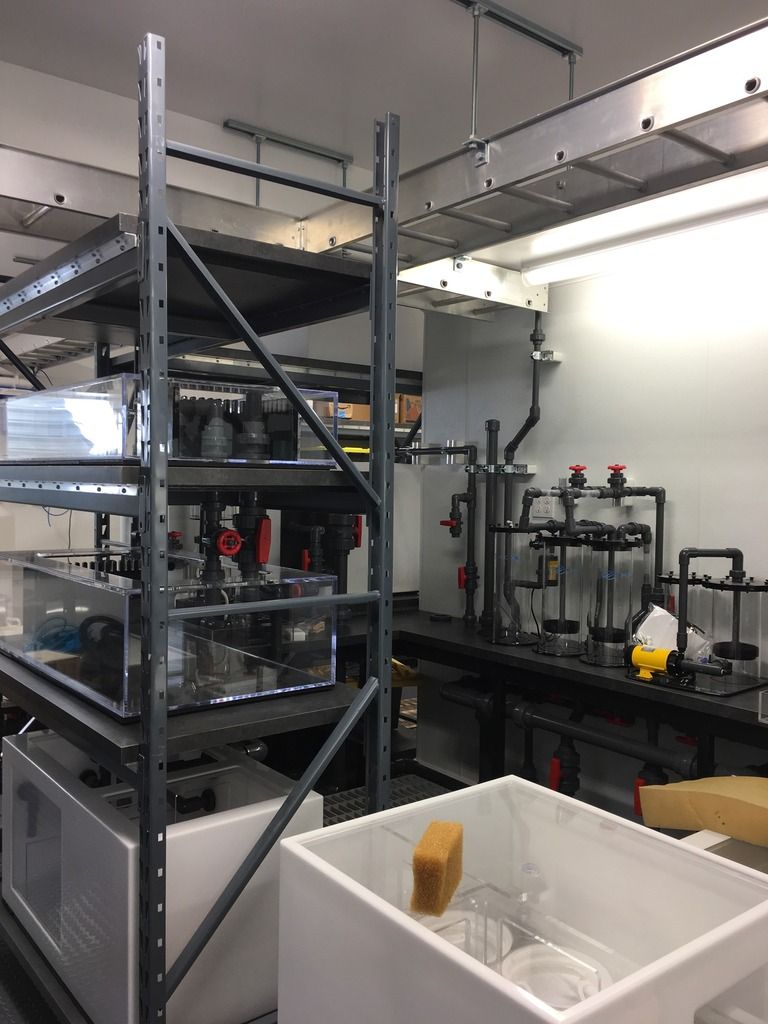
Here is a big photo dump of the QT systems. I mentioned the general goal before, but to help provide some context here, the QT is basically two separate systems. There's a coral QT and a fish QT. I don't plan on medicating the fish QT. The sump is one large box with two separate sumps built into one. They're a mirror image of each other. I have them plumbed so that with the turn of a valve, I can turn the two QT systems into one single system sharing water.
The coral QT is composed of a return pump which provides water to the shallow tank and a manifold for GFO and carbon. There's a modest RO skimmer. It's pretty simple. The fish QT is composed of a matching return pump with matching GFO and carbon reactors and a matching RO skimmer. The return feeds x3 tanks above. That can be adjusted so that all three tanks feed into the sump, or any combination of running stand-alone. I made space for a HOB filter in each. They will each have their own heater and a modest circulation pump. The lights aren't in place yet. 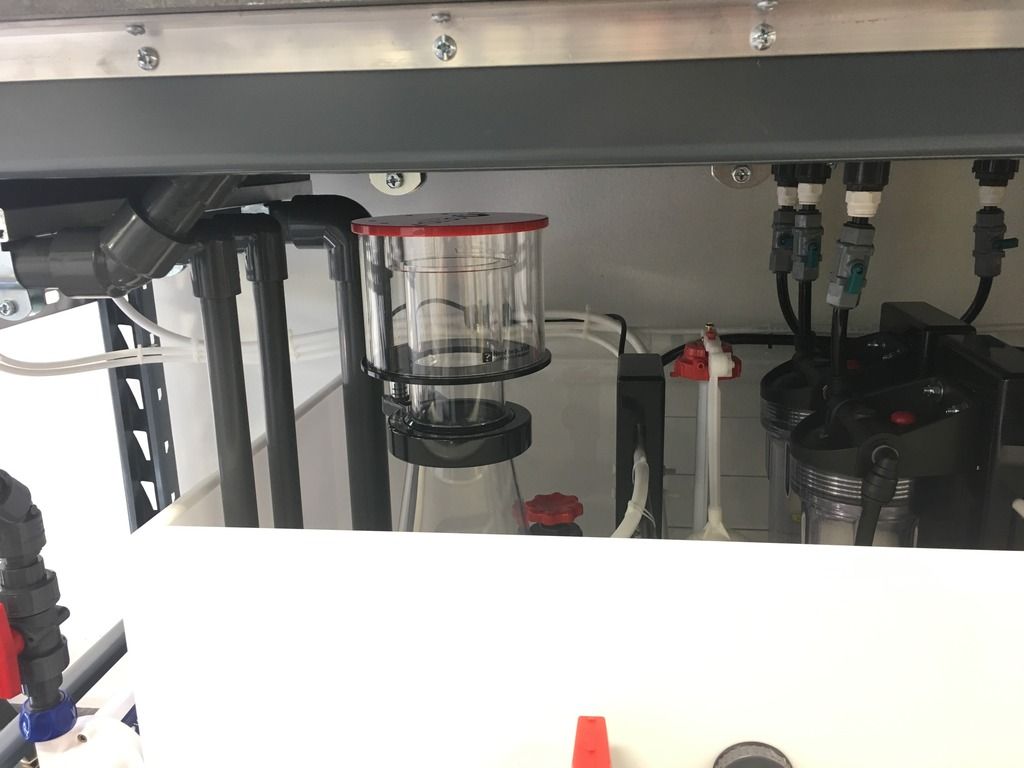 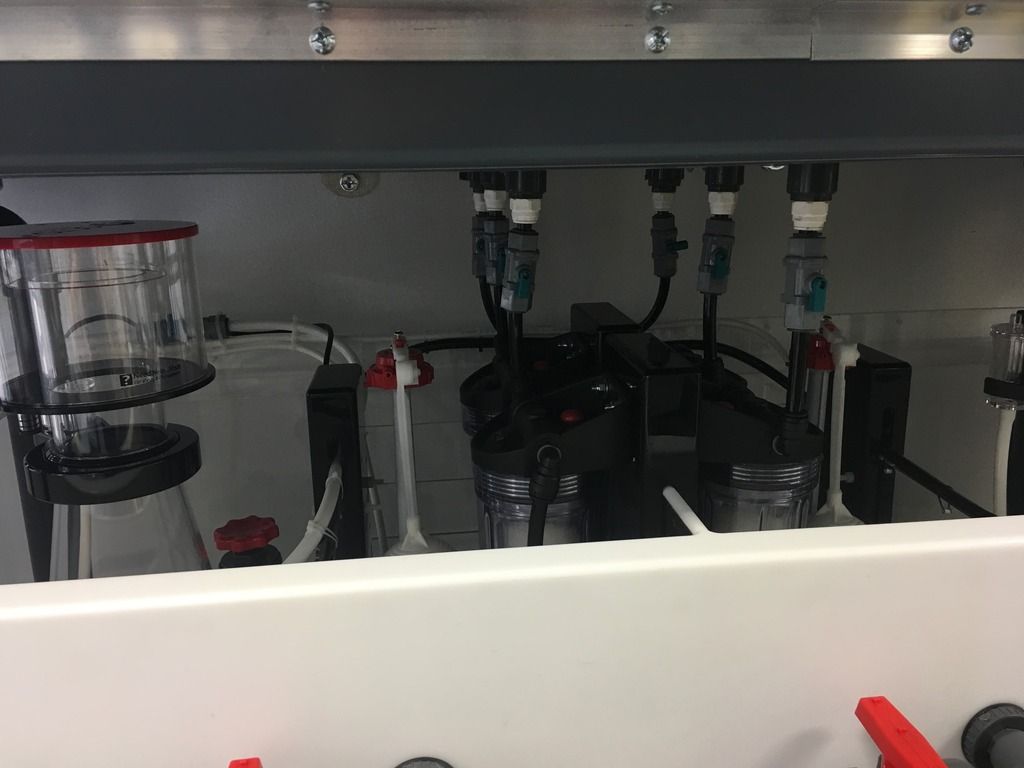 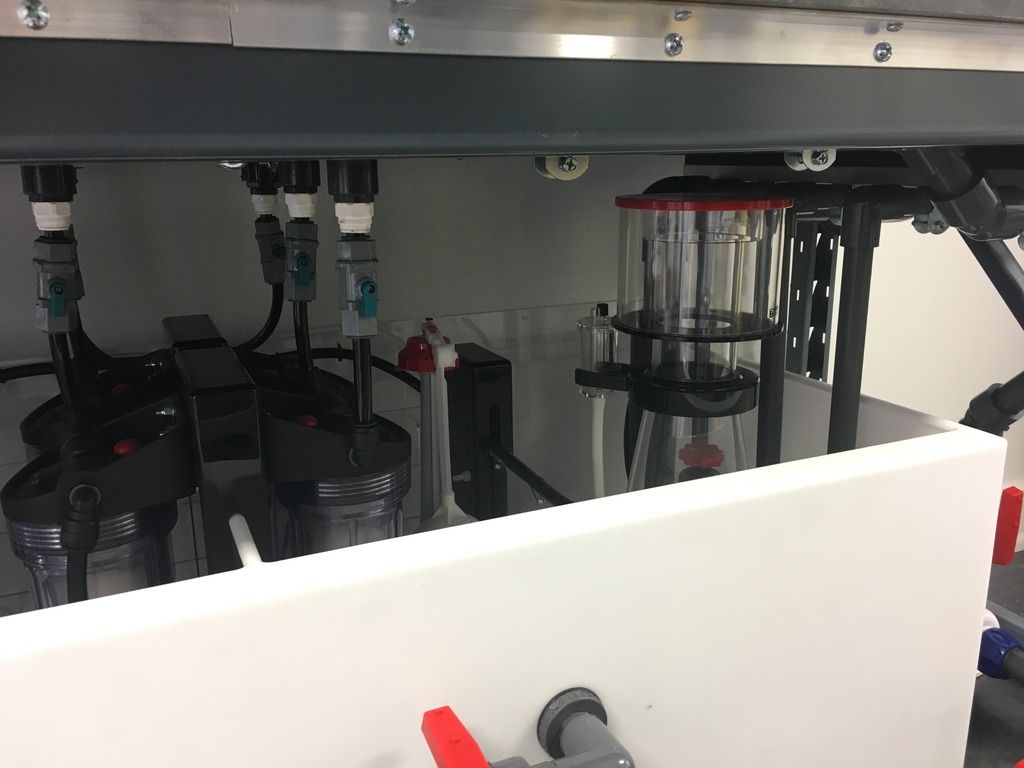 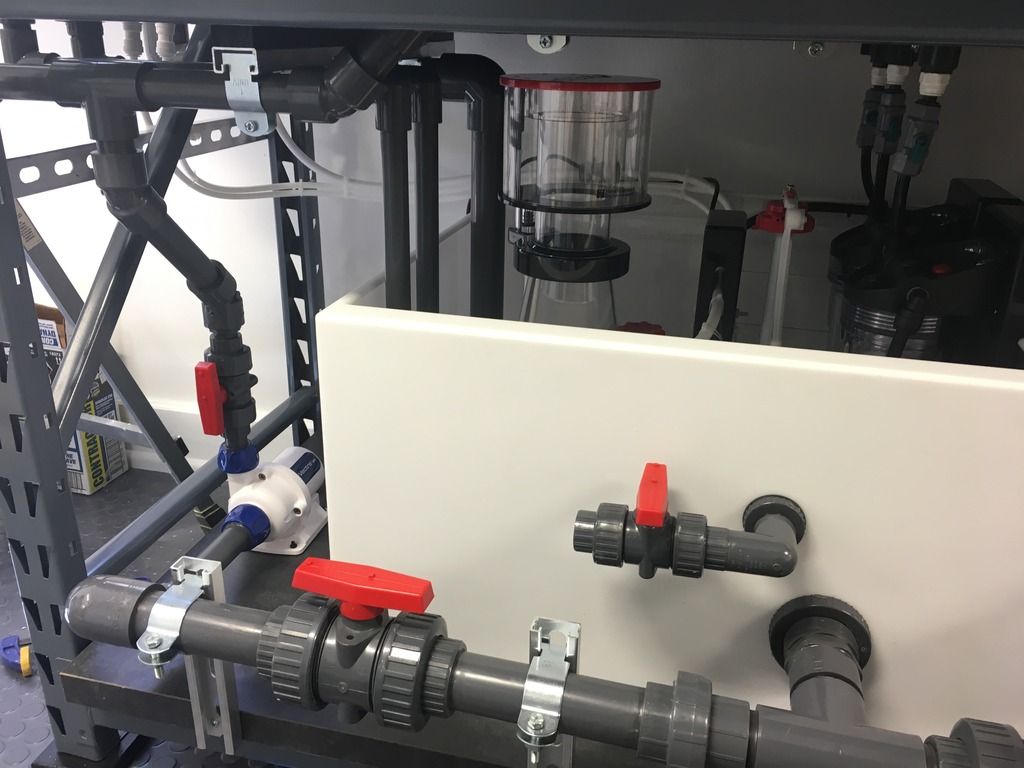 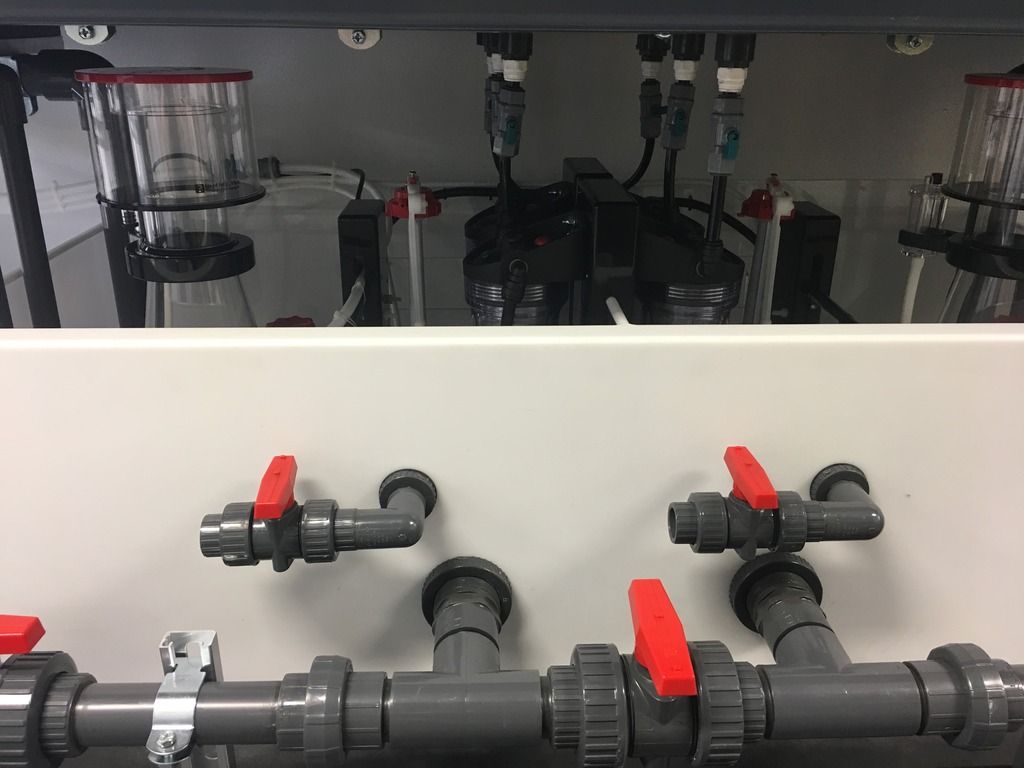 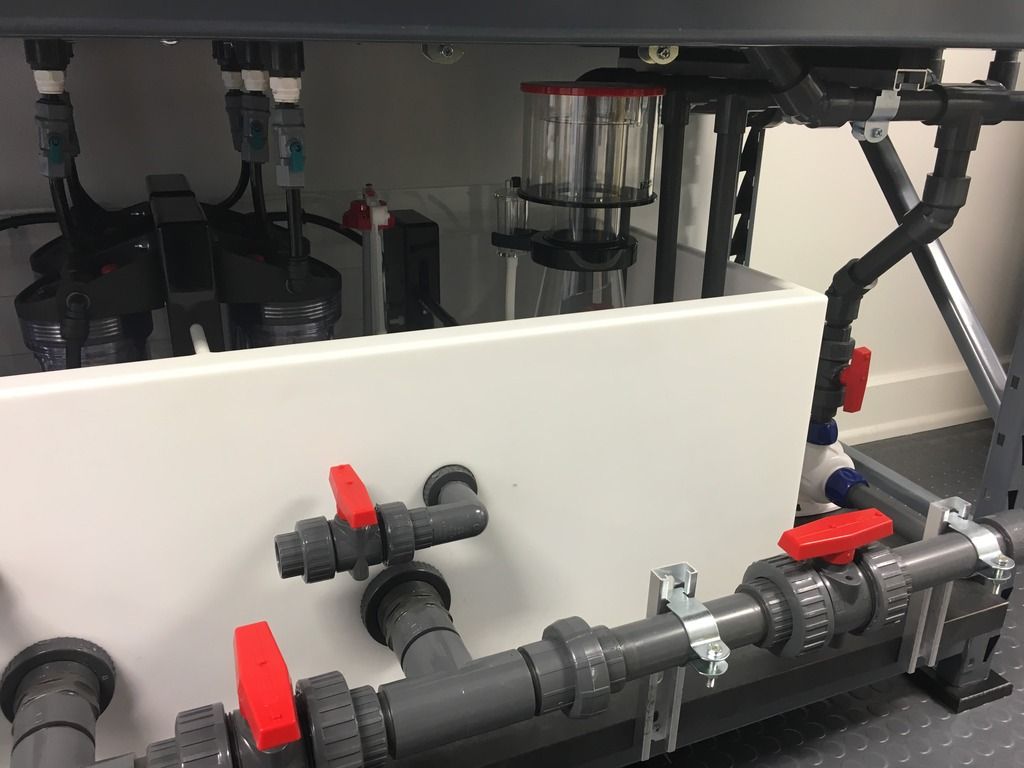
|
|
|
|
|
05/13/2017, 01:14 PM
|
#131 |
|
Registered Member
Join Date: Mar 2011
Location: Golden, CO
Posts: 340
|
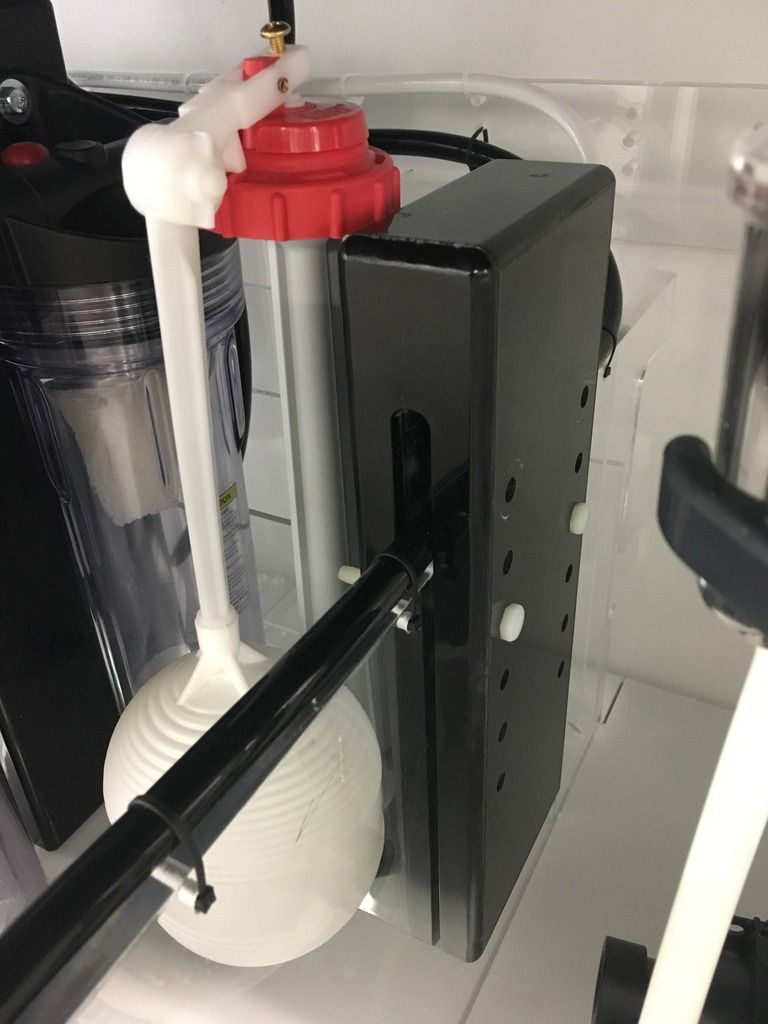
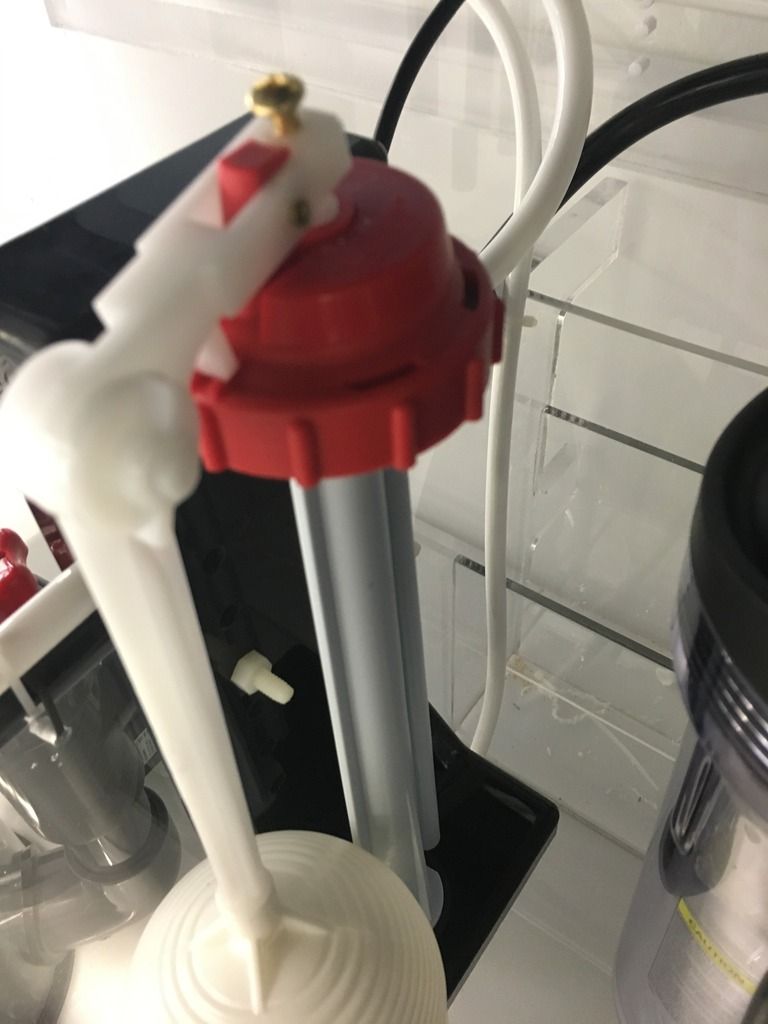
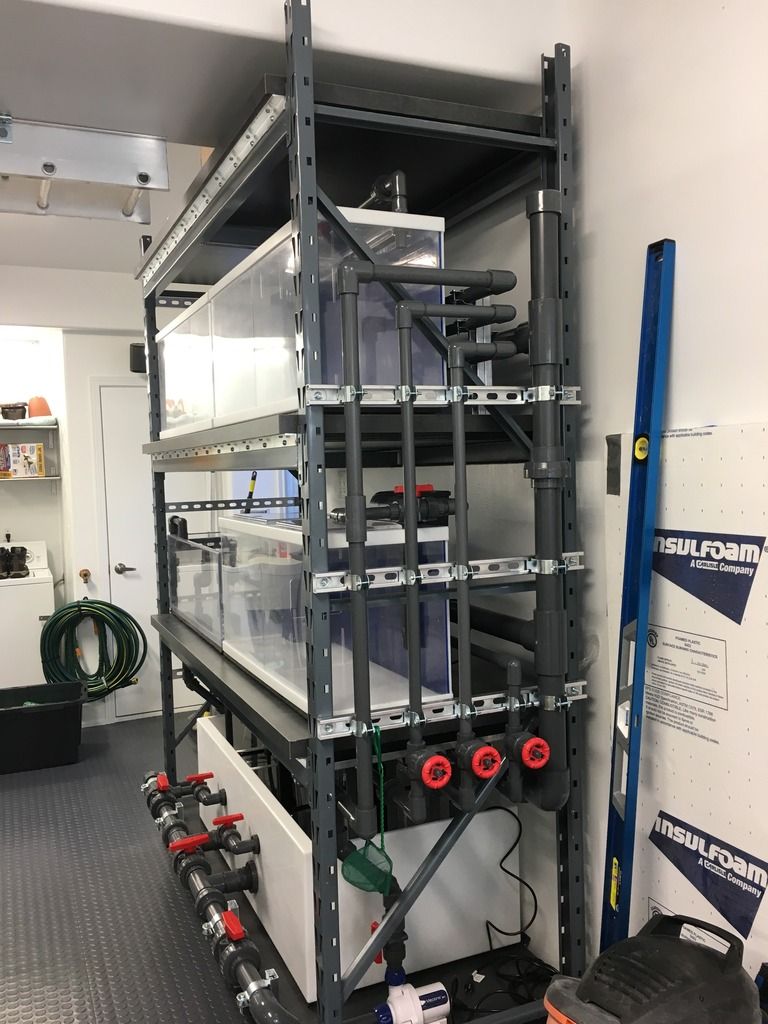
FWTO will be a gravity fed line from a central FW tank located on the top shelf of a rack above the refugium. The top-off is controlled by the toilet plunger valves in each separate sump. I know that might seem crazy to some, but I've used those toilet plunger valves on the last few builds and they've never failed. I made sure there isn't any metal to leach into the water. It's all plastic and rubber.
I built custom acrylic racks that slide over the various dividers to hold the FWTO valves and reactors. Those are the black acrylic inserts you can see equipment attached to. They are bolted in place and can be removed if needed. I'll be using nylon bolts for all of that. I still need to replace a few of the metal bolts you see in a few pics.       
|
|
|
|
|
05/13/2017, 01:17 PM
|
#132 |
|
Registered Member
Join Date: Mar 2011
Location: Golden, CO
Posts: 340
|
|
|
|
|
|
05/13/2017, 09:49 PM
|
#133 |
|
Registered Member
Join Date: Mar 2017
Location: South Florida
Posts: 115
|
u like the toilet plunger idea. i will have to steal that one. such a savings and they will still do the same job or better. I have always used timers for TO water but the accuracy suffers that way.
|
|
|
|
|
05/15/2017, 07:02 AM
|
#134 | |
|
Registered Member
Join Date: Mar 2011
Location: Golden, CO
Posts: 340
|
Quote:
There are smaller solutions available for the hobby. They would fit better. I'm not sure how reliable they are? I've never tried them. The nice thing is that I can always go back and rework this. The bracket is solid but not permanent. It's adjustable in height so I can set the depth in the final zone as needed. I did have to buy an extra kit of rubber gaskets to make this work. The gasket included didn't seal well around the 3/8" line I'm using. I personally avoid electronics for top-off even though I know there are some really good products out there. |
|
|
|
|
|
05/15/2017, 07:40 AM
|
#135 |
|
Registered Member
Join Date: Apr 2017
Posts: 30
|
Very neat work...
I like how you have supported the plumbing everywhere you can. Sent from my iPhone using Tapatalk |
|
|
|
|
05/16/2017, 07:15 AM
|
#136 | |
|
Registered Member
Join Date: Mar 2011
Location: Golden, CO
Posts: 340
|
Quote:
Thanks Fernandes. I'm a bull in a china shop, so supporting everything means there's less to worry about from bumping into pipes. It's extra nice to feel the solid support when you're tweaking the valves. You don't get the sense that all of that pressure is being translated back to a fitting or bulkhead that's going to break. The Unistrut I'm using is aluminum so I don't have to worry about rust there. However, I'm not as confident in the brackets. We'll see how they do over time. |
|
|
|
|
|
05/16/2017, 03:00 PM
|
#137 |
|
Registered Member
Join Date: Jan 2006
Location: Westminster, CO
Posts: 17,289
|
Looks great!
__________________
Hobby Experience: 9200ish gallons, 26 skimmers, and a handful of Kent Scrapers. Current Tank: Vortech Powered 600G SPS Tank w/ 100gal frag tank & 100g Sump. RK2-RK10 Skimmer. ReefAngel. Radium 20k. |
|
|
|
|
05/25/2017, 01:27 PM
|
#138 |
|
Registered Member
Join Date: Mar 2011
Location: Golden, CO
Posts: 340
|
Thank you
|
|
|
|
|
05/25/2017, 01:28 PM
|
#139 |
|
Registered Member
Join Date: Mar 2011
Location: Golden, CO
Posts: 340
|
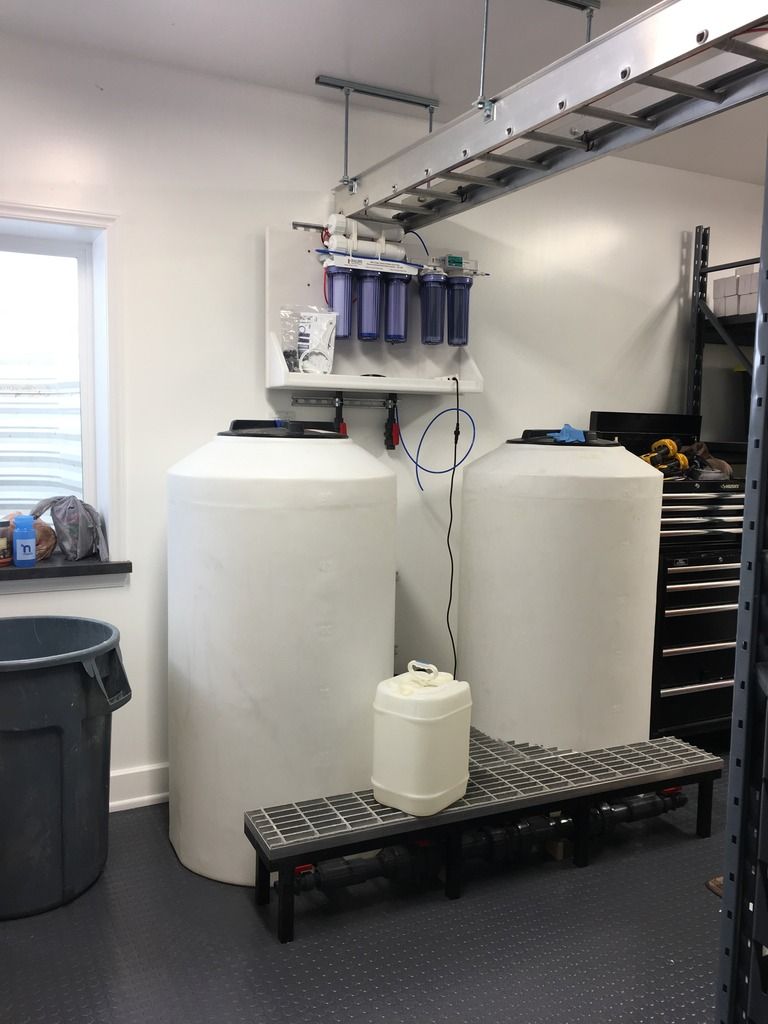
Here is the sketch I did a few months ago planning out the mixing station.

|
|
|
|
|
05/25/2017, 01:34 PM
|
#140 |
|
Registered Member
Join Date: Mar 2011
Location: Golden, CO
Posts: 340
|
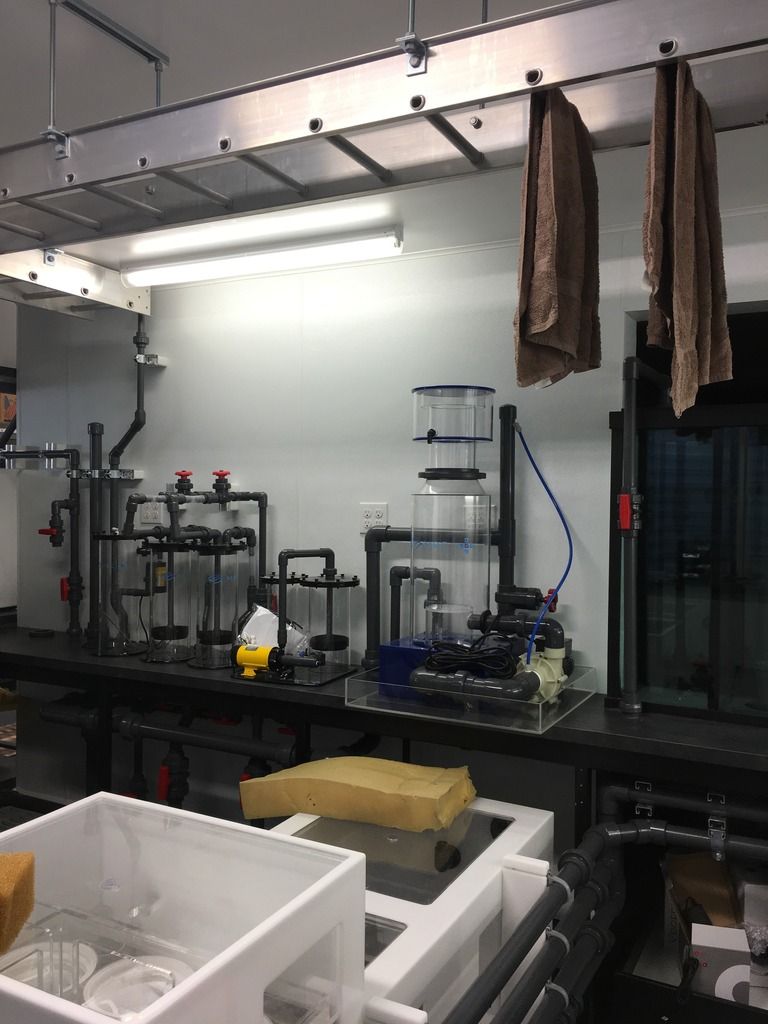
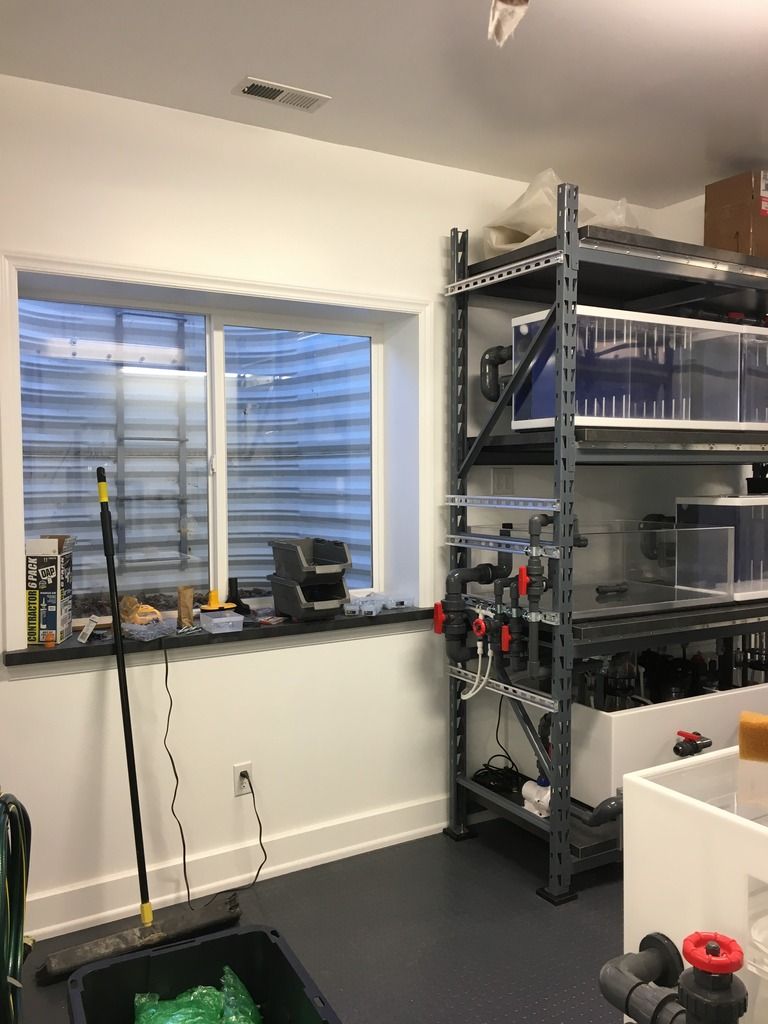
And here's the progress so far....
    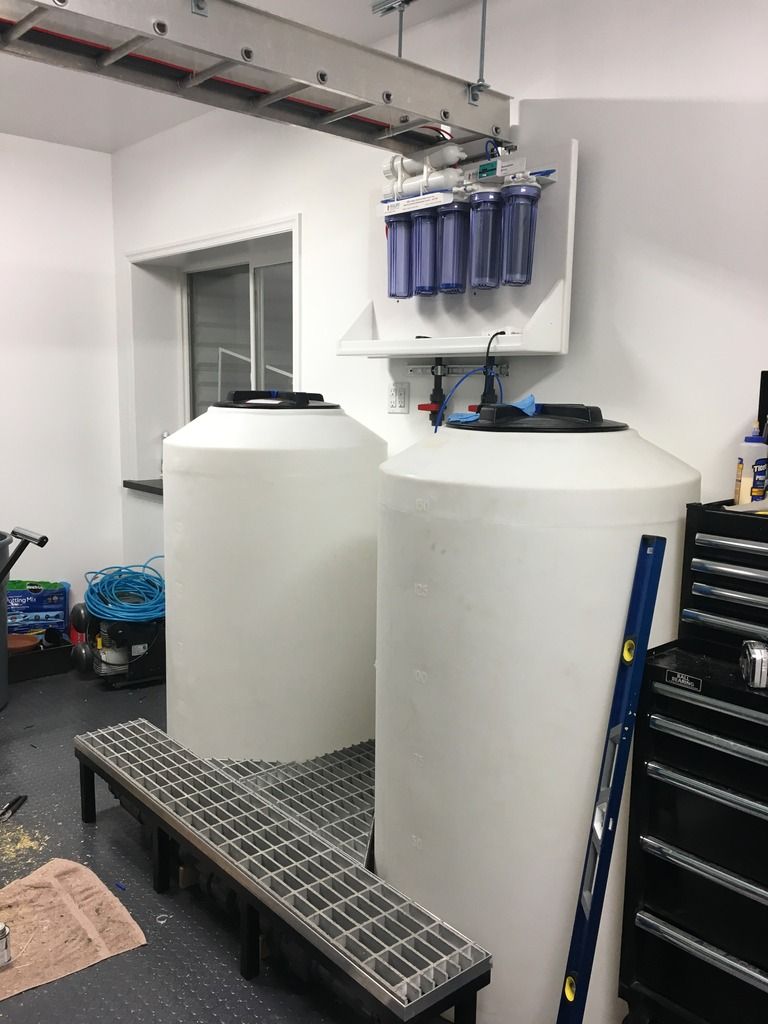 The actual FWTO tank. Top shelf. I'm waiting on some transparent PVC I'm going to run vertically from the open union. I'll use that to visually check the water level in the tank. I'll put graduated marks on that to determine gallons. I'm also putting an "electronic tape measure" in that eventually. The water depth can be correlated to gallons electronically and I can feed that into a user interface to show how many gallons top off I have at any time. 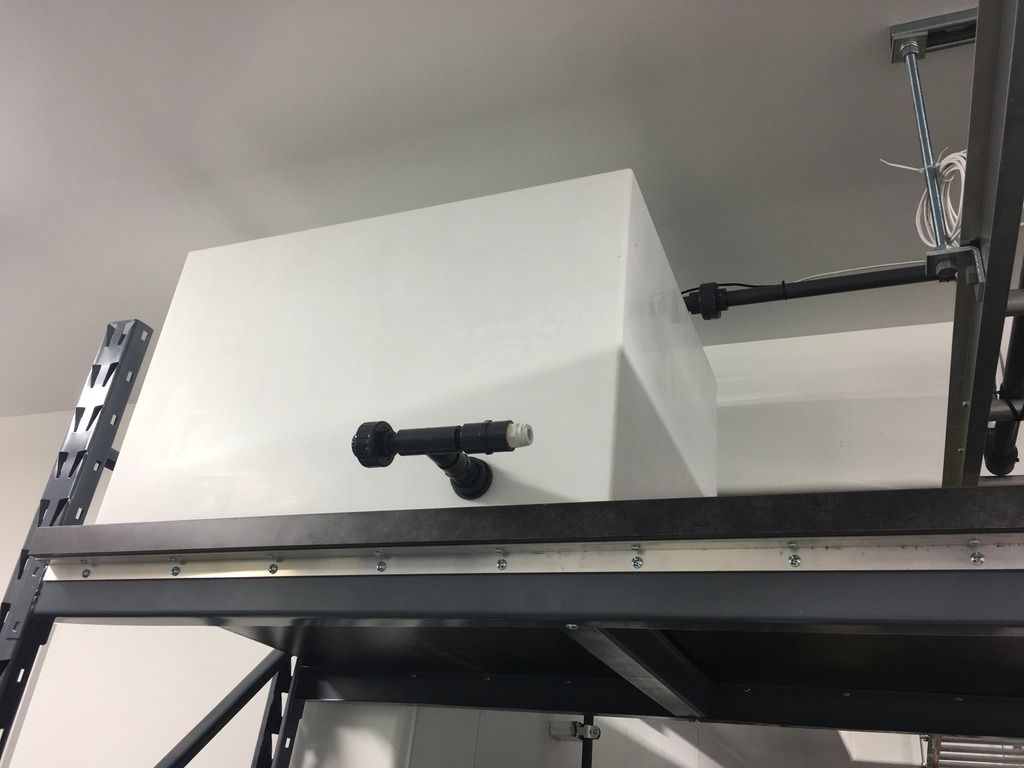 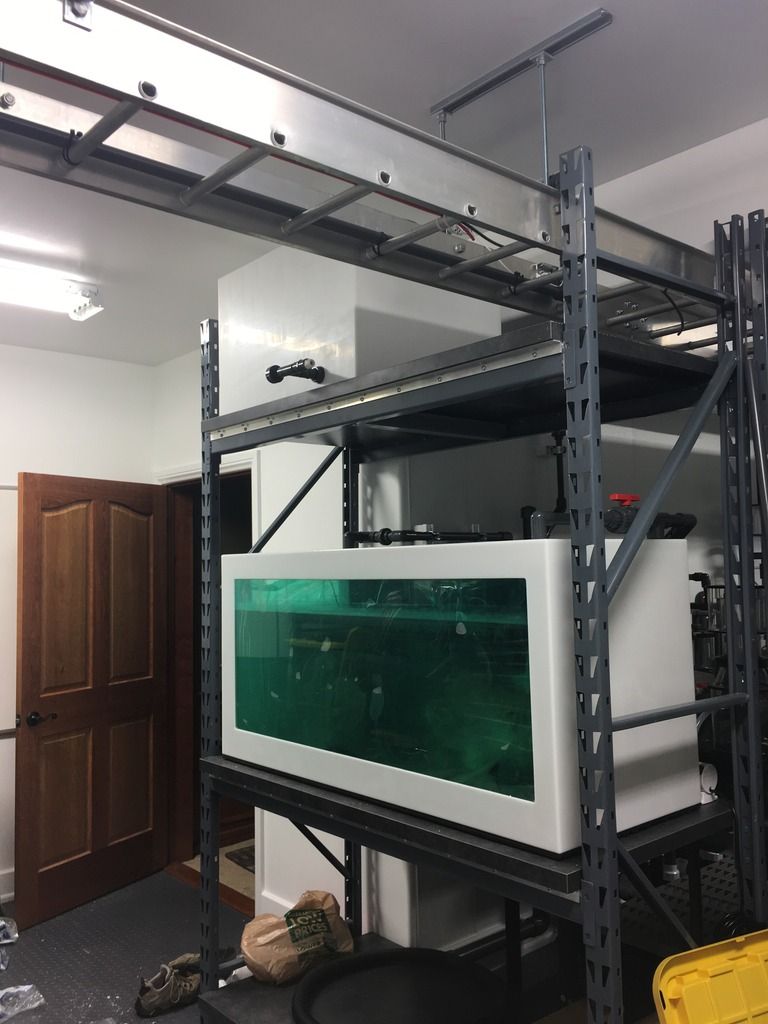
|
|
|
|
|
05/30/2017, 01:20 PM
|
#141 |
|
Registered Member
 Join Date: Mar 2010
Location: Calabasas, CA
Posts: 1,501
|
Shut the front door!!
You, friend have mad all around skills. Really looking forward to the finished product. Judging from the few pics of your last tank, your display will be worthy of the engine room.
__________________
Current tank: 340g AGE peninsula |
|
|
|
|
05/30/2017, 05:01 PM
|
#142 |
|
Registered Member
Join Date: Feb 2008
Location: Bay Area, CA
Posts: 1,722
|
Wow...I enjoyed all the pics. Great craftsmanship and awesome attention to details. It looks like a commercial setup.
__________________
(1) 300g mixed reef (Starfire DT) + 100g Sump (2) 100g Softie tank (Starfire DT) My Build Thread: http://www.reefcentral.com/forums/showthread.php?t=263472 |
|
|
|
|
05/30/2017, 06:28 PM
|
#143 |
|
Registered Member
Join Date: Jul 2007
Location: 90713
Posts: 1,391
|
Just finished the entire thread.
So sorry for your loss. Your build is one of the nicest I have ever seen and your attention to detail is evident. Its builds like these that make websites like reef central such a valuable resource. Future Tank of the Month for sure! I cannot wait to see progress! Subscribed!~
__________________
120" x 34" x 30" 540g Build Starting Soon! Royal Exclusiv Dream Box Sump, 2 x 60" ATI LED/T5, DaStaCo CARx, Apex, Genesis, BK SM 250, 3 x RD 3 230w, UV, ATS, & Arid Reactor! Will have build thread so |
|
|
|
|
05/31/2017, 04:59 AM
|
#144 |
|
Registered Member
Join Date: Mar 2011
Location: Golden, CO
Posts: 340
|
Thank you for the compliments everyone. I do hope the display is worthy of the back end once it's finally running.
I cleaned the room again because we're having guests over in a week. It is a good breaking point. I drained the refugium and removed the protective plastic coating on the acrylic. 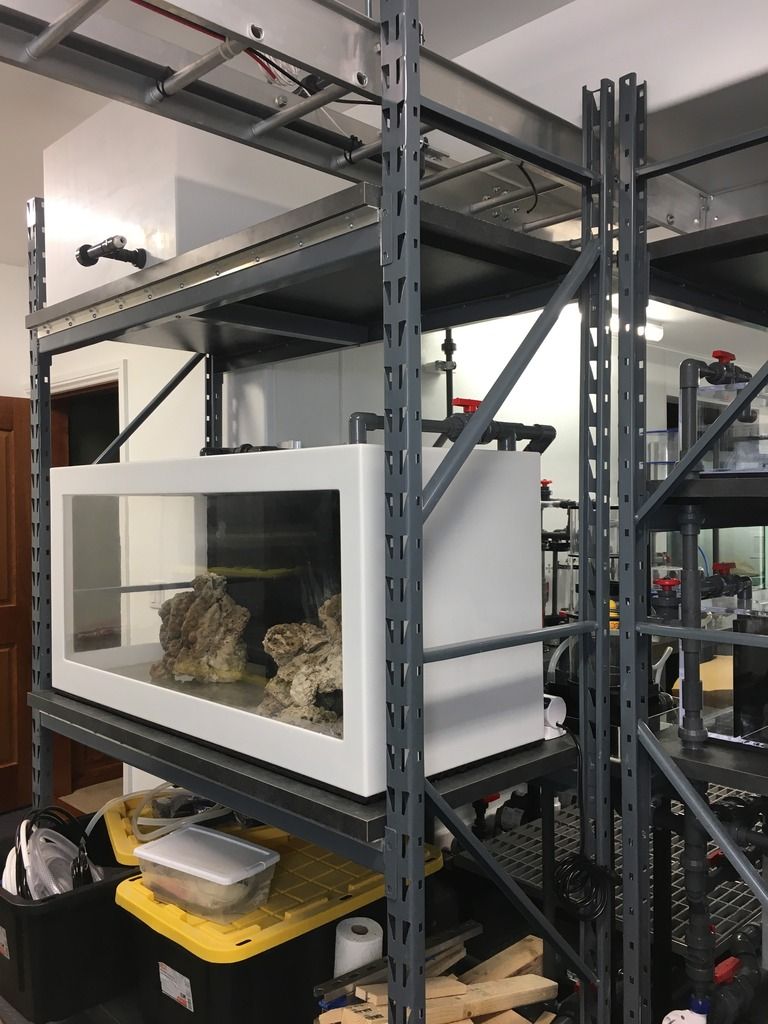 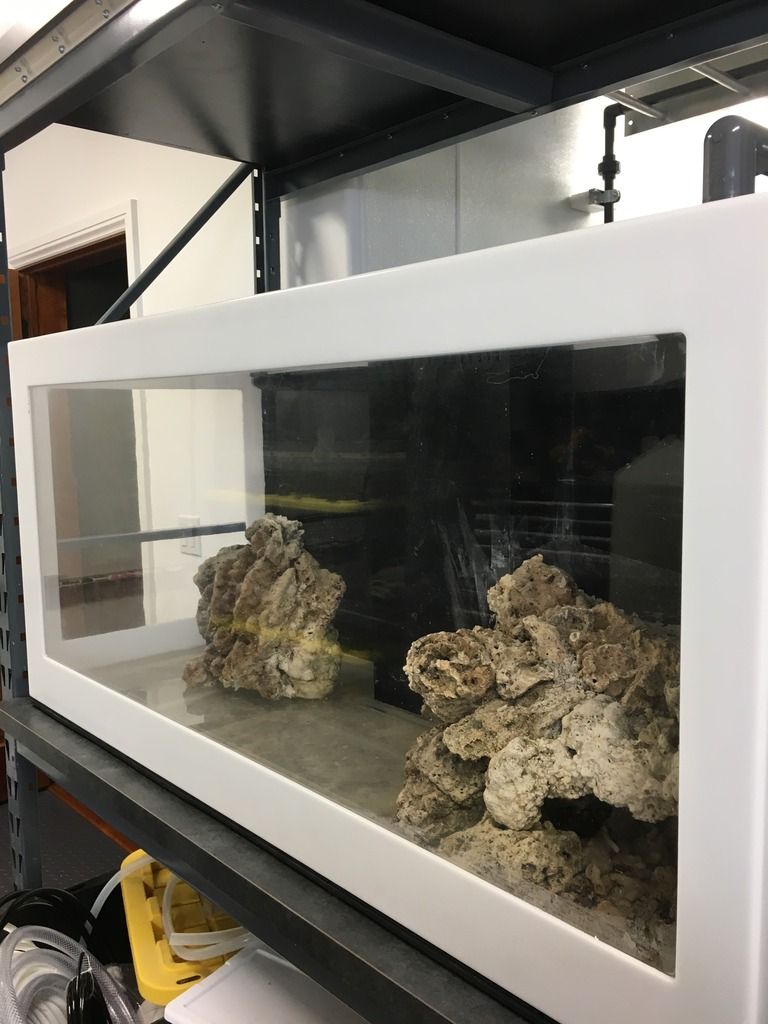 I built a large cave network in the fuge. There is a closed loop on the fuge with outlets down in that cave network. This is a poor picture of the cave. It doesn't show the depth very well. 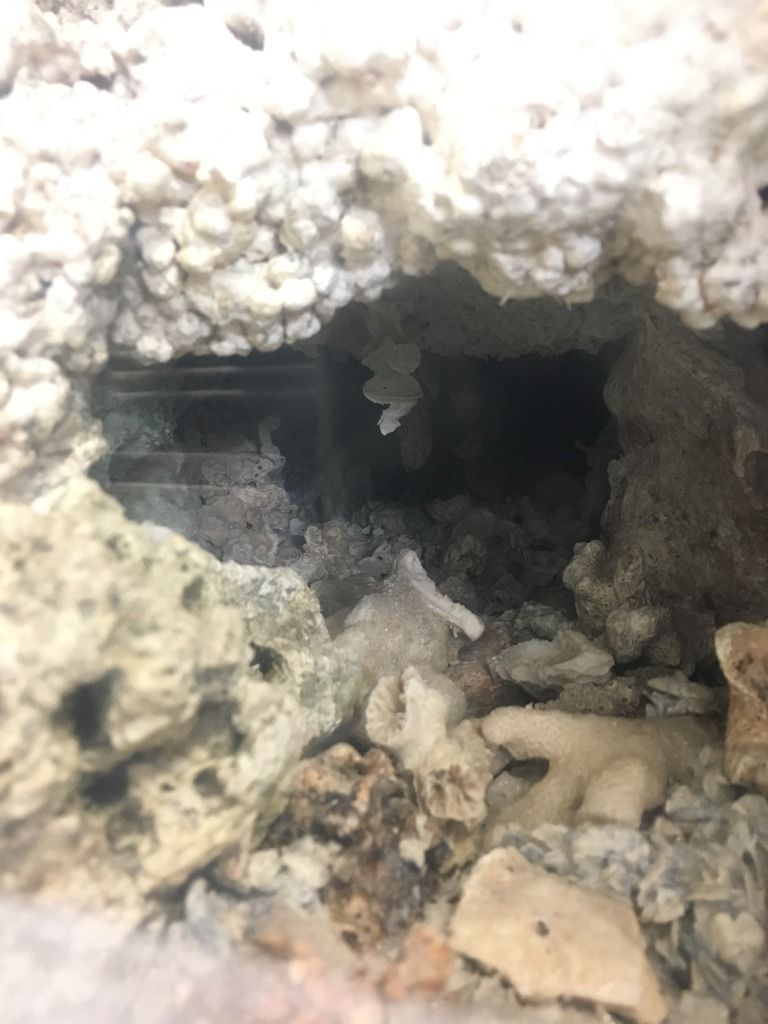 This is the back side of the fuge. The overflow section. The bottom pipe is the feed line to the DC closed loop pump. 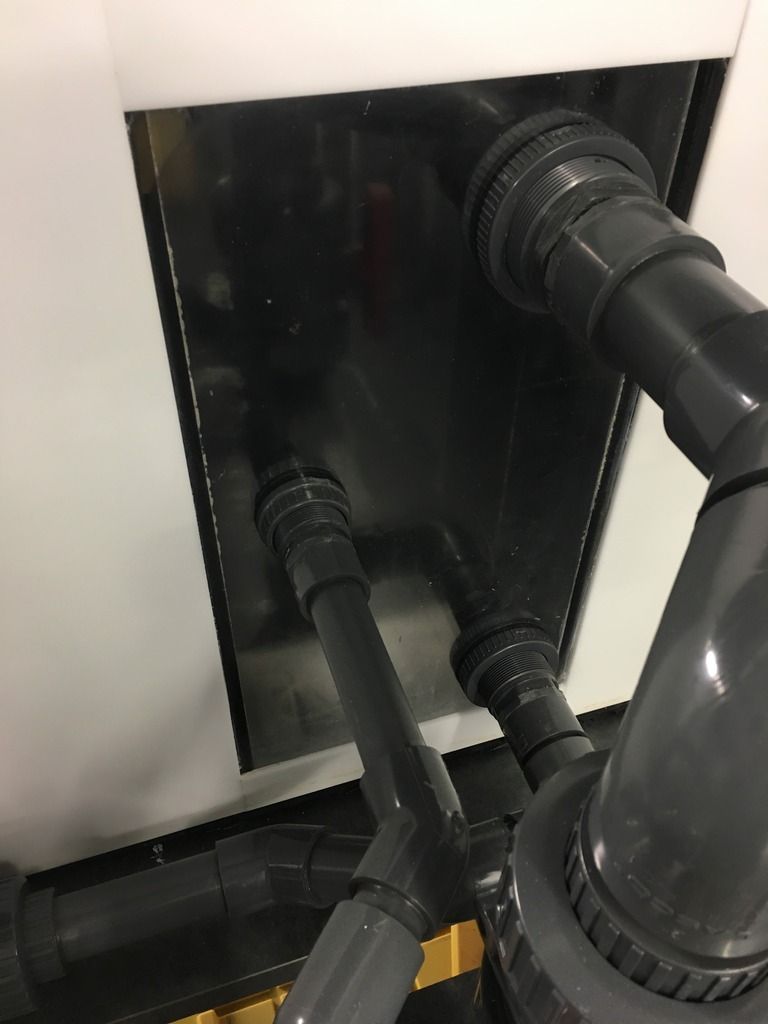 And the pump. 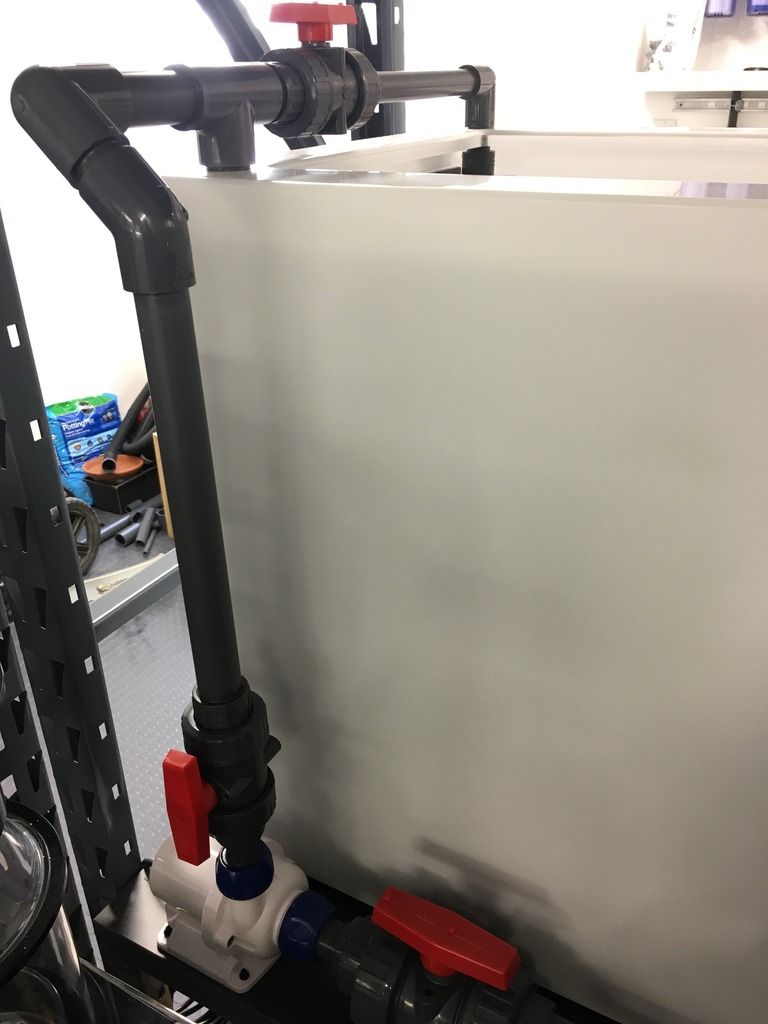 Why a closed loop on a fuge? I won't be feeding a huge amount of water through from the main display. I want to make sure there is plenty of flow through that cave network. It will all be adjustable. |
|
|
|
|
06/01/2017, 06:38 AM
|
#145 |
|
Registered Member
Join Date: Mar 2011
Location: Golden, CO
Posts: 340
|
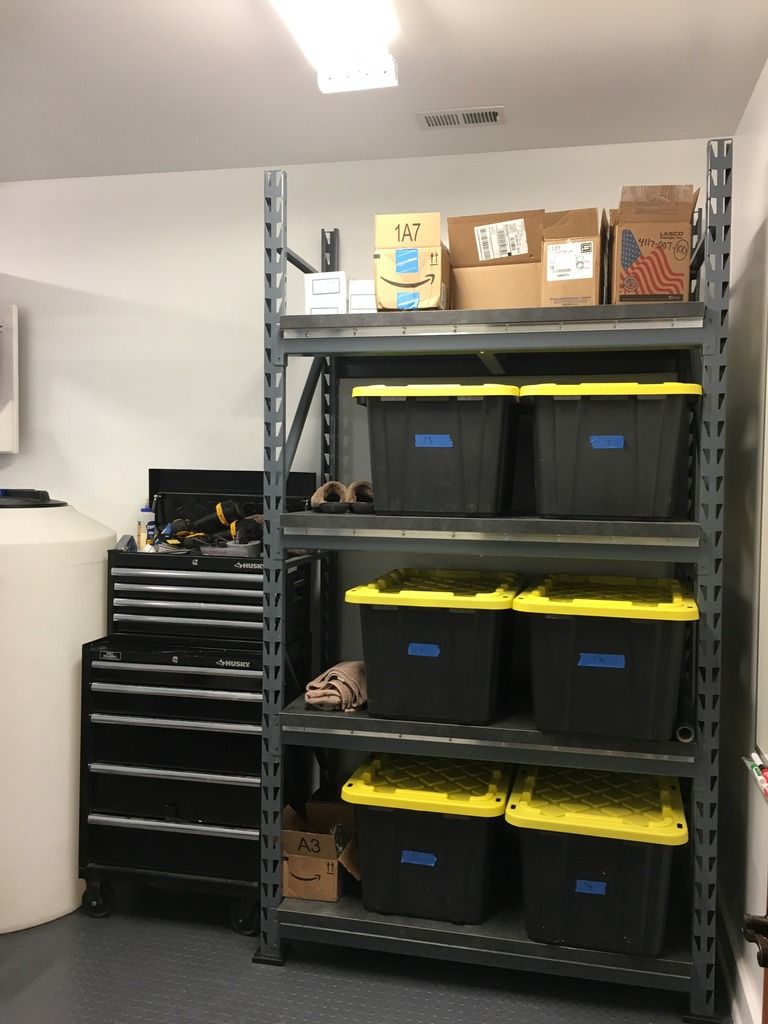
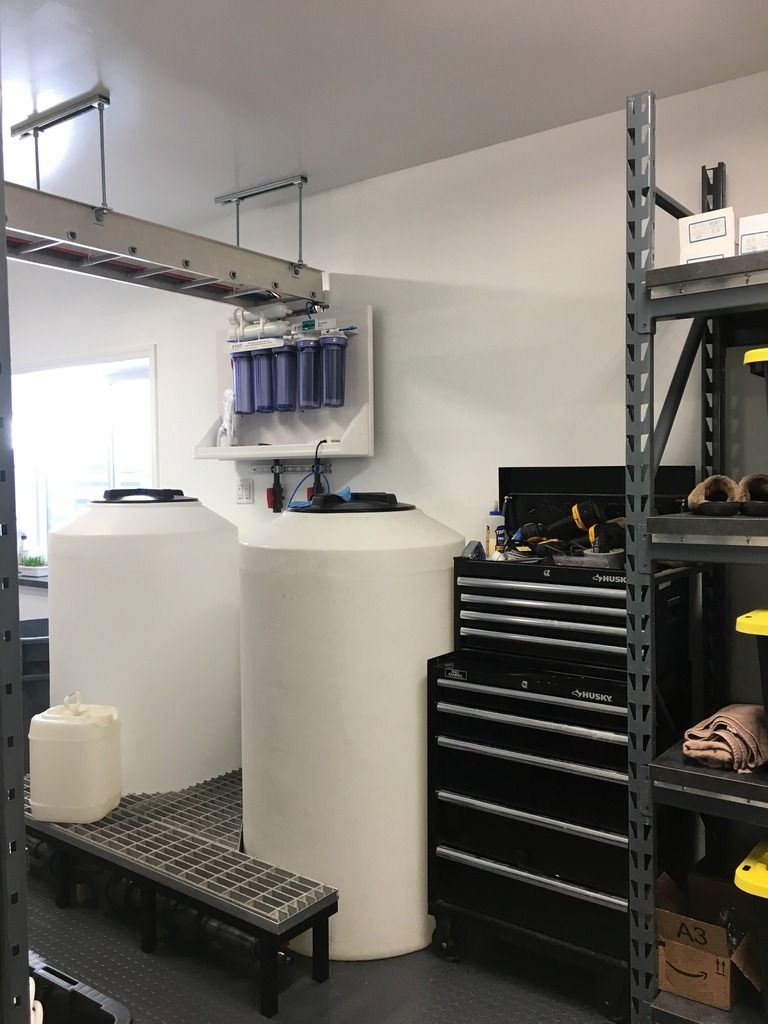
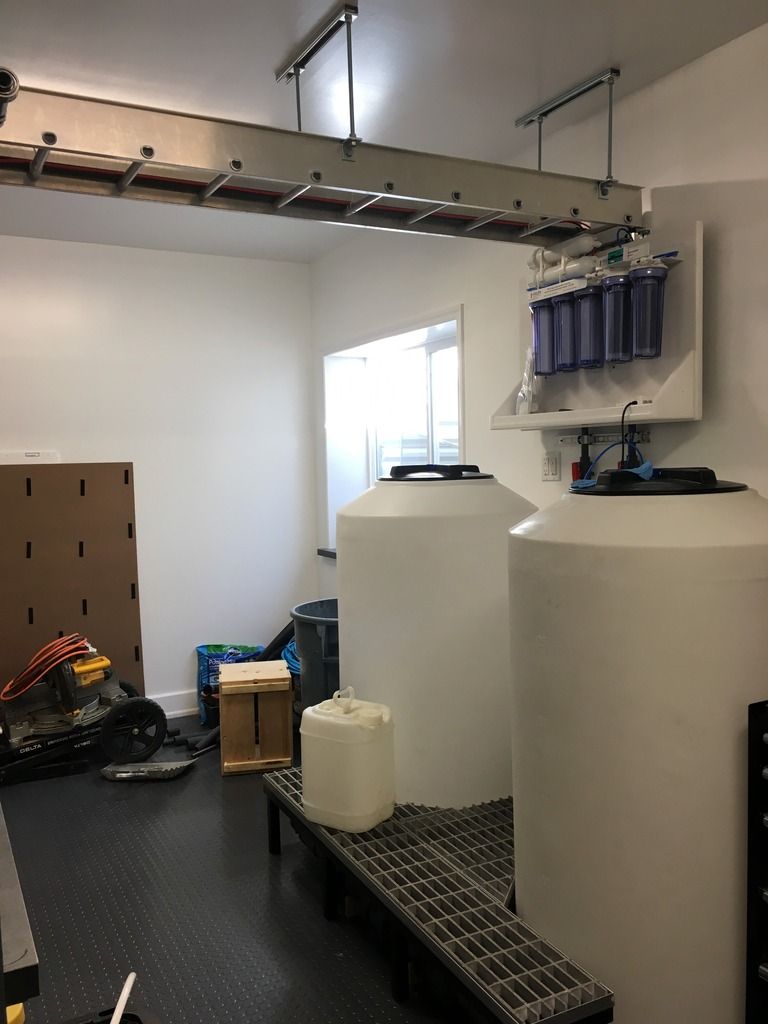
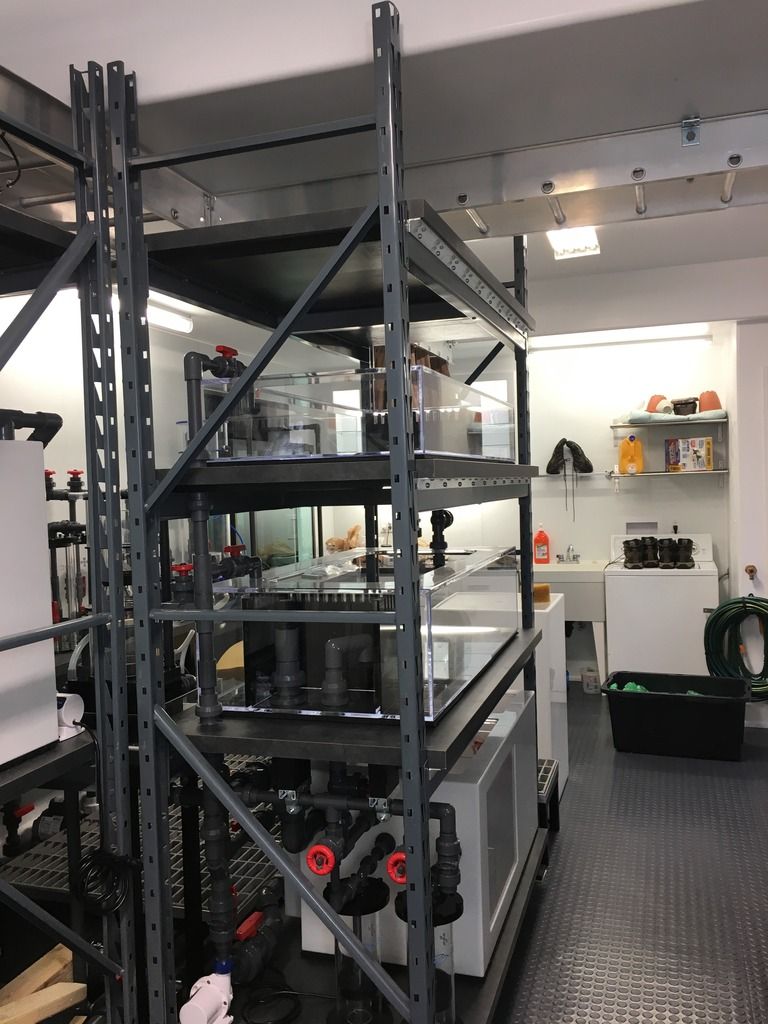
And here is an updated walk-through of the space.
|
|
|
|
|
06/01/2017, 06:44 AM
|
#146 |
|
Registered Member
Join Date: Mar 2011
Location: Golden, CO
Posts: 340
|
|
|
|
|
|
06/01/2017, 06:54 AM
|
#147 |
|
Registered Member
Join Date: Mar 2011
Location: Golden, CO
Posts: 340
|
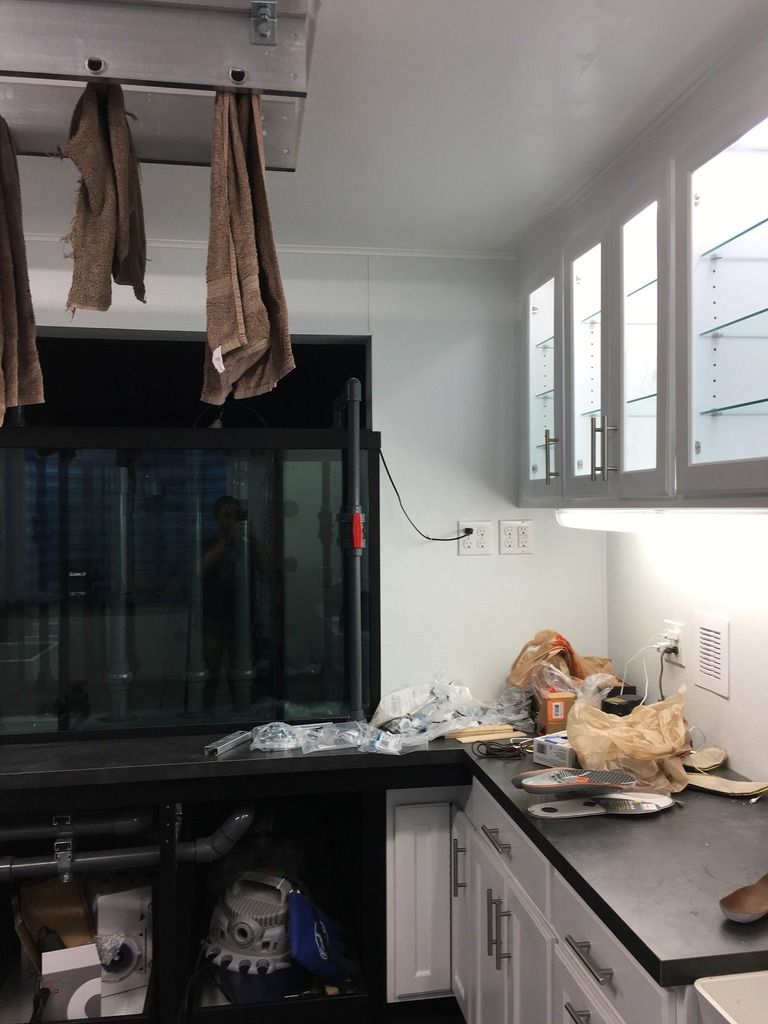
And this is what the front of the tank looks like today.
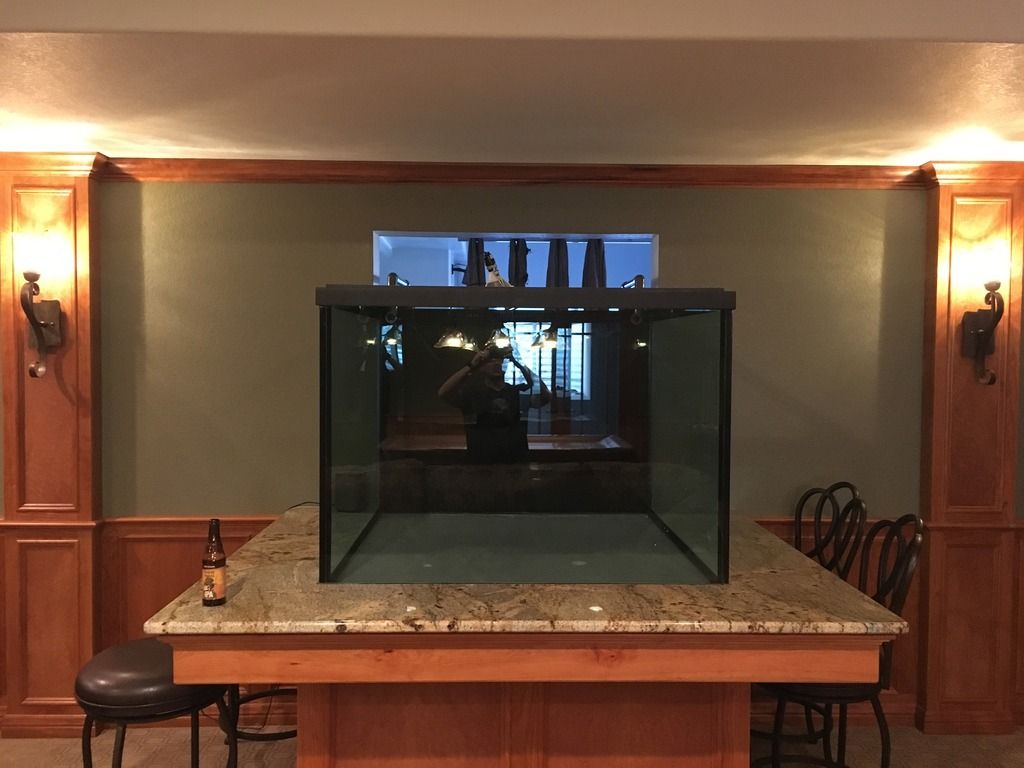 The open area above the tank will have a wooden hood. The hood will be open to the back filtration room. Underneath, the wooden hood will be built on a frame of aluminum 8020 material.  The entire hood will be built on a center framework that will hold 60" full extension glides. That will allow the entire hood to slide out beyond the end of the front of the tank. That will allow full access to the tank when needed and easy access to the lights for maintenance. When the hood is in the normal position, I'll have small door access. This is the model I've been designing to build from. 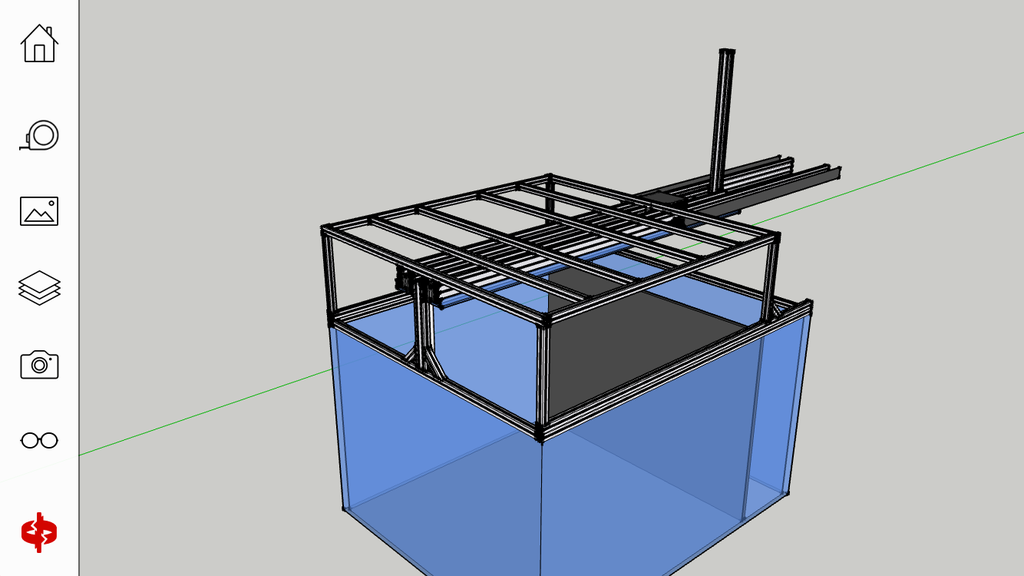 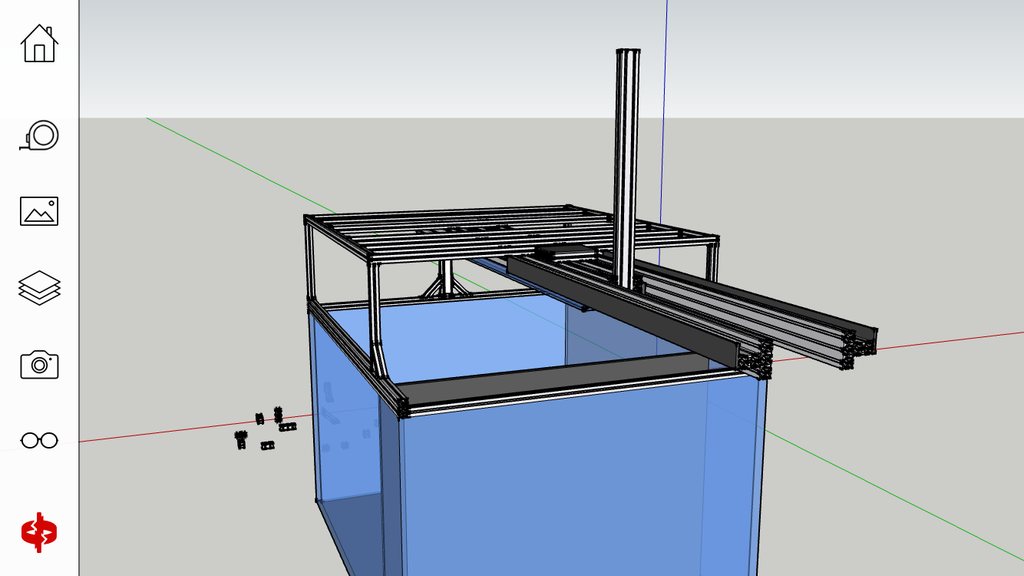 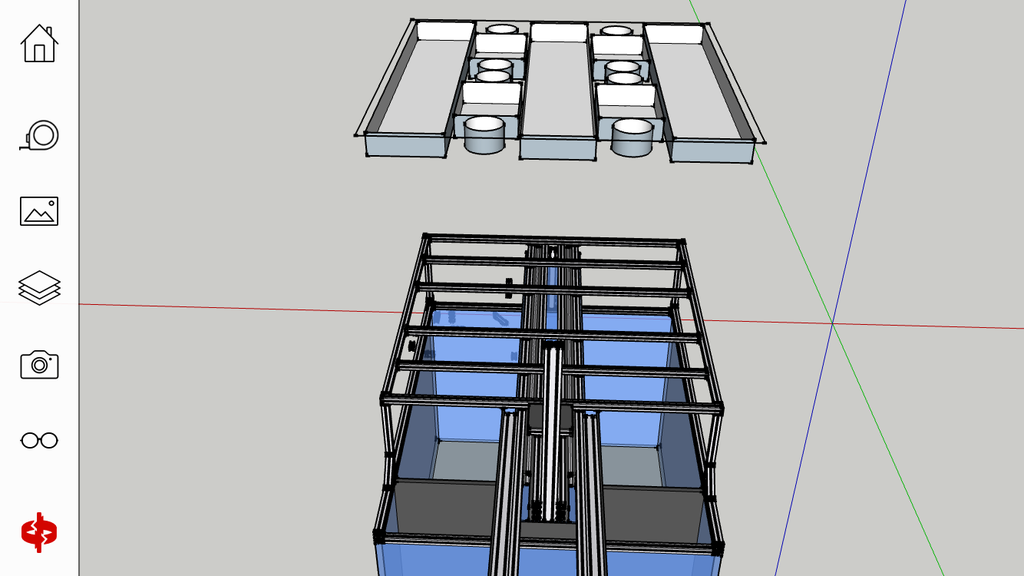 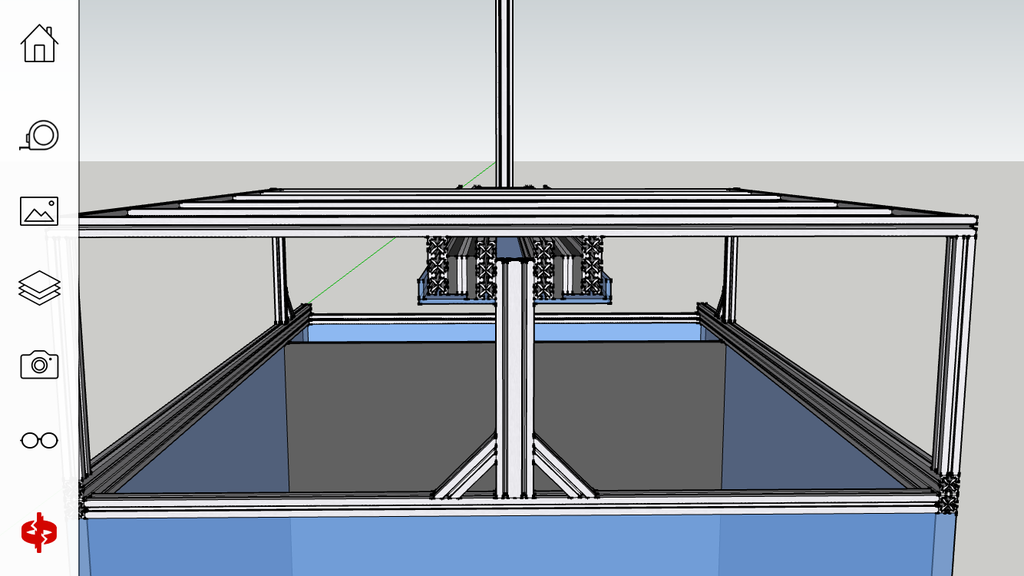 I'm building the whole sliding rack with the backbone to allow for future automation. |
|
|
|
|
06/01/2017, 08:58 AM
|
#148 |
|
Registered Member
Join Date: Nov 2013
Location: Louisville,Kentucky
Posts: 1,208
|
Great build I am sure you can not wait to get it wet.

__________________
President Louisville Marine Aquarium Society. http://www.lmas.org/ The 3rd Annual Frag swap will be held September 23rd,2017 11 am till 3pm Saint Thomas Fellowship hall,9616 Westport Road,Louisvi |
|
|
|
|
06/01/2017, 02:07 PM
|
#149 |
|
Registered Member
Join Date: Dec 2014
Location: Boulder, Colorado
Posts: 1,430
|
Looks awesome man! Can't wait to see it wet!
Sent from my iPhone using Tapatalk
__________________
75 gal, 20 L using as sump, MP40Qd , Eheim 1260 Return,Royal Exclusiv Bubble King Mini 160,Kamoer FX-STP Calcium Reactor Setup, ATI Sunpower 6x54W |
|
|
|
|
06/01/2017, 05:18 PM
|
#150 |
|
Registered Member
Join Date: Mar 2011
Location: Golden, CO
Posts: 340
|
Thanks to both of you.
I will have an open house once water is flowing. Even at that point, I'll still have a lot of work to do in automating the system. I'll just be plugging pumps straight into the wall at first. Once that is running, I'll decide on the controller and start integrating all of that in while the system is cycling. I'm closer to being wet than I was a year ago this time! |
|
|
|
 |
|
|


