
|
|
 02/19/2017, 08:33 PM
|
#51 |
|
Registered Member
Join Date: Jul 2011
Location: New Jersey
Posts: 283
|
Excellent choice in beer... and just about everything else.
|

|

|
|
02/19/2017, 09:33 PM
|
#52 | |
|
Not afriad to admit wrong
Join Date: Jun 2012
Location: South of WashDC in Maryland
Posts: 7,774
|
Quote:
__________________
Stock:LPS/SPS|1 hippo|4 OC Clown|4 Pepp shrimp|2 Brittle Star|3000+ Copepods|10+ MiniBrittle|8+ Bristle Worm|2 Anemone|100+ mini-feather|4 boys 14,21,22,22 Current Tank Info: Tank:300g Mixed Reef 300+lb LR|4" LS|5x MP40W|75g fuge|5x RadionPRO|RO DB250 skimmer|Apex |
|
|
|
|
|
02/19/2017, 09:34 PM
|
#53 | ||||
|
Registered Member
Join Date: Mar 2011
Location: Golden, CO
Posts: 340
|
Quote:
Thanks. I've been drinking barley wine once in a while also when it's available. I don't really chase labels but there are a few breweries that consistently impress me. Quote:
I'm glad I can be disturbing in a good way.  I do go overboard with being organized. I think there's a medical term for that.....I try to keep a healthy balance of chaos and organized. I do go overboard with being organized. I think there's a medical term for that.....I try to keep a healthy balance of chaos and organized.Quote:
Thanks for the detailed advice. I will try to keep the rock manageable but there's only so much I can do considering the type of rock formations I'd like to build. They will need to be made secure in the tank which means not easy to remove. I may have to get creative with a fish trap if the worst happens. As far as frag disk prep, that's excellent advice. Quote:
Thank you for the kind wishes. I'm just keeping my head down and moving forward at this point. There's so much work left to do, I have a hard time picturing water running. |
||||
|
|
|
|
02/19/2017, 09:41 PM
|
#54 | |
|
Registered Member
Join Date: Mar 2011
Location: Golden, CO
Posts: 340
|
Quote:
I'll have to post up pics soon to show what I'm doing. You're right in wondering about shutoff valves. I just couldn't fit them in with the space. What you saw in that picture was the outlets returning to the sump. Those outlets should be above the water line during normal operation. The highest internal baffle in that sump is lower than the outlets of the rectors. Even if the water raises above the outlet level when the pump is off, the reactors will be sealed and it won't be an issue. The inlet sides have gate valves that are attached to a manifold supplied by the pump. That wasn't built yet when I took the picture you referenced. I am plumbing in the pump tomorrow and should have the frag system 90% done minus the parts I'm short. |
|
|
|
|
|
02/19/2017, 09:43 PM
|
#55 | |
|
Not afriad to admit wrong
Join Date: Jun 2012
Location: South of WashDC in Maryland
Posts: 7,774
|
Quote:
Yeah aren't we all short parts when we need them the most. I hate starting a plumbing job at 7 at night. NO MORE. HAHA. 7am works best, even if I have to get up early.
__________________
Stock:LPS/SPS|1 hippo|4 OC Clown|4 Pepp shrimp|2 Brittle Star|3000+ Copepods|10+ MiniBrittle|8+ Bristle Worm|2 Anemone|100+ mini-feather|4 boys 14,21,22,22 Current Tank Info: Tank:300g Mixed Reef 300+lb LR|4" LS|5x MP40W|75g fuge|5x RadionPRO|RO DB250 skimmer|Apex |
|
|
|
|
|
02/19/2017, 10:08 PM
|
#56 |
|
Registered Member

Join Date: Aug 2006
Location: TUCSON
Posts: 569
|
Nice job. Your attention to details and craftsmanship are unmatched
I have a question about your simp. I noticed you raised the filter socks. Is there a bypass if the socks get filled without flowing onto the floor? I couldn't see the detail of your sump very well. |
|
|
|
|
02/20/2017, 09:18 AM
|
#57 | |
|
Registered Member
Join Date: Mar 2011
Location: Golden, CO
Posts: 340
|
Quote:
Thanks for checking. It's always possible I'm overlooking something along the way. I appreciate the questions. Deciding to go with sch80 was a tough choice because I can't just run down to the hardware store unless I want to mix in sch40. You can tell by my OCD that mixing plumbing isn't acceptable. I have to do an inventory every weekend and plan out next week's goals to make sure I have the materials. That's pretty much been the story throughout the entire remodel. I work 4-10s which makes it nice having a Friday off but I have to make the most of my weekends rather than chasing materials. |
|
|
|
|
|
02/20/2017, 09:25 AM
|
#58 | |
|
Registered Member
Join Date: Mar 2011
Location: Golden, CO
Posts: 340
|
Quote:
Thank you for the compliments. That's a good point to consider. I did leave a significant gap as a failsafe. Looking down on that part of the sump, the far left section is where the water flows into from the tank's overflow. The water flows into the socks and the far right is a 2-3" gap. The filter sock tray is removable so I can service that section down inside. The bulkheads are just staged because return lines from the reactors, skimmer, fuge, and frag tanks will be directed back into this first stage below the water line. I want all of the bubbles to have the opportunity to disperse a little before flowing through the bubble trap and return to the tank. 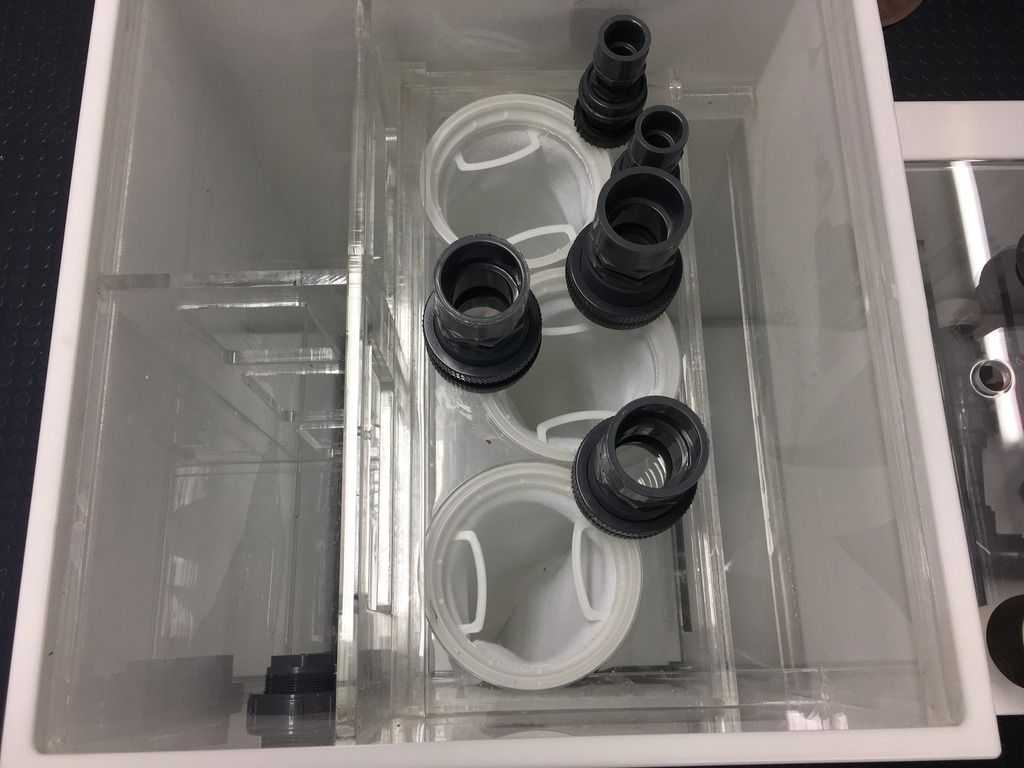
|
|
|
|
|
|
02/20/2017, 09:31 AM
|
#59 |
|
Registered Member
Join Date: Mar 2011
Location: Golden, CO
Posts: 340
|
This is a fuzzy picture looking at the floor of that first section. The elevated box in the upper left hand corner is the previously mentioned box where water flows into the sump from the tanks overflow before going through the filter socks. You can see the bottoms of the filter socks hanging down.
I elevated that box to maximize the sidewalk access for all of those bulkheads below the waterline. 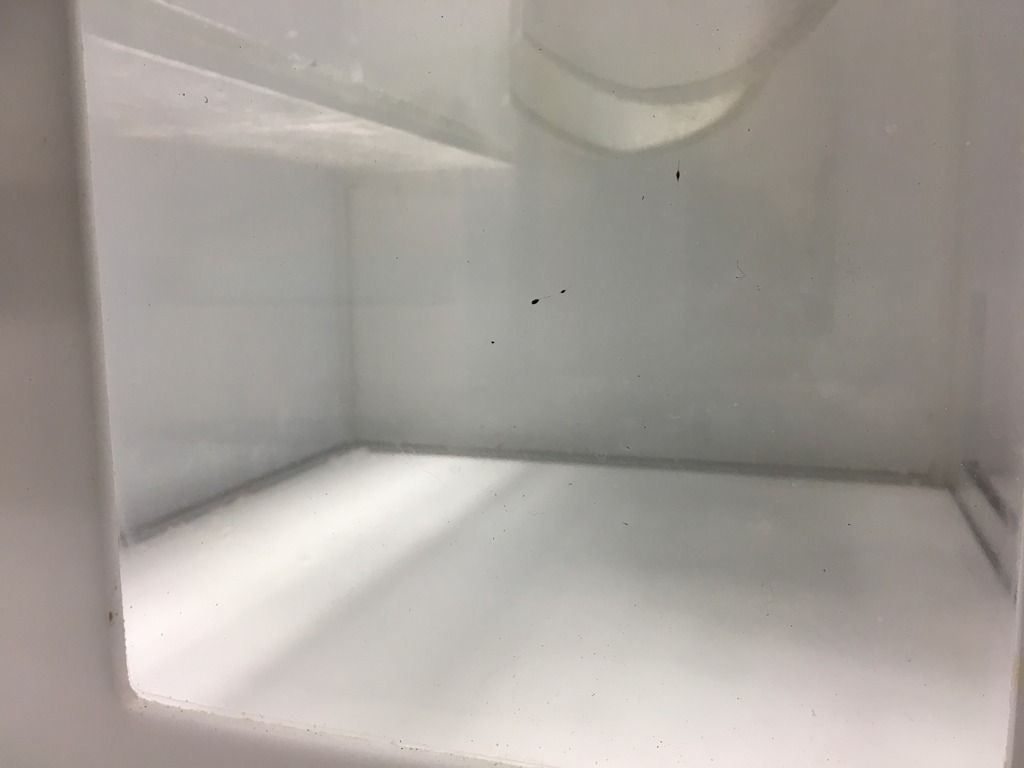
|
|
|
|
|
02/20/2017, 05:52 PM
|
#60 |
|
Registered Member
Join Date: Aug 2006
Location: TUCSON
Posts: 569
|
The micro fiber socks seem to clog very quickly. The mesh socks clog but, not as quickly. How much space is between filter sock and top of bypass?
Also, if you 45 the drains to the entry of your sump, the water will have less bubbles. Air gets trapped in your drains as it travels down the PVC. If you have the 45 half above and half below the water line, then the bubbles should be significantly reduced before entering sock chamber and downstream. I tried both ways and have no bubbles getting into my skimmer compartment or dsb. |
|
|
|
|
02/20/2017, 08:54 PM
|
#61 |
|
Registered Member
Join Date: Mar 2011
Location: Golden, CO
Posts: 340
|
In answer to your question about space and layout of the filter sock area, check out post #22 and the pictures of me building that sump. Before I covered it in white acrylic, you can see how it's layed out. Those are 7" filter socks to put things in perspective. The sump is 36" tall at the highest point, 24" wide, and 72" long. There is probably 8" of height above the socks.
As far as how the lines are routed coming back into the sump, having them halfway out of the water makes sense. However, I have some space requirements that mean the lines are going to have to go where they go. I don't want to raise them too much because I'm building an elevated platform over all the plumbing lines that run across the floor. It will hopefully make sense as things come together. Thanks for the advice. I'll have to check out your build thread. |
|
|
|
|
02/20/2017, 10:45 PM
|
#62 |
|
Registered Member
Join Date: Jan 2004
Location: San Francisco
Posts: 9,103
|
Man that is definitely how to do a build thread! Instead of tanking many months to years showing off things as they go in real time (because we all know real life sometimes puts a hold on our build schedules!) and having people screaming for updates every 5 minutes, getting threads so large they split before water hits the tank.
No sir, do not apologize for this, I appreciate these "quick" builds just as much if not more.
__________________
Mike |
|
|
|
|
02/21/2017, 07:08 AM
|
#63 |
|
Registered Member
Join Date: Nov 2014
Location: Magnolia Texas
Posts: 64
|
Fantastic build. Your acrylic work is fantastic. I am curious about how you skinned them in the ¼ in white acrylic. Did you glue the sheets to the sump and weld the corners or build it and set the sump inside?
Chris |
|
|
|
|
02/21/2017, 07:41 AM
|
#64 | |
|
Registered Member
Join Date: Mar 2011
Location: Golden, CO
Posts: 340
|
SFSUPHYSICS - Glad to have you following. This whole build would have killed everyone if I had posted from day one. Woodwork took forever after the contractors completed taking forever after my wife and I got done taking forever to decide on the room layouts.......
Quote:
Then, I applied one piece of 1/4" white at a time with a LOT of clamps and blocking. I started at one end and clamped it loose, poured in the Weld-On 3, clamped a little bit higher, poured, clamped....repeat. Once everything cured, I made acrylic snow with my router trimming that piece flush along all sides. Then, moved on to the next face. I repeated that process for every face I wanted to cover. Then, rounded over the corners so there would be fewer sharp edges exposed in the room. It was time consuming. The sumps all ended up 3/4" thick with 1/2" clear and 1/4" white bonded together. It's overkill but there are so many potential failure points with the build that I wanted to be relatively certain no sump could ever possibly bust a seam. That's one less thing to worry about. In hind site, I probably should have done things differently. I thought I would save money by refurbishing and reusing old tanks. Between time and materials, I probably should have built everything from scratch with 1/2" white acrylic. But, they're done and I'm happy. |
|
|
|
|
|
02/21/2017, 09:27 AM
|
#65 |
|
Registered Member
Join Date: Nov 2014
Location: Magnolia Texas
Posts: 64
|
Thanks for the info. I ask because I am in the middle of my 430 build and doing the custom sumps myself but yours look cleaner with the white overlay. Again love the build and look forward to more updates.
Chris |
|
|
|
|
02/21/2017, 10:29 AM
|
#66 |
|
Registered Member
Join Date: Aug 2006
Location: TUCSON
Posts: 569
|
I looked at #23. Is there a gap to the right side of the filter sock assembly that allows water to flow downward in case the filter socks are clogged?
I recently had a sump acrylic seam failure. I have a 72" x 19" x 18" sump. Lots of baffles. 1/2" acrylic. Seemed to be glued well with a lot of support from the baffles. The sump was custom. I didn't have the nice top support you've installed on the lower section of the sump. To repair, we added two additional acrylic pieces the height of the sump in the corners. I also added acrylic corner supports and long pieces from side to side of the sump on exterior of small panels. My reef is spectacular with exceptional water quality. The sump issue was a very bad day. Not much loss except for some equipment that ran dry for a little while. You may want to consider extra support before installation. I also have purchased and installed the APEX Leak detection modules. |
|
|
|
|
02/21/2017, 11:02 AM
|
#67 | |
|
Registered Member
Join Date: Jul 2014
Location: Atlanta
Posts: 110
|
Quote:
Will you have detritus or other larger particle build up in the first entry section of the sump or you think the amount of flow you'll have will keep things moving to the socks? |
|
|
|
|
|
02/21/2017, 11:19 AM
|
#68 |
|
Registered Member
Join Date: Jan 2006
Location: Westminster, CO
Posts: 17,289
|
Awesome build!
__________________
Hobby Experience: 9200ish gallons, 26 skimmers, and a handful of Kent Scrapers. Current Tank: Vortech Powered 600G SPS Tank w/ 100gal frag tank & 100g Sump. RK2-RK10 Skimmer. ReefAngel. Radium 20k. |
|
|
|
|
02/21/2017, 11:48 AM
|
#69 | |
|
Registered Member
Join Date: Mar 2011
Location: Golden, CO
Posts: 340
|
Quote:
I actually have already reinforced many of the seams inside and out on the main sump. I added an extra 1/2" layer to the entire bottom of all sumps in addition to the 1/2" acrylic of the main body. With 1/2" corner reinforcement on the inside, that brings it up to 1 1/2" thick acrylic in some spots. The white acrylic deliberately overlaps joints on the outside and I paid special attention to clamping the perimeter when I applied those and tried to get 100% coverage and bonding between the white and clear. If I bust a joint on any of the sumps, I'm not sure what more I could have done. |
|
|
|
|
|
02/21/2017, 11:49 AM
|
#70 | |
|
Registered Member
Join Date: Mar 2011
Location: Golden, CO
Posts: 340
|
Quote:
Edit: Yes, I'm sure I'll get some detritus build up there. But, there is no way around tank maintenance. It is just an engineering tradeoff I'm willing to make to get the filter socks where I want them and I couldn't think of a better way. That space is really easy to access periodic cleaning won't be an issue. |
|
|
|
|
|
02/21/2017, 11:54 AM
|
#71 | |
|
Registered Member
Join Date: Mar 2011
Location: Golden, CO
Posts: 340
|
Quote:
|
|
|
|
|
|
02/21/2017, 01:37 PM
|
#72 |
|
Registered Member
Join Date: Jan 2006
Location: Westminster, CO
Posts: 17,289
|
Would love too come check it out. Thanks!
__________________
Hobby Experience: 9200ish gallons, 26 skimmers, and a handful of Kent Scrapers. Current Tank: Vortech Powered 600G SPS Tank w/ 100gal frag tank & 100g Sump. RK2-RK10 Skimmer. ReefAngel. Radium 20k. |
|
|
|
|
02/21/2017, 01:55 PM
|
#73 |
|
Registered Member
 Join Date: Feb 2004
Posts: 260
|
This is going to be a good one. Looking forward to watching this grow!

|
|
|
|
|
02/21/2017, 04:09 PM
|
#74 |
|
Registered Member
Join Date: Nov 2014
Location: Magnolia Texas
Posts: 64
|
One thing I am adding to the sumps I am building is a 1/2 inch bulkhead with valve coming out of each compartment of the sump. They will be connected to a floor drain under my tank. That way I can drain and rinse out each compartment out when there is a build up. I was sick of rinsing and pumping when there is build up. Again your acrylic work looks great.
Chris |
|
|
|
|
02/21/2017, 04:43 PM
|
#75 | ||
|
Registered Member
Join Date: Mar 2011
Location: Golden, CO
Posts: 340
|
Quote:
Quote:
|
||
|
|
|
 |
|
|


