
|
|
 07/16/2014, 03:08 PM
|
#1 |
|
Registered Member
Join Date: Jun 2007
Location: Phoenix, AZ
Posts: 1,605
|
Zibba's Reefs
A tank this size was a pipe-dream, we never truly thought it would become a reality and certainly didn’t expect it to happen so soon. But two weeks ago, Elliott (sn: same) sent me an email with a description of a tank that sounded too good to be true: A.G.E. Starphire Glass/PVC bottom, peninsula overflow setup, with black silicone that measures 84”(long) x 42”(wide) x 30”(high).
Chris (sn: Siasl) had planned a beautiful system with precision but was forced to move for work and he cut us a deal that we couldn’t refuse. It’s in like-new condition and we’re hoping we can carry out a build that will match his professionalism. About 1.5 years ago we began setting up a 100g and 50g connected system – you can see that build here. We've had relatively good success with that system and are hoping for the same moving forward. The 100g Envision aquarium is going to be replaced with the new A.G.E. aquarium and we’re going to reconnect the smaller ADA, which will remain in its current location. This is all happening very fast but I will try to document things as best I can during the chaos. I don’t have any good pictures of the aquarium yet, but I put together a quick sketch so you can see the dimensions: 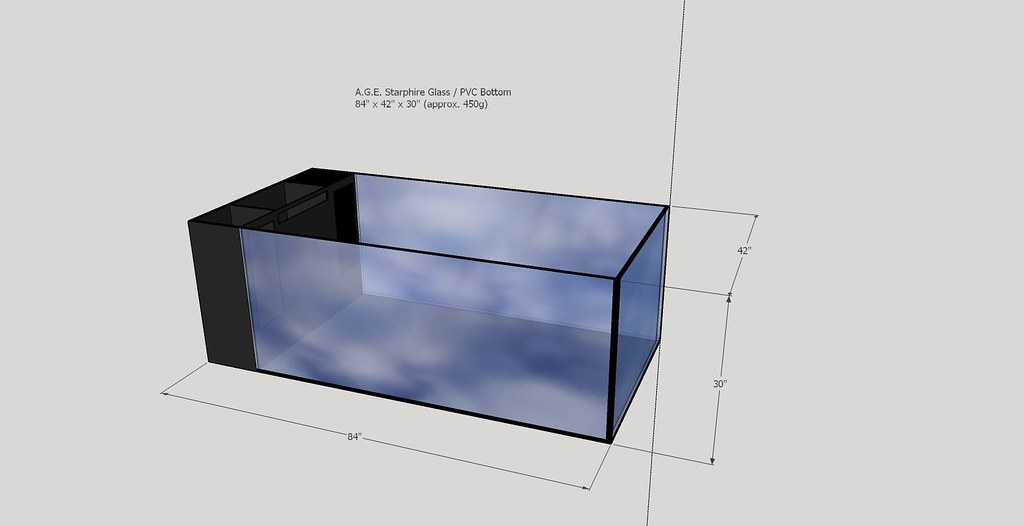 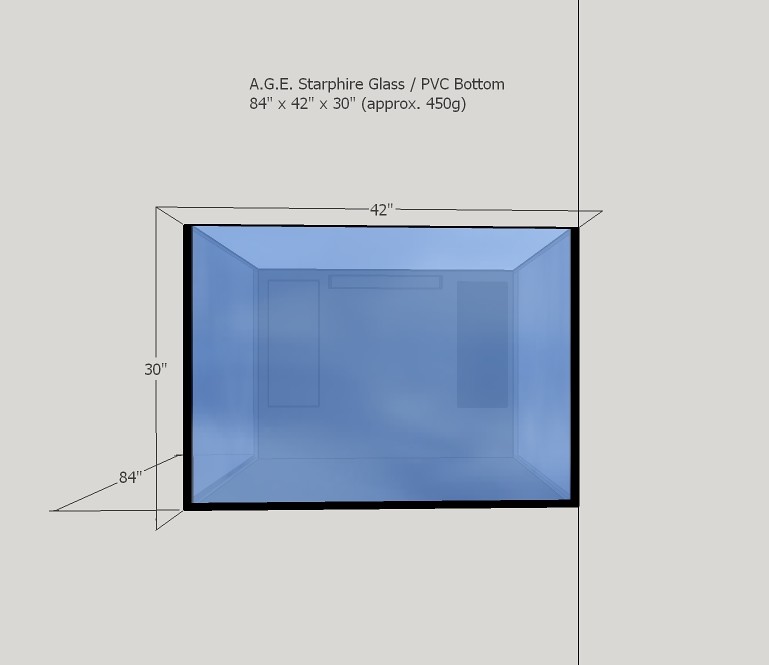 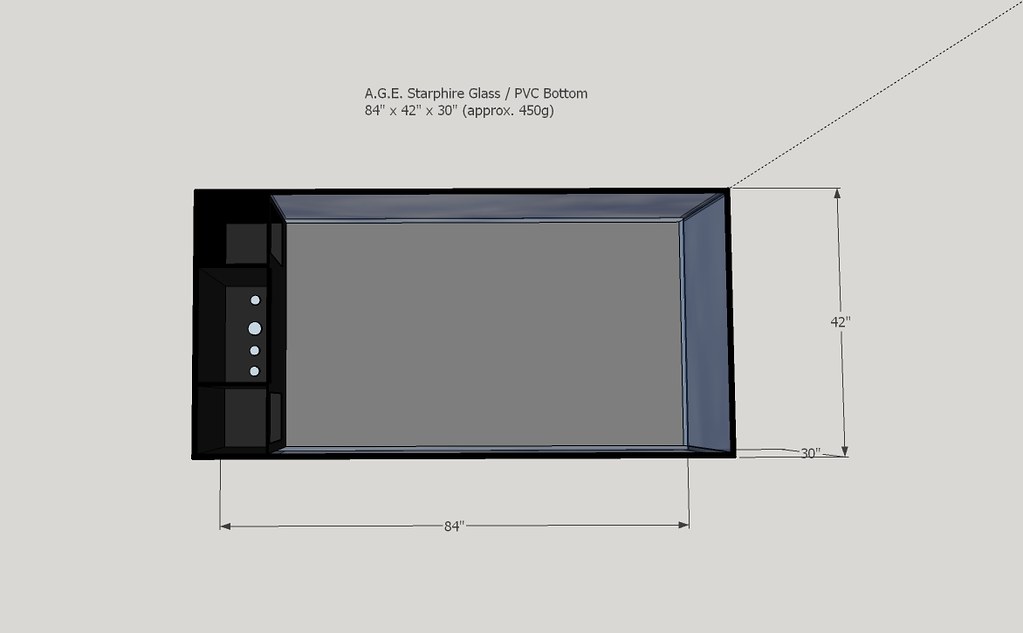 We’d love for you to follow along on this adventure and give us your comments and feedback.
__________________
84x42x30 (~450g) A.G.E. and ADA 90-P (~45g). Last edited by zibba; 07/16/2014 at 03:56 PM. |

|

|
|
07/16/2014, 03:27 PM
|
#2 |
|
Registered Member
Join Date: Oct 2006
Location: laredo tx
Posts: 646
|
you have my attention
|
|
|
|
|
07/16/2014, 03:46 PM
|
#3 |
|
Rocky
Join Date: Nov 2003
Location: Gilbert, Arizona
Posts: 822
|
Can't wait Eric! Going to be amazing. Are you going LED on this one?
__________________
"I ain't no physakist---but I knows what matters..." -Popeye the Sailorman Current Tank Info: Envision 150 gallon, ATI 8x54w, 30" Venturi skimmer, Neptune Apex flow and dosing |
|
|
|
|
07/16/2014, 04:00 PM
|
#4 | ||
|
Registered Member
Join Date: Jun 2007
Location: Phoenix, AZ
Posts: 1,605
|
Quote:
Quote:
Yes, I have 2 Hydra52s over the current tank and I really like them. Based on what I've seen out of the 52s so far, I think I'll ultimately need 6 and I'll slowly add more as my wallet allows.
__________________
84x42x30 (~450g) A.G.E. and ADA 90-P (~45g). |
||
|
|
|
|
07/17/2014, 10:53 AM
|
#5 |
|
Registered Member
Join Date: Jun 2007
Location: Phoenix, AZ
Posts: 1,605
|
So, here's the simplified protocol (thanks, Elliott!) for the big move:
Before and during move: 1. Make up enough new seawater needed to make up the difference between old and new tank volumes and either aerate or agitate with a pump for 24 hrs The day before the move: 1. Set up kiddie pool, transfer all fish and corals (along with rock that they're attached to) into pool with existing water and add additional water to fill to appropriate height; 2. Put sand in 5-gallon buckets (use to seed new sand after move); and 3. Move existing tank out of the way Day of move: 1. Set new tank in place; 2. Begin filling tank with water; 3. Plumb tank to sump and ADA while filling; 4. add livestock/rock from kiddie pool (along with water from the same) I have been making water in spare aquariums and borrowed containers for the past few days and will continue to do so throughout the move so I have enough water on-hand. Right now, I have about 200-gallons plus whatever I can pull from the display -- maybe another 60-gallons. I'm going to buy two kiddie pools tonight and double them up to reduce the risk of leaks in my living room. The kiddie pool holds over 250g and it will basically be a big water change on Saturday followed by a big water change on Sunday. Hoping for very little loss this way.
__________________
84x42x30 (~450g) A.G.E. and ADA 90-P (~45g). |
|
|
|
|
07/17/2014, 11:07 AM
|
#6 |
|
Registered Member
Join Date: Jun 2007
Location: Phoenix, AZ
Posts: 1,605
|
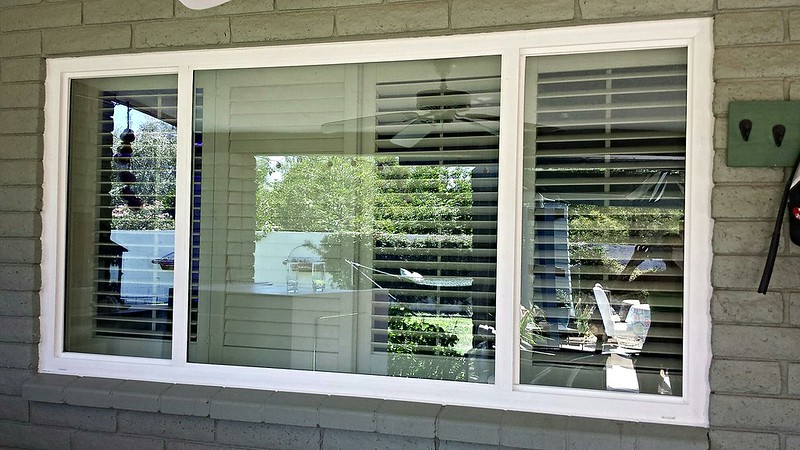
I have an older house with narrow doorways and old windows. We plan to upgrade all of the windows in the house over time, but this tank move sort of forced our hand with this particular window (the biggest in our house). Unfortunately, I wasn't home to see the entire glass pane broken but K (my gf) took a picture once it was removed and then boarded up. They're coming to replace the window with a low-e one after the tank is inside. If we ever need to get the tank out again, we can have a glazier come out and remove just a single panel (relatively cheap, actually) and take it through a 48"x50" opening -- so at least we aren't completely stuck once it's inside.
Not to interesting but here's the damage: 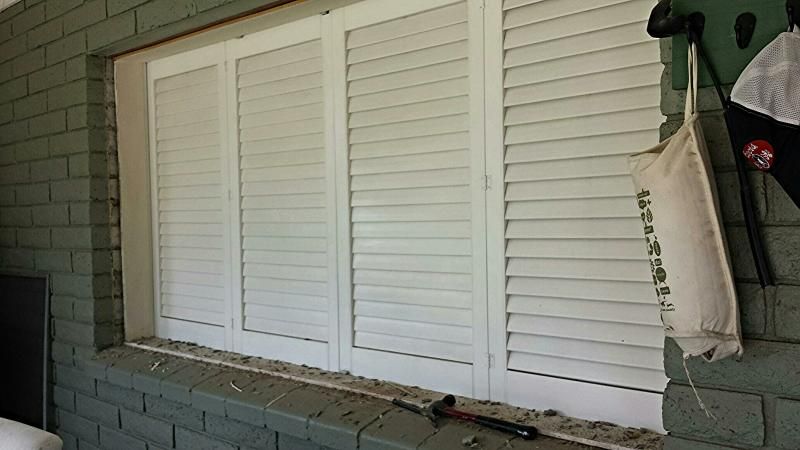 Old window frame: 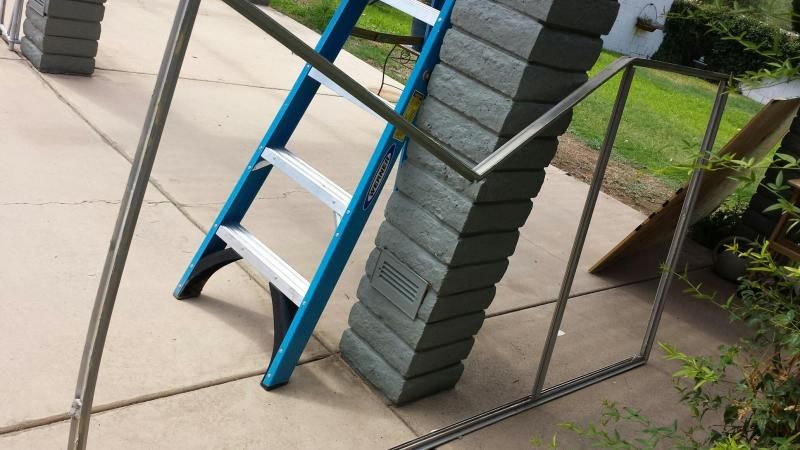 Boarded and ready for a quick removal come Sunday. 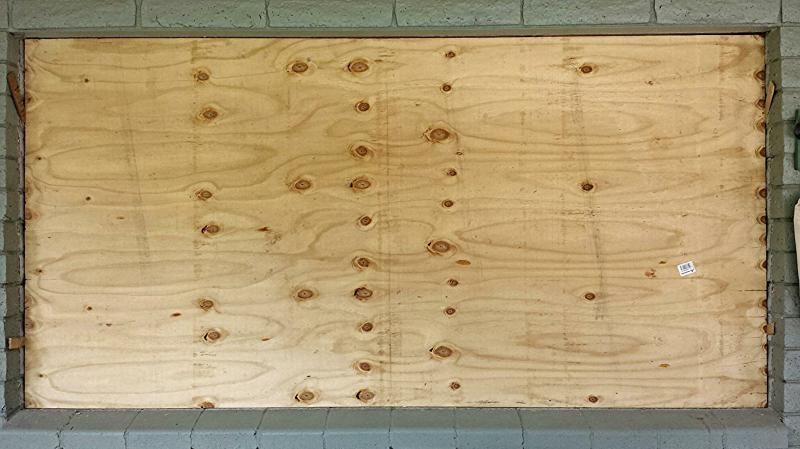 You'd think that the room/house would get hot here in the desert with just the plywood up, but it actually provides better insulation compared to the shoddy window it replaced.
__________________
84x42x30 (~450g) A.G.E. and ADA 90-P (~45g). |
|
|
|
|
07/18/2014, 01:04 AM
|
#7 |
|
Registered Member
Join Date: Jan 2012
Location: Scottsdale
Posts: 421
|
Congrats on tank! It was a great deal. My AGE coming end of month. Clap clap
|
|
|
|
|
07/18/2014, 11:39 AM
|
#8 | |
|
Registered Member
Join Date: Jun 2007
Location: Phoenix, AZ
Posts: 1,605
|
Quote:
Congrats to you too...  What size tank are you getting? What size tank are you getting?
__________________
84x42x30 (~450g) A.G.E. and ADA 90-P (~45g). |
|
|
|
|
|
07/18/2014, 11:59 AM
|
#9 |
|
Registered Member
Join Date: Jan 2012
Location: Scottsdale
Posts: 421
|
600g here. Did you get the sump also? It's a monster. Can't wait for pics.
|
|
|
|
|
07/18/2014, 12:00 PM
|
#10 |
|
Registered Member
Join Date: Jan 2013
Location: Long Island, NY
Posts: 361
|
following!
|
|
|
|
|
07/18/2014, 12:22 PM
|
#11 | ||
|
Registered Member
Join Date: Jun 2007
Location: Phoenix, AZ
Posts: 1,605
|
Quote:
Yes, I got the sump as well. Will be posting pictures of everything once it's in place. For the time being, there's a lot of planning going on "behind the scenes," as they say. The "to do list" is growing by the hour!  I just keep telling myself that it will all get done in time and work out as it should. Quote:
__________________
84x42x30 (~450g) A.G.E. and ADA 90-P (~45g). |
||
|
|
|
|
07/18/2014, 01:03 PM
|
#12 |
|
Registered Member
Join Date: May 2007
Location: Acworth, GA
Posts: 834
|
Looking very forward to see this build. I love your other two tanks so I'm sure this one will be nothing short of awesome!
|
|
|
|
|
07/19/2014, 04:55 PM
|
#13 | |
|
Registered Member
Join Date: Jan 2012
Location: Scottsdale
Posts: 421
|
Quote:
96x48x30 👍 My budget went out the window and the "to do list" never ends... |
|
|
|
|
|
07/21/2014, 10:44 AM
|
#14 |
|
Registered Member
Join Date: Sep 2010
Location: Queen Creek, AZ.
Posts: 1,419
|
Wow, what a great tank! I love the dimensions, especially the width. I just finished reading through your previous build and was very impressed! Your attention to detail is top notch and your photography skills are even better. I am very excited to follow along on this build. Best of luck to you Eric!
|
|
|
|
|
07/21/2014, 11:21 AM
|
#15 |
|
Registered Member
Join Date: May 2013
Location: DFW
Posts: 41
|
dimensions are awesome!! following along
|
|
|
|
|
07/21/2014, 12:34 PM
|
#16 | ||||
|
Registered Member
Join Date: Jun 2007
Location: Phoenix, AZ
Posts: 1,605
|
Quote:
Quote:
Quote:
I'm hoping to step up the game on the little details that go into the form/function of the actual aquarium. I'm going to need to streamline things as much as possible so I can maximize my time to enjoy simply viewing the tank. Quote:
So here's what happened this weekend: Saturday morning we transferred all of the corals to a kiddie pool: 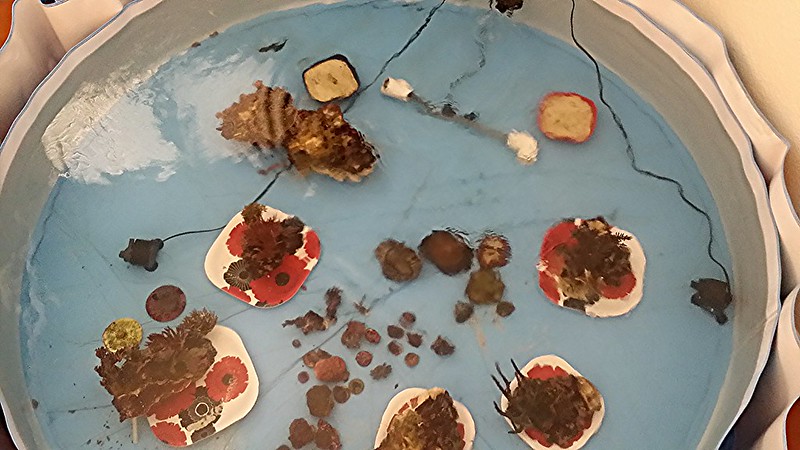 I cut off the plumbing to the main display, kept flow going to the ADA and Kris and I started cleaning out the Envision: 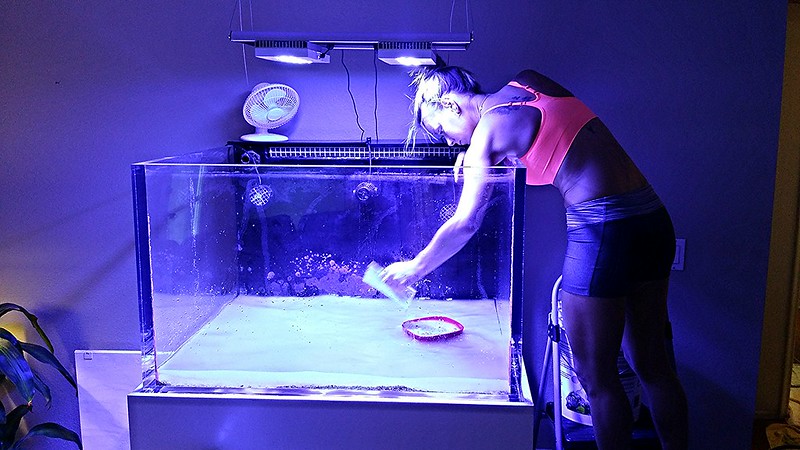 Moved the display then cut off circulation to the ADA and disconnected the sump/fuge: 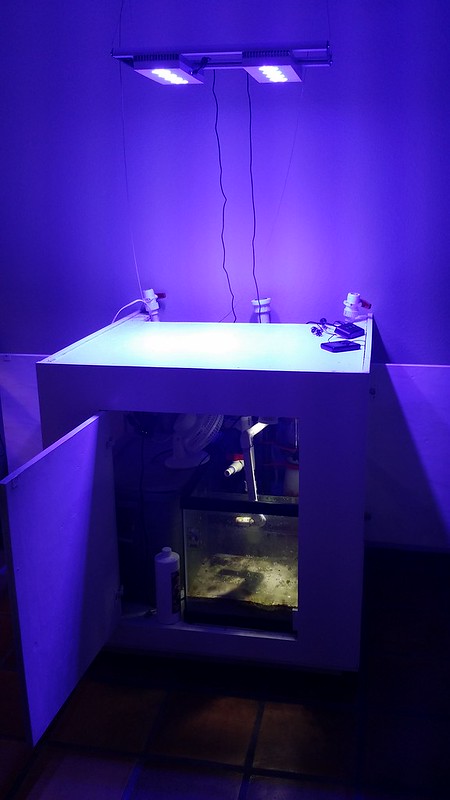 Cleared everything for the new tank: 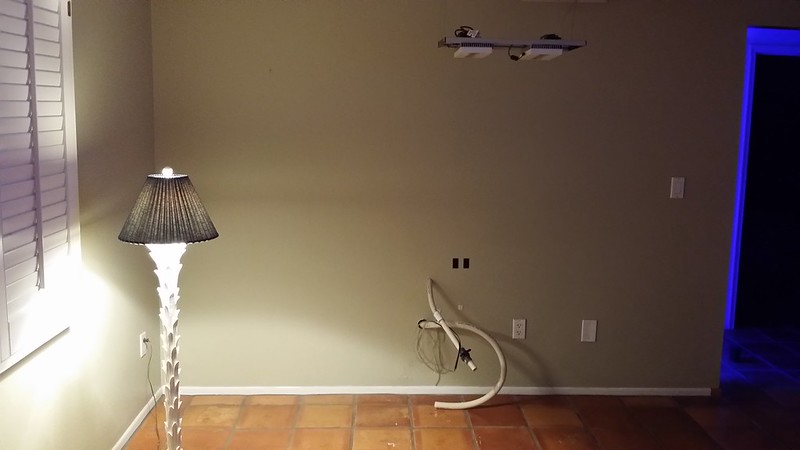 Organized the plumbing so we could start drawing up a schematic: 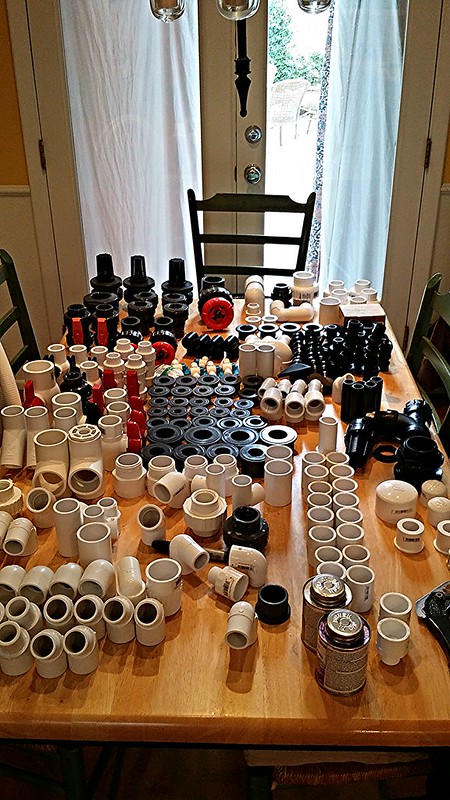
__________________
84x42x30 (~450g) A.G.E. and ADA 90-P (~45g). |
||||
|
|
|
|
07/21/2014, 12:50 PM
|
#17 |
|
Registered Member
Join Date: Jun 2007
Location: Phoenix, AZ
Posts: 1,605
|
Sunday morning was the big move. I was able to convince 9 guys to wake up early so we could start moving this thing at 7 am before it got too hot outside (remember, desert = 105+ degrees this time of year).
Using suction cup grips (not the best), dollies and brute force, we were able to muscle this thing into a 24' enclosed trailer and move it to my place. Finally got it in the backyard and this is us getting it prepped to go through the window and onto the stand with Elliott acting as our commander in chief. 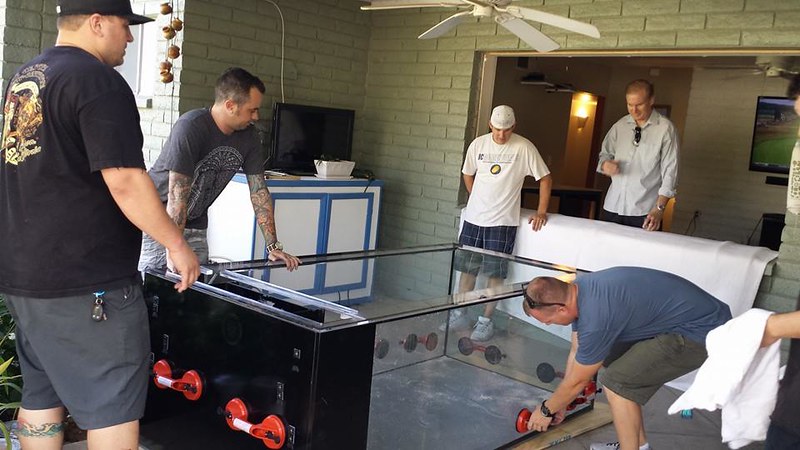  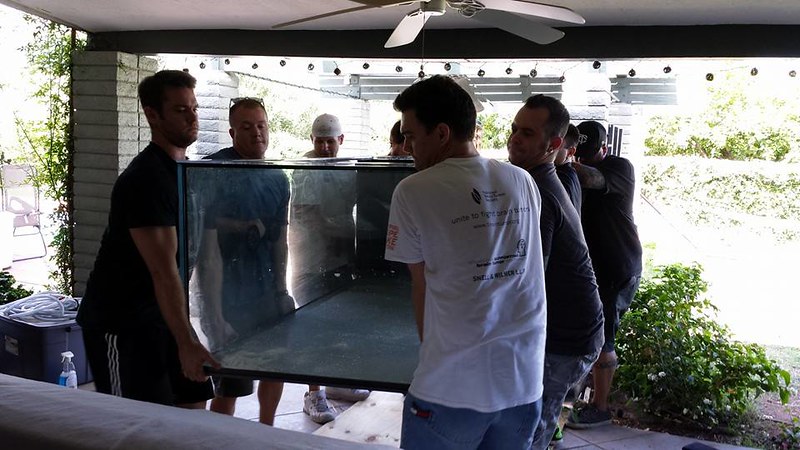 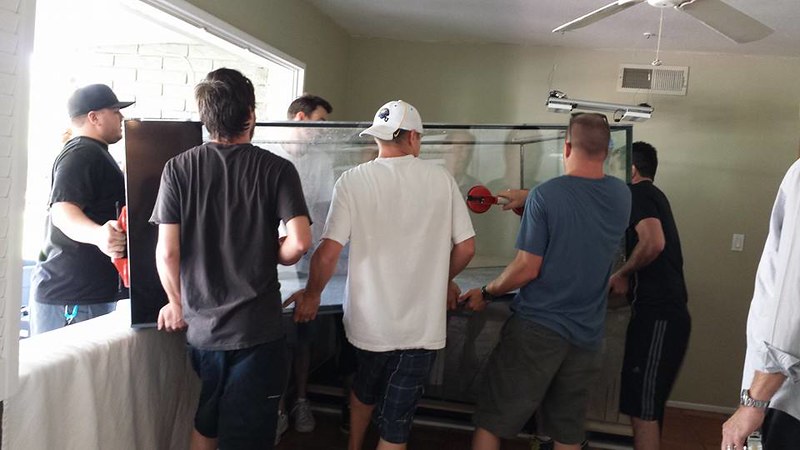 Into it's final spot and we started to clean/get plumbing going. Pretty weird to climb into the tank to clean it! 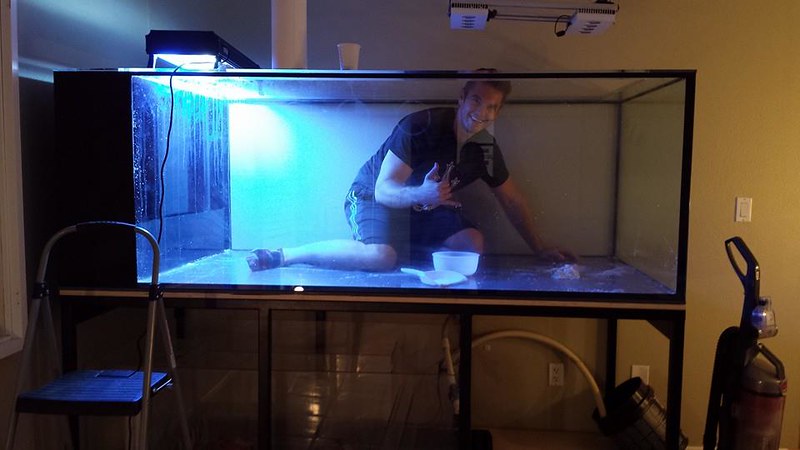 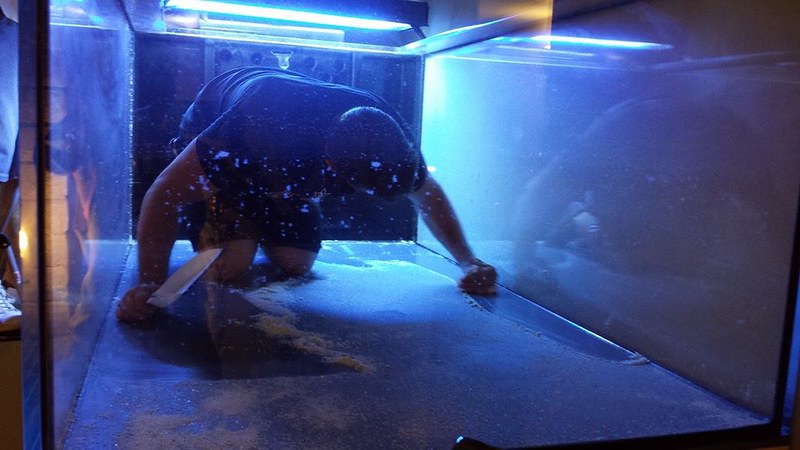 Here's a shot of Hunter (evolved) and I scoping out the overflow and and getting things glued into place. 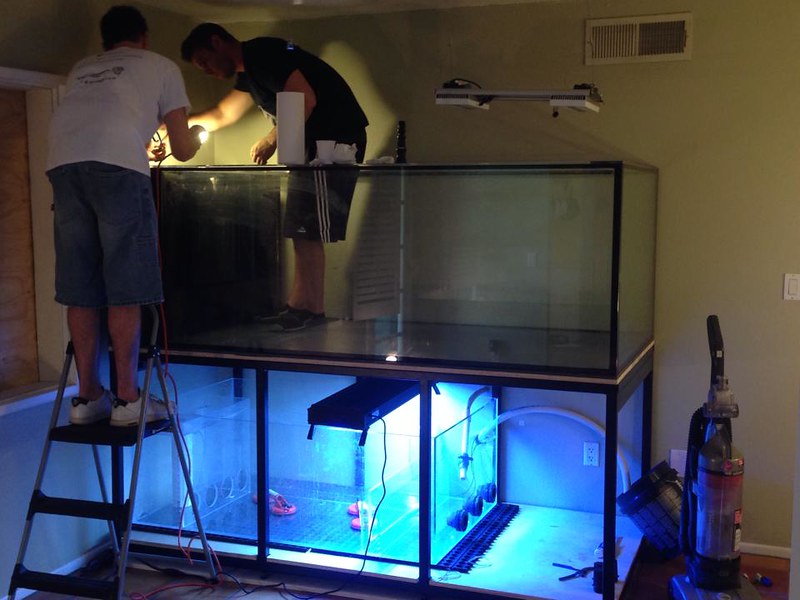 First few drops of water into the tank -- Frick is fearlessly hanging out under the tank working on the plumbing (it's dark but he's down there!). You can also see that we had to shim a corner of the stand where the plywood was separated from the tank. 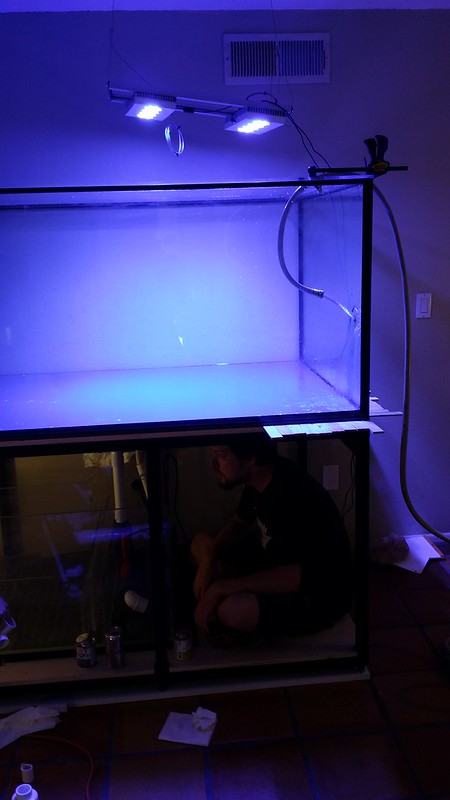 We got all of the livestock transferred back over last night and the ADA plugged back in. There are a few minor leaks but overall it was a complete success. I'm not out of the woods yet -- still a lot of planning and work ahead. Stay tuned!
__________________
84x42x30 (~450g) A.G.E. and ADA 90-P (~45g). |
|
|
|
|
07/21/2014, 03:11 PM
|
#18 |
|
Registered Member
Join Date: Jun 2007
Location: Phoenix, AZ
Posts: 1,605
|
Just received a text...the window is fixed! Better than before...this time low-e! Yeah!!
__________________
84x42x30 (~450g) A.G.E. and ADA 90-P (~45g). |
|
|
|
|
07/23/2014, 10:33 AM
|
#19 |
|
Registered Member
Join Date: Jun 2007
Location: Phoenix, AZ
Posts: 1,605
|
A huge THANK YOU to Hunter (evolved) for coming over last night to help fix a minor leak and install the UV sterilizer.
The former owner, Chris (Siasl), ran this tank with a UV sterilizer and after a few email exchanges with him and other reefers, along with my own research, I thought it would be a good addition to the tank. It's a 114-watt AquaUV sterilizer that I'll be running it according to Mojo's recommendation in this post, which at about 325 gallons/hr should kill ich. And, from Elliott's recommendation, I'll be running it for about 4-6 hrs in the morning, say 4am-10am, or something like that because that's when ich is most active. I wanted to give some more details on the plumbing and took some pictures with my cell phone last night. Hopefully they can help demonstrate what was done. The tank has 7 holes in the overflow: 1-1.5", 4-1", 2-0.5" drains. The tank is set up to run "Herbie" style, meaning it runs at full siphon with an emergency drain that is capable of handling the entire flow in-case the main siphon is clogged. So here's how it's set up: 1.5" drain has a 17" piece of PVC in the overflow box. The 17" is the height that the water will backflow to, so you cut this according to how much room you have in your sump. Underneath the tank, it attaches to a gate valve (very important to use a quality gate valve for accuracy). The gate valve is on spa flex so I can toss a filter sock underneath it if necessary (for example, when I start adding sand to the tank). A single 1" drain acts as the emergency and at full siphon can handle the water volume being pumped into the tank. It's cut just just above the running water line, at 28-inches. I run the overflow around 27" so that there's no trickling sound. Again, you need a quality gate valve to make fine-tuned adjustments and it's easily achieved with the gate-valve. The emergency line drains through 1" spa-flex underneath the tank without any restriction. You can see the gate valve and emergency line (the closest black spa flex line) here: 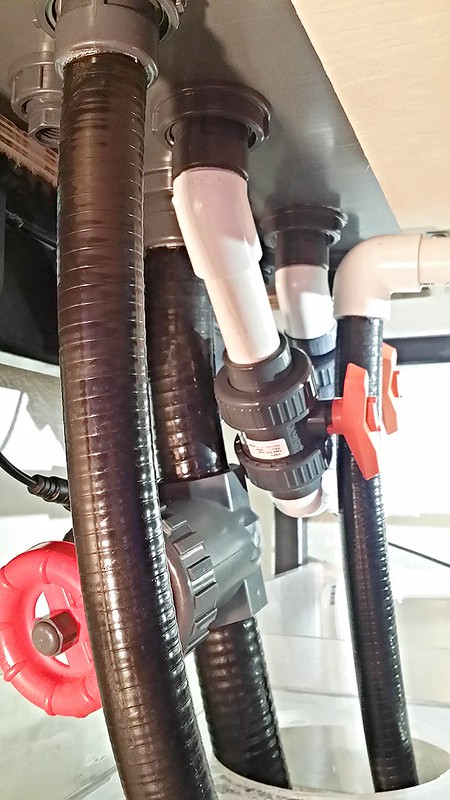 Two 1" lines are used for the returns. They are controlled via ball-valves because they operate as on/off. Actual flow is controlled using the Waveline (a DC pump) controller. Hunter cleverly split these with a "y" and it came out very clean: 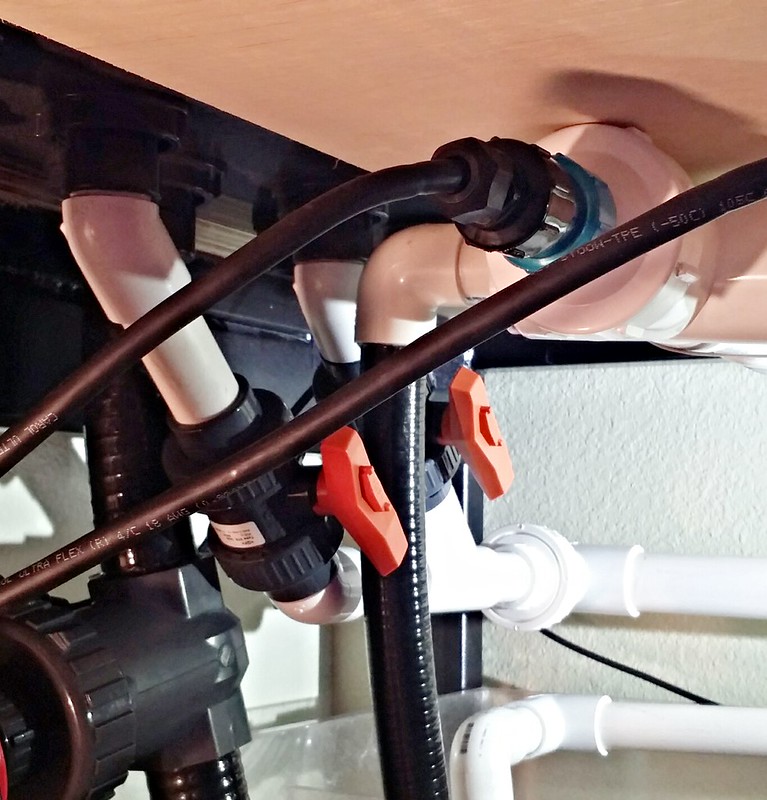 The remaining bulkheads are used as "pass-throughs" for cords. They are cut about an inch above the emergency drain line and water shouldn't ever enter them. If they do for some reason, water will drip into the sump and I'd have far more serious issues on my hands to deal with (water would literally be overflowing from the top of my tank. The only way that happens is if both the full 1.5" siphon and 1" emergency drain are clogged. Very, very unlikely -- **knocks on wood**. I've only utilized one of the 1" drains so far because I'll have to cut and reconnect cords when everything is set up. I'm going to wait to do so until the aquascaping is finalized before tackling that project. The heart of the plumbing is a Waveline DC12000, which feeds the main display tank, the smaller 50-gallon ADA on the otherside of the wall (via ball valve), the UV sterilizer (via gate valve) and a "quick-water change" port that I'll eventually get fitted for a garden hose to pump water directly into our desert rock-scaped front yard or into the sewer. You can see all of that here: 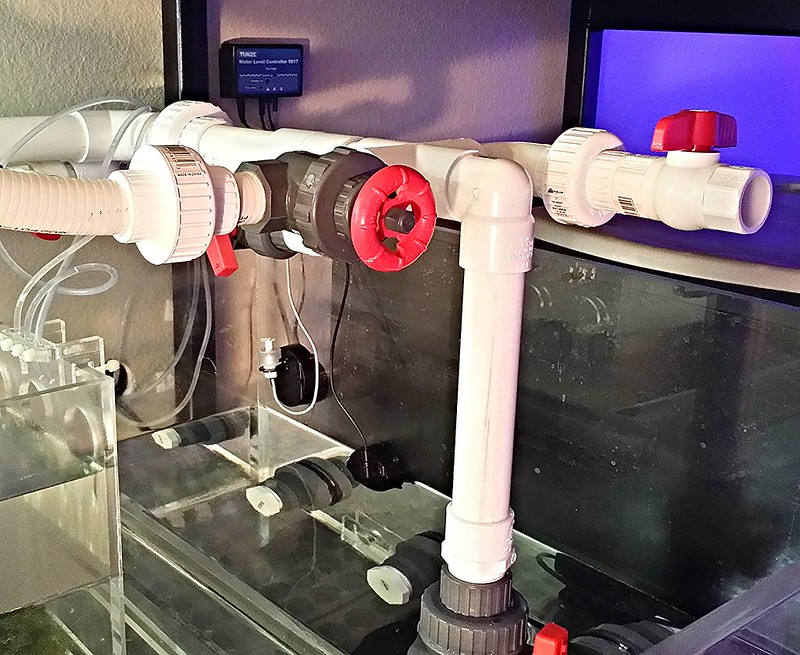 In the picture above, you can see a 50-gallon aquarium that is going to be used for ATO. It's currently set up with a Tunze Osmolator. The UV sterilizer is attached to the underside of the aquaruim for easy access and cleaning. Unions were used for a quick dismantle and it's held in using straps that are drilled into the plywood base. It feeds into the sump's first chamber that feeds into the chamber where the skimmer sits. 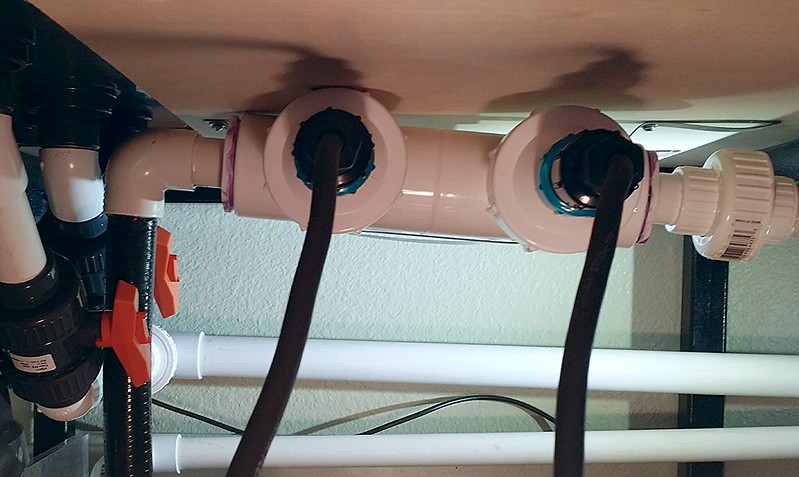 A few other things worth mentioning: The overflow from the smaller 50-gallon tank that sits in our bedroom is routed into the refugium and has a gate valve to regulate the flow if necessary -- I'm planning to keep this running at full speed. I placed a Jaebo wp25 in the fuge to tumble chaeto-- it's currently bare bottom and I'll likely leave it this way. A "maggie muffler" keeps the smaller bedroom tank pretty quiet even with a good amount of flow coming in. Hunter and Jason created a slight slope to both the ADA overflow and the AGE return lines to help facilitate waterflow back into the sump in case of power-loss. Hopefully that all makes sense!
__________________
84x42x30 (~450g) A.G.E. and ADA 90-P (~45g). Last edited by zibba; 07/23/2014 at 11:15 AM. |
|
|
|
|
07/24/2014, 12:39 AM
|
#20 |
|
Registered Member
Join Date: Jul 2014
Location: Hamburg, Germany
Posts: 85
|
Subscribed!
__________________
- Bjorn 1300Liter in-wall, ATI PowerCone 250iS Skimmer, Maxspect R420R LED 10k, MP40QD, Jebao DCT-12000 ECO, Deltec UV Steriliser, Deltec GFO Reactor, H&S sulfur denitrator Current Tank Info: DT: 200x80x80(cm) + Sump: 130x60x60(cm) |
|
|
|
|
07/29/2014, 09:12 AM
|
#21 |
|
Registered Member
Join Date: Jun 2007
Location: Phoenix, AZ
Posts: 1,605
|
Made more progress this past weekend: We built, painted and installed the electronics panel, installed some cable management brackets, organized a lot of cords and started ridding the dryrock of any nasties (particularly phosphates).
I'll post pictures of the cable management and electronics box once all of the components are installed. I'm far from a wood worker, so this thing is more about function rather than form. It's basically a shallow box that was installed on the end of the stand to reduce the risk of water splashing on the electronics. Here's a candid from the process: 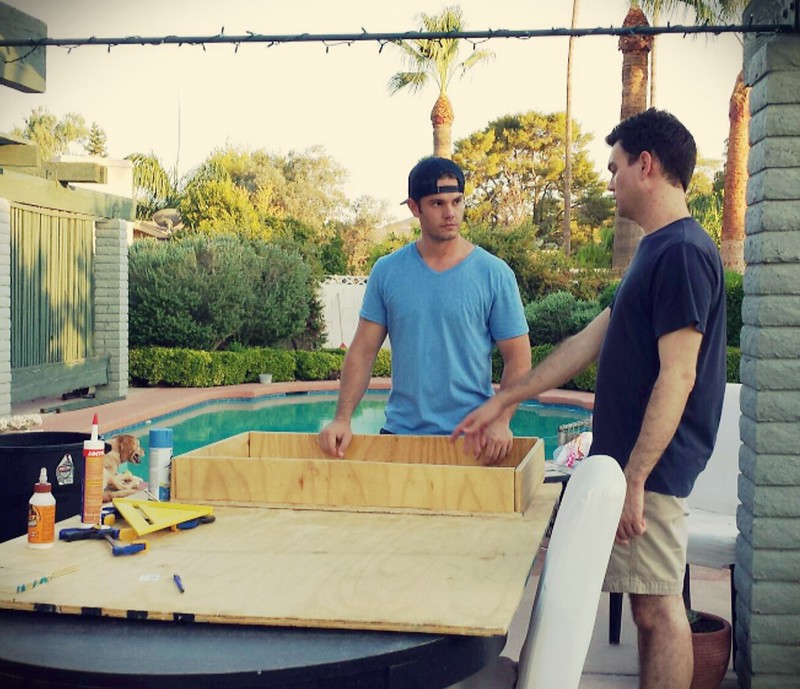 We had a major mess of cords that posed a serious fire risk. It was embarrassing and dangerous to say the least. As part of this whole process, we're trying to make the entire system more presentable. This was a great step in that direction. K picked out some faux marble laminate and a glass shelf and we found a new LED light for under the smaller ADA 90P. I thought the final result came out looking really nice: 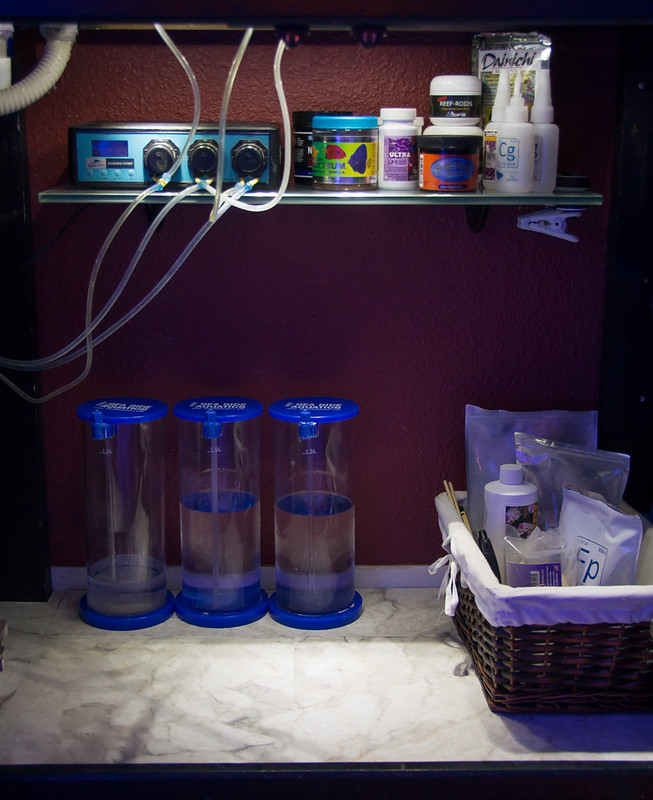 The A.G.E. doesn't look quite that nice (hey, I have a huge sump and ATO to work around), but it's significantly cleaner and safer than my previous set-up. In between all of that we started the acid-wash + LaCl3 treatment on the rock. Muratic acid (~31%) was used to help unbind any phosphates from the rock. Placed all of the rock (mostly Marco rock) into large containers, filled it up most of the way with water from the garden hose and then poured the acid in slowly until it started bubbling. You don't need too much. 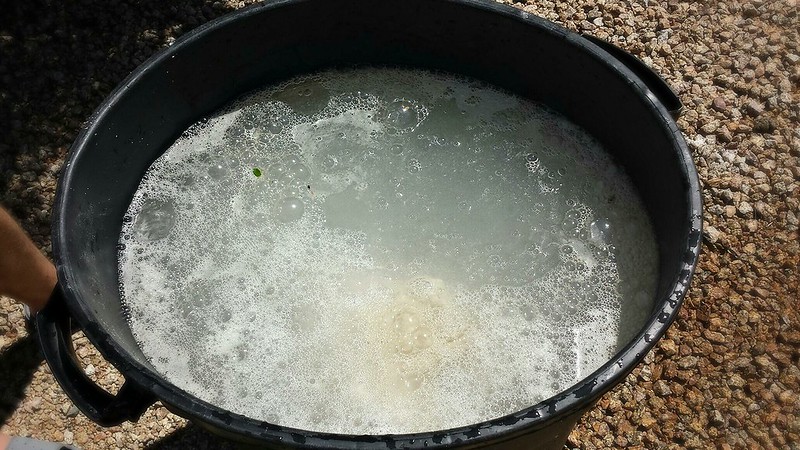 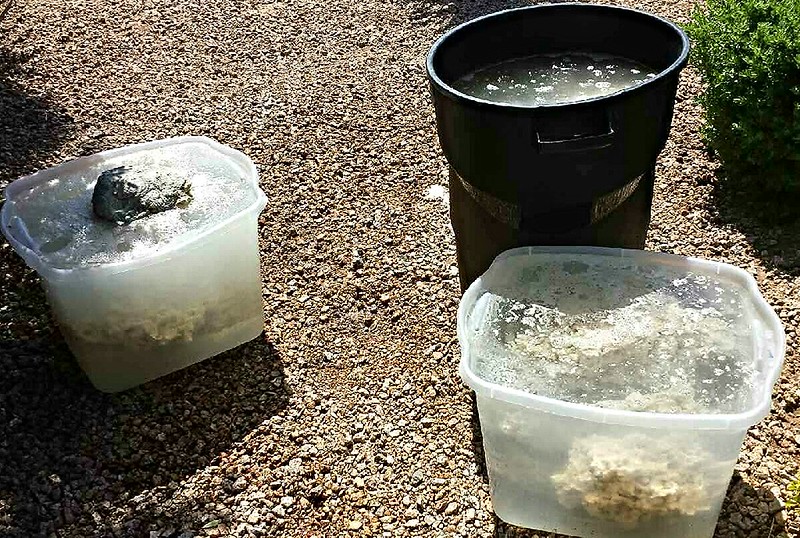 We dried out that rock and then started treating with lanthanum chloride. We only have one batch of rock in the LaCl3 right now and it was reading around 0.1-0.16 ppm. We'll give it some more time. The good news is that we didn't lose anything during the move. There are a few corals that aren't looking great but, overall, it has been a successful transfer. Hoping for more of the same moving forward.
__________________
84x42x30 (~450g) A.G.E. and ADA 90-P (~45g). |
|
|
|
|
07/29/2014, 02:32 PM
|
#22 |
|
Registered Member
Join Date: Mar 2012
Location: Pensacola, FL
Posts: 194
|
Sweet looking upgrade. I enjoyed the last two tanks, and look forward to seeing this one mature.
|
|
|
|
|
07/31/2014, 03:34 PM
|
#23 |
|
Registered Member
Join Date: Dec 2001
Location: Scottsdale, AZ
Posts: 3,849
|
man I love that tank, subscribed
__________________
Rodney Dangerfield - "I worked in a pet store and people would ask how big I would get." TOTM, March 2015 Current Tank Info: tank video: https://www.youtube.com/watch?v=va1dI7mdnGU ,900g in wall mixed reef, another 500g sumps, 19 AI Sol LED's, 2 CL's w/VFD's controlled pumps to 24 eductors, 2 Tunze WB's, 2 Barr 5220's and RK2 25PE and BK500, etc |
|
|
|
|
08/07/2014, 10:32 AM
|
#24 |
|
Registered Member
Join Date: Jan 2014
Location: Miami, FL
Posts: 52
|
nice score on the big tank.. looking good.. tagging along
|
|
|
|
|
08/21/2014, 08:55 PM
|
#25 |
|
Registered Member
Join Date: Jun 2007
Location: Phoenix, AZ
Posts: 1,605
|
I apologize for the lack of updates. Most of the work on the tank is on the dry-side, literally and figuratively. Things are still plugging along but with the big 3-day move last month I wanted to give things sometime to settle in. In addition to that, we’ve been traveling. Nonetheless, we’ve been “cooking” rock and playing with aquascaping ideas, trying to organize wiring when we have time and continuing to plan this entire setup.
This past weekend we finalized the aquascaping design and got half of the rock into the tank. The plan is to let the first addition sit in the tank for a few weeks, observe how everything reacts; then, add the second half of the rockwork, let things sit for a few weeks; then, add sand slowly every week. Once we have the second half of the rockwork looking how we want it, we’re going to start placing corals, which means breaking some of them off the old rock and incorporating others as they fit. Instead of putting up a picture that doesn’t do the tank any justice, I’m going to wait until all of the liverock is in before the big reveal. I appreciate everyone’s patience. The next big step is adding lights. I was originally thinking of going with six-Hydra52s from the beginning of this build since we ran two-Hydra52s over the last tank with good success. After continued thought, receiving advice from Joel over at AI and additional research, the plan is to go with four-Hydra26s on the outer corners and run the two Hydra52s in the middle. I’m confident that this will be more than enough light. The next step is deciding how to hang them (leaning towards AIs EXT rails) and run the wiring (each fixture is only 10’ long). Here’s a mock-up of how the lights will be placed:  And, I realize that this thread is awfully boring without picture so I decided to change that with some updated stick & zoa pictures. 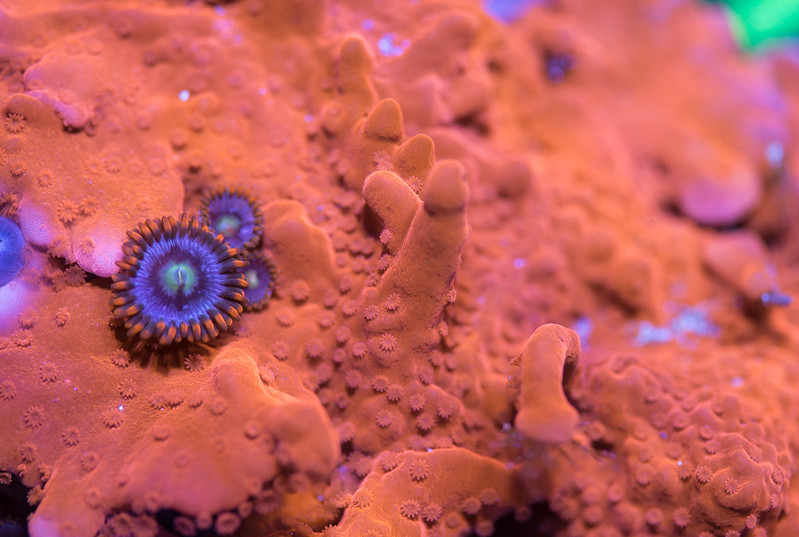 Setosa, x-man zoa by ..:.. EZ ..:.., on Flickr 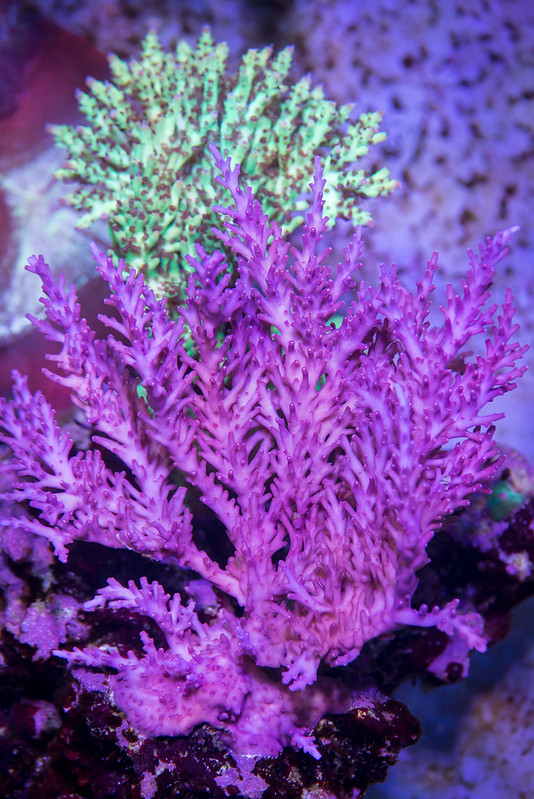 WWC Red Dragon by ..:.. EZ ..:.., on Flickr 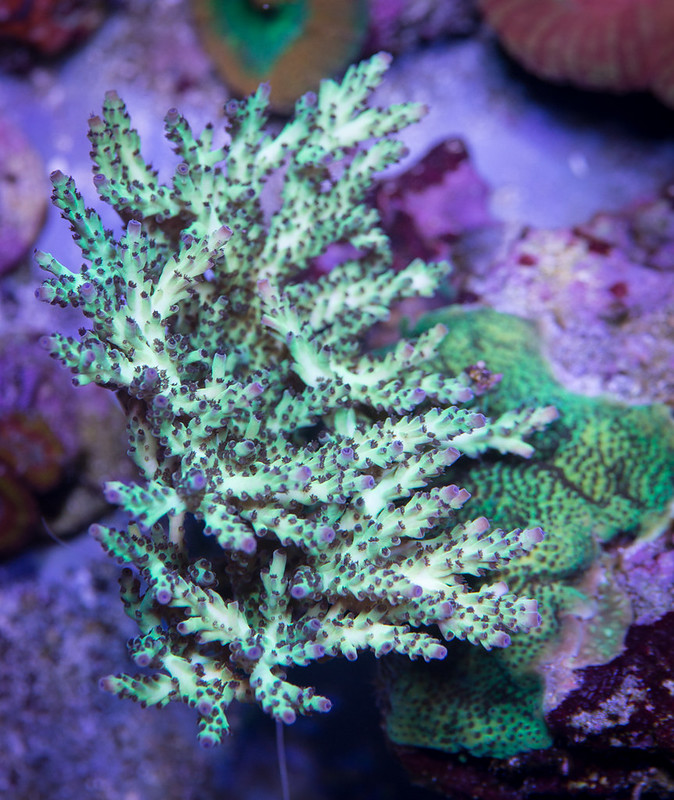 Grapejuice acro by ..:.. EZ ..:.., on Flickr 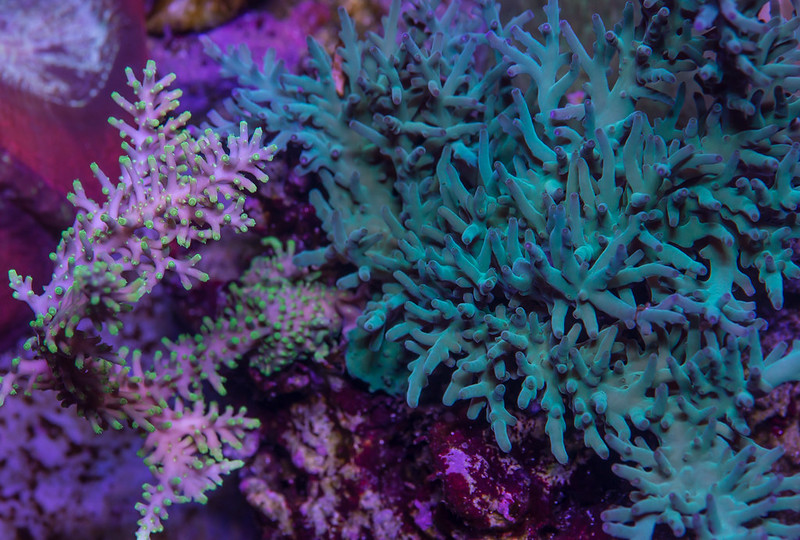 RR USA Phuong, ORA Hawkins by ..:.. EZ ..:.., on Flickr 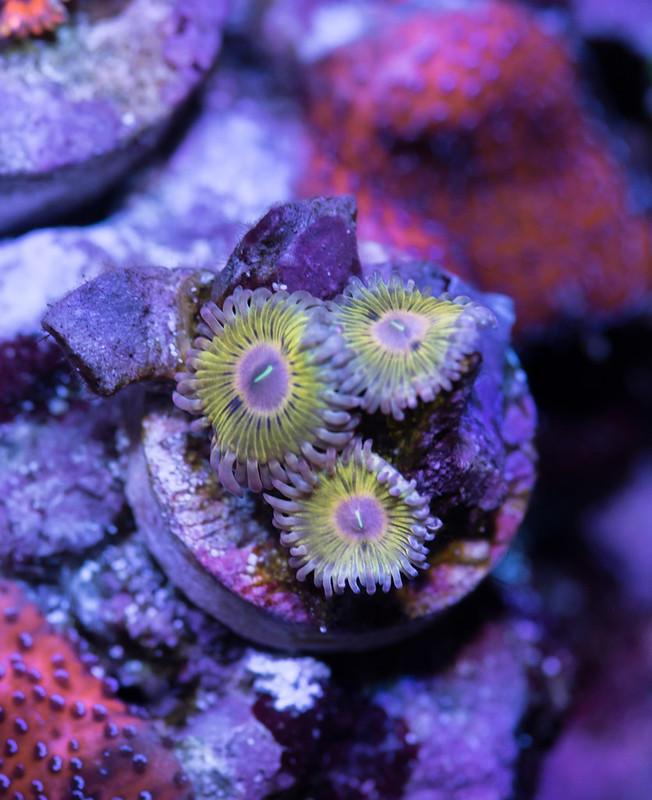 zoas? by ..:.. EZ ..:.., on Flickr 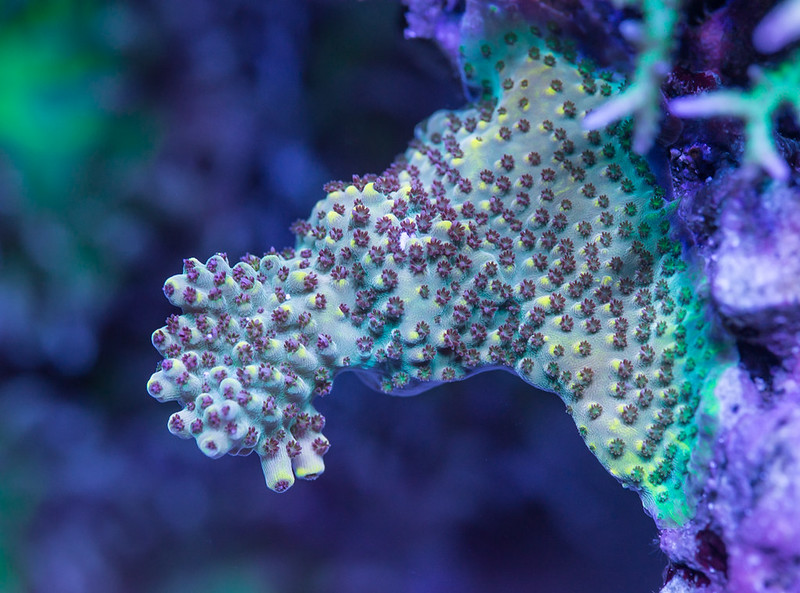 RR USA Led Zeppelin by ..:.. EZ ..:.., on Flickr  Kwoww acro by ..:.. EZ ..:.., on Flickr  Hornets by ..:.. EZ ..:.., on Flickr Thanks for sticking with us on this adventure!
__________________
84x42x30 (~450g) A.G.E. and ADA 90-P (~45g). |
|
|
|
 |
|
|


