
|
|
 05/19/2011, 11:31 PM
|
#1 |
|
More Idiot Than Savant
Join Date: Nov 2005
Location: Billings, MT
Posts: 560
|
CyclistMT's 300 Gal Plywood and Glass Build
If that title sounds familiar to any of you that's because this is the sequel!
BIGGER, BADDER, and with more SPECIAL EFFECTS! Yippee-ki yay moth........ Oh, wait. I better keep this PG. If you want to view Episode 1:The Directors Cut, you can find it here: CyclistMT's 150 Gal Plywood and Glass Build Ok, so technically this tank is not a 300 gal by internal measures, it's more like 250 but with my sump and other various tanks that will be tied in to the system it will be 300 gal plus. Besides, it's a nice round number. But I'm getting ahead of myself. I want to start this thread off with an homage (that's pronounced O-MAZ-SHG) to der_willie_zur_macht. BEHOLD, the mountain of sawdust! 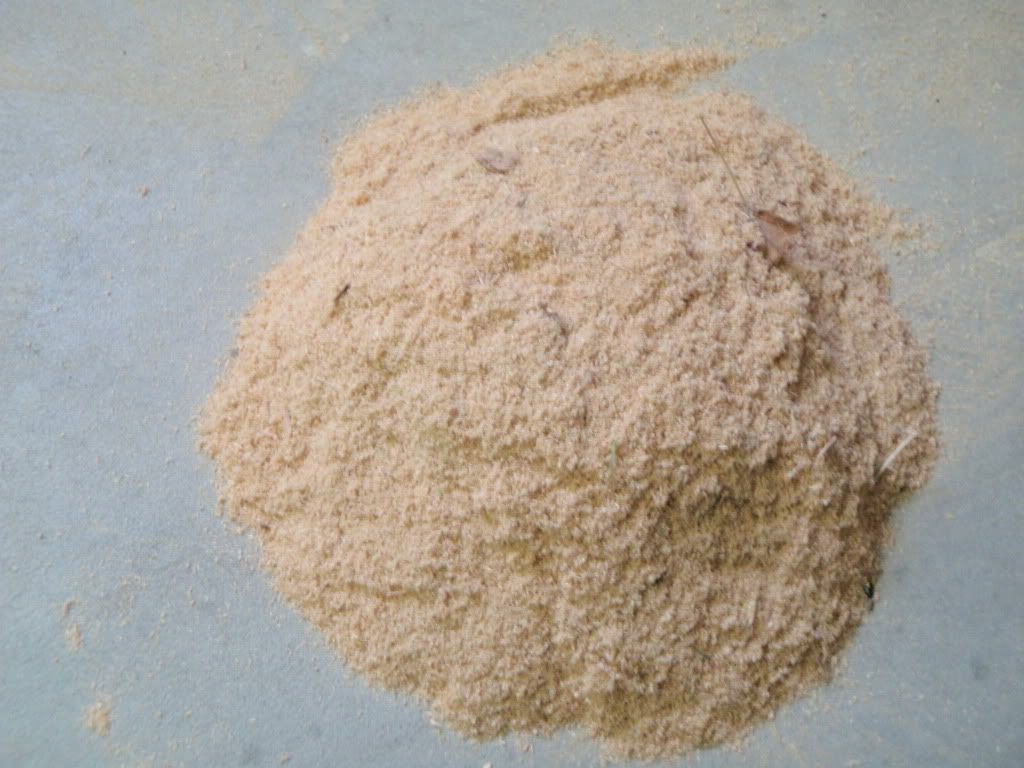 And because I know all you guys and gals love macro shots, here you go! 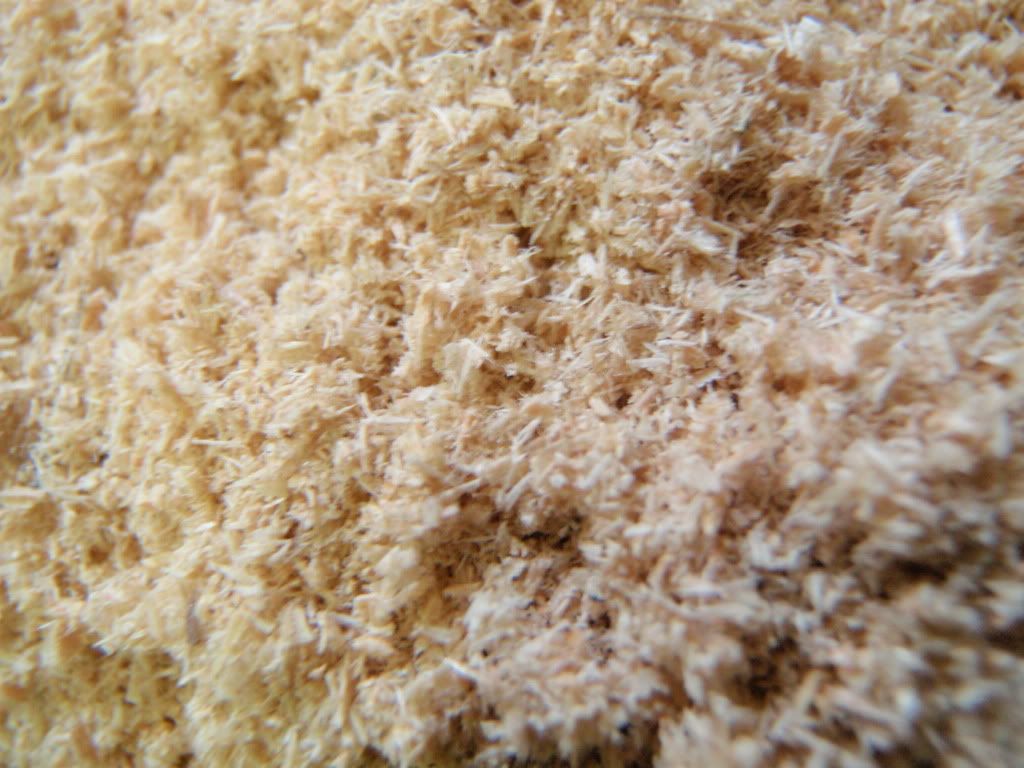 Why an homage to dwzm? Because my tank is nearly identical in dimensions and construction techniques to his so I spent a lot of time watching his thread, and learning a lot before I began construction on mine. Here is his thread for reference. Mountains of Sawdust I plan to address the various parts of the system design through individual topic posts in this thread. So, construction techniques, filtration, water movement, lighting, etc. will all get discussed in forthcoming posts. Here are some basics about the tank and design goals.
And without further delay, here it is! My new tank in all its glory! Some assembly required.  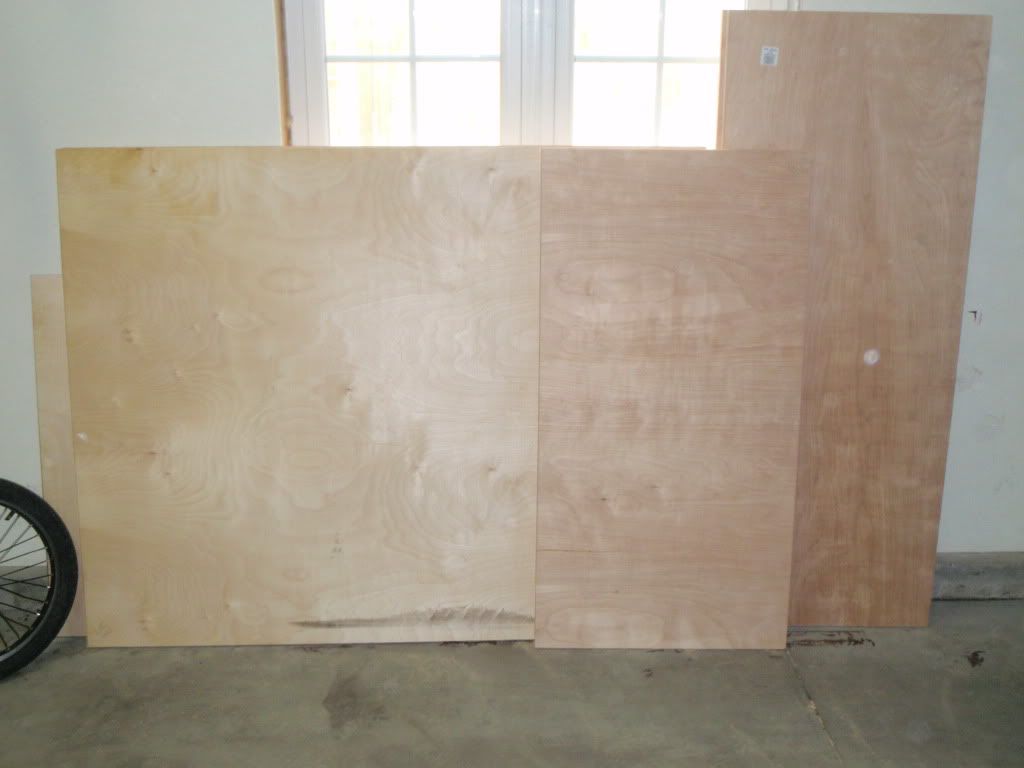
|

|

|
|
07/03/2011, 11:16 PM
|
#2 |
|
More Idiot Than Savant
Join Date: Nov 2005
Location: Billings, MT
Posts: 560
|
Wood Aquarium Construction- Not your typical wood shop project.
(TLDNR- Screwed and glued plywood together, poured epoxy, cut out viewing panels, siliconed glass in. You may now skip to pictures. ) If you build it they will come.... I don't know who “they” are but I built it anyway. So here we go. Plywood aquarium building. When I built my first plywood aquarium I had a hard time finding information. Some construction techniques were easy to find, most notably those found on garf.org, but I had real trouble finding information on long term success. That has definitely changed and most likely due to immersing myself in the subject but it does seem like more and more people have given it a go and have come up with some new ideas in the process. There are many variations on the way to go about this and I've posted some links below to give you an idea of those variations. Many more ideas can be found on this site, at fingerlakesreef, and monsterfishkeepers. MattShack's Build redtops03's Build scchase's Build Sean:EbN Build dsanfort's 540 Gal Build And a current build in progress- d3hree's Build With my first tank I pretty much followed the Garf instructions to a tee. Plywood was screwed at 2” inch intervals and I used the Sweetwater epoxy paint from Aquaticeco both inside and out. It worked very well and the tank is still in service today. But here is the way I went about building this tank. Since this tank is going to be 4’ wide I felt the need to enhance the process over my previous tank. Fiberglass layup with epoxy was always an option as several people have done it that way but I’ve never worked with fiberglass and that had me a bit nervous. Honestly, the only epoxy experience I had was from the previous tank and that was technically a paint and not straight epoxy. But the concept was the same so I had an idea of how to work with it. Anyway, after happening on fingerlakesreef and watching DWZM’s build, I found that pouring and then spreading the epoxy on rather then brushing was the way to go for me. I used wood glue and deck screws at 1” intervals to build the basic box. Drilled pilot holes for all screws and kept things square as I went. You may be wondering why I didn't use biscuits to join the plywood and that would be a good question. I don't have a jointer and I've never used one so I wasn’t keen on adding that unknown quantity to the mix. Besides, biscuits taste better with sausage and gravy then they do with plywood.  I know, I know, plywood does not take screws on end well but I built my previous tank this way and besides, with the pour method, the plywood is really nothing more then a fancy mold. The epoxy becomes the actual tank. Wood filler was used on all internal seams and to fill in over the counter sunk screws. The filler was sanded smooth before epoxy application. I know, I know, plywood does not take screws on end well but I built my previous tank this way and besides, with the pour method, the plywood is really nothing more then a fancy mold. The epoxy becomes the actual tank. Wood filler was used on all internal seams and to fill in over the counter sunk screws. The filler was sanded smooth before epoxy application. 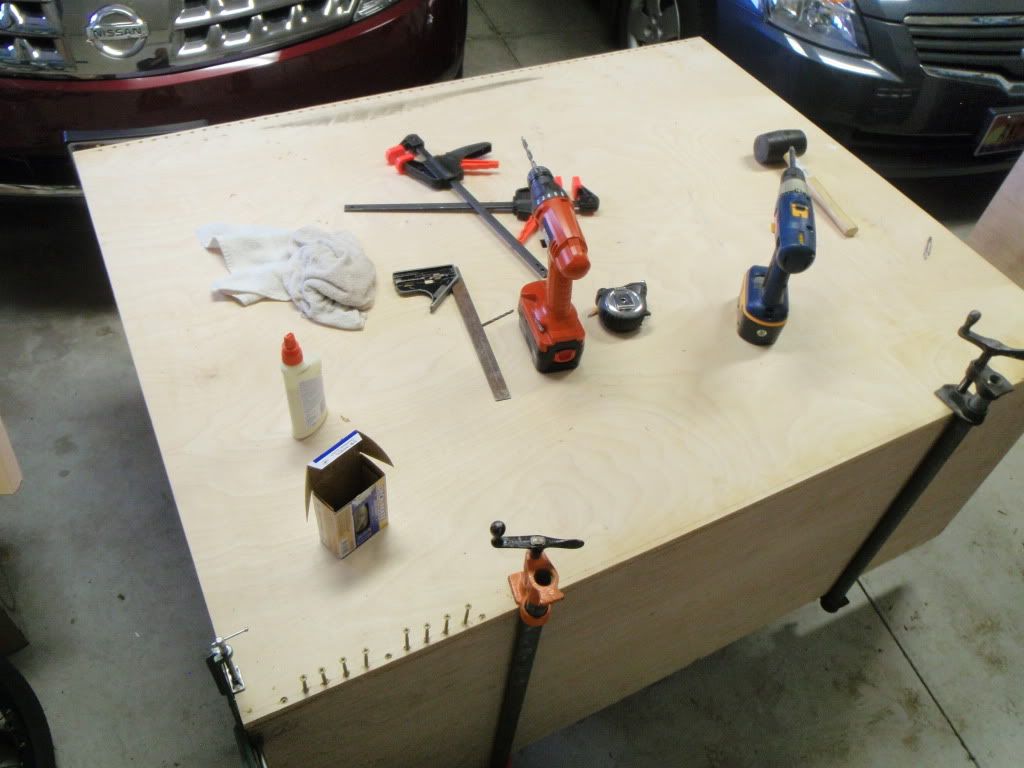 I decided to basically build a box and epoxy everything first. Then I could use the cut out viewing panels for building my sump saving me some time in epoxy pours. It worked very well. I was a bit nervous because I was going to have to do a plunge cut with my circular saw and since I'm going to use my panels for my sump, the cuts had to be very clean. I have this little Ryobi cordless saw that I had hoped would be up for the task. I found these 36 tooth blades to fit and they cut through the ply and epoxy like butter. 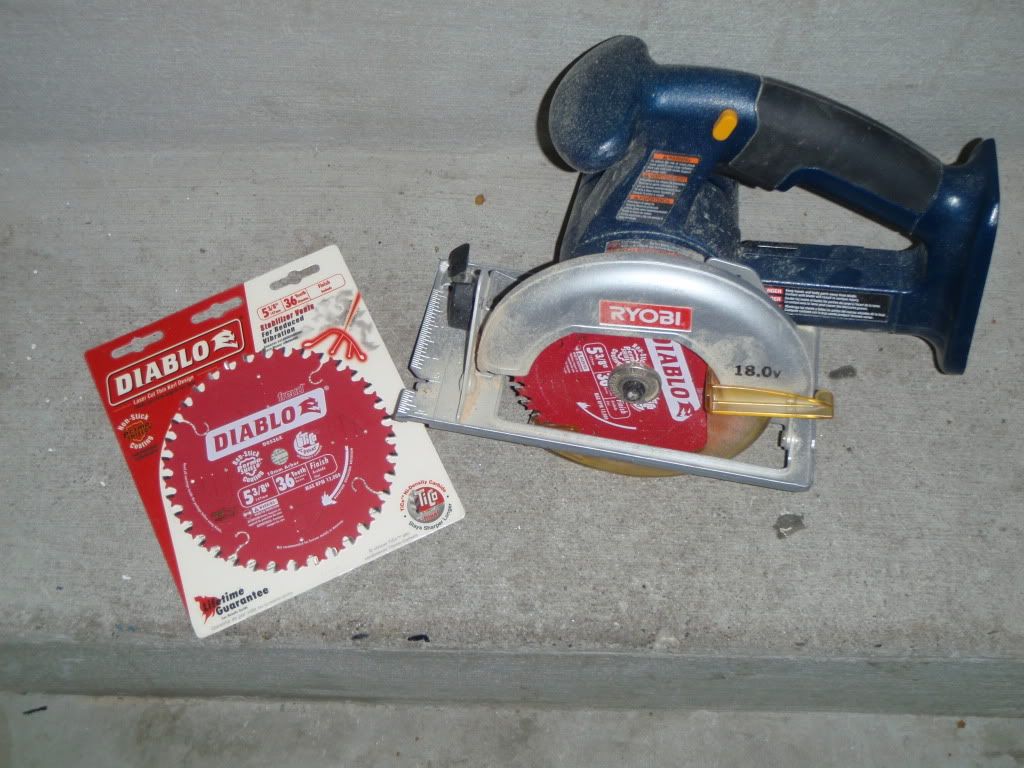 They worked like a charm but I had to repent afterwards for going to the devil for help.  Sorry, I didn't take any pictures of the box epoxied before I cut it out. Sorry, I didn't take any pictures of the box epoxied before I cut it out. 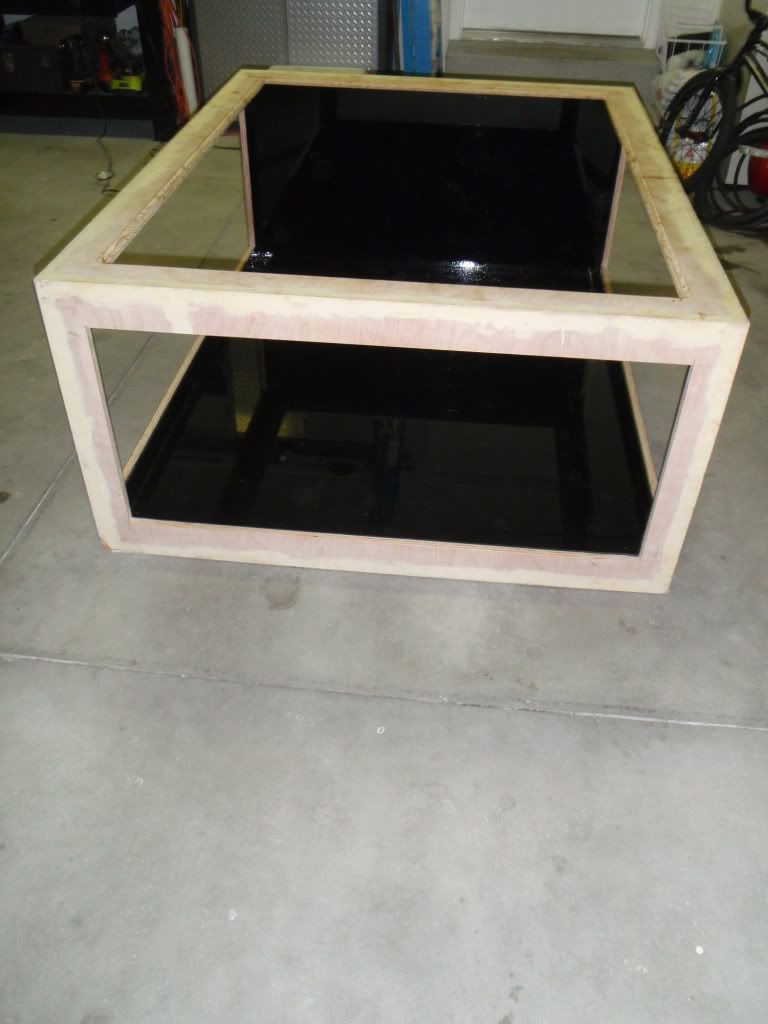 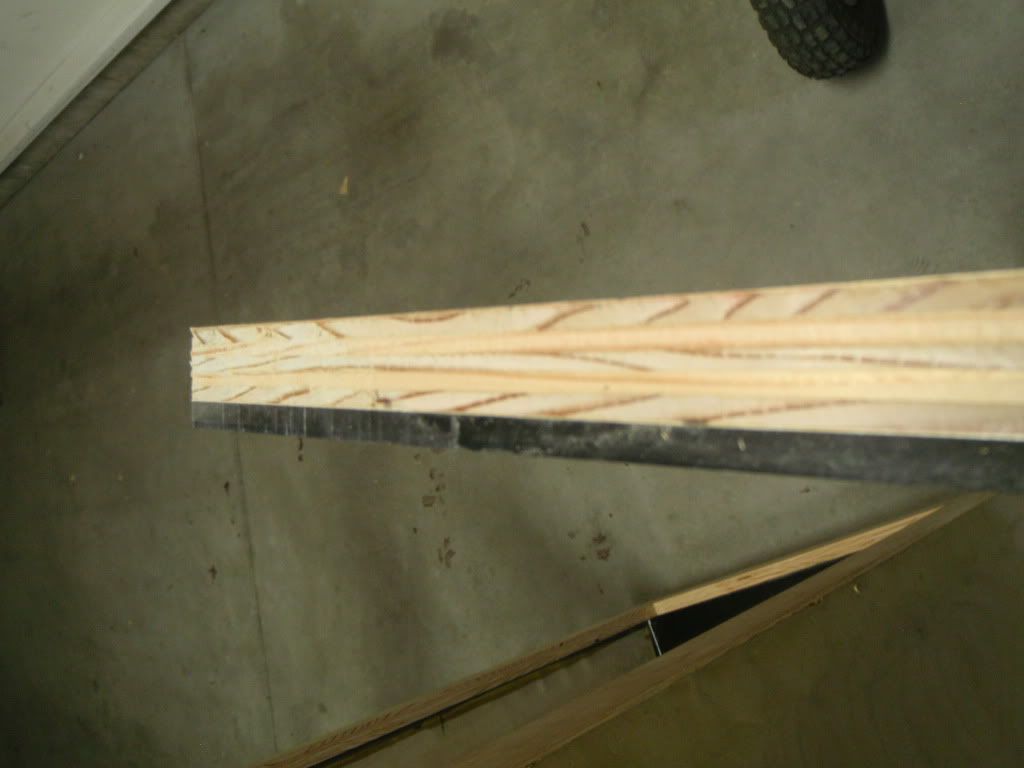 One snag I ran into was with my Euro brace. I had planned to screw it on from the top but when I went to do it, I discovered that I had cut it to fit inside the opening instead of on top. Cutting out a new Euro brace would have meant using a whole new piece of plywood and it just pained me to throw the already cut brace out. I know, it's only another $50 in the grand scheme of thousands that I'll end up spending but I just couldn't bring myself to do it. Using the original brace meant sacrificing an inch of space and screwing in from the sides. I talked myself into in figuring that it could ultimately provide me with more rigidity this way. I'm no engineer so I'm totally guessing at this. Bottom line, the worst is an inch of water height lost. One thing I am unsure about at this point is if I will have too much deflection using a Euro brace on a 60”x48” tank with three sides viewable. The brace is a single piece cut out of plywood and I'm hoping that the glass will provide additional support to keep deflection to a minimum but I won't know until I start filling with water. My previous tank was also 24” high and had zero deflection but it was only 32” wide with only two viewing panels so this is definitely a different beast. I do have a contingency plan if deflection proves to be too much. I'll have to wait and see. As for the epoxy, I use the pour method described in DWZM's build and on several builds on fingerlakesreef.com in the Plywood section. Basically you pour and spread epoxy on each panel in multiple layers. This is really tough stuff and I have no concerns over it's ultimate strength and ability to provide a watertight seal. On my last tank I used an epoxy paint and brushed it on. That epoxy layer was a lot less thick then the this one is and it worked out fine. Given the size of this tank and 3 viewing panels I did want to step it up so that's why I decided on the pour method. You will also see described in some of these builds the use of wood angles in the corners along with fiberglass to provide additional support. I've never worked with fiberglass and didn't want to put that unknown in to the mix of my build. Also I think the wood angles are unneeded and potentially create more failure points. Instead I did the same thing as DWZM and poured epoxy filets in each corner. After my previous build and now using this pour method without fiberglass I'm 100% comfortable that this build process is more than sufficient and that many plywood builds are way overbuilt. And that's OK if that's what it takes to give someone peace of mind. I have complete confidence and peace of mind in my build. The epoxy I used was from US Composites (slow hardener). 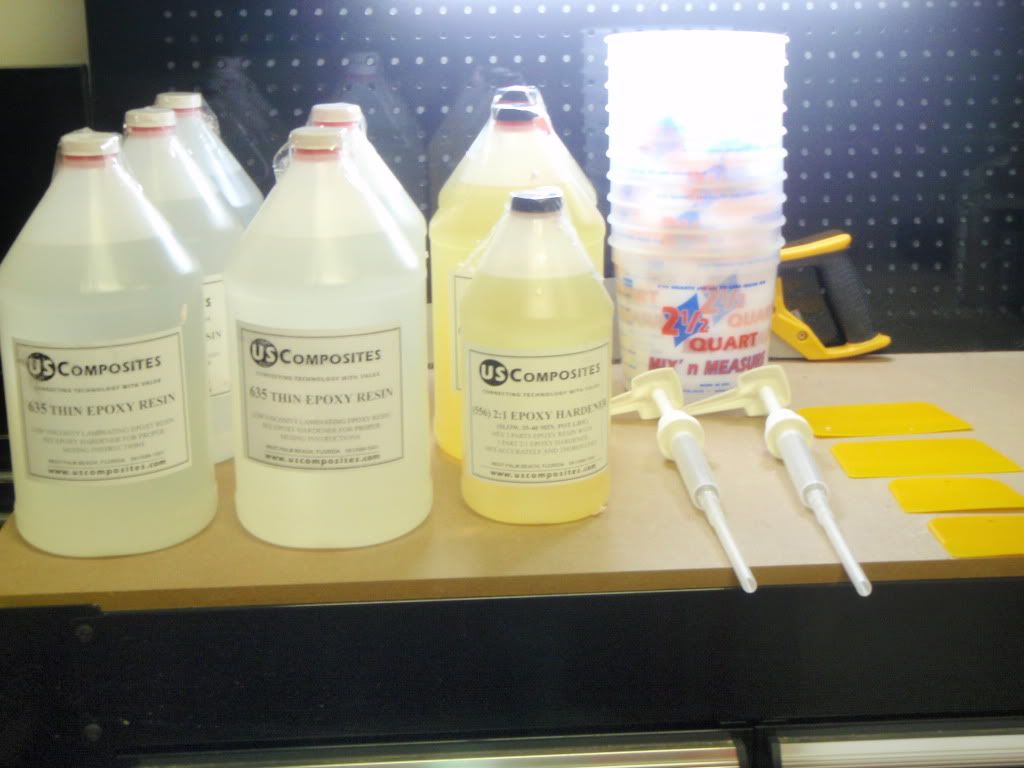 I found it to be very easy to work with and had minimal fumes/odor. In fact, I had to finish some of my pours inside because it got to be fall and was getting too cold. Even without being able to open the windows for ventilation, the fumes were never too strong to be worried about it. You couldn't even hardly smell it beyond the room I was working in. I think regular latex paint has more fumes. Pouring filets 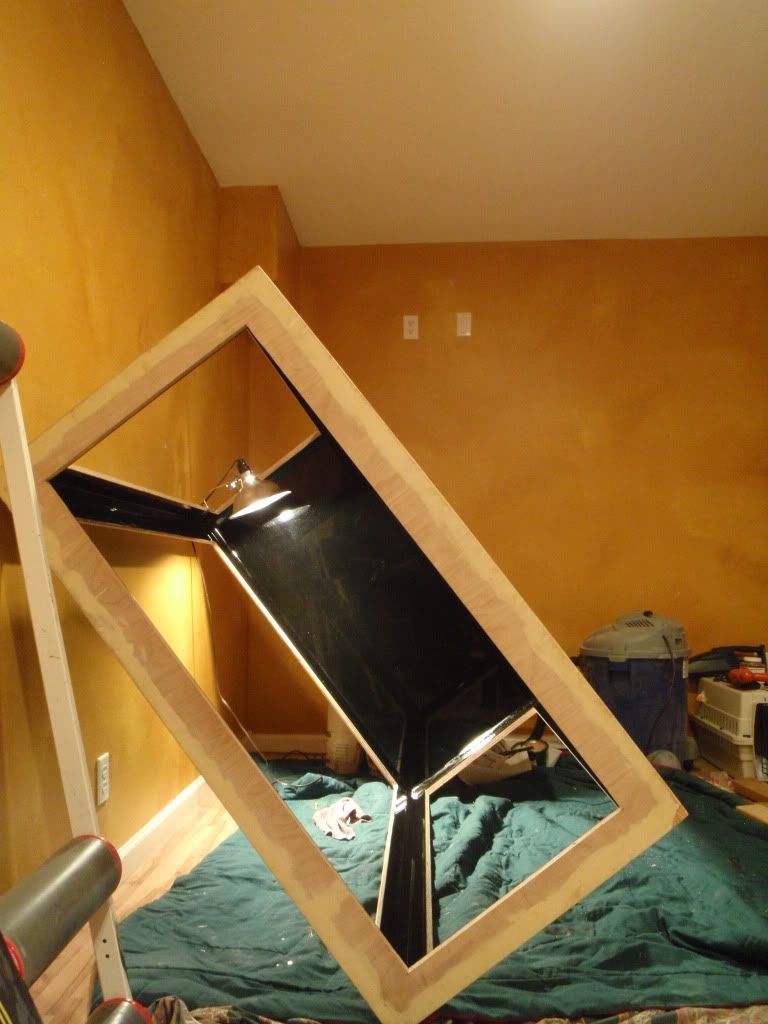 Finally, to silicone the glass in I used RTV103 black silicone. 1/8” spacers (the kind you use for floor tile) were inserted to give a uniform height to the silicone gasket once the glass was laid down. In a build like this the silicone actually acts as a gasket rather than being structural and the water pressure helps keep everything in place. I also used epoxy on the outside (brushed and poured) to provide a seal against water spills. Frankly, I trust well sealed wood/epoxy tanks more then all glass or acrylic tanks. We've all heard of horror stories when a seam on a glass or acrylic tank fails (this is the weak point on these tanks). Of course a wood tank can fail too, especially if there is anywhere for water to get in between the plys but 3/4” of plywood screwed, glued, and biscuited (if you must) creates a very strong seam that is not going to fall apart. Be mindful of water proofing by being cautious and not rushing the epoxy application. Make sure all holes are filled, especially any exposed voids in the plywood before applying. Carefully check everything over once poured/brushed and don't be afraid to add more epoxy if necessary. Even if your layer is fully cured, a little sanding will allow adhesion to take place between the layers. I'm sorry I didn't get pictures of the process of siliconing in the glass. The silicone I used skinned over very quickly so I had to work fast and just didn't have time to grab the camera. And the final result! 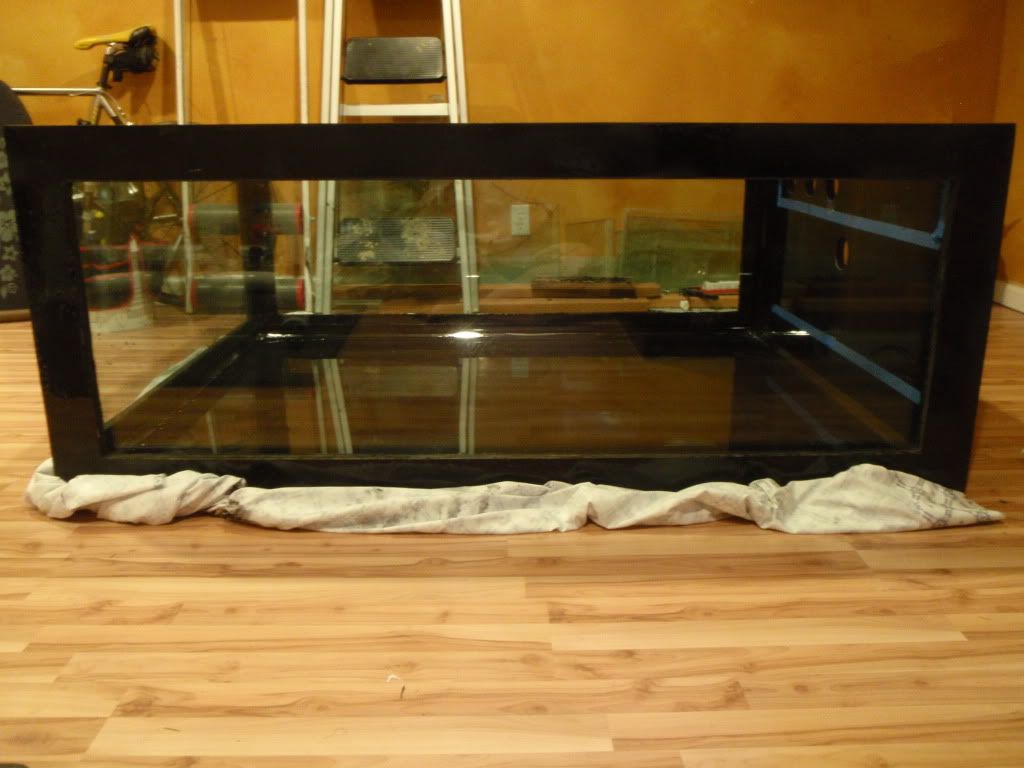 I'll upgrade once they perfect transparent aluminum.
Last edited by CyclistMT; 07/03/2011 at 11:25 PM. Reason: Added link. |
|
|
|
|
07/04/2011, 11:18 AM
|
#3 |
|
Registered Member
Join Date: Oct 2009
Location: Lancashire, UK
Posts: 773
|
Awesome, I love the glass look to poured epoxy and I wish that I could do it on my build. Unfortunately being bolted to walls makes it difficult to rotate!
I will eagerly follow this one, good luck! |
|
|
|
|
07/04/2011, 12:46 PM
|
#4 |
|
Registered Member
Join Date: Jan 2010
Location: Canadia
Posts: 4,276
|
Looking good! In all your reading did you ever come across anything about practical limits on the size of a plywood tank, i.e. height and width so large that deflection could not easily be overcome?
Thx, Dave.M
__________________
My Gawd! It's full of corals! Current Tank Info: None. Nil. Zip. Nada. |
|
|
|
|
07/05/2011, 05:37 PM
|
#5 |
|
More Idiot Than Savant
Join Date: Nov 2005
Location: Billings, MT
Posts: 560
|
@d3hree - Thanks for the words of encouragement! I've been watching you're build as well and wish I had your rendering skills. I'm too embarassed to even post my Sketch Up attempt. It sounds like you've got a solid plan so I doubt you'll have any problems once you get to the epoxy stage.
@dave.m - I have not come across any practical limits on size of a wooden tank especially in regards to deflection. There are some huge tanks out there and with wood you have so many ways to prevent deflection. On really large tanks, many people actually use more of a wall building technique (think 2x4s attached to the plywood) that would make things very rigid. Also lots of ways to do cross bracing so I think there are really many more options to prevent deflection on a ply tank vs glass or acrylic. I think cost becomes the practical limit as you go up becuase at some point I would think concrete becomes more cost effective. However, I have come across an 8000 gal plywood tank in my internet travels. Check out the DIY section on monsterfishkeepers.com. There are some seriously huge plywood tanks over there. Worth checking out even if they are primarily freshwater. |
|
|
|
|
07/05/2011, 07:29 PM
|
#6 |
|
Registered Member
Join Date: Jan 2010
Location: Canadia
Posts: 4,276
|
Freshwater? What's that?
 Seriously, though, I will look up the monsters. I was only contemplating 2200 US gal, so if they're doing 8000 I should be fine. Thx, Dave.M
__________________
My Gawd! It's full of corals! Current Tank Info: None. Nil. Zip. Nada. |
|
|
|
|
07/07/2011, 11:07 PM
|
#7 |
|
More Idiot Than Savant
Join Date: Nov 2005
Location: Billings, MT
Posts: 560
|
Filtration Plan (Warning, lots of words and no pictures in this section. Bring your reading glasses.
 ) )(TLDNR- Live rock, skimmer, algae export, plenum ) Its too bad Britta doesnt make aquarium filtration products. Theres nothing I like better then overpaying for a simple carbon filter. Since that isnt likely to happen anytime soon I guess Ill have to stick to tried and true methods for reef tanks. Although I dont want to unnecessarily complicate my system, I do feel that a multi pronged and mostly natural approach is the best way to accomplish my goals. To that end I plan on using a live rock, a sized right skimmer, algae export (ATS/Cheato/Seagrass), carbon, GFO if needed, and a plenum. Wait....what? Did you just say plenum? Yes, yes I did. For those of you that havent already closed your browser and branded me el loco or if you think I've been drinking to much Four Loco, then let me explain. I have been in this hobby long enough to say I was old school when it was still considered new school. I was using the Berlin method with a bare bottom 20 years ago (after stressing for weeks about taking my bio balls out of the wet/dry). I have done shallow sand beds and deep sand beds. But I have never done a plenum so this is new area for me. I have reviewed the concept in depth AND I stayed at a Holiday Inn Express last night so I should be good to go. I believe that plenums have gotten a bad rap and I believe that's due to incorrect application of the method. The traditional Jaubert plenum requires a plenum height of about 1 and a gravel depth of 3-4 inches over the plenum. Notice I said gravel, not sand. The Jaubert plenum should have gravel sized between 2 to 5 mm. This is decidedly bigger then sand. Substituting any one of these parameters could easily lead to a different result and possibly cause someone to denounce the method rather then realizing that they altered the method. I will be sticking with the recommend parameters so I'll see for myself the effectiveness of a plenum. Natural Nitrate Reduction is another name for Jaubert's plenum method which really is the same goal that deep sand beds and remote deep sand beds hope to attain. Based on my research, I believe a plenum will be easier to maintain then a deep sand bed and less prone to becoming a nutrient sink. If you're unfamiliar with plenums and want to know more, a Google search will give you all you need and then some. You'll find proponents and opponents, just keep in mind the above parameters when reviewing others' methodology. Here is a link to some interesting articles on various components of reef keeping from a public aquaria perspective. One of these articles is from Dr. Jaubert himself that will detail not only the method, but the history, how he arrived at the final form, and an acknowledgment that there is much left to be learned in regards to plenums. Well worth your time. http://www.burgerszoo.eu/over-burger...-contents?ce=1 Ok, now that we have that out of the way, let's start back at the top. Live rock, that's a no brainer. I already have all the rock I'll probably need. I will be using the DIY oystercrete rock that I took out of my 150 before I moved. It's been sitting in a Brute can of saltwater for a couple of years now. Do you think it's cured yet? Actually there's quite a bit of life in the can. I see pods, feather dusters, and I bet there's probably quite a few mini serpent stars still too. I'm hoping it's shed most of it's detritus so it will be like starting the new tank with good quality live rock. Protein skimmers, so many choices here and I'm limited by not only my space but by my design goals for this tank. I can only really do a skimmer that's around 24 tall because I want an internal skimmer and I want to keep my stand around 40 high. Clearly that means the skimmer will be in the sump, under my tank so that brings us back to the design goals of quiet and energy efficient. However, I won't buy hype and can't imagine paying much over $500.00 for a skimmer. That being said I love new tech, but only if it works. So, I have been looking at several different cone skimmers. I may still change my mind but right now I'm really digging on the SWC New 300 Cone. It's $650and will fit in my allotted space. It is likely oversized for my tank right now but I'm expecting a full tank with a heavy bio load eventually. And I plan to tie a frag tank into the main system so that will increase the bio load too. I think algae is one of the best ways to manage nitrate and phosphate export. GFO and solid carbon dosing can certainly provide the same results and I'm not opposed to using them if need be, but I prefer to use natural methods as much as possible. The biggest problem with algae (or marine plant) export is the footprint required to have a meaningful impact can be quite large. I realize that a ball of cheato in a 20 gal fuge is probably not going to cut it for this tank so I'm going to give an Algae Turf Scrubber a try. Admittedly there is some controversy surrounding ATS but it's not a new idea and appears to be working for many folks. Additional information on ATS can be found in this thread. Algae Scrubber Basics http://www.reefcentral.com/forums/sh....php?t=1977420 I will be deviating from the basic plan listed in the link above due to space constraints and a desire to minimize energy footprint. I'll explain in more detail once I get to that point in the build. I also plan on incorporating some seagrass in the system which will provide additional export. But that is a longer term strategy so the ATS will be the primary and pioneer algae export for the tank. Well, if you've made it with me this far I applaud you and congratulate you. My plans for in tank water movement and lighting are yet to come. Yes, that means more of these things called words without a lot of pictures. I promise I'll get some pictures up as soon as I'm a little further along on the stand.
|
|
|
|
|
07/08/2011, 08:09 AM
|
#8 |
|
MTS Sufferer!
Join Date: Feb 2005
Location: NW Ohio
Posts: 1,926
|
Good luck with this, I am thinking about a plywood build, probably a small one to get the method down before tackling a large (400 to 600 gallon) project.
I think you will find success with your filtering methods. I believe in the multipronged approach, and it seems you won't be putting all of your eggs in one basket. Lastly, you have a writing style that is easy and fun to read, maybe when this journey is complete you should think about cndensing it into an article to sell one of the rags, or online zines. Matt
__________________
Next step on the system is adding A 90 gallon! Current Tank Info: 475 multitank system is now running! Several hundred gallons of additions planned! |
|
|
|
|
07/08/2011, 09:58 AM
|
#9 |
|
Registered Member
Join Date: Apr 2003
Location: Cupertino, CA USA
Posts: 4,027
|
Great start to the build! You've got me really intrigued as I'm hoping to build a similar sized peninsula tank, and I'd honestly never considered plywood....
If you don't mind answering a few questions, here are some I have: 1) Is tank strength ultimately your primary reason for building this way? 2) How wide if your bracing and the vertical wood areas on the sides with the glass panels? 3) How thick of glass did you use? 4) Do you think that this method of construction ends up cheaper than using all glass to build the tank? (sorry, I hate asking about cost, but it's definitely something I'm keeping in mind when imagining my build). Thanks! Tyler |
|
|
|
|
07/08/2011, 11:09 AM
|
#10 |
|
Registered Member
Join Date: Oct 2009
Location: Lancashire, UK
Posts: 773
|
I agree with Matt, reading your thread so far has been very enjoyable.
|
|
|
|
|
07/08/2011, 11:57 AM
|
#11 |
|
Team RC Member
Join Date: Jul 2005
Location: houstonia
Posts: 7,989
|
Excited to see this build come together. Looks like you're off to a great start!
__________________
-Chris- You don't win friends with salad. "Look! They're trying to learn for free!" ... "Use your phony guns as clubs!" Current Tank Info: rectangluar? wet? |
|
|
|
|
07/08/2011, 09:51 PM
|
#12 |
|
More Idiot Than Savant
Join Date: Nov 2005
Location: Billings, MT
Posts: 560
|
@ Matt and d3hree - Thank you for the compliments and the encouragement. I'm glad you enjoyed reading it so far as much as I have enjoyed writing it.
@Tyler - I don't mind at all! 1) Is tank strength ultimately your primary reason for building this way? No. Cost was my primary reason for building this way although I do find the strength far superior to other methods. Right now I have about $1200 invested in bulidling the tank and that doesn't include the fact that my sump is being bulit out of my scraps. So really, tank and sump for $1200. For a comparable sized glass tank it would be at least $3000 if not more and it would probably require 3/4" glass. Acrylic might be cheaper but there is no one near me that makes acrylic tanks so I would have to pay freight to have it shipped in. Also, my son and I hauled the tank (without glass) downstairs ourselves. Even with the glass now in, just the two of us will be able to hoist it on the stand. No way we could do that with an all glass tank this size. 2) How wide is your bracing and the vertical wood areas on the sides with the glass panels? Mine are 3.5 inches. 3-4 inches is pretty standard on these builds. One thing you want to make certain of is that your glass is at least 1 inch bigger then your opening so you can get a large enough silicone seal. (Think of the silicone as a gasket in this type of build.) 3) How thick of glass did you use? 1/2". My 150 was 48"x32"x24" and I used 3/8" on that. 4) Do you think that this method of construction ends up cheaper than using all glass to build the tank? (sorry, I hate asking about cost, but it's definitely something I'm keeping in mind when imagining my build). See above. Absolutely I do. I know a lot of people say the tank is the not the most expensive part of the build so don't obsess over the cost of it but I disagree. At these sizes it get's very costly and I'd rather put the $2000 I saved building it to equipment or livestock. However, you need to decide how much your time is worth since this is DIY. @crvz - Glad to have you along! I've been watching your bulid come together too. Those are some mighty nice tangs you got the other day! |
|
|
|
|
07/10/2011, 12:34 PM
|
#13 | ||||
|
Registered Member
Join Date: Apr 2003
Location: Cupertino, CA USA
Posts: 4,027
|
Quote:
From your pics it looks like the epoxy is quite thick. How does the epoxy "behave" in response to "trauma"? For example, if a rock was dropped on it, do you feel it would be apt to just chip or scratch without negatively impacting it's structural integrity, or would it crack/splinter like glass? Quote:
Does the silicone bond to the epoxy at all or it is just a compression seal from the water? Quote:
Quote:
I like to build things myself; I think setup is almost half the fun! I'll be keeping a close eye on this build! Thanks for the responses! Tyler |
||||
|
|
|
|
07/10/2011, 02:22 PM
|
#14 | |||||
|
More Idiot Than Savant
Join Date: Nov 2005
Location: Billings, MT
Posts: 560
|
Tyler,
Quote:
Quote:
Quote:
Quote:
Quote:
Just as an FYI, I used to build glass tanks at the local fish store I worked at many years ago. We built all of our tanks from 10 gal to 240 gal and anything custom that someone wanted. I'm no stranger to building glass tanks. That being said, to build this tank out of glass I would have had to use 3/4" glass to feel safe about it given the width. I didn't price it out but I would bet that the glass alone would have cost me at least $2K if I went that route. My 3 peices of 1/2" was nearly $600 for this tank as it was. So again, cost was a deciding factor and in a significant way since we're talking thousands of dollars of difference. If you're familiar in working wood and basic construction/framing techniques, this is a very simple project. You're building a wood box. It doesn't get much easier then that. I think you should got for it! Good luck! -Lance |
|||||
|
|
|
|
07/17/2011, 02:51 PM
|
#15 |
|
Pro builder/aquarist hack
 
Join Date: Jul 2002
Location: NORCAL (Vacaville, CA)
Posts: 5,125
|
Lance,
Another great build/writeup. Nice work again on both! |
|
|
|
|
07/17/2011, 09:29 PM
|
#16 |
|
More Idiot Than Savant
Join Date: Nov 2005
Location: Billings, MT
Posts: 560
|
Hey there H2O! Thanks for the kind words and for tagging along!
|
|
|
|
|
07/17/2011, 09:49 PM
|
#17 |
|
More Idiot Than Savant
Join Date: Nov 2005
Location: Billings, MT
Posts: 560
|
Lighting and Water Movement
Or How to become your electric company's best customer. (TLDNR 2 x MH, LED actinic supplementation, Water Blaster main system pumps, Sicce Voyager for in tank flow, and electric ball valve actuated surge.) Sorry, no new pictures yet. It used to require the energy footprint of a particle accelerator to power a reef tank. For some it still does but thankfully we have many more options to reduce our carbon footprint than ever before. Lighting is a prime candidate for this especially because I believe many of us could not only get by with less, but that our tanks would continue to thrive. However, it takes careful planning and deliberate attention to certain design element details. The height of the tank and the aquascaping are key components to consider. LED is all the rage and it seems like a slam dunk when discussing lighting and energy efficiency. However, that's only half of the story for me when it comes to LED. Energy wise they are very efficient but pocket book wise, not so much. I know there are a lot of cheap LED systems out there but as you all know, in this hobby, cheap doesn't necessarily mean inexpensive in the long run. I have been up and down, back and forth, inside and out on the subject of lighting for this tank. In the past I've always been a MH+Actinics guy so that was my baseline for this analysis. I assumed I would need at least four 250W bulbs in Lumenarc/max/brite type of reflectors. I figured with the right bulb I could probably ditch the actinics. But that's still a 1000W of light for 8-10 hours a day. Not exactly energy efficient. So, of course, with all the buzz about LED I starting looking in that direction. I knew LED had a high up front cost but a low electrical footprint and an alleged long life. I made comparisons using a five year ROI. I figured five years should be a good usable life span for both MH ballasts and LED fixtures. I didn't choose the most expensive or lowest cost LED solutions for my analysis but rather what I felt was the best value and quality for the required coverage I would need for that tank. What I found is that over the period of five years, even considering the higher monthly electrical costs and bulb replacement of MH, there wasn't a significant difference in overall cost between the two products. It was really only a couple of hundred bucks. And considering that LED's are still in their infancy in terms of our hobby, I didn't feel the risk of new technology vs. the tried and true was worth a couple of hundred bucks. After all, this 5 year ROI assumes NO issues with LED that would create extra expense. Admittedly it also assumes no issues with MH which can happen, such as an early failure of a ballast or a bulb. I just don't think LED's have reached a level where we can make the assumption that they are completely stable yet. That being said, I do think LED's have a promising future in our hobby. Once manufactures are able to provide us with options to dial in the colors we've become accustomed to with MH and make it easier to change out a failed bulb, I think LED's could be the de facto choice. I do think LED's can make a great replacement for actinics and can give even more pop and sizzle to our corals' florescence than our beloved UVL VHOs. In fact, I plan on using LED's for actinic supplementation. While I reserve the right to change my mind, I've got my eye on Reefbrite strips to serve this purpose. I also looked at Plasma lighting and I'm really, really excited about this tech. Unfortunately it's even more expensive than LED and at this time I believe it is bleeding edge in terms of application in our hobby. If they can bring the price down and increase spread through reflectors designed specifically for our applications, then it will be a viable alternative. What I really like about the tech is the ability to change the perceived color of the light without a massive drop off in PAR. It can be controlled and dimmed through 10v interfaces in most aquarium controllers. This allows you to ramp up the light slowly over the course of hours until it reaches full intensity (at which is has a color temp very similar to sunlight) and then ramp back down. When plasma is at a reduced intensity, the light is decidedly bluer without a huge reduction in PAR (although it is reduced). You could easily have the intensity at it's highest when you're at work and have a 15-20K look when you're at home to view the tank. This would seem to be the best way to simulate a more natural light cycle for our corals while giving us that pleasing look to our tanks. I know LED's can do this too but from what I've seen, the color temp of plasma at these various intensities is closer to what we're used to with MH than LED is. If you're interested in exploring this further, here's a couple of threads to get you started. There's still not a lot of plasma in use yet. Plasma Lighting Growth Shots http://web4.reefcentral.com/forums/s....php?t=2000482 1000 Gal Rimless Build http://reefcentral.com/forums/showthread.php?t=1854516 Some of you might be thinking that if I want cheap lighting so bad, why don't I just use that blazing ball of thermonuclear energy that's sitting only 93 million miles away (aka- THE SUN). Trust me, if I thought there was a feasible way to use Solar Tubes on this build I would be all over it. Unfortunately for this option I have opted to put my tank in the basement. Even though the Tim the Tool Man Taylor part of my brain is screaming MORE POWER and suggesting I just put the tubes all the way through the basement ceiling, that would mean running them directly through my wife's scrapbooking room. And folks....that dog just ain't gonna hunt. So you're probably wondering, well that's great and all but what ARE you going to do for main lighting? Great question! Four MH with actinics (even if they are LED's) is not going to meet my objective of keeping my electrical costs under $50 a month. So, after all of this analysis and review (and believe me when I tell you it's been a months long process) I remembered Sanjay's tank was 4 feet wide too. And who better to copy than the lighting guru himself? Sanjay's tank is actually 84x48x30. Longer and taller then mine. He is using three 400w MH in Lumenarc/max fixtures. No actinic supplementation, no other lights. That's is, three. Drei. Tres. Trois. 3. Since my tank is only 60 long and 24 high, I figure I can get by with two 250W MH in Lumenarc/max/brite reflectors. Of course I need to maximize par so I'm going to go with an XM 10K bulb on a Lumatec select a watt ballast. That way if I find that 250W is not enough, all I have to do is swap out the bulbs for 400W but I won't have to buy a new ballast. I will also aquascape the tank to take the most advantage of the light available. I believe I will have plenty placement options for SPS, LPS, and softcorals alike. I do also believe with the right placement I will be able to have clams. Remember that I'm doing a plenum and I'll have a sandbed height of 5 inches so my actual water column will probably only be about 18 inches. Here's Sanjay's thread if you're not yet familiar with his tank. 500gal (84x48x30)- Now Real! http://web4.reefcentral.com/forums/s....php?t=1025029 Even with all of THAT said, I may yet change my mind. It seems like everyday there is a new LED fixture popping up. I'm pretty excited about all the LED pendants that are showing up recently so if I find one that fits the bill for me, I might still go that direction. Yes, pass the butter and pour the syrup, I definitely waffling and this decision.  This will certainly be the last purchase of equipment for my tank since I obviously can't make up my mind yet. This will certainly be the last purchase of equipment for my tank since I obviously can't make up my mind yet. Whew! That ended up longer than I expected. I think I'll save the water movement topic for another post. Thanks for hanging in there so far! |
|
|
|
|
07/18/2011, 12:39 PM
|
#18 |
|
Team RC Member
Join Date: Jul 2005
Location: houstonia
Posts: 7,989
|
you should be fine with each of the 250 watt bulbs across a 30x24 footprint... on my setup I'm doing a 24x36 inch for each bulb. It works fine with my lumenbright mini-wides.
__________________
-Chris- You don't win friends with salad. "Look! They're trying to learn for free!" ... "Use your phony guns as clubs!" Current Tank Info: rectangluar? wet? |
|
|
|
|
07/31/2011, 09:40 PM
|
#19 |
|
More Idiot Than Savant
Join Date: Nov 2005
Location: Billings, MT
Posts: 560
|
Sorry for the delayed reply. Did some vacationing (spent a couple days in Yellowstone Park) and spent all last week catching up at work from that.
I agree crvz. Technically each bulb has to cover a 30" x 48" foot print if I'm trying to light the entire sandbed with just two bulbs. However, I figure that the outer 6" perimiter of the sandbed doesn't need light enough to grow anything so with my planned aquascaping each bulb will probably need to light about a 24" x 36" footprint, just like yours. I'm leaning towards the Lumenbrite Large for a reflector. |
|
|
|
|
07/31/2011, 09:47 PM
|
#20 |
|
More Idiot Than Savant
Join Date: Nov 2005
Location: Billings, MT
Posts: 560
|
Water Movement
(TLDNR Water Blaster main system pumps, Sicce Voyager for in tank flow, and electric ball valve actuated surge.) As for water movement, I plan on a 3 pronged approach. 3 prongs as in a trident, you know, the symbol of Poseiden, mythical god of the ocean? Also as in the Poseiden Adventure that Gene Hackman played in. Gene was in The Royal Tannenbaums with Luke Wilson. And finally Luke was in My Dog Skip with Kevin Bacon. So, from the god Posieden to Kevin Bacon we have Bacon number of 4. Bet you didn't see that coming did you? But I digress. Water movement....In my last tank I wanted to try and create gyre movement but I never really did get it pulled off. I never got all the components in place the way I wanted them. So, I'm giving it a go again. It won't be an exacting gyre as described in the article on Advanced Aquarist (sorry, won't be linking this one, you'll have to Google it) but I'm hopeful it will produce the desired effect of getting the entire water mass moving and letting the aquascape create the random flow. Of course the aquascape design is being planned to aid in the free movement of water so it doesn't slow it down from one end of the tank to the next. Basically I'm going to have flow alternate about every 6 hours from the back right side of the tank to the back left. I will use two main system pumps in conjunction with Sicce Voyager HP pumps to accomplish this. Without pictures I know this might be hard to visualize and I'll definitely post pictures once I get that far but basically I'll have an effluent pipe from the main system pump on the back right side and a Voyager HP pump there too. They will push water across the 5 foot length of the tank for 6 hours and then the flow will switch to the left side with the same configuration for 6 hours. This will, in effect, create alternate laminar currents that will be similar to tidal flows, I hope. At the same time I will have a surge discharge in the middle of the back of the tank that will fire every time the surge tank gets high enough. Between the aquascape and the surge, I'm hopeful this will provide enough randomization of current for the inhabitants. I admit that this is untested so I may very well have to modify my design once I see how it really works out. So a note on Sicce. You might be asking, why not Tunze or Vortech? Simple answer, price. I have looked very, very closely at both Tunze and Vortech. They're awesome at what they do, but I don't believe I need what they offer. Because I'm trying to create a gyre type flow, I don't need the in tank flow to ramp up and down over a few seconds. All I need is simple off and on. But I still need the most flow I can get in an on/off stream type pump and the Sicce Voyager HP can do that at minimal cost. For the main system pumps I'm looking at the Water Blaster 10000. I'm planning for 3x sump turnover so some of this flow is going to be used for other items (calcium reactor, ATS, surge tank, etc). Only one pump will be on at a time and having two gives me some redundancy should one fail. Finally, a little bit about the surge. I had experimented with a surge tank on the 150g. I used a modified Borneman design and it worked very well. I had minimized the bubbles and I didn't get a flushing noise sometimes associated with this type of surge tank. Ultimately I did take it offline though because there was some noise (a thud) when the plunger closed and even though the bubbles were minimal, there were still some, which meant salt spray. It just got to the point where I didn't want to deal with it anymore. Unfortunately, I never did feel like I had as good of flow in the tank after that. I really believe the surge provided excellent flow that just can't be achieved any other way. I also think it was instrumental in helping keep my sand bed cleaner than it was without it. At any rate, the only way I've found to completely eliminate bubbles and noise issues is to use an actuated ball valve to open and close the surge pipe. They can be a bit pricy but honestly you can spend more on a Vortech so that's basically how I'm justifying the cost. If it wasn't an actuated ball valve, it would be a Tunze or Vortech. The ball valve will be controlled by top off sensors in the surge tank. The surge will end up being between 20-25 gals. I wish I had the space for a bit larger surge but it's really about what my sump will accommodate if the power went out and everything drained to that point. It should be high enough to get some good flow going though, so a smaller surge just means it will fire more often. Whew, well if anyone actually made it through all of this without having pictures to look at then I think you deserve an honorary doctorate or something. Maybe all you insomniacs just needed something to help you fall asleep. Glad I could be of service! At any rate, more pictures will definitely be forthcoming, the next major post should see some progress on the stand so I'll be sure to show that off. Thanks for reading! |
|
|
|
|
08/07/2011, 02:05 PM
|
#21 |
|
Premium Member
Join Date: Jun 2003
Posts: 69
|
looks good
|
|
|
|
|
11/01/2011, 08:44 PM
|
#22 |
|
More Idiot Than Savant
Join Date: Nov 2005
Location: Billings, MT
Posts: 560
|
STAND by me.
STAND and deliver. STAND and be counted. Last man STANDing. Can you guess what this post is about yet? That's right! It's about my chair! Err...well...Ok, it's about my stand. Well, part of it anyway. This is just the undercarriage as I have a beautiful exoskeleton planned. At least I hope it turns out that way. But, that's a post for much, much later. Don't believe me? Well how long did it take from my last post until now? Like three months? Noah built his arc faster then this tank build is coming together! Ah life, she be a cruel mistress and keeps getting in the way. All right, all right, enough whining. Here is the site planned for excavation. 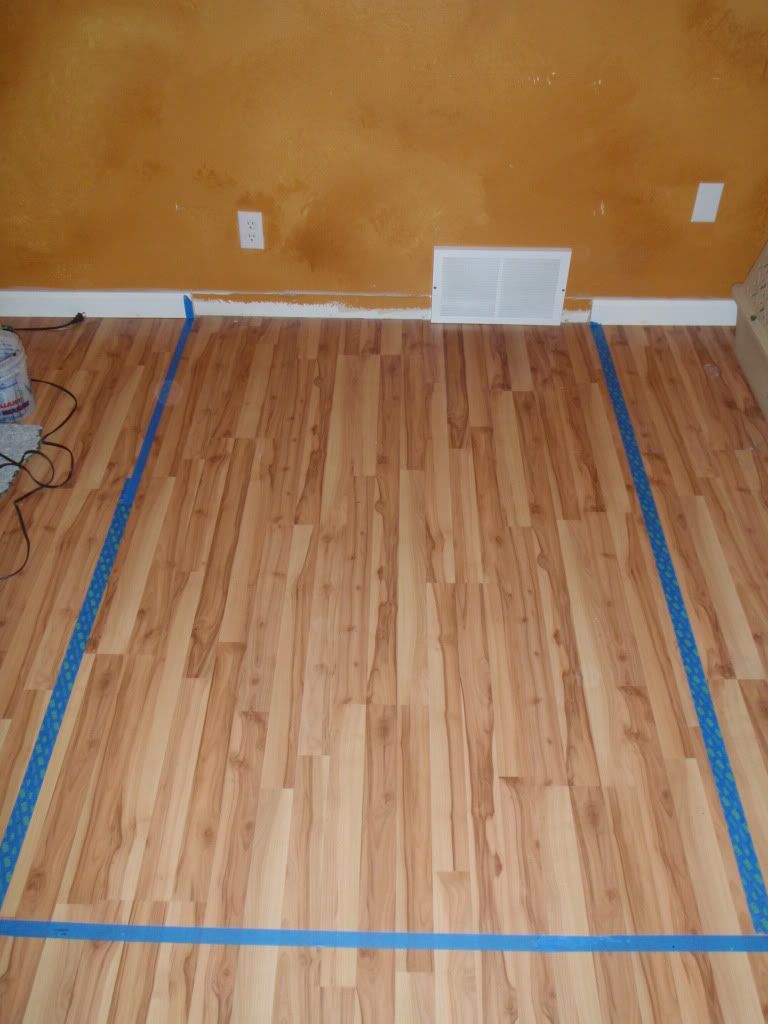 First thing that had to be done was getting down to bare concrete. 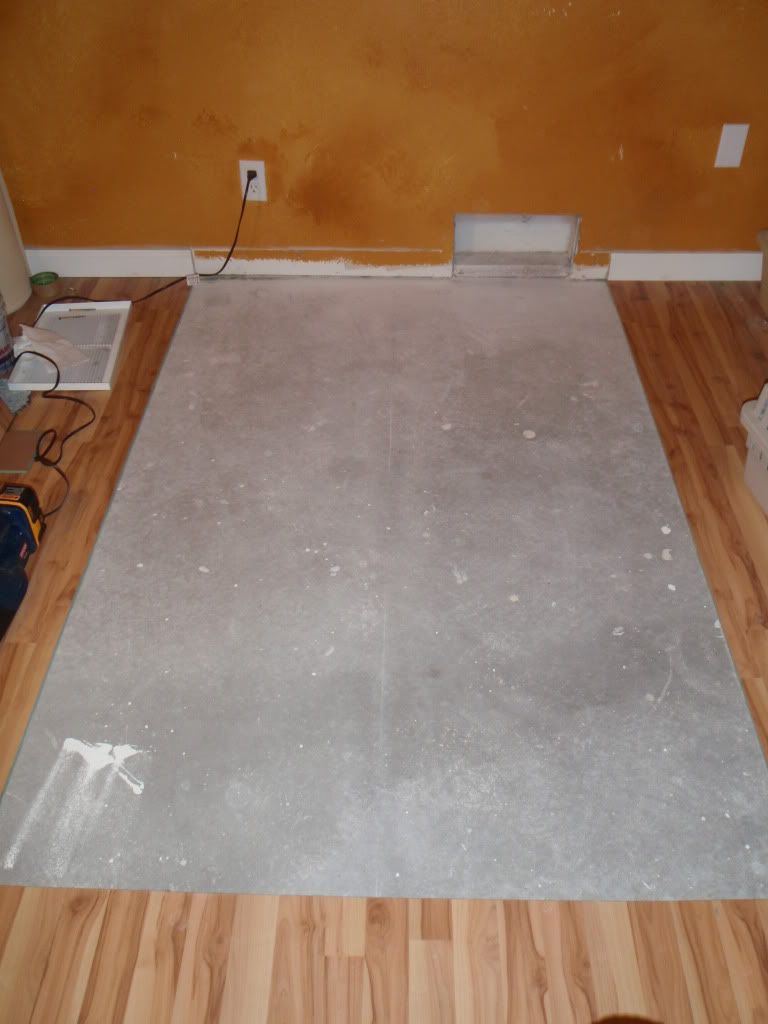 Basic frame up work shown here. 2X6's on end for horizontals and 2x4 uprights. You can see I used 45 degree angles in all the upper corners. Not really sure if they're adding any value but it made me feel better. The extended portion you see in the back is where my surge tank will sit. 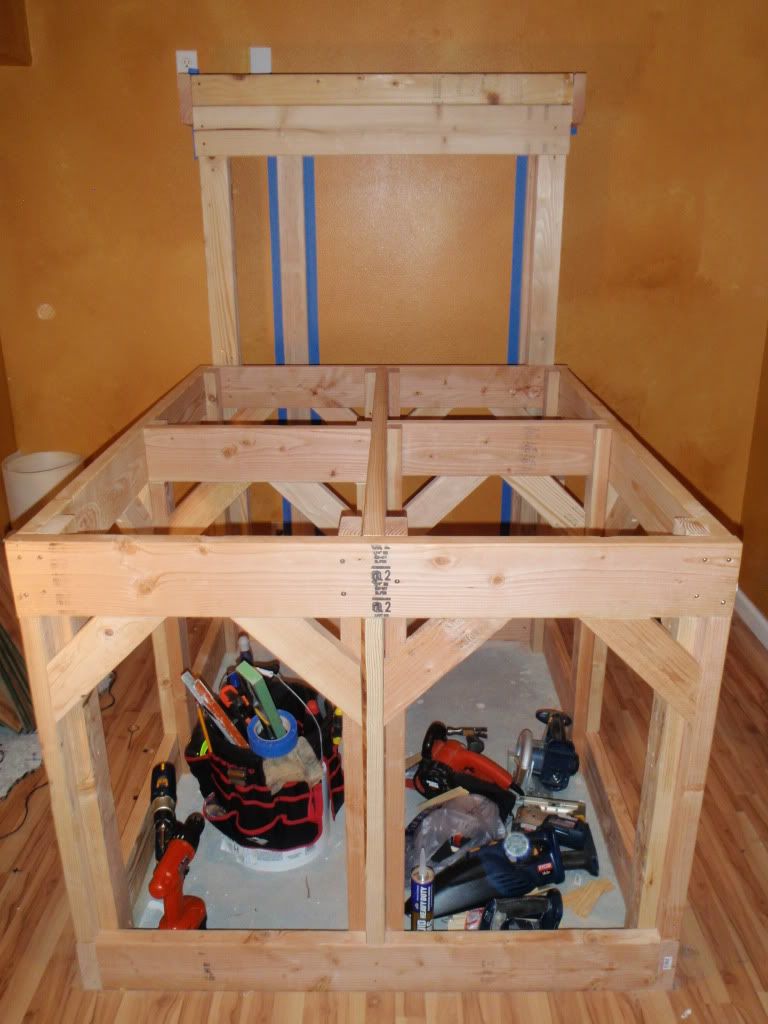 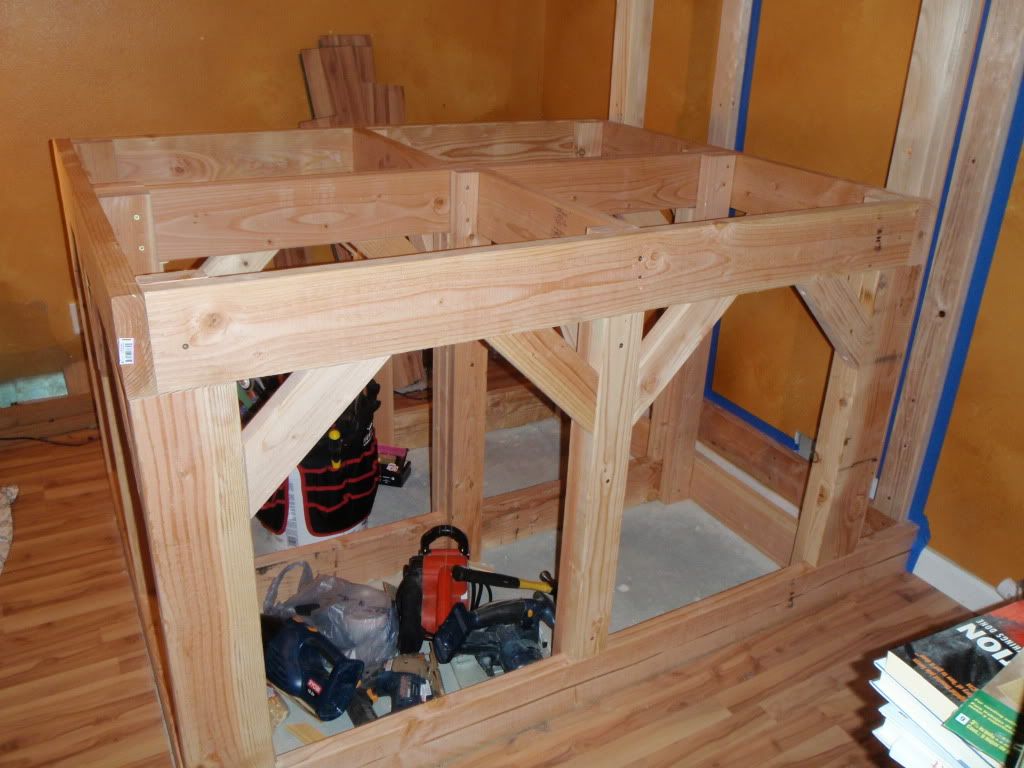 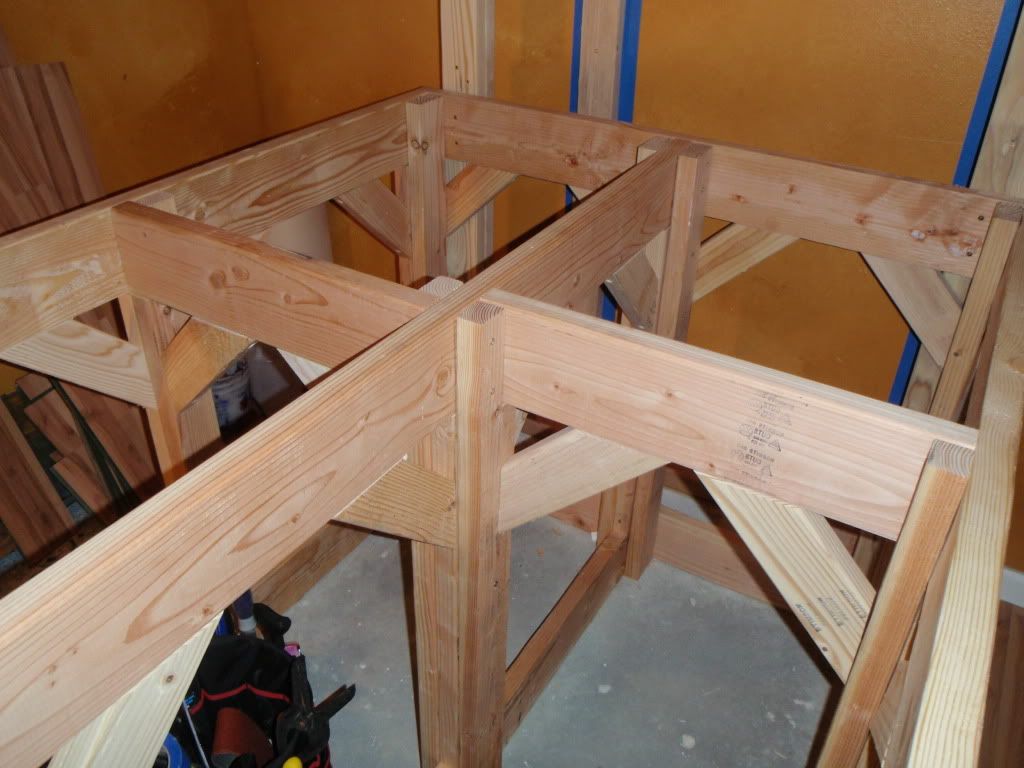 And here it is painted along with the floor. I thought I'd do something different then the traditional white this time. I've done white before and it always seems to get dingy to me after it's been around salt water for a while. I'm not sure if the black will fare any better but there was only one way to find out so I went for it. 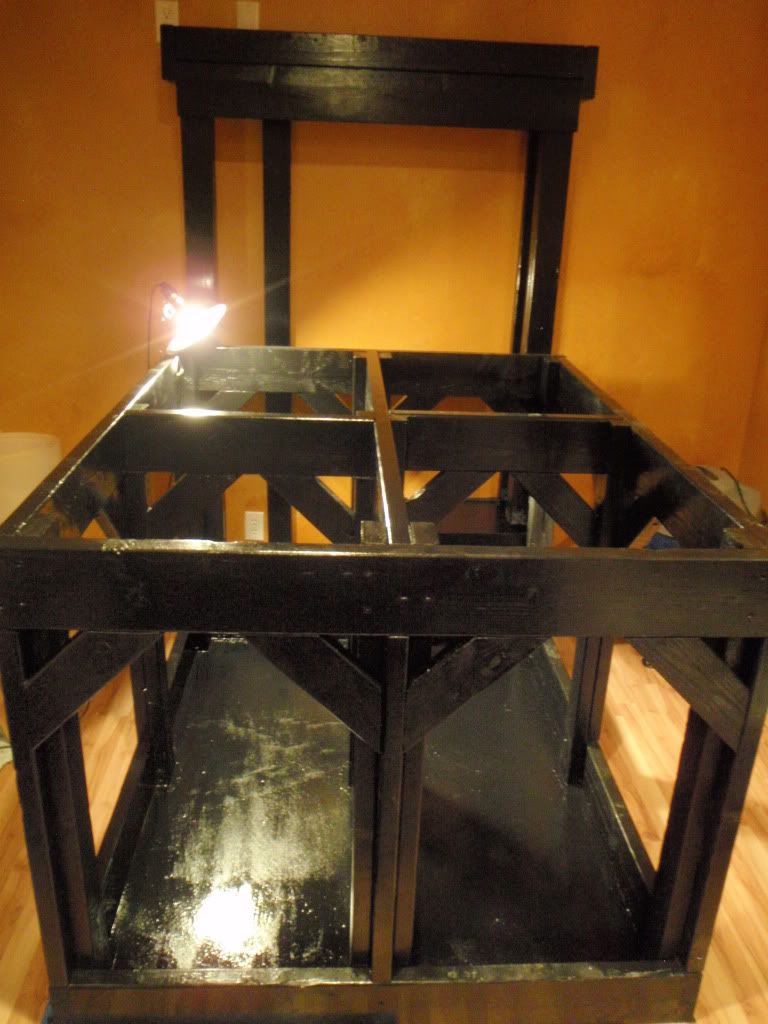 Well, there you have it! A post that has less words then a Tolstoy novel, for once, and a lot of pictures to boot! That's it for now but stay tuned for more! You'll probably want to take a nap and a shower or two by the time I get back to it though.....just sayin'.... |
|
|
|
|
11/02/2011, 02:26 PM
|
#23 |
|
Likey the bikey
Join Date: Dec 2004
Location: Colorado
Posts: 3,371
|
Cool build. Subscribed.
Now go hit those rollers!
__________________
Mike On hiatus. I'm either out riding my bicycle, playing with my family, or throwing ferts in my planted tank. Or working. I hope I'm not doing that though. Current Tank Info: 140 DIY Cube |
|
|
|
|
11/02/2011, 08:30 PM
|
#24 |
|
Registered Member
Join Date: Oct 2009
Location: Lancashire, UK
Posts: 773
|
nice stand!
I am building a surge system in the exact same way as you are with an actuated ball valve...I look forward to seeing how you do it!! Have you seen cmpenny's one? |
|
|
|
|
11/04/2011, 01:38 PM
|
#25 |
|
Registered Member
Join Date: Jun 2005
Location: Ocoee, Fl
Posts: 1,580
|
Im tagging along for this build. I want to build a plywood tank so bad.
|
|
|
|
 |
|
|
 Similar Threads
|
||||
| Thread | Thread Starter | Forum | Replies | Last Post |
| 300 gallon plywood tank build re post!!!! | dericcanderson | Do It Yourself |
42 | 09/04/2011 11:04 AM |
| Looking to build a 300 gal glass tank need advice ?? | steelhant | Do It Yourself |
6 | 12/01/2010 06:35 PM |
| FS: Complete 300 gal Oceanic tank and livestock | greenbench | Tampa Bay Reef Club | 2 | 07/05/2010 07:46 AM |
| 300 gallon plywood tank build | dericcanderson | New to the Hobby | 180 | 06/04/2010 08:37 AM |
| CyclistMT's 150 Gal Plywood and Glass Build Log | CyclistMT | Reef Discussion | 55 | 12/06/2009 05:22 PM |


