
|
|
 04/13/2018, 06:42 AM
|
#1 |
|
Registered Member
Join Date: Jun 2015
Location: Youngstown, Ohio
Posts: 358
|
Wooden stand questions
This was asked by someone else on another forum but only got two responses with little explanation and I wanna be sure before I move forward.
The DP tank is an 80g rimless (48x24x16). It does have a bottom frame that has outside dims of 48 3/8 x 24 3/8. If I build the stands frame to match those outside dims, and then skin it with 3/4 plywood, I'll end up with a 3/4" ledge around the tank. I'd like to avoid that ledge and have the total outside dims of the stand flush with the outside dims of the bottom frame of the tank. So I'm wondering if I could just subtract the thickness of the 3/4 plywood from the frame build so that after I add the plywood it ends up flush? My concern is that by doing it this way, the weight of the filled tank is now distributed to both the stands frame and the plywood. Thoughts? Sent from my Z956 using Tapatalk |

|

|
|
04/13/2018, 08:01 AM
|
#2 |
|
Registered Member
Join Date: Jun 2015
Location: Buffalo, MO
Posts: 651
|
The 3/4" Ply is likely stronger than the dimensional lumber you're using for a frame. What you plan is fine... I'd recommend gluing, sanding, and sealing the top so everything is flush and smooth, and should stay that way for a while.
|
|
|
|
|
04/13/2018, 08:20 AM
|
#3 | |
|
Registered Member
Join Date: Jun 2015
Location: Youngstown, Ohio
Posts: 358
|
Quote:
Sent from my Z956 using Tapatalk |
|
|
|
|
|
04/13/2018, 09:05 AM
|
#4 |
|
Registered Member
Join Date: Sep 2003
Location: North Carolina
Posts: 20,050
|
You don't need a "frame" (assuming you meant 2x4s,etc...)
You can just build the stand with 3/4" ply only.. This is my stand for my Deep Blue 80G rimless.. Just plywood and 1by lumber all screwed together with the kreg pocket screws/glue.. I did double up on the front/rear 1by just because The side sections are slide out storage.. The tank rests on the plywood.. I didn't even put a top on it (I did on the 2 side sections though).. I can see all of the bottom of the tank when I look inside the cabinet.. I added doors and the slide outs and voila.. Plenty strong like that.. For some reason I don't have a full "finished" shot.. But it got shaker style doors/pull outs,etc... to match the wood/doors in my house
__________________
Who me? |
|
|
|
|
04/13/2018, 09:21 AM
|
#5 | |
|
Registered Member
Join Date: Jun 2015
Location: Youngstown, Ohio
Posts: 358
|
Quote:
Sent from my Z956 using Tapatalk |
|
|
|
|
|
04/13/2018, 09:45 AM
|
#6 | |
|
Registered Member
Join Date: Sep 2003
Location: North Carolina
Posts: 20,050
|
Quote:
Should be pretty self explanatory from the pictures alone.. Just a plywood box with holes cut for doors is all you need.. I really just started with 2 x 2'x4'x3/4" plywood sheets as the 2 ends then just a frame of 1x on the front to hide the plywood edges really and give a spot for the doors to mount,etc.. Typical cabinet construction for the most part.. and of course mans best friend the "Kreg pocket Jig".. But you can do the same just face nailing the 1x material to the plywood edge and filling the holes..
__________________
Who me? |
|
|
|
|
|
04/13/2018, 09:55 AM
|
#7 | |
|
Registered Member
Join Date: Jun 2015
Location: Youngstown, Ohio
Posts: 358
|
Quote:
Sent from my Z956 using Tapatalk |
|
|
|
|
|
04/13/2018, 10:23 AM
|
#8 |
|
Registered Member
Join Date: Sep 2003
Location: North Carolina
Posts: 20,050
|
oops.. I see where you could have gotten that the front/back is plywood.. Its not..
plywood is only the 2 sides all the rest is just 1x.. I think it was 36" tall.. I typically space my pocket holes around 1ft apart and just do 2 screws at each 1ft interval using both holes in the jog.. Lets see if this helps since I'm at work with my cad program.. I just whipped this up 2 sheets of ply and 1x4s Thats all you really need.. the plywood is the green and I just colored the "inner" 1xs red so you could see them easier.. but the red and grayish pieces are all just 1x4s and dimension as applicable so that the trim of the tank sits on what I've shaded "blue" in the second image.. I increased the 1x at the bottom (I think I used 1x6 there) so that it would hold more water should the sump "fail" and I have a bottom on it and siliconed all the joints so its watertight down there "just in case" But this is just showing the basic concept to how you can make a stand that easily..
__________________
Who me? Last edited by mcgyvr; 04/13/2018 at 10:29 AM. |
|
|
|
|
04/13/2018, 10:38 AM
|
#9 |
|
Registered Member
Join Date: Sep 2016
Location: St. Augustine, FL
Posts: 1,857
|
Another option:
http://www.reefcentral.com/forums/sh....php?t=2613836 Mine was done the way you described in your original post. Certainly not saying one way is better than the other. It's simply an option since you asked for them.
__________________
90g Mixed Reef |
|
|
|
|
04/13/2018, 04:26 PM
|
#10 | |
|
Registered Member
Join Date: Jun 2015
Location: Youngstown, Ohio
Posts: 358
|
Quote:
Sent from my Z956 using Tapatalk |
|
|
|
|
|
04/13/2018, 04:28 PM
|
#11 | |
|
Registered Member
Join Date: Jun 2015
Location: Youngstown, Ohio
Posts: 358
|
Quote:
Sent from my Z956 using Tapatalk |
|
|
|
|
|
04/14/2018, 08:05 PM
|
#12 | |
|
Registered Member
Join Date: Apr 2008
Location: Indianapolis
Posts: 2,447
|
Quote:
__________________
120g DT 100lbs LR / 200 lbs LS, 45g fuge, VectraM1 Return, Herbie drain, 4x RW-8, 2x AI Hydra 26 w AWM, ASM G2, Apex controller, Apex BoB w floats ATO |
|
|
|
|
|
04/16/2018, 08:45 AM
|
#13 | |
|
Registered Member
 Join Date: Nov 2011
Location: Santa Rosa, CA
Posts: 2,727
|
Quote:
4x4s are another matter. Totally the wrong lumber to use under any circumstances.
__________________
John DT 120G. mixed reef w/ lots of automation + assorted FW and SW tanks. |
|
|
|
|
|
04/16/2018, 08:59 AM
|
#14 |
|
Registered Member
Join Date: Sep 2003
Location: North Carolina
Posts: 20,050
|
Yes when one isn't confident in their own abilities or confident in any design/joinery method,etc... building way beyond what one thinks is safe is just fine..
For all hobby/amateur level stuff there is nothing wrong with a massive safety factor/overkill.. Now that all costs time/money/etc... in the real world but in a hobby.. Overbuild all you want.. Its likely not needed but if it helps you sleep at night.. Go for it.. The added cost/labor of an overkill here is nothing compared to the cost/labor should your stand fail..
__________________
Who me? |
|
|
|
|
05/11/2018, 04:54 PM
|
#15 | |
|
Registered Member
Join Date: Jun 2015
Location: Youngstown, Ohio
Posts: 358
|
Quote:
Sent from my Z956 using Tapatalk |
|
|
|
|
|
05/11/2018, 05:46 PM
|
#16 |
|
Registered Member
Join Date: Sep 2003
Location: North Carolina
Posts: 20,050
|
Since I painted mine I used pine board and pine is a soft wood so coarse screws are used..
__________________
Who me? |
|
|
|
|
05/11/2018, 06:02 PM
|
#17 | |
|
Registered Member
Join Date: Jun 2015
Location: Youngstown, Ohio
Posts: 358
|
Quote:
Sent from my Z956 using Tapatalk |
|
|
|
|
|
05/11/2018, 06:14 PM
|
#18 |
|
Registered Member
Join Date: Sep 2003
Location: North Carolina
Posts: 20,050
|
The common board is usually knotty/crooked crap with larger dimensional tolerances...
I personally avoid it for anything close to "furniture grade " needs... Unless Im confusing the 2...It is friday and I havr started drinking  HD usually just has a few types of pine board ranging in price based on quality...I usually get the nice pine
__________________
Who me? |
|
|
|
|
05/11/2018, 06:24 PM
|
#19 |
|
Registered Member
Join Date: Nov 2005
Location: San Diego, CA
Posts: 14,655
|
If you plan to stain, just know that pine stains really weird sometimes, absorbs very unevenly, conditioner can be used and usually overcomes that.
Painted like Mcgyvers is no issue. Personally for what you are doing, I would do birch ply if you plan to stain it. I do agree w. woodnaught, nothing wrong w/ 2x and a little overkill, especially if you may be a newer or back yard DIY guy, but if you know what you bare doing, a step that can easily be skipped.
__________________
There's a fine line between owning your tank and your tank owning you! Current Tank Info: SCA 120g RR Starfire, Tunze silence 1073.02 return, 40g sump w/ fuge, SWC Extreme 160 cone skimmer,Geismann reflexx 4xT5, 2x Panorama Pro LED strips, Vortech MP40QD |
|
|
|
|
05/11/2018, 06:39 PM
|
#20 | |
|
Registered Member
Join Date: Jun 2015
Location: Youngstown, Ohio
Posts: 358
|
Quote:
 Sent from my Z956 using Tapatalk |
|
|
|
|
|
05/11/2018, 06:52 PM
|
#21 | |
|
Registered Member
Join Date: Jun 2015
Location: Youngstown, Ohio
Posts: 358
|
Quote:
Sent from my Z956 using Tapatalk |
|
|
|
|
|
05/11/2018, 07:21 PM
|
#22 |
|
Registered Member
Join Date: Nov 2005
Location: San Diego, CA
Posts: 14,655
|
Ah gotcha, well 1x is great and being a carpenter for a living that is what I would actually be doing for myself, and you'll actually have more material choices.
I'm a huge fan of African mahogany really, many of my builds have been that, but beech, alder, even poplar, others.
__________________
There's a fine line between owning your tank and your tank owning you! Current Tank Info: SCA 120g RR Starfire, Tunze silence 1073.02 return, 40g sump w/ fuge, SWC Extreme 160 cone skimmer,Geismann reflexx 4xT5, 2x Panorama Pro LED strips, Vortech MP40QD |
|
|
|
|
05/11/2018, 07:32 PM
|
#23 | |
|
Registered Member
Join Date: Jun 2015
Location: Youngstown, Ohio
Posts: 358
|
Quote:
Sent from my Z956 using Tapatalk |
|
|
|
|
|
05/11/2018, 08:05 PM
|
#24 |
|
Registered Member
Join Date: Nov 2005
Location: San Diego, CA
Posts: 14,655
|
Lol, I bet you gotta have a nice mill yard near, often it's actually even cheaper than hd, and better selection.
I like the african mahogany because it looks nice, but it's also priced nice for what it is, though that is my particular taste, not for everyone . Our HD's over here have even been carrying it lately, yours might have that and other options. Saw some walnut too, but that was not cheap
__________________
There's a fine line between owning your tank and your tank owning you! Current Tank Info: SCA 120g RR Starfire, Tunze silence 1073.02 return, 40g sump w/ fuge, SWC Extreme 160 cone skimmer,Geismann reflexx 4xT5, 2x Panorama Pro LED strips, Vortech MP40QD |
|
|
|
|
05/13/2018, 04:35 PM
|
#25 |
|
Registered Member
Join Date: Apr 2008
Location: Indianapolis
Posts: 2,447
|
Cabinet grade Poplar with "chocolate over cherry" 2 step stain.
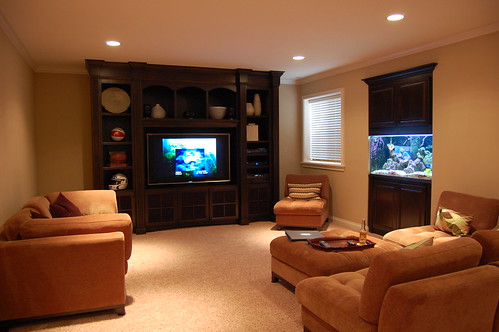 ******** async src="//embedr.flickr.com/assets/client-code.js" charset="utf-8"> ******** async src="//embedr.flickr.com/assets/client-code.js" charset="utf-8">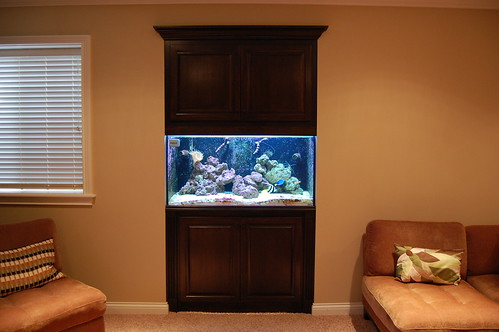 ******** async src="//embedr.flickr.com/assets/client-code.js" charset="utf-8"> ******** async src="//embedr.flickr.com/assets/client-code.js" charset="utf-8">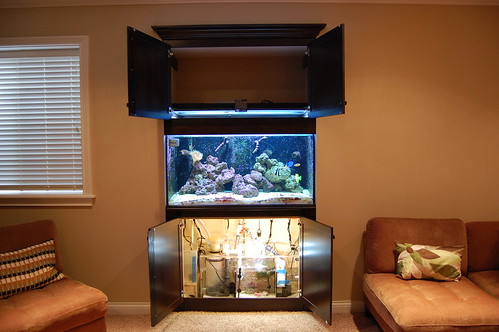 ******** async src="//embedr.flickr.com/assets/client-code.js" charset="utf-8"> ******** async src="//embedr.flickr.com/assets/client-code.js" charset="utf-8">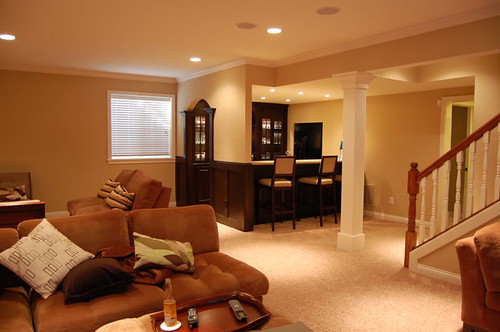 ******** async src="//embedr.flickr.com/assets/client-code.js" charset="utf-8"> ******** async src="//embedr.flickr.com/assets/client-code.js" charset="utf-8">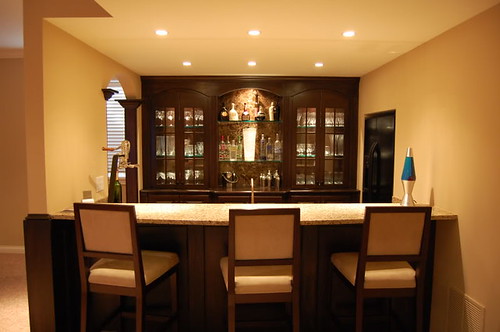 ******** async src="//embedr.flickr.com/assets/client-code.js" charset="utf-8"> ******** async src="//embedr.flickr.com/assets/client-code.js" charset="utf-8">
__________________
120g DT 100lbs LR / 200 lbs LS, 45g fuge, VectraM1 Return, Herbie drain, 4x RW-8, 2x AI Hydra 26 w AWM, ASM G2, Apex controller, Apex BoB w floats ATO |
|
|
|
 |
|
|


