
|
|
 03/08/2009, 12:27 AM
|
#1 |
|
Registered Member
Join Date: Mar 2004
Location: 08876
Posts: 224
|
Burrito's 5.5g Rimless AIO build!
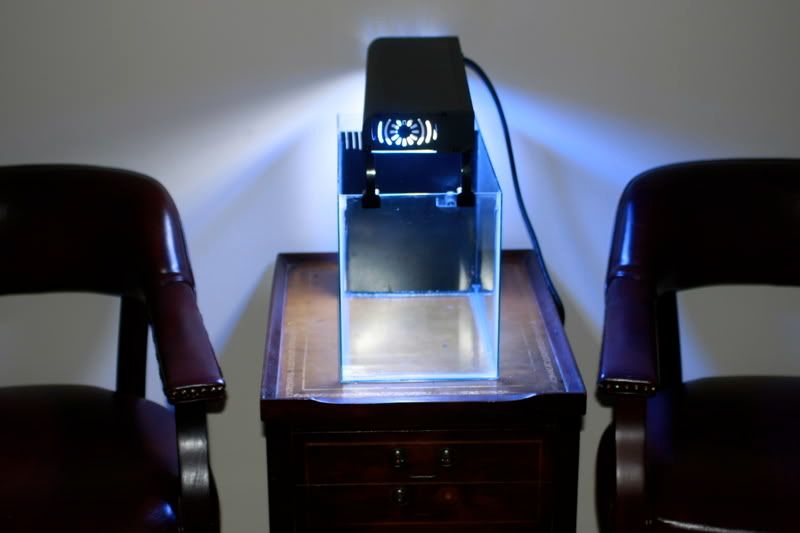
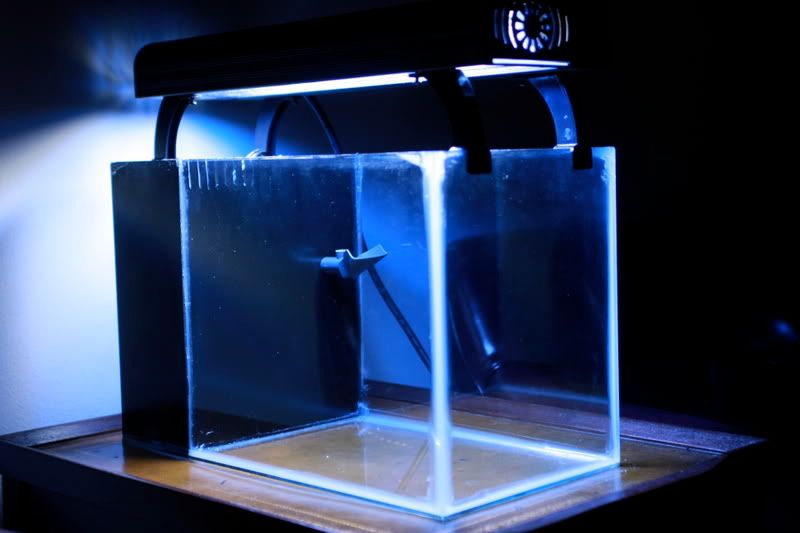
so after having a nanocube and a 2.5g a few years ago in college, i am back to start a new tank.(both the others were sold after various dorm room move hassles)
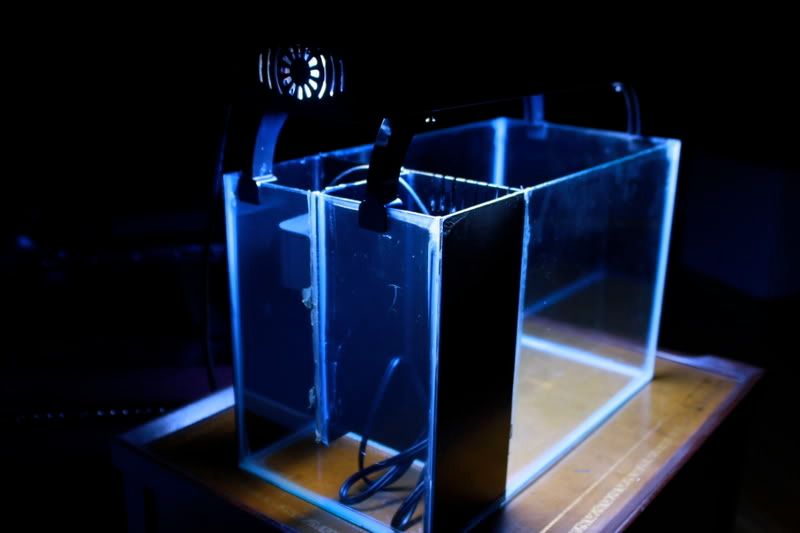
RIP 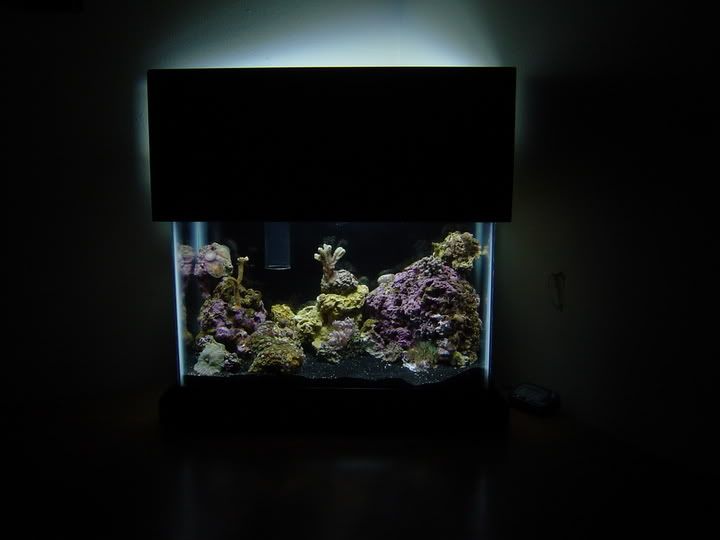 so with the inspiration of others on the forum i have decided to do a 5.5g rimless AIO. i've never done a DIY project before but i figured what the hell. ill be documenting this with as many pictures as possible, and im sure ill ask the advice of many of you all in the process. Hardware 5.5g tank from petco $15 18' nova extreme 2x18 $49 Theo heater 50w $15 Maxi-jet 600 $18 API test kit $18 Coralife thermometer $6 Acrylic sheets(Home depot) $4 aquarium sealer $5 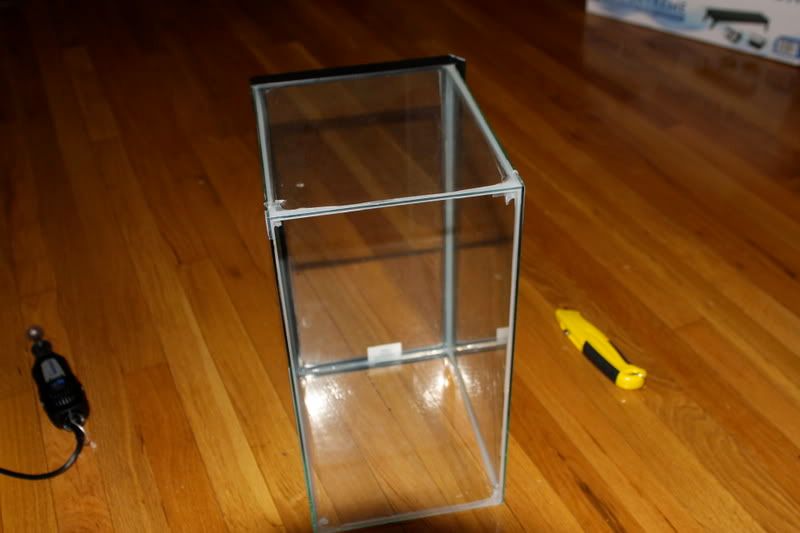 oopss safety first kids! 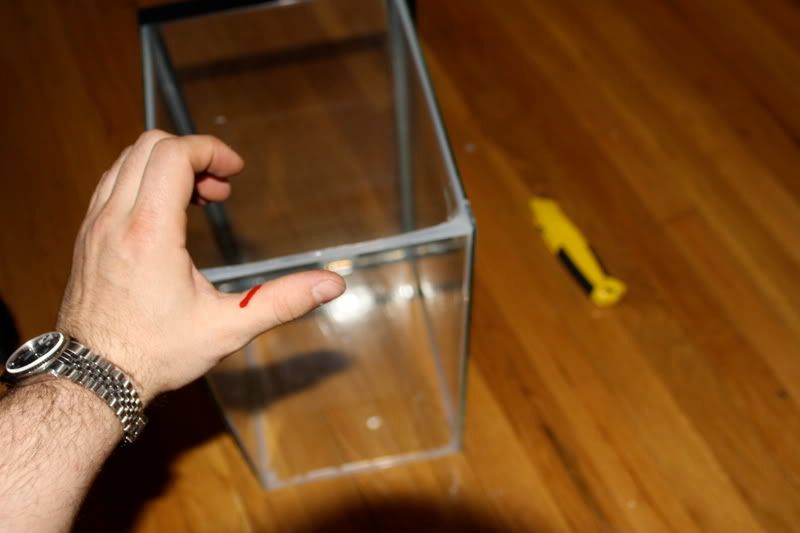 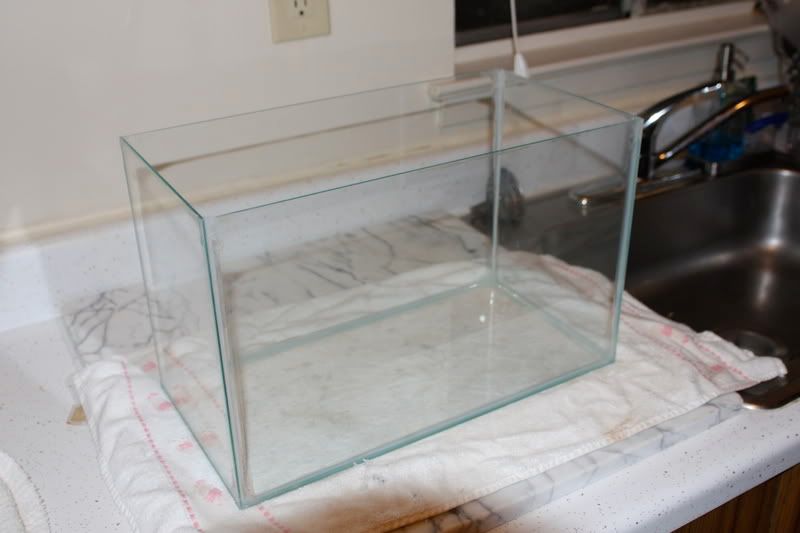 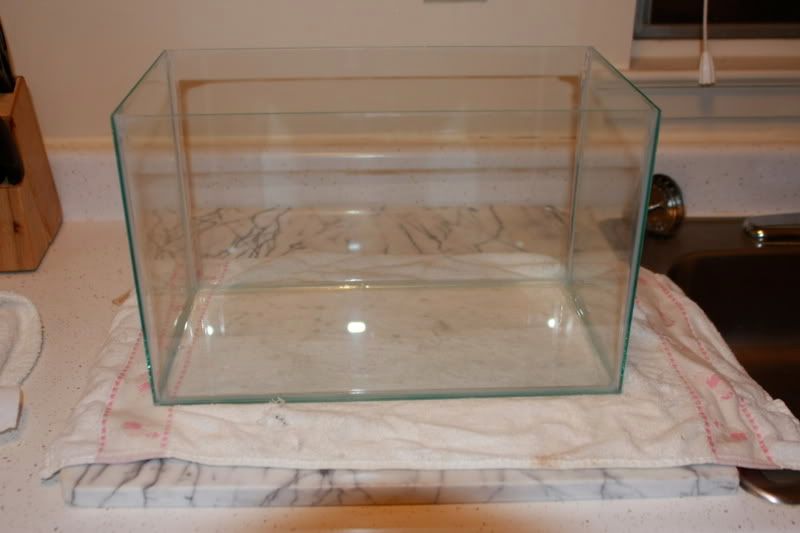 all cleaned up 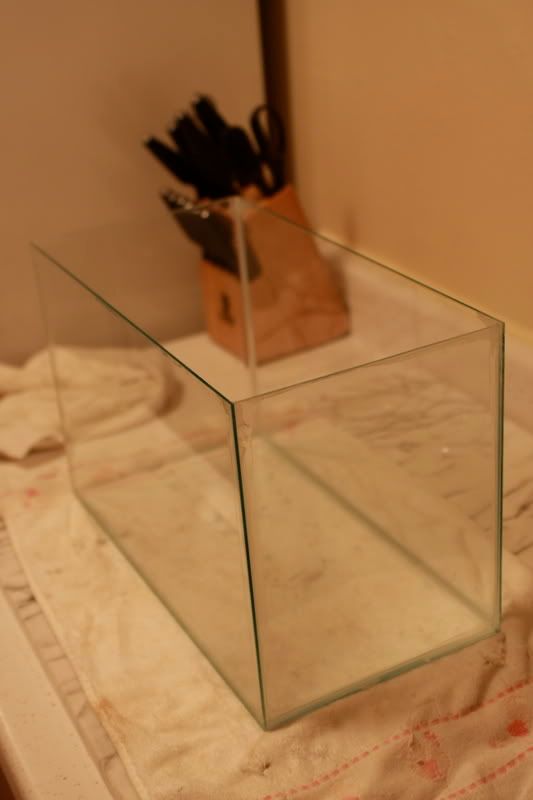 cutting the false wall 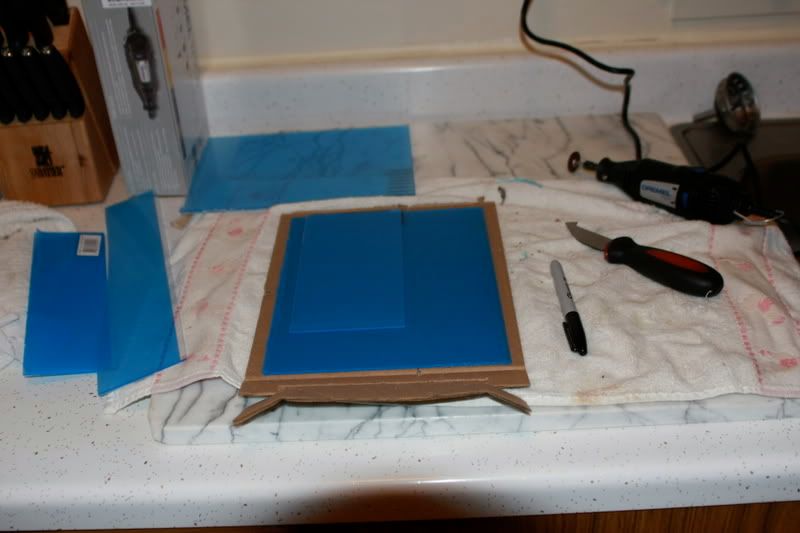
|

|

|
|
03/08/2009, 12:27 AM
|
#2 |
|
Registered Member
Join Date: Mar 2004
Location: 08876
Posts: 224
|
photo limit
 spray paint(kyrlon fusion) 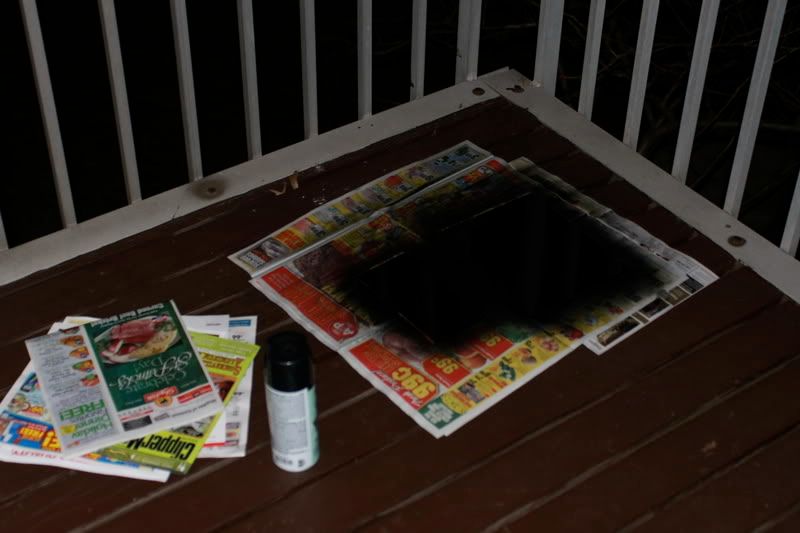 i suck at silicone i have a lot of clean up when it dries 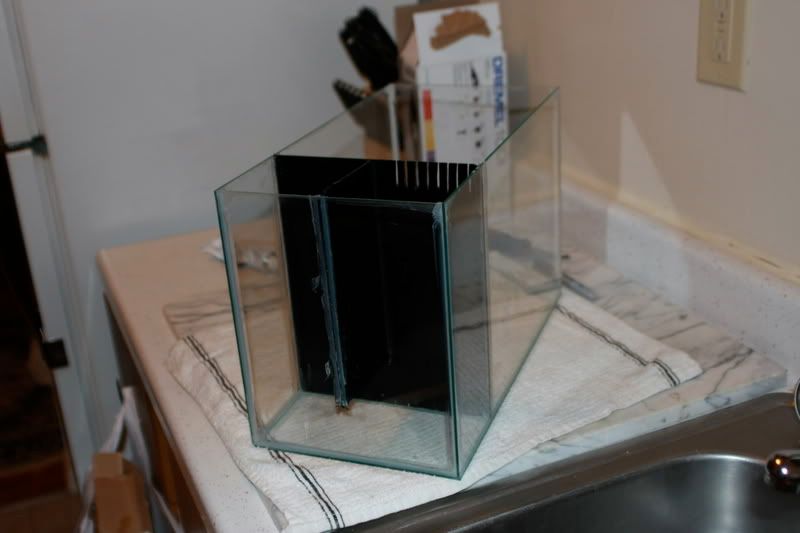 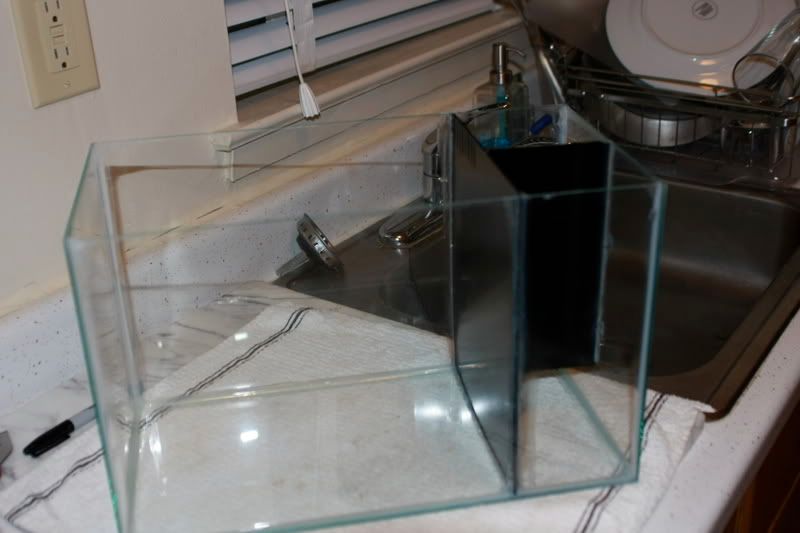 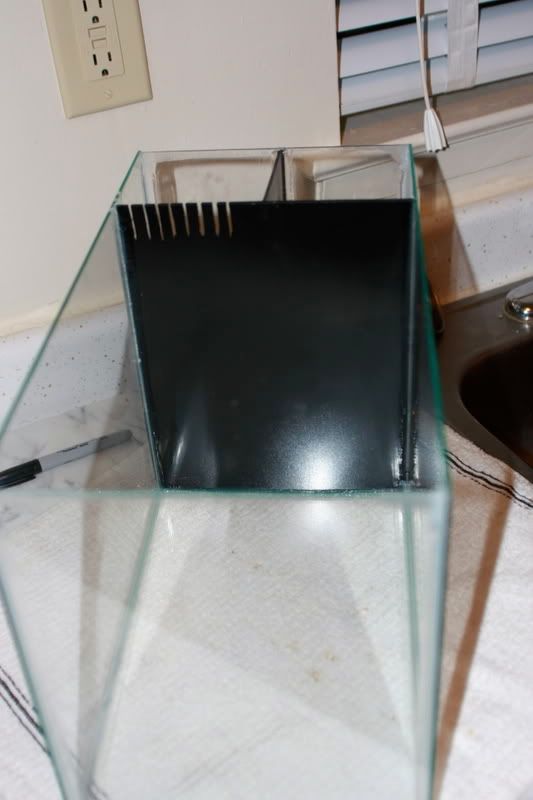 ok. 1 HUGE!!!!! oversight was i forgot to drill the hole for the PH. any ideas how i can go about making a hole with the false wall in place already? can i water test it tomorrow? or is it too early. |
|
|
|
|
03/08/2009, 12:36 AM
|
#3 |
|
Registered Member
Join Date: Feb 2007
Location: Goose Creek, SC
Posts: 238
|
dude... im more worried about ur finger removal attempt and now ur talking about power tools?
__________________
5 gal. salt nano 20L salt nano 55 gal. malawi cichlid community |
|
|
|
|
03/08/2009, 12:39 AM
|
#4 |
|
Registered Member
Join Date: Mar 2004
Location: 08876
Posts: 224
|
haha its all good, my fingers fine. i rock climb on a regular so my hands are used to bleeding alot.
but about that hole... or lack there of. |
|
|
|
|
03/08/2009, 12:42 AM
|
#5 | |
|
*Zoa Freak*
Join Date: Jun 2006
Location: Sioux City, IA
Posts: 752
|
Quote:
But seriously, if the new tank looks anything like your old tank it's gonna be sick!  -Chris- |
|
|
|
|
|
03/08/2009, 03:29 AM
|
#6 |
|
Short Bus Rider
Join Date: Sep 2007
Location: Union, Mo.
Posts: 1,937
|
dremel should help with the hole cutting.
__________________
!~-*Bryan*-~! ><((((º>`·.¸¸.·´¯`·.¸.·´¯`·...¸><((((º>¸. ·´¯`·.¸. , . .·´¯`·.. ><((((º>`·.¸¸.·´¯`·.¸.·´¯`·...¸><((((º> Current Tank Info: 29 gallon RR, 15 gallon sump, 175w mh, two 24" T5's. |
|
|
|
|
03/08/2009, 12:57 PM
|
#7 |
|
Registered Member
Join Date: Dec 2007
Posts: 2,575
|
I did that on accident when i did a 5.5 (forgot the hole for the ph).
I heated up a metal object that was large enough and near the size of a round metal file (the tapered ones work best for this), then slid the file in and got to work. The benefit to this is you get a perfectly round hole and if you go slow you can get a hole that will be just the right size.
__________________
I hope it never catches on, I like having the oldest tank on here and I don't have to worry about calcification, bio pellets, Vodka dosing, DSBs, Chaetomorpha (I don't even know what that is) Carbonite hardness and all of these other things many people worry about. If I had to think about all of that stuff I would get a stroke. My test kit came in a wooden box and the directions say to keep in a cool chariott. I throw some food in the tank, wave hello to the fish and go out with my wife and have a nice glass of merlot with dinner. Have a great day but most of all, have fun. -PaulB Current Tank Info: 27 Gallon DAS softy/fish reef |
|
|
|
|
03/08/2009, 02:25 PM
|
#8 |
|
Registered Member
Join Date: Mar 2004
Location: 08876
Posts: 224
|
so i heated up a 3/8th drill bit and made a nice hole that way, then filed with sand paper untill the hole was just big enough for the maxijet. if there is any water leak with the maxijet hole should i silicone it or would that be shooting myself in the foot later on.
|
|
|
|
|
03/08/2009, 04:36 PM
|
#9 |
|
Registered Member
Join Date: Mar 2004
Location: 08876
Posts: 224
|
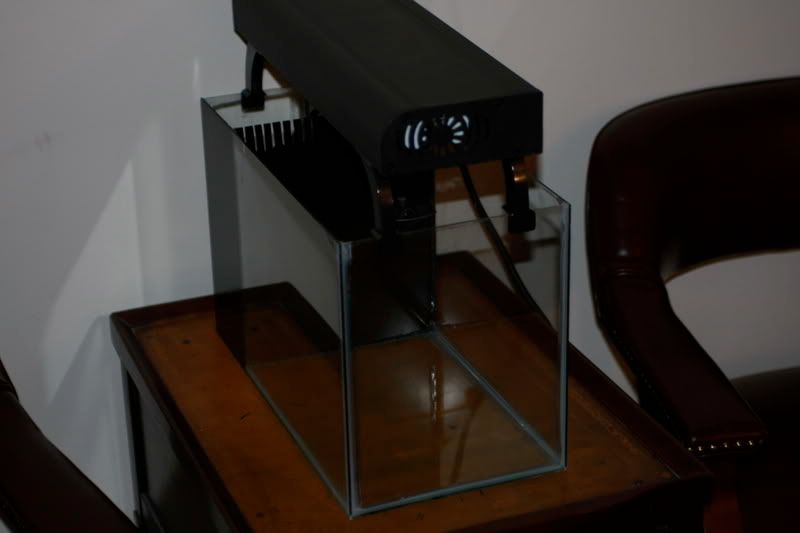
i still have to clean up a bit but its done
|
|
|
|
|
03/08/2009, 05:09 PM
|
#10 |
|
Registered Member
Join Date: Aug 2008
Location: Jersey Shore
Posts: 3,003
|
looking good. i have the same light on top of a 5.5 foam build i did. you'll like the performance on it...
__________________
One Life One Shot Current Tank Info: 40B Mixed reef |
|
|
|
|
03/08/2009, 07:09 PM
|
#11 |
|
Registered Member
Join Date: Dec 2007
Posts: 2,575
|
If there is a small water leak around it dont worry. If you are losing a ton of flow then drain it, dry it, and silicone it.
__________________
I hope it never catches on, I like having the oldest tank on here and I don't have to worry about calcification, bio pellets, Vodka dosing, DSBs, Chaetomorpha (I don't even know what that is) Carbonite hardness and all of these other things many people worry about. If I had to think about all of that stuff I would get a stroke. My test kit came in a wooden box and the directions say to keep in a cool chariott. I throw some food in the tank, wave hello to the fish and go out with my wife and have a nice glass of merlot with dinner. Have a great day but most of all, have fun. -PaulB Current Tank Info: 27 Gallon DAS softy/fish reef |
|
|
|
|
03/08/2009, 09:47 PM
|
#12 |
|
Registered Member
Join Date: Mar 2004
Location: 08876
Posts: 224
|
ok so the PH hole is great and i did another water test with it on. its a MaxiJet 600. as you can see in the pictures below, the flow is too much for comfort, even after i added 2 more slits(with a hot knife at this point which ruined the look of the teeth but oh well)
so my question is, to bring the water level down about 1cm do i make the slits deeper(they come down about an inch right now)? wider? or will spliting the output hole with some locline into 2 heads reduce the flow enough to bring the water level down. like shown. 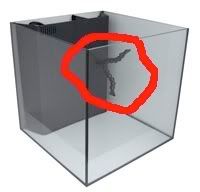 also do hardware stores carry locline? 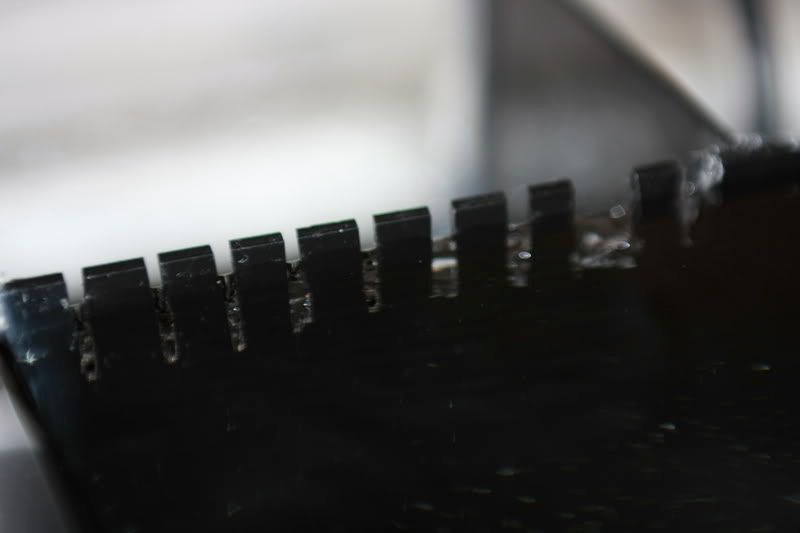 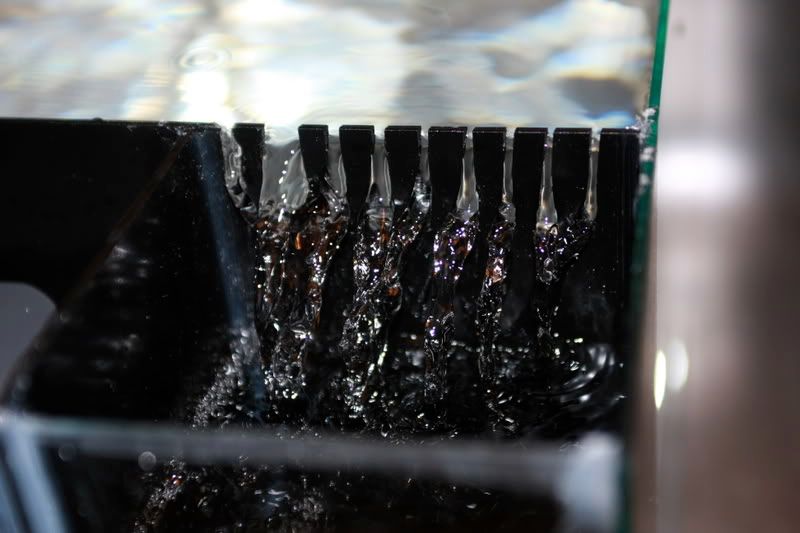   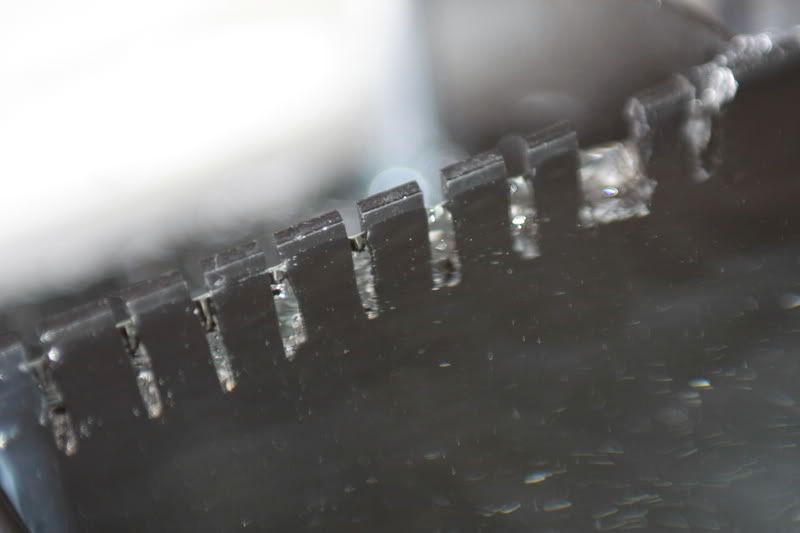 so any ideas? |
|
|
|
|
03/09/2009, 09:19 AM
|
#13 |
|
Registered Member
Join Date: Feb 2003
Location: Northern VA
Posts: 17,691
|
Yeah, that water level is a bit high. Use the dremel and lower those teeth another half inch. If you have a decent reef store around you may be able to find loc-line, otherwise it's going to be online. From all the 5.5 builds I"ve seen, most seem to have to split their return to reduce the flow. What if you used a MJ 400 instead? It would reduce the flow from 160 gph to 106 gph.
I've got a 5.5 and a sheet of acrylic waiting for warmer weather for my build. What dimensions did you make the back portion?
__________________
Adrienne The only thing to fear is fear itself....and spiders. |
|
|
|
|
03/09/2009, 12:02 PM
|
#14 |
|
Registered Member
Join Date: Mar 2004
Location: 08876
Posts: 224
|
Would spliting the line be effective enough that I wouldn't have to cut the teeth more?
|
|
|
|
|
03/09/2009, 07:46 PM
|
#15 |
|
Registered Member
Join Date: Jul 2008
Location: laurel de
Posts: 168
|
what are you planning on keeping in there? (types of coral and any fish possibly)
|
|
|
|
|
03/09/2009, 08:28 PM
|
#16 |
|
Registered Member
Join Date: Sep 2008
Posts: 1,840
|
Splitting the return will not do anything for the water level. The pump will still pump the same amount. You will have more control on where it goes.
You can make the notches wider if you don't want them any deeper to reduce the friction/pressure. That will lower the water level a little bit. If you look at the pic of the water flowing through the teeth. You can see how much more water is going through the one the is more wide then the others. Maybe you can break or cut out every other one to keep a clean look. It should run more quiet as well. Less water splashing noise. |
|
|
|
|
03/10/2009, 11:49 AM
|
#17 |
|
Registered Member
Join Date: Mar 2004
Location: 08876
Posts: 224
|
so i widen the slits and flow is perfect putting the water level about 1/2cm from the rim. it looks great. rocks and water go in tomorrow!
as far as stocking i think i will stock sps and zoas. my fish ideas is inverts and a yellow clown goby. or inverts and a pistol/goby combo.(is the tank big enough for this combo)? but cycle first. |
|
|
|
|
03/10/2009, 05:59 PM
|
#18 |
|
Registered Member
Join Date: Jul 2008
Location: laurel de
Posts: 168
|
wat is your maintenance schedule going to be? How much water will you change? Will there be any other filtration.
|
|
|
|
|
03/10/2009, 06:39 PM
|
#19 |
|
Registered Member
Join Date: Sep 2008
Posts: 1,840
|
Glad it worked out for you.
|
|
|
|
|
03/10/2009, 10:11 PM
|
#20 |
|
Registered Member
Join Date: Mar 2004
Location: 08876
Posts: 224
|
camero- i plan to do 1-2 gallon water changes a week. no other filtration. there will be some sponge right under the skimmer to get out debris though
|
|
|
|
|
03/10/2009, 10:23 PM
|
#21 |
|
Registered Member

Join Date: Jan 2009
Location: Connecticut
Posts: 126
|
This is a little of topic but, how does the kyrlon fusion paint hold up in the long term? btw nice build.
__________________
Pm me if you got any questions. Current Tank Info: 24 gal jbj nano cube |
|
|
|
|
03/11/2009, 09:23 AM
|
#22 |
|
Registered Member
Join Date: Mar 2004
Location: 08876
Posts: 224
|
and we have rock sand and water!!!!
requisite cloudy tank pics 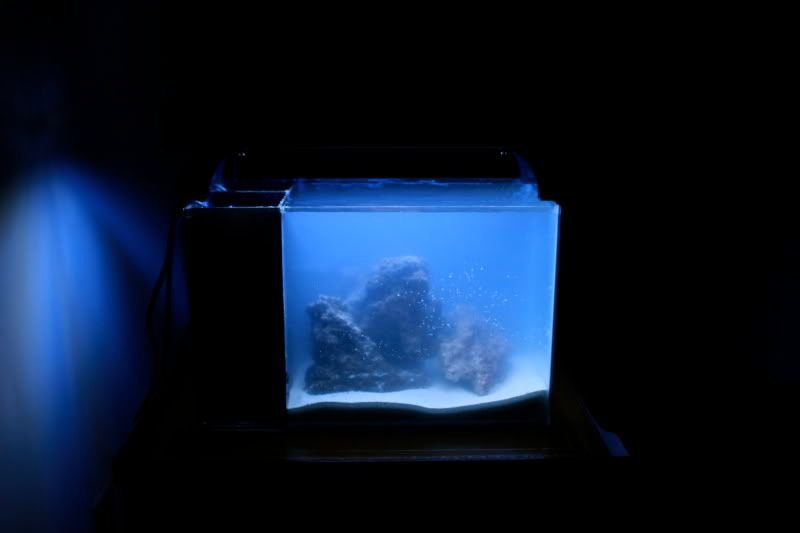 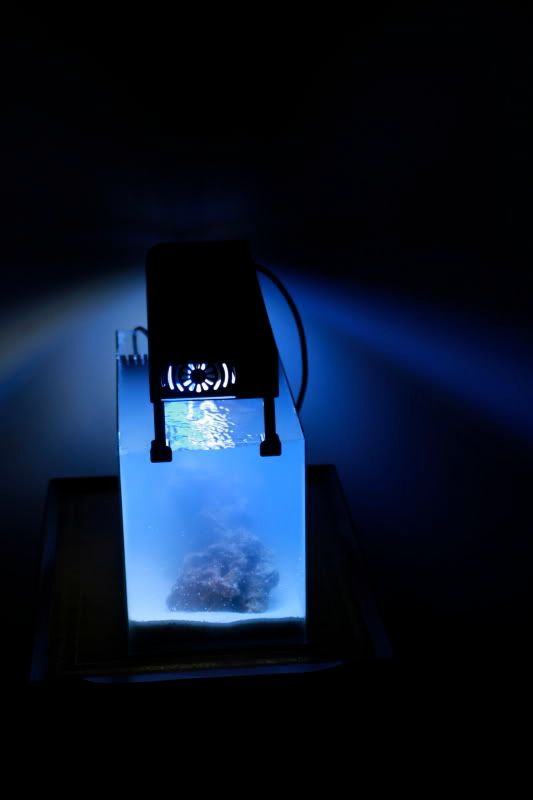 [IMG]  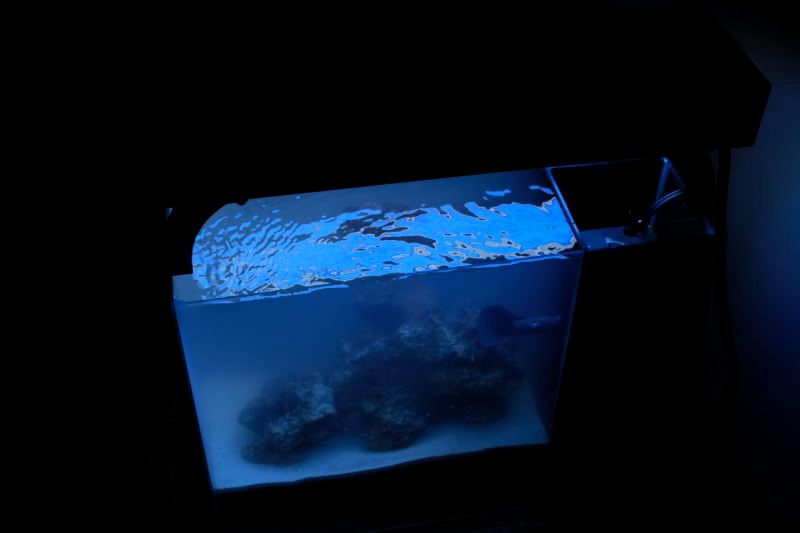 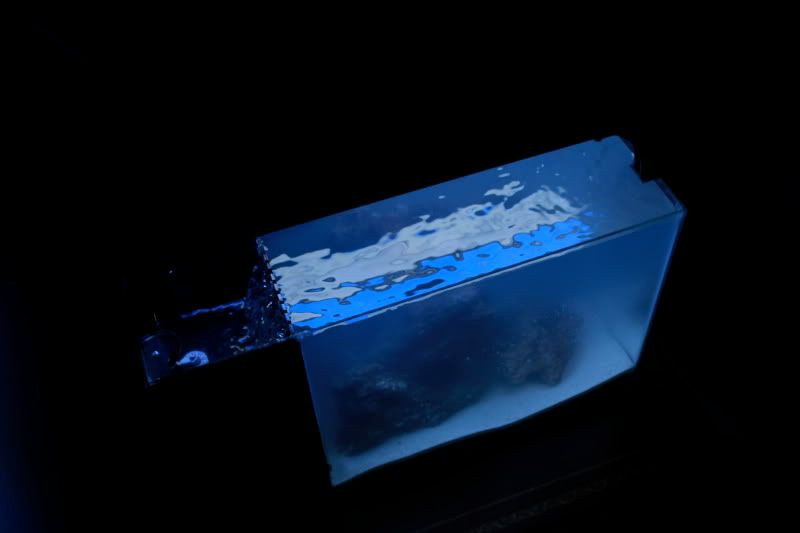 water is just under the rim, im a little worried though about something getting caught in the skimmer... i may just snap a tooth or 2 off just to be safe. |
|
|
|
|
03/11/2009, 01:02 PM
|
#23 |
|
Registered Member
Join Date: Feb 2003
Location: Northern VA
Posts: 17,691
|
Looks great!
__________________
Adrienne The only thing to fear is fear itself....and spiders. |
|
|
|
|
03/11/2009, 01:45 PM
|
#24 |
|
Moved On
Join Date: May 2008
Location: Ohio
Posts: 253
|
looking good
|
|
|
|
|
03/11/2009, 02:02 PM
|
#25 |
|
Premium Member
 Join Date: Jun 2002
Location: LA
Posts: 2,483
|
That is awesome.
Bump and subscribe. |
|
|
|
 |
| Thread Tools | |
|
|


