
|
|
 12/28/2008, 11:28 AM
|
#1 |
|
Moved On
Join Date: Dec 2007
Location: Tiger Stadium Baton Rouge, Louisiana
Posts: 529
|
J.R.L.'s 120 Build Thread
Up until now I've successfully kept a nice mixed reef in my 75g with very sub-par equipment. Nows the time for a nice upgrade. If you want some pics of my current setup, check out my latest FTS and random shots in the following link:
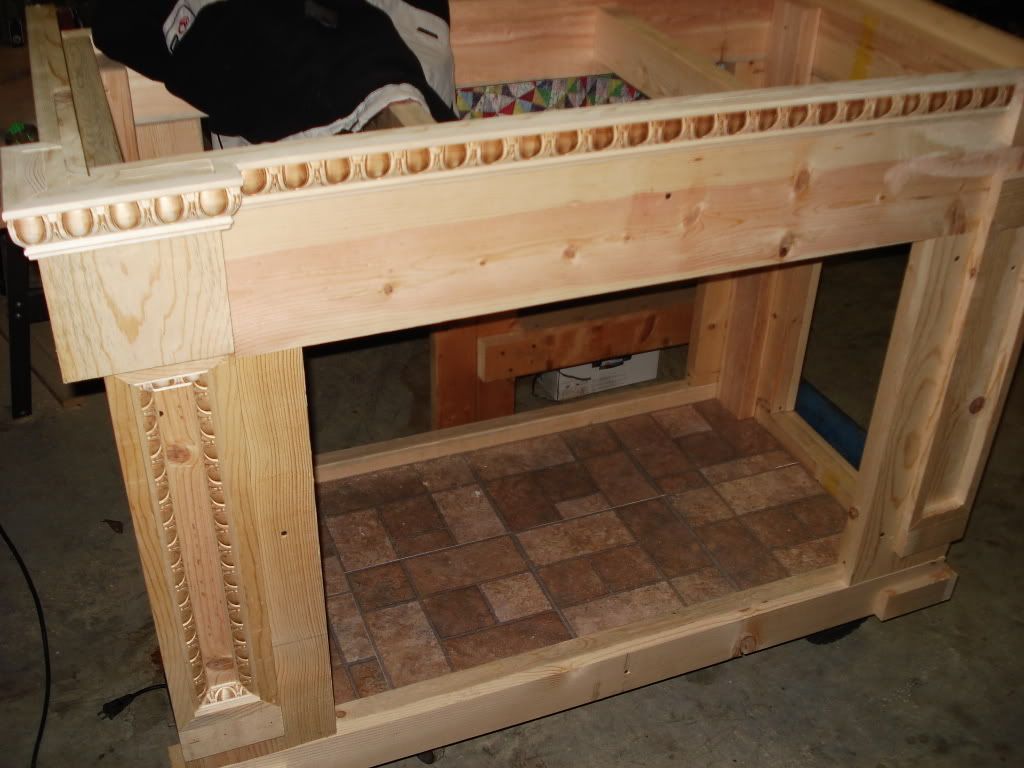
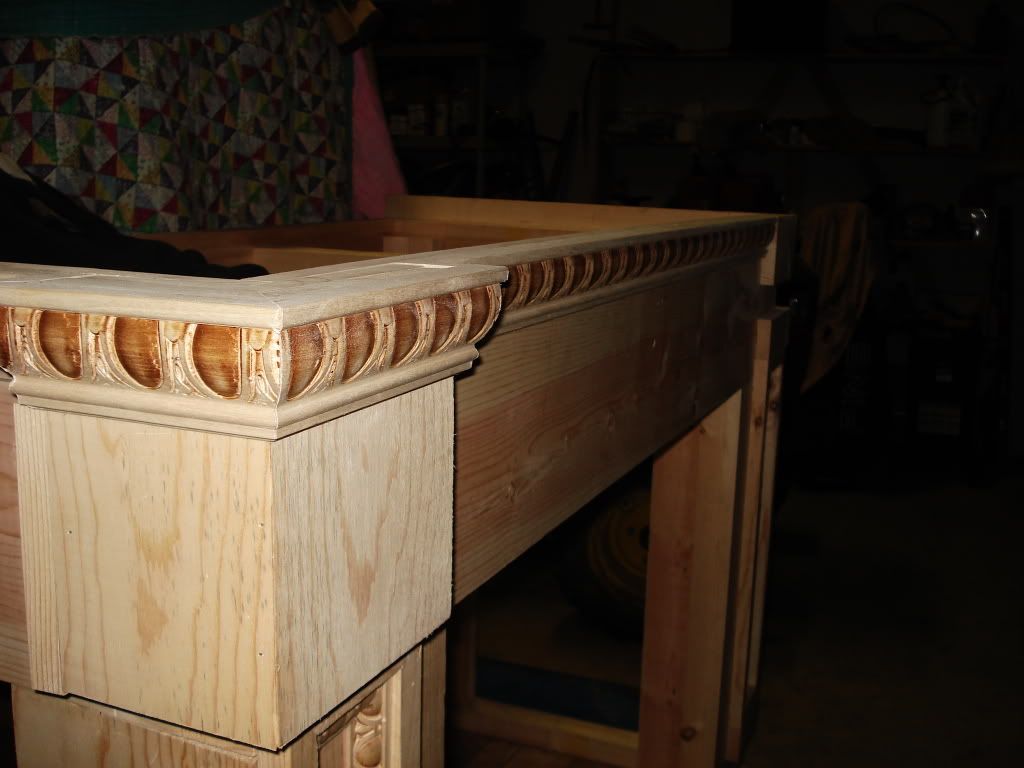
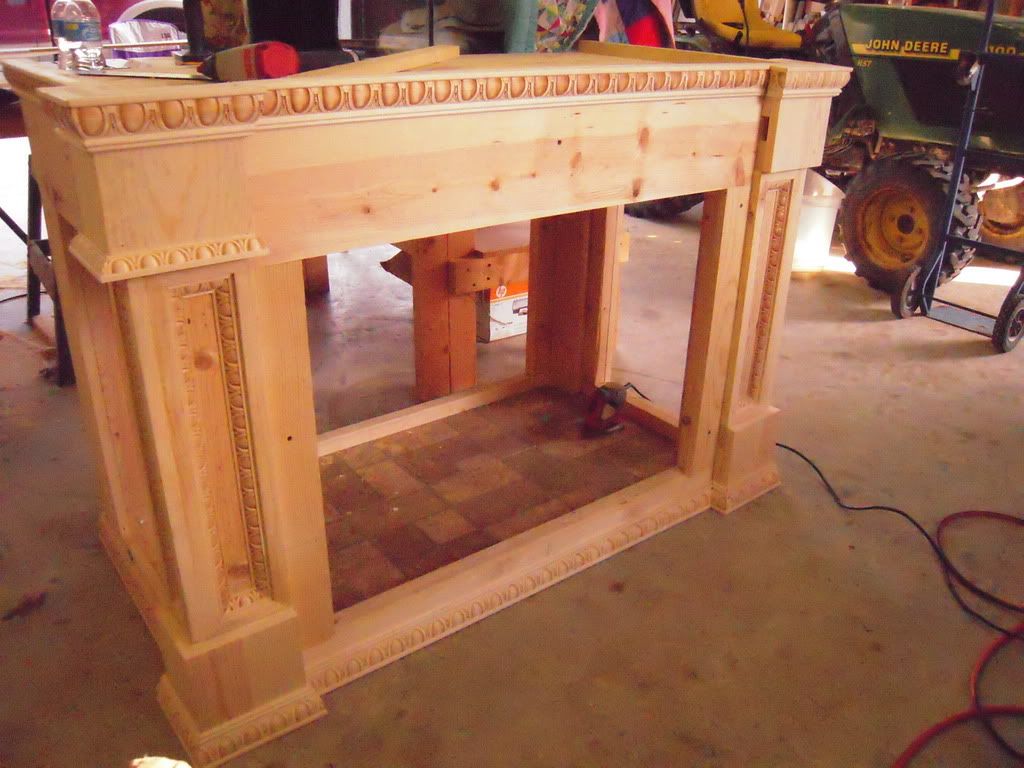
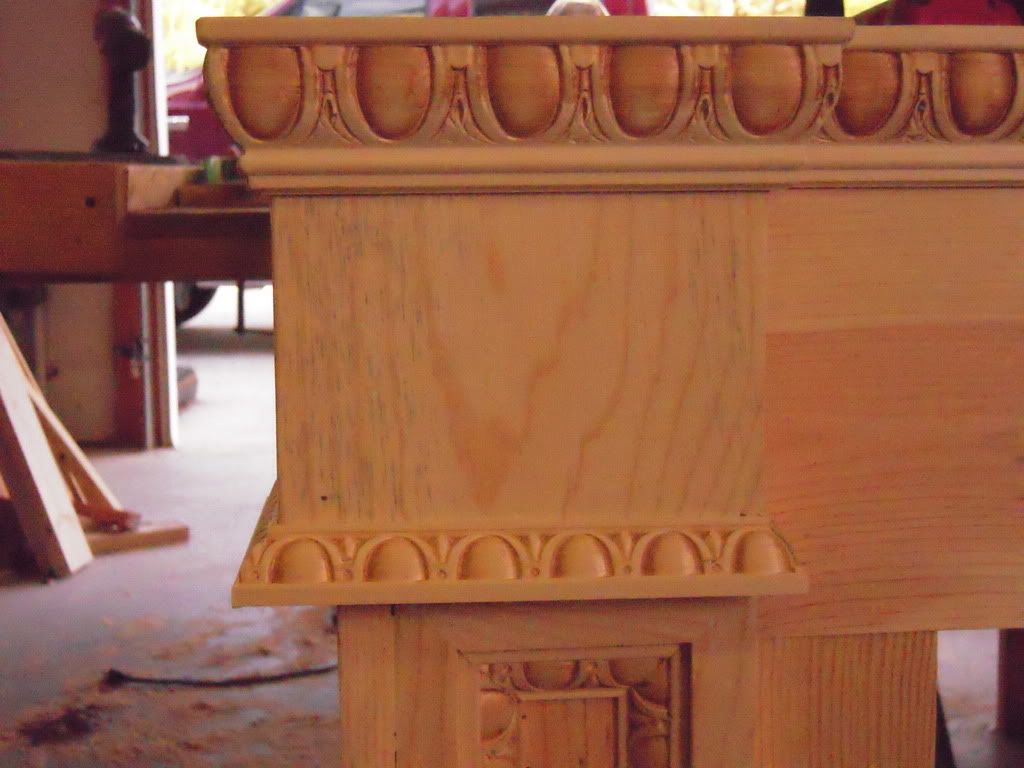
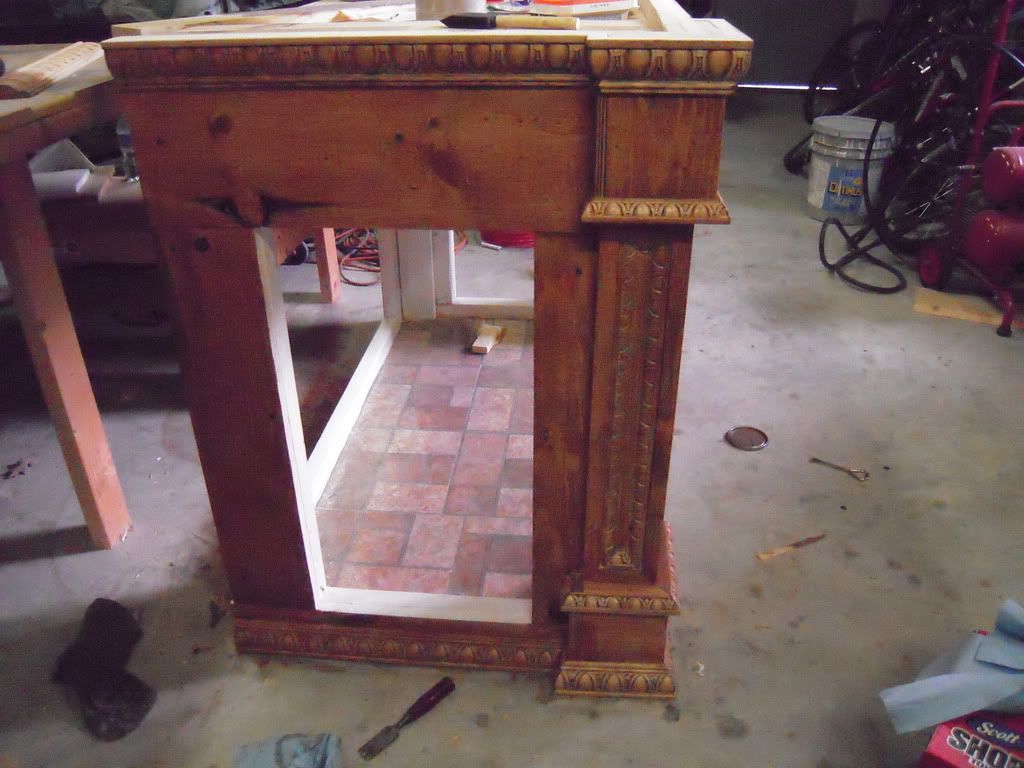
http://reefcentral.com/forums/showth...readid=1537124 The goal of my new 120 is a mainly SPS dominated tank while still keeping some nice zoas and my large LPS colonies. I also like the look of a "two mountain" aquascape which is what i will be shooting for. Im also in the process of building my own stand and canopy from start to finish. Now on with the pics! Brand New Oceanview RR 120 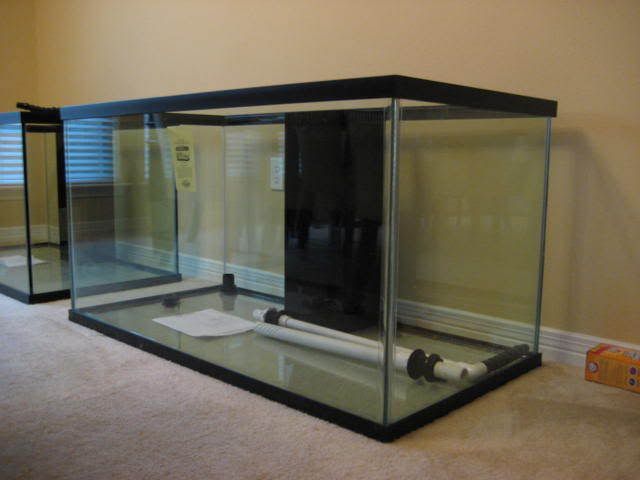 Reef Octopus Extreme 200 (next to my most sub-par piece of equipment) 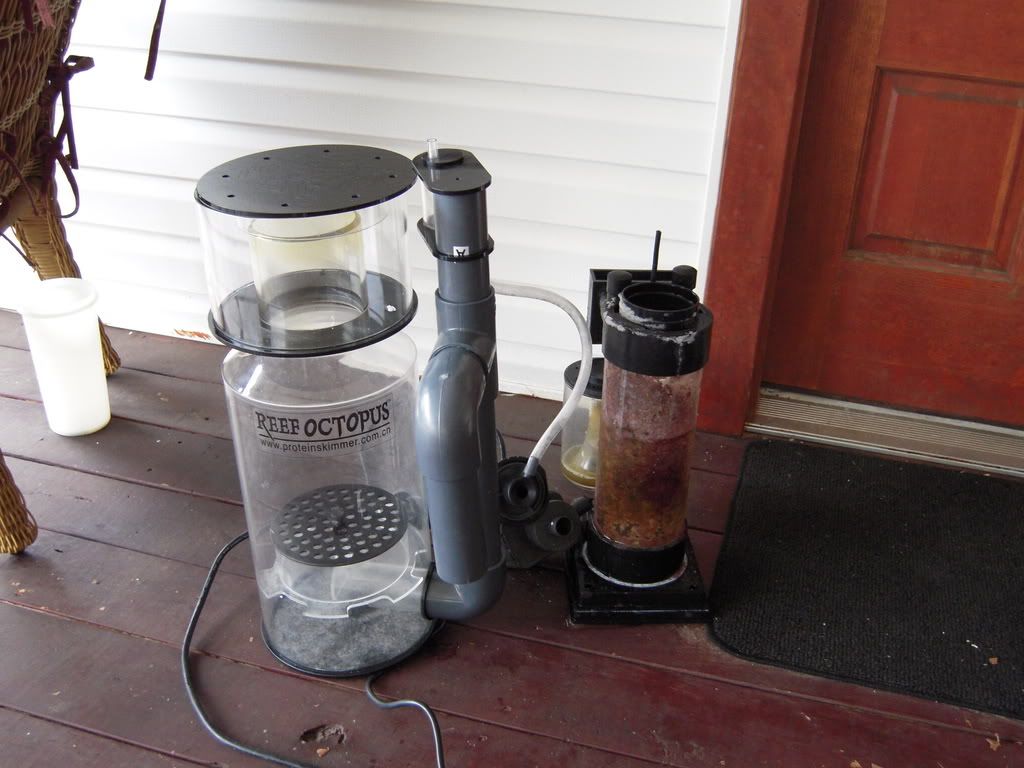 Tunze 6060s for circulation (another nice upgrade from my Seio 820s)  Return pump is still to be determined (anyone have any good ideas or have one for sale?) Like I said I have been building the stand and canopy for the past week or so and am almost finished with the stand (still need to stain) but haven't even started the canopy yet. Here is where I am now with the stand. (Thanks a ton Will16 and marino420td for answering my question about the stand and for documenting your builds for people like myself to use as a guide.) 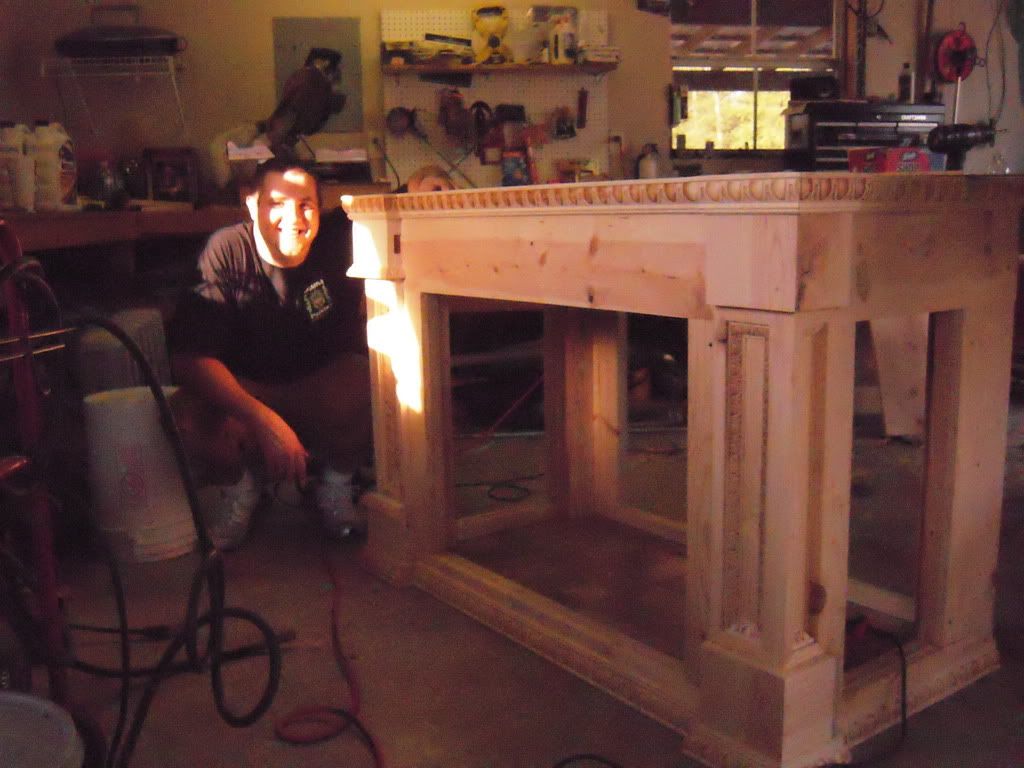 I still have a little bit left to finish such as a couple more pieces of moulding here and there but other than that it is almost done. I have to go but will post pics of the entire build process up until now when i get back. Thanks for looking! |

|

|
|
12/28/2008, 01:34 PM
|
#2 |
|
Moved On
Join Date: Dec 2007
Location: Tiger Stadium Baton Rouge, Louisiana
Posts: 529
|
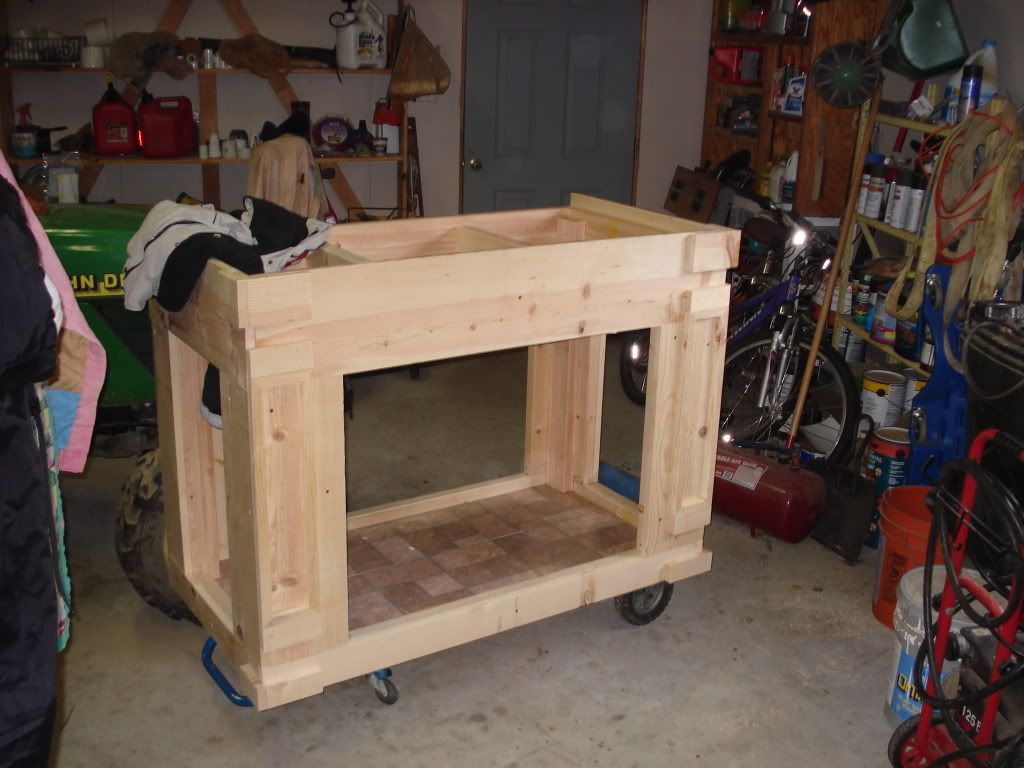
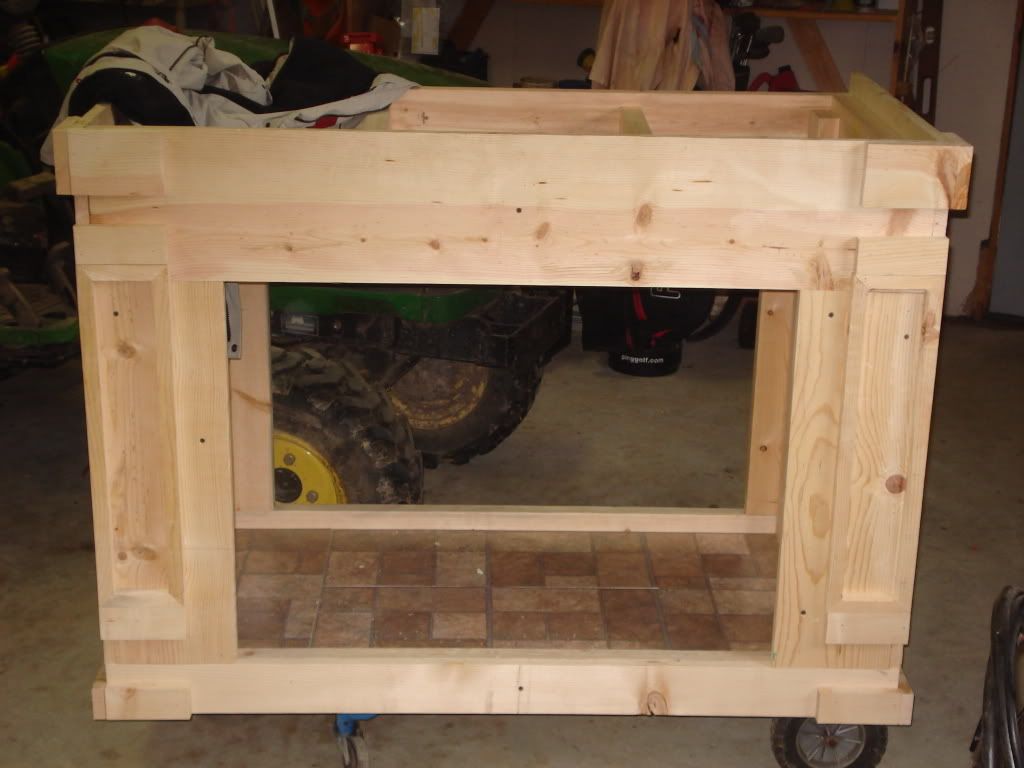
Heres the build up until now
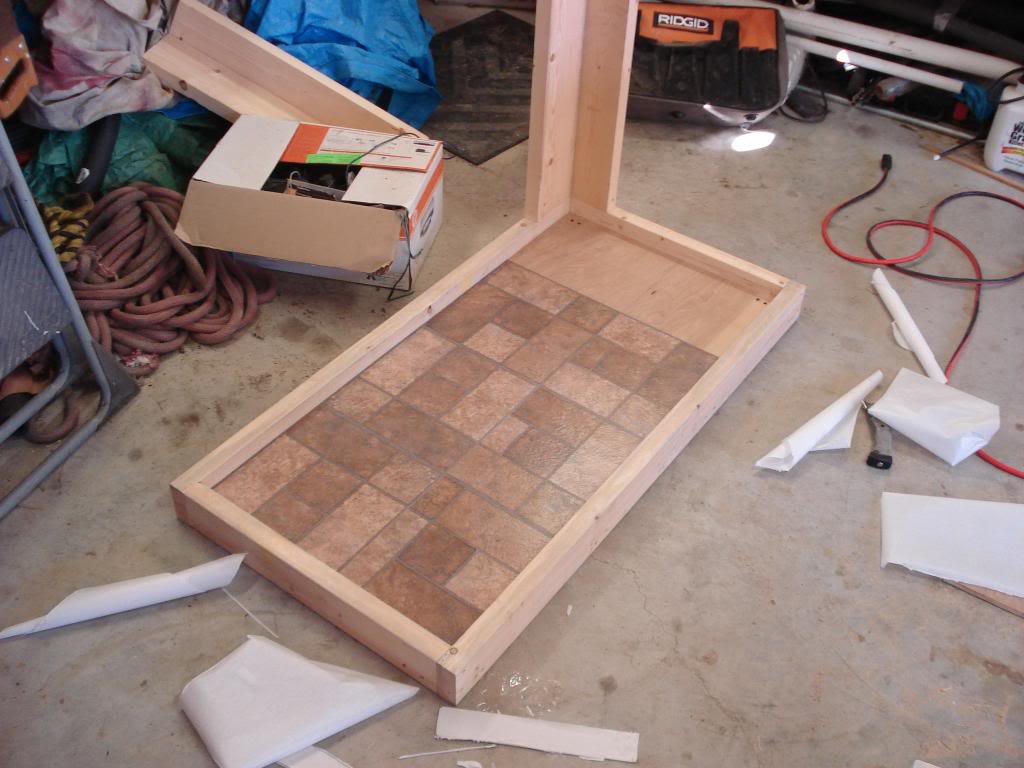
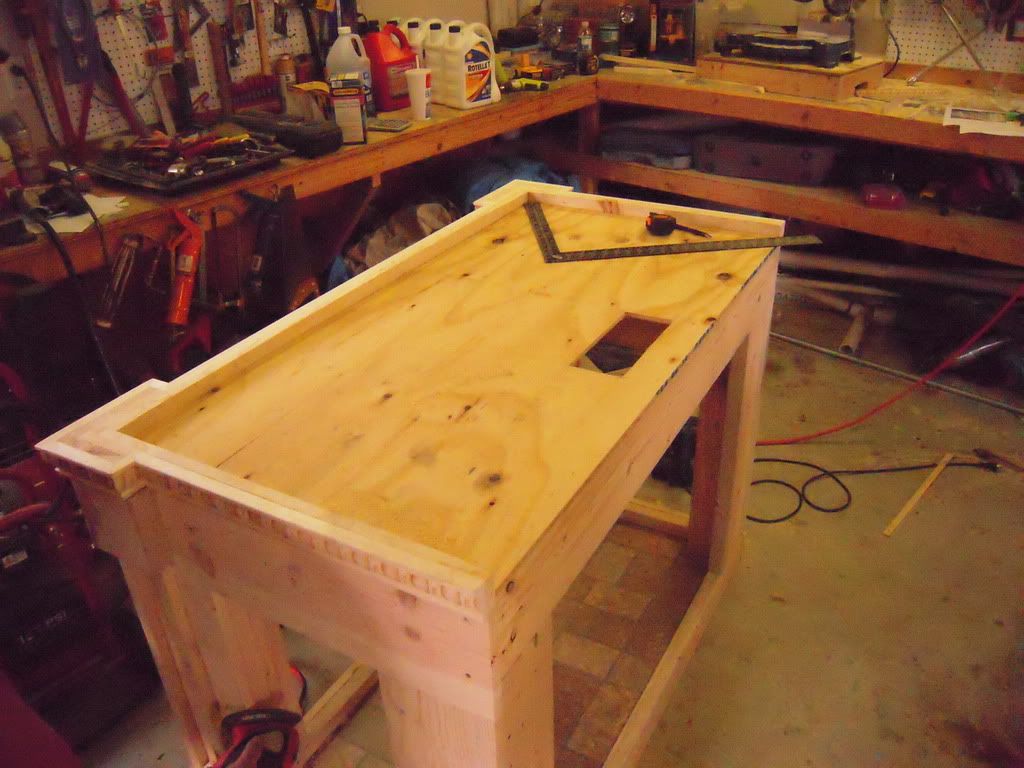
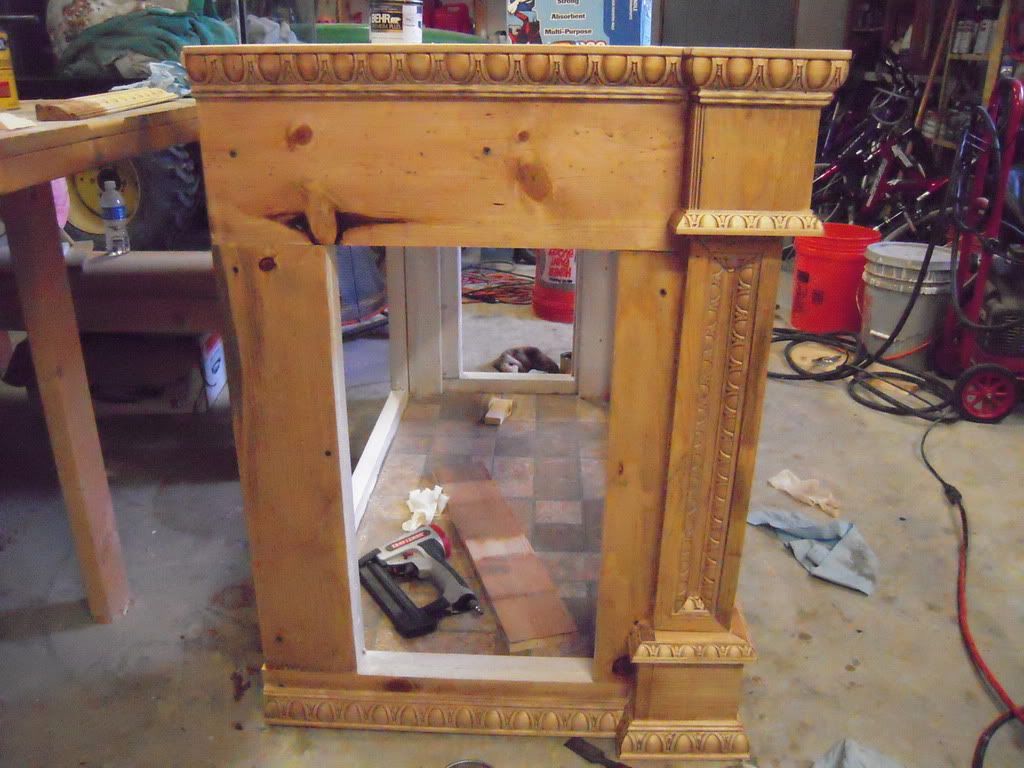
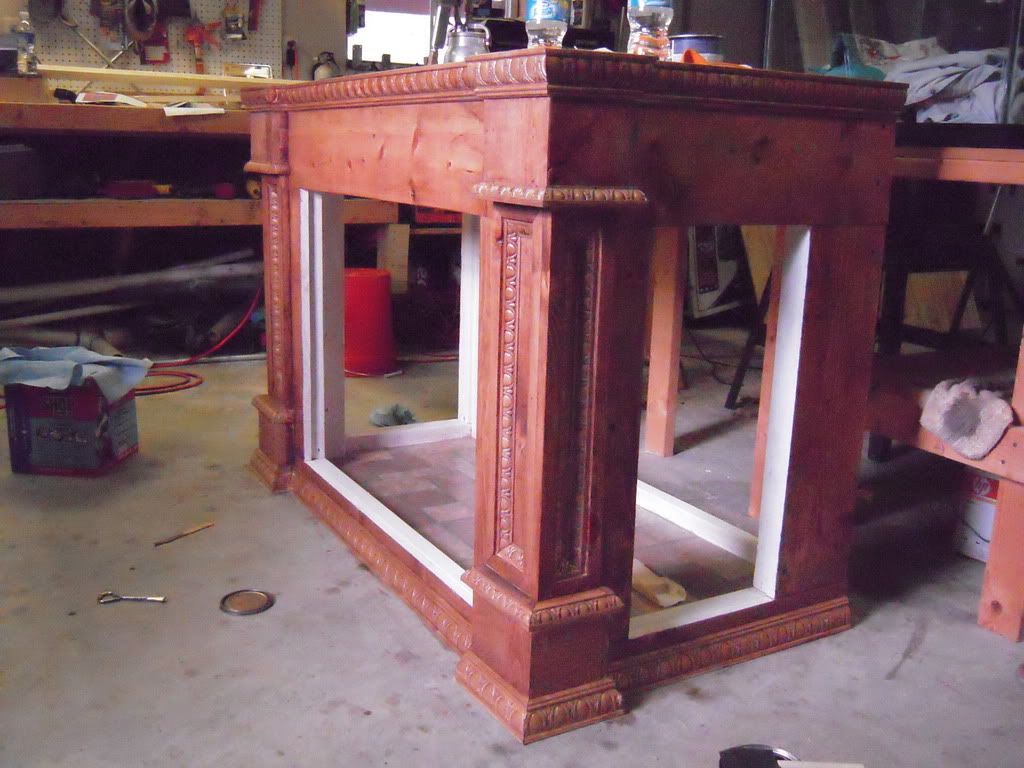
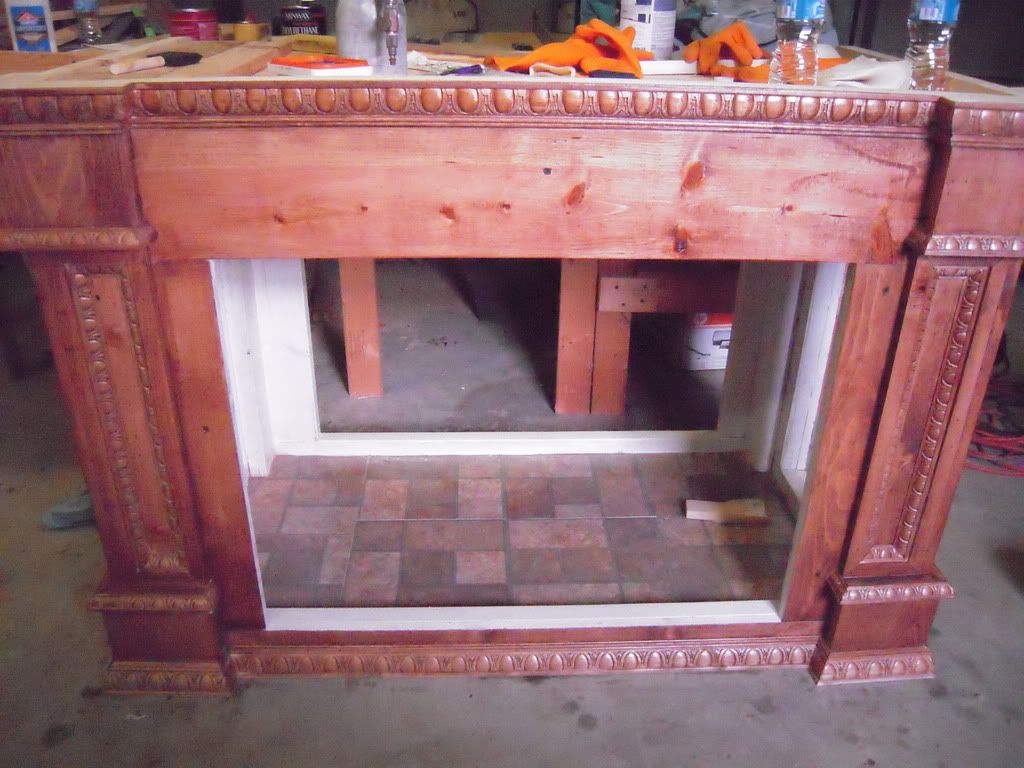
wood all cut up 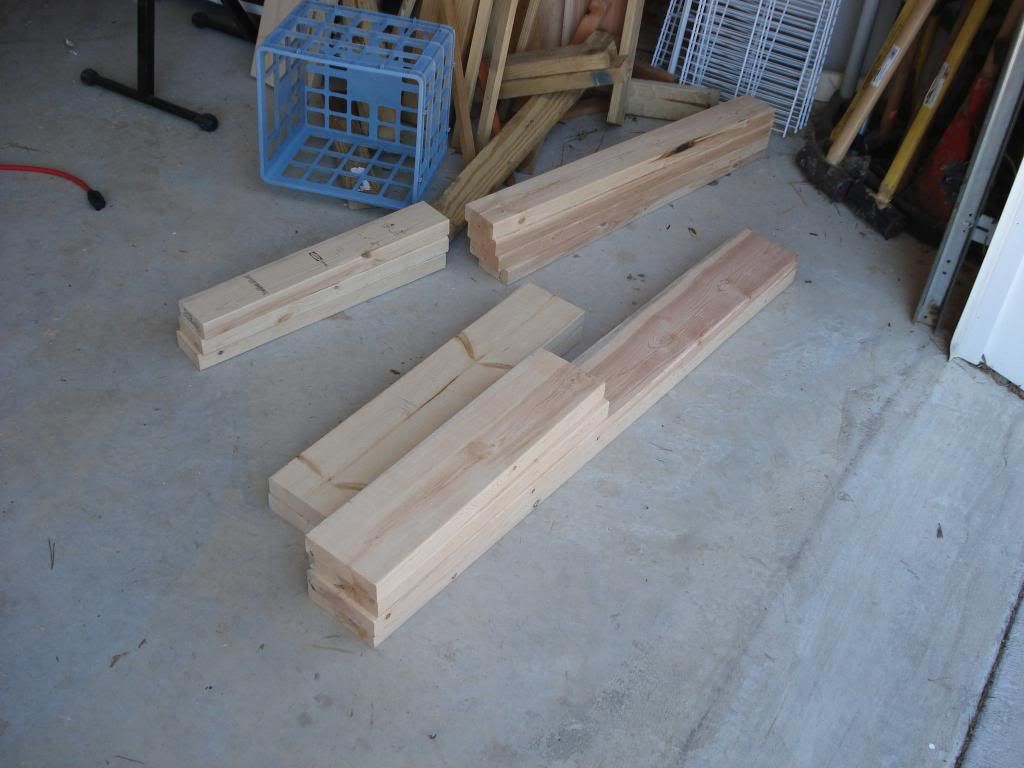 bottom framed up 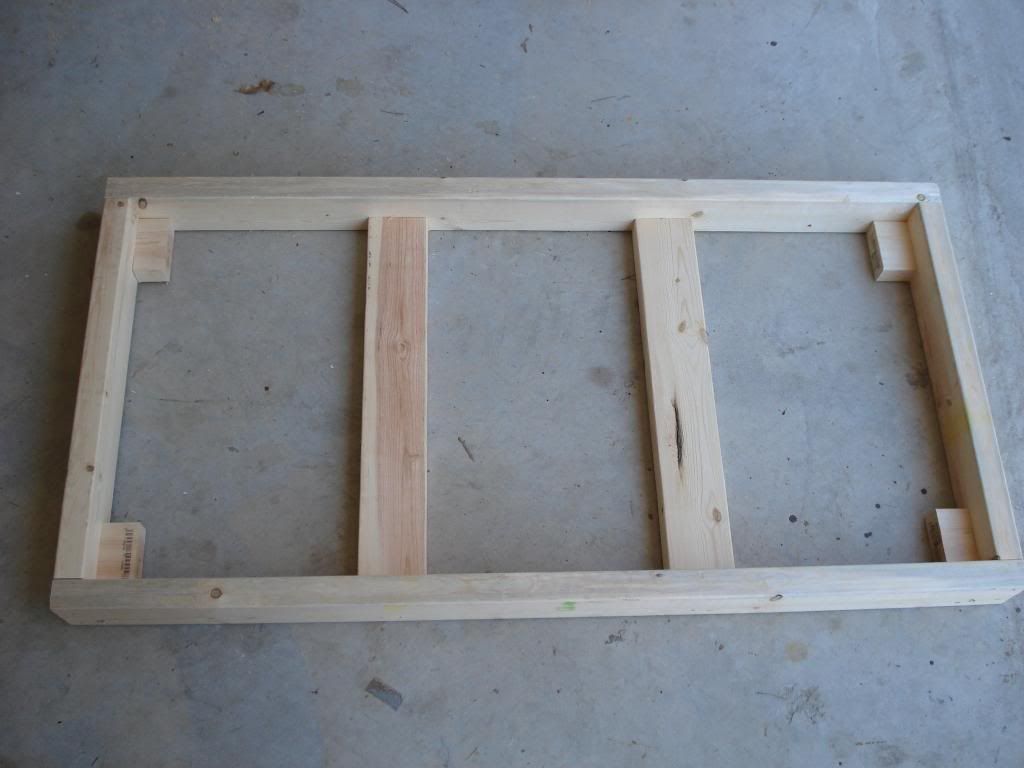 mock up 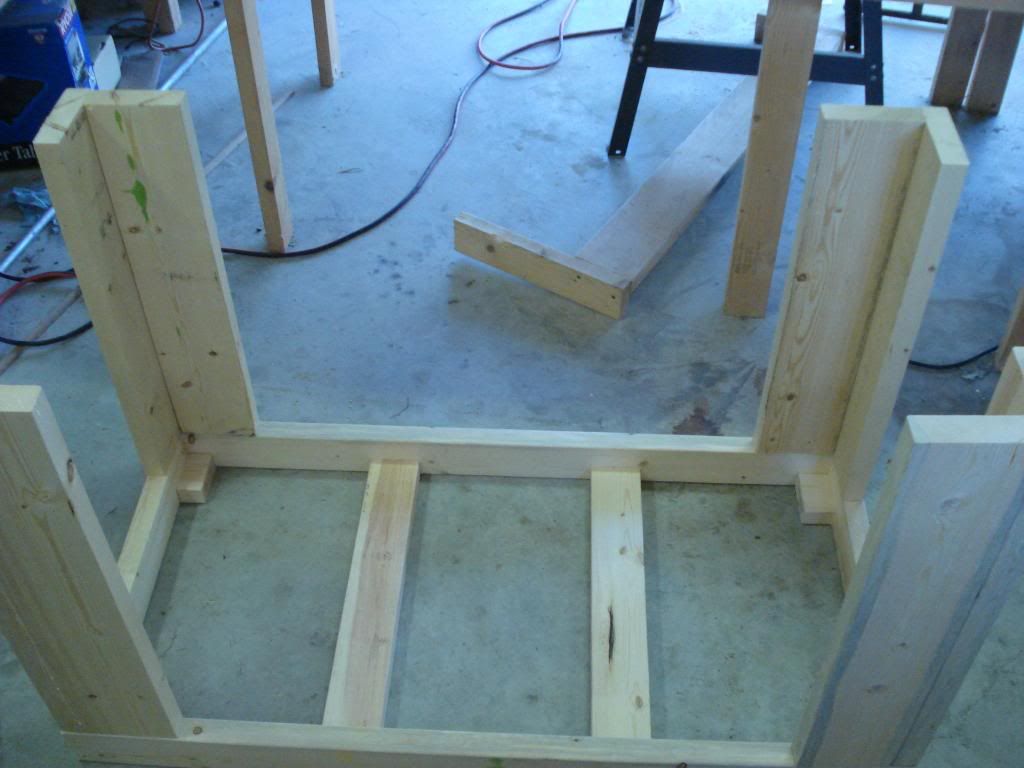 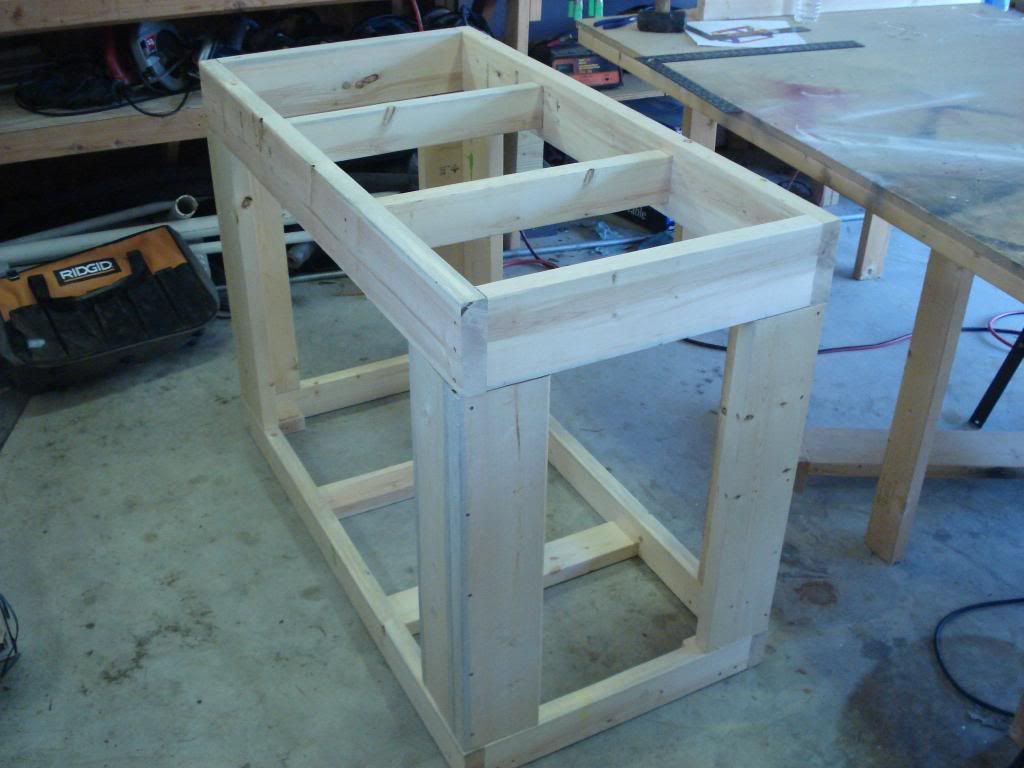 this is where i wanted to make a floor and lay some pretty laminate down 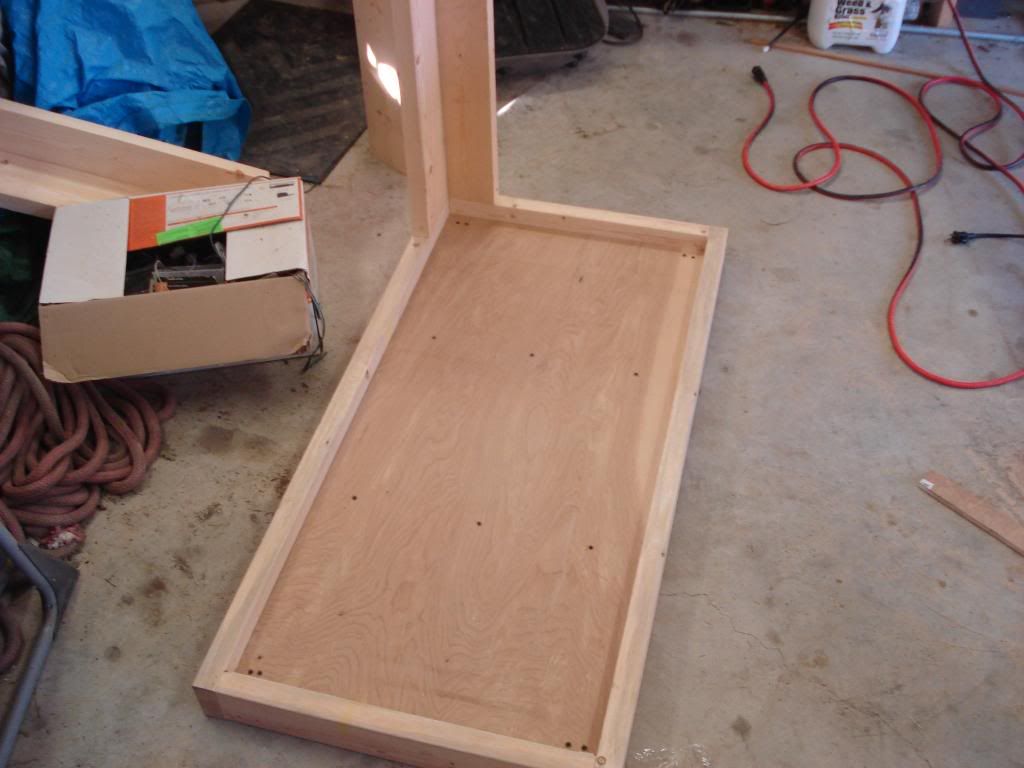
|
|
|
|
|
12/28/2008, 01:35 PM
|
#3 |
|
Moved On
Join Date: Dec 2007
Location: Tiger Stadium Baton Rouge, Louisiana
Posts: 529
|
 i used these precut squares from HD only $.69 each!  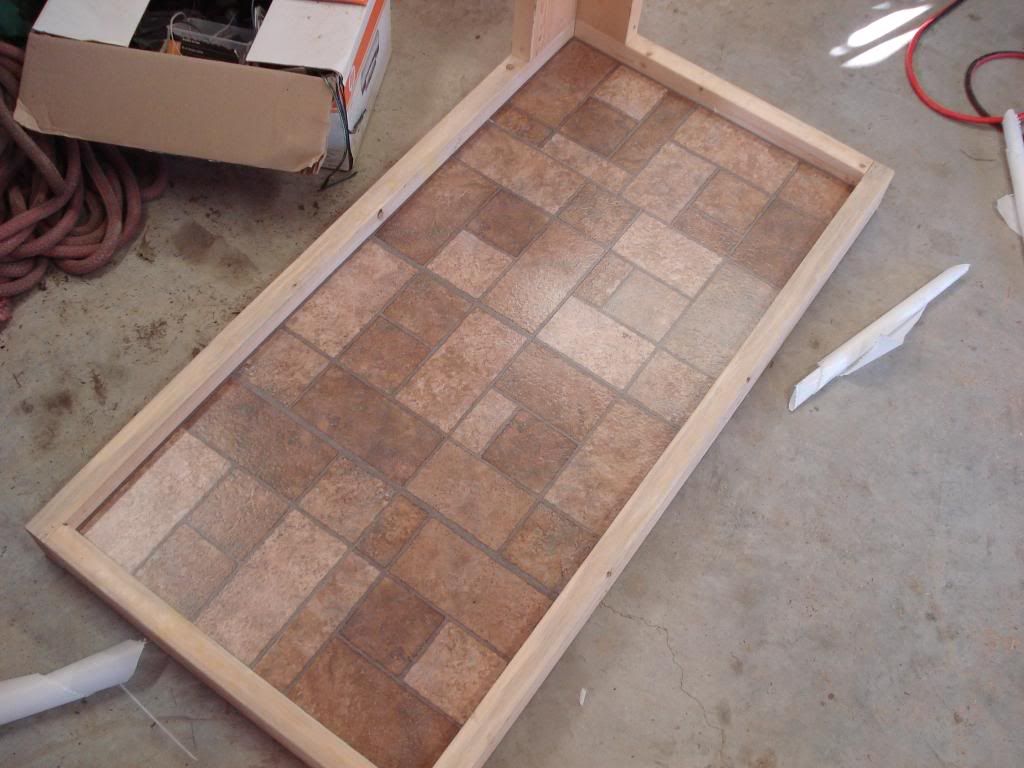 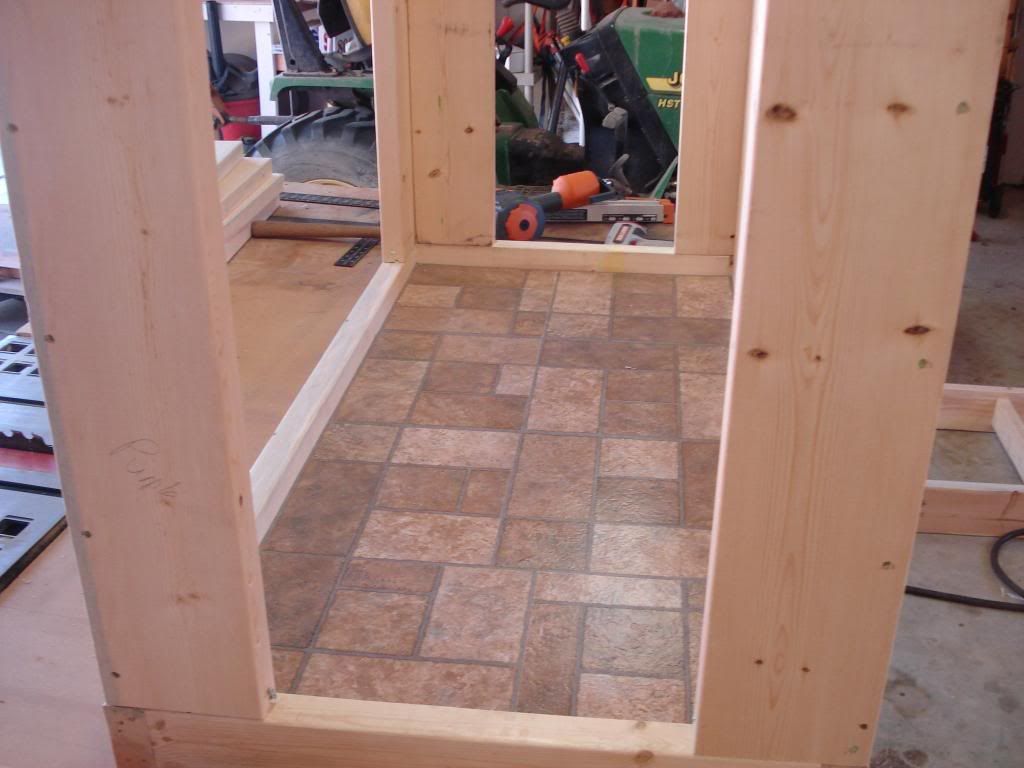 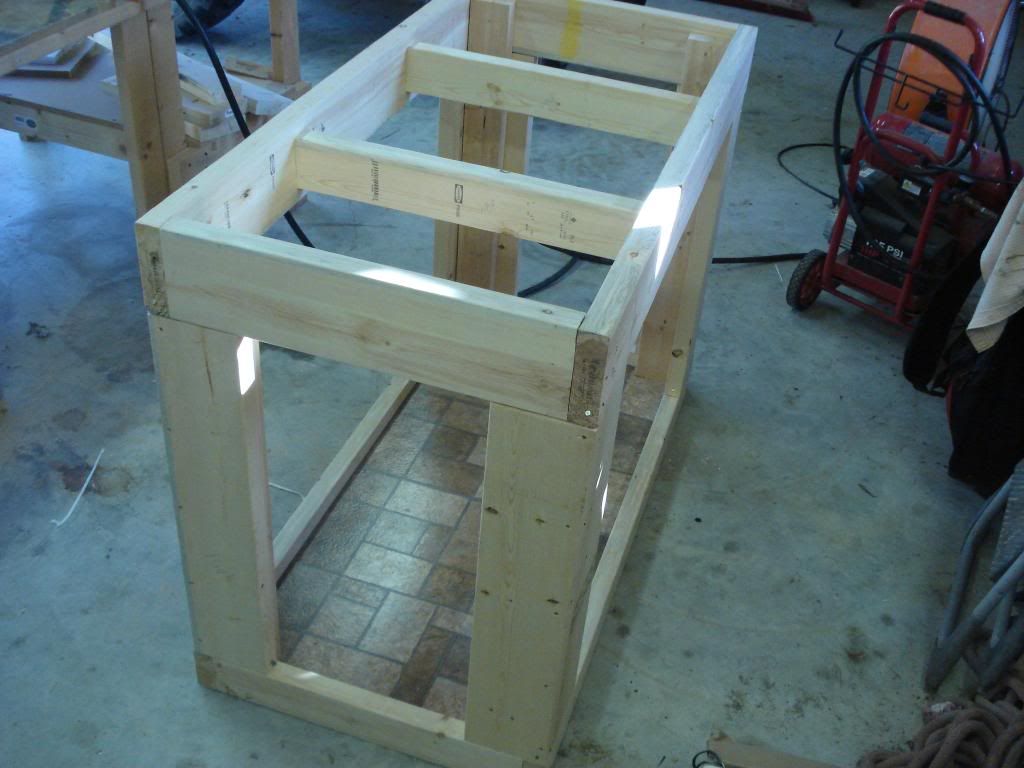 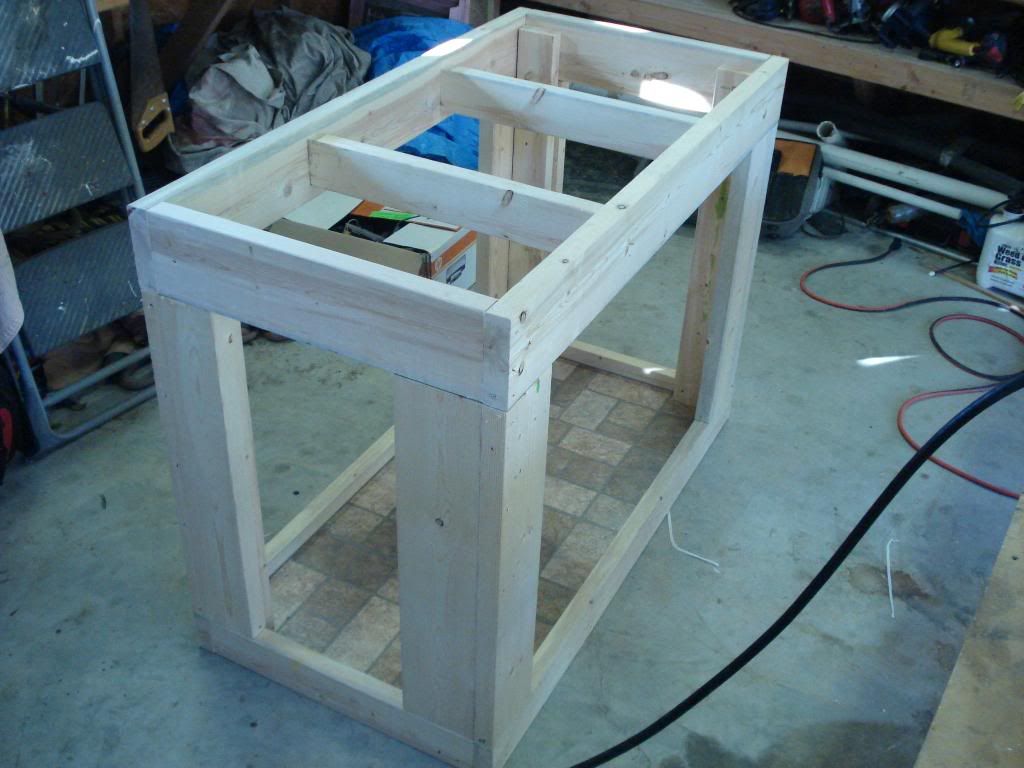
|
|
|
|
|
12/28/2008, 01:38 PM
|
#4 |
|
Moved On
Join Date: Dec 2007
Location: Tiger Stadium Baton Rouge, Louisiana
Posts: 529
|
     didnt want any rogue nails from the nail gun shattering my tank so i took a few precautions lol 
|
|
|
|
|
12/28/2008, 01:39 PM
|
#5 |
|
Moved On
Join Date: Dec 2007
Location: Tiger Stadium Baton Rouge, Louisiana
Posts: 529
|
|
|
|
|
|
12/28/2008, 01:47 PM
|
#6 |
|
Registered Member
Join Date: Nov 2006
Location: Seattle
Posts: 231
|
WOW
 That stand is sweet! Excellent work, I did the same on the bottom of mine also with the flooring, I will be following this one, BTW nice skimmer That stand is sweet! Excellent work, I did the same on the bottom of mine also with the flooring, I will be following this one, BTW nice skimmer
|
|
|
|
|
12/28/2008, 03:15 PM
|
#7 |
|
Moved On
Join Date: Dec 2007
Location: Tiger Stadium Baton Rouge, Louisiana
Posts: 529
|
Thanks squidward5...im still waiting on my skimmer to break in but so far its very nice!
|
|
|
|
|
12/28/2008, 09:57 PM
|
#8 | |
|
Registered Member
Join Date: Nov 2006
Location: Seattle
Posts: 231
|
Quote:
|
|
|
|
|
|
12/29/2008, 07:37 AM
|
#9 |
|
Moved On
Join Date: Dec 2007
Location: Tiger Stadium Baton Rouge, Louisiana
Posts: 529
|
since Christmas

|
|
|
|
|
12/29/2008, 08:22 AM
|
#10 |
|
Registered Member
Join Date: Jan 2008
Location: Northern NJ
Posts: 1,812
|
Awesome! Great job! How long before you start filling?
Keep us posted with your progress. Looking forward to seeing this completed. - Will |
|
|
|
|
12/29/2008, 12:53 PM
|
#11 |
|
Moved On
Join Date: Dec 2007
Location: Tiger Stadium Baton Rouge, Louisiana
Posts: 529
|
im aiming to have the tank up and running in about 2 weeks...oh and will16 what is that white paint you used one the inside of your stand? im assuming its a type of waterproof paint?
heres todays progress 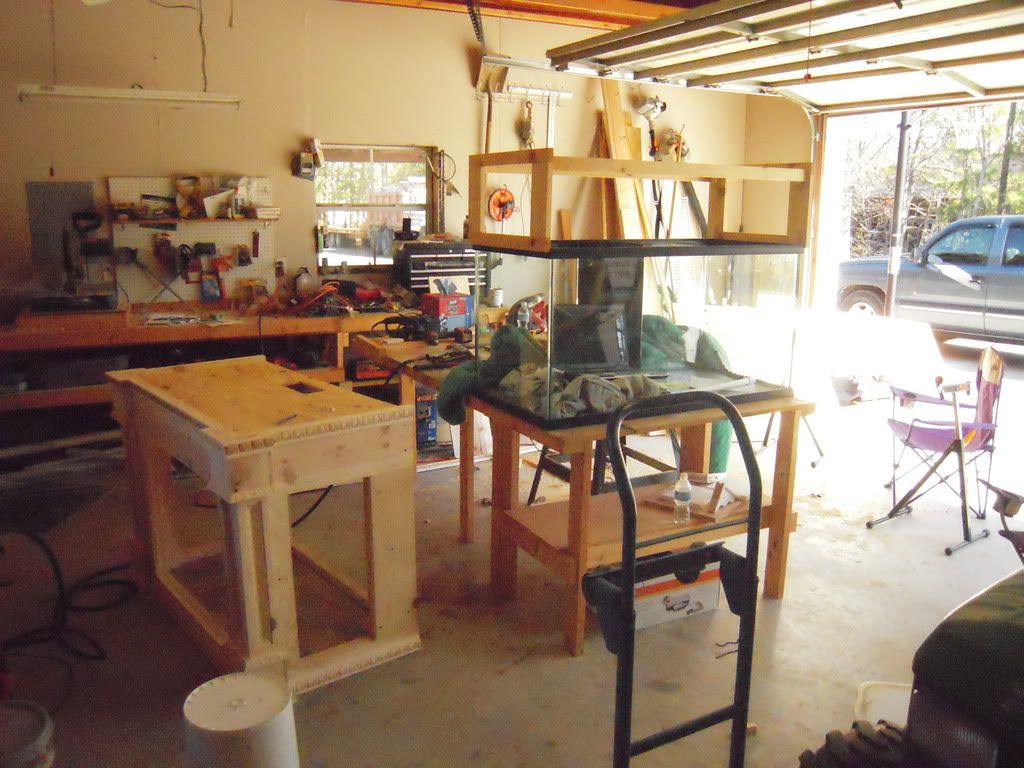 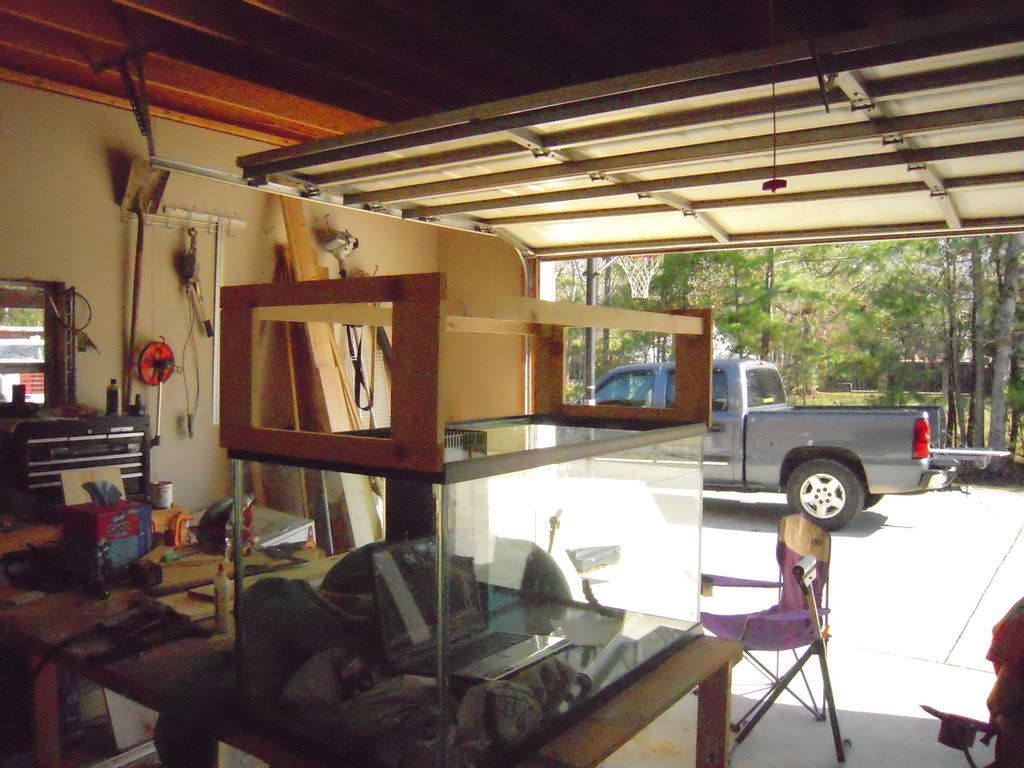  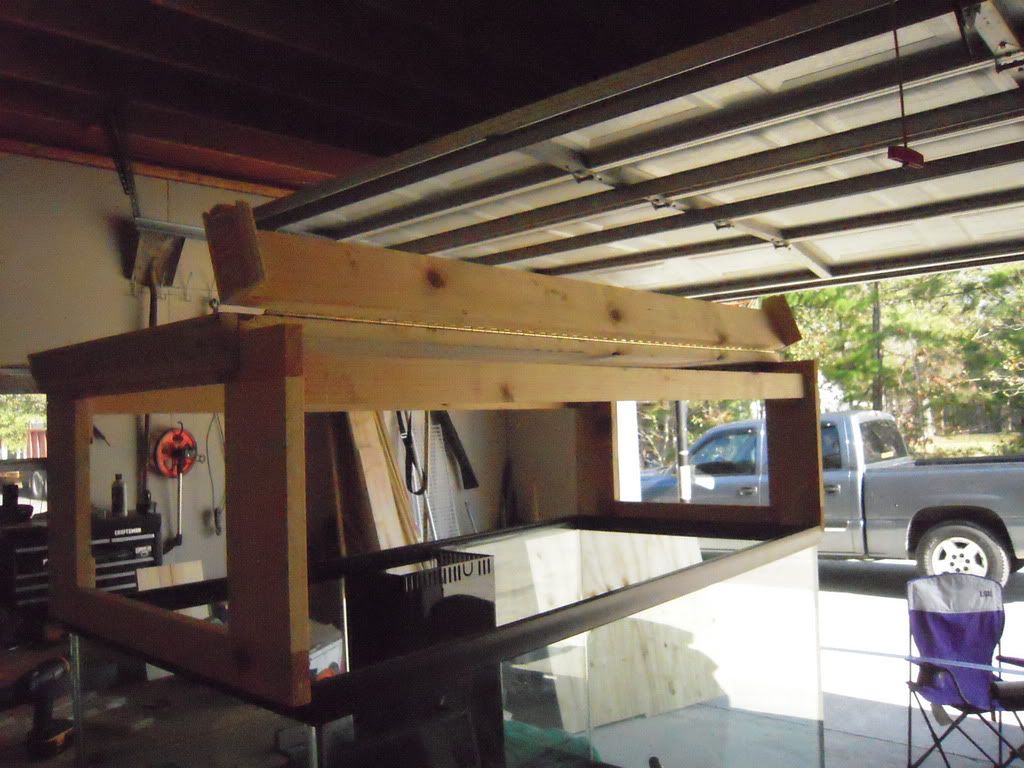 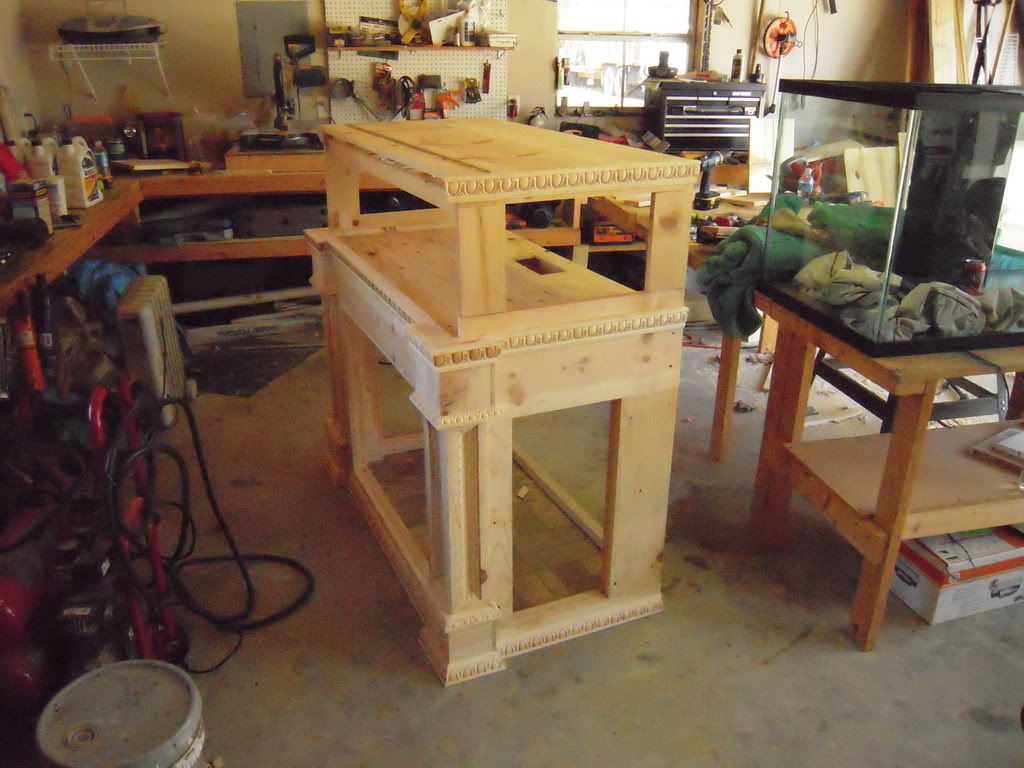 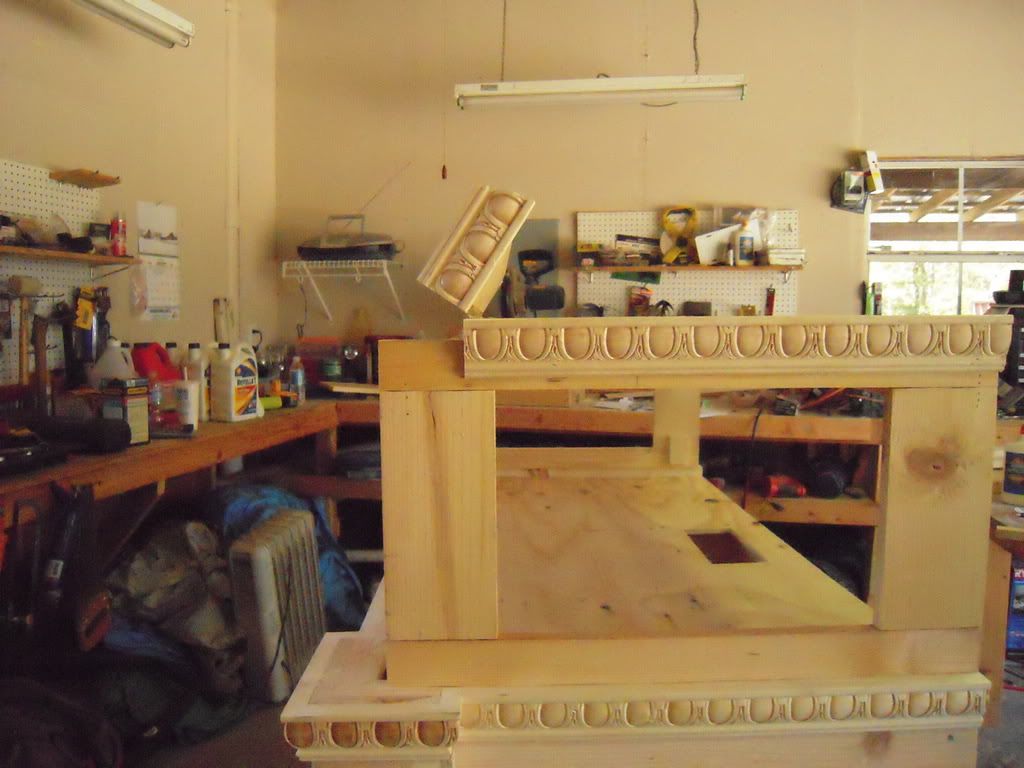
|
|
|
|
|
12/29/2008, 01:15 PM
|
#12 |
|
Registered Member
Join Date: Jan 2008
Location: Northern NJ
Posts: 1,812
|
Very nice. I just used regular primer and latex paint. I rely on the 4 coats of poly to protect.
|
|
|
|
|
12/29/2008, 01:51 PM
|
#13 |
|
Moved On
Join Date: Dec 2007
Location: Tiger Stadium Baton Rouge, Louisiana
Posts: 529
|
ok gotcha
|
|
|
|
|
12/29/2008, 09:09 PM
|
#14 |
|
Registered Member
Join Date: Dec 2004
Location: Colorado Springs, Co
Posts: 89
|
that setup is sweet how tall is the stand?
|
|
|
|
|
12/29/2008, 09:54 PM
|
#15 |
|
Moved On
Join Date: Dec 2007
Location: Tiger Stadium Baton Rouge, Louisiana
Posts: 529
|
the stand is 36" tall
heres some shots of what ive done so far tonight and some stuff i got at HD (they had a sale on the buckets...only $3 each! so i HAD to grab some!) 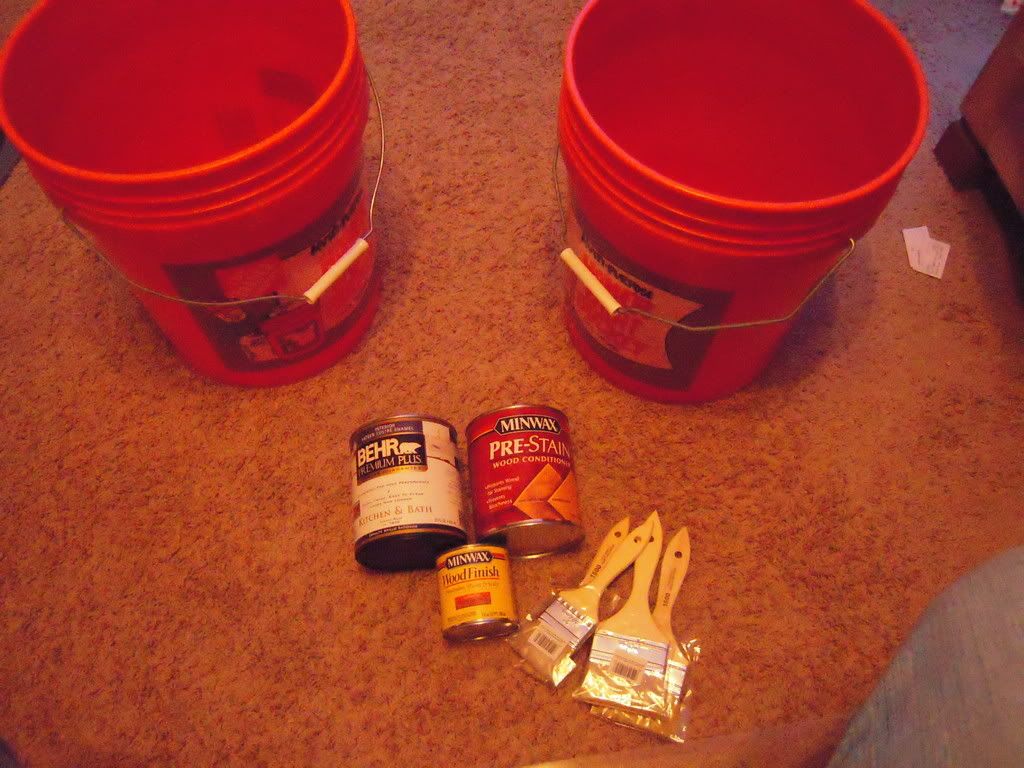 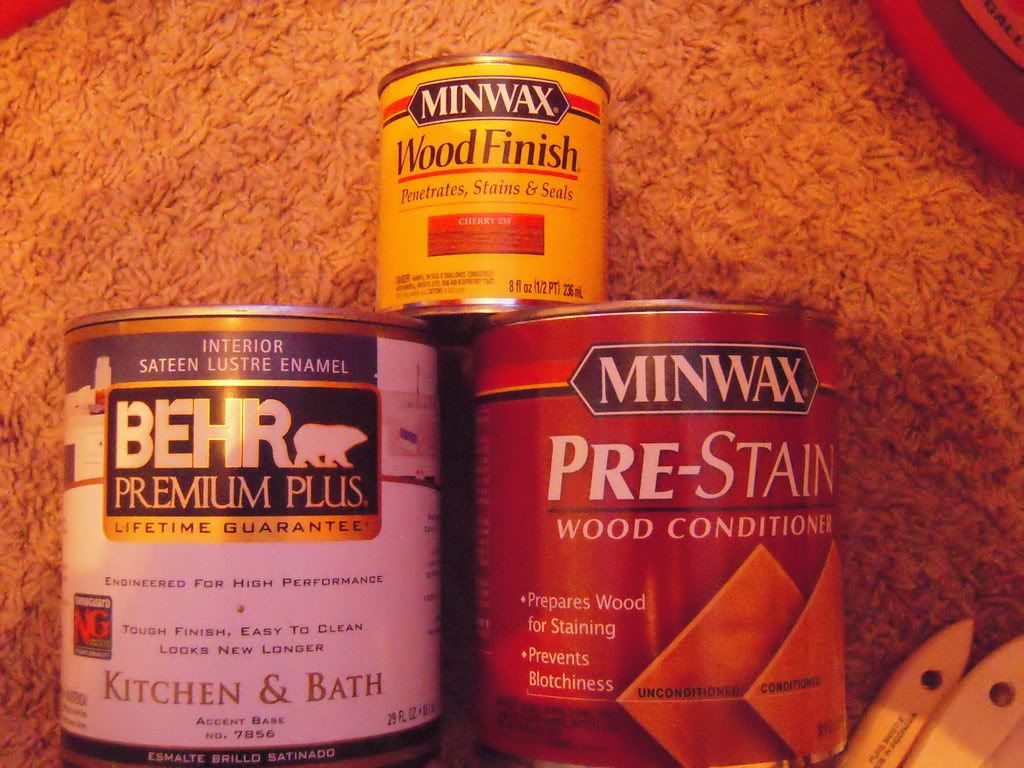 painted the inside of the stand and canopy with the first coat of white paint...its a special formula for Kitchen and Bath and is suppsoed to be very moisture resistant (hey coff, it was cheaper to buy a smaller can for $13 than to buy the paint and poly seperately and thanks again for the help!) 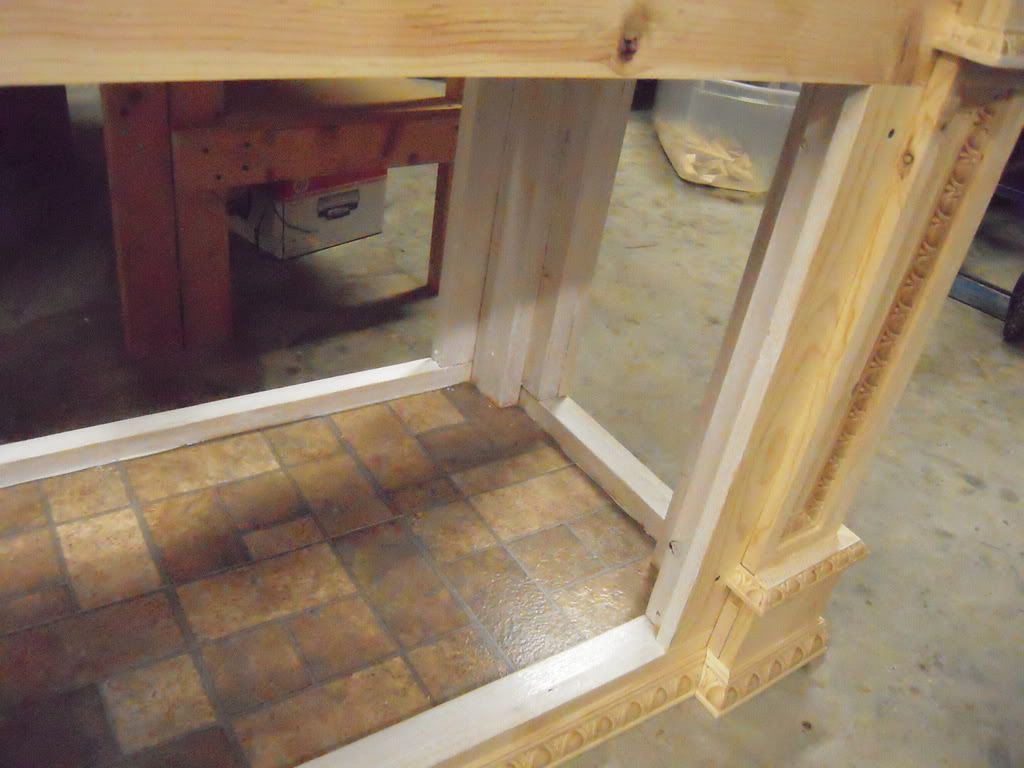 testing out the stain...i went with the Cherry 235 i think...i tried it with and without the wood conditioner which is made for very soft wood like pine and man its night and day! I also let the stain soak for 5,10&15 minutes before wiping to see if there were any differences and there wasnt much...i tested the diff time intervals with letting the wood cond. set for 8 minutes this is with wood cond. (on right) and without cond. (on left)...you can clearly see the blotchyness and uneveness that happens without the wood cond. 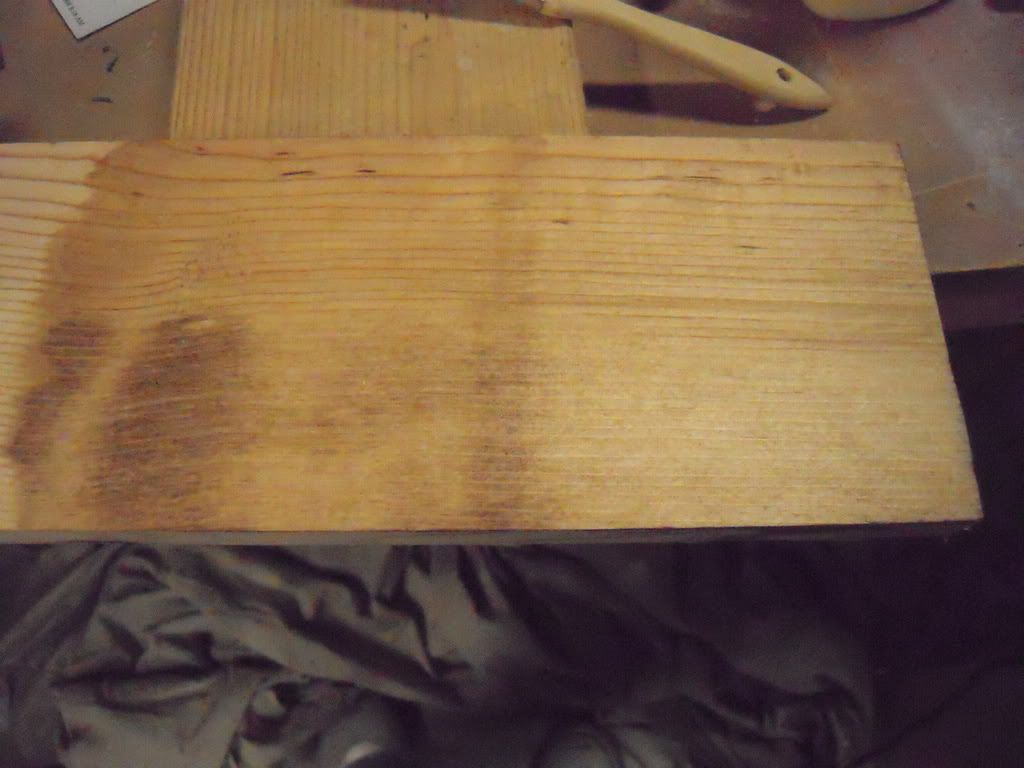 and heres the scrap with the diff time intervals at 5 10 and 15 minutes of soak time from left to right along with the previous picture on the far right 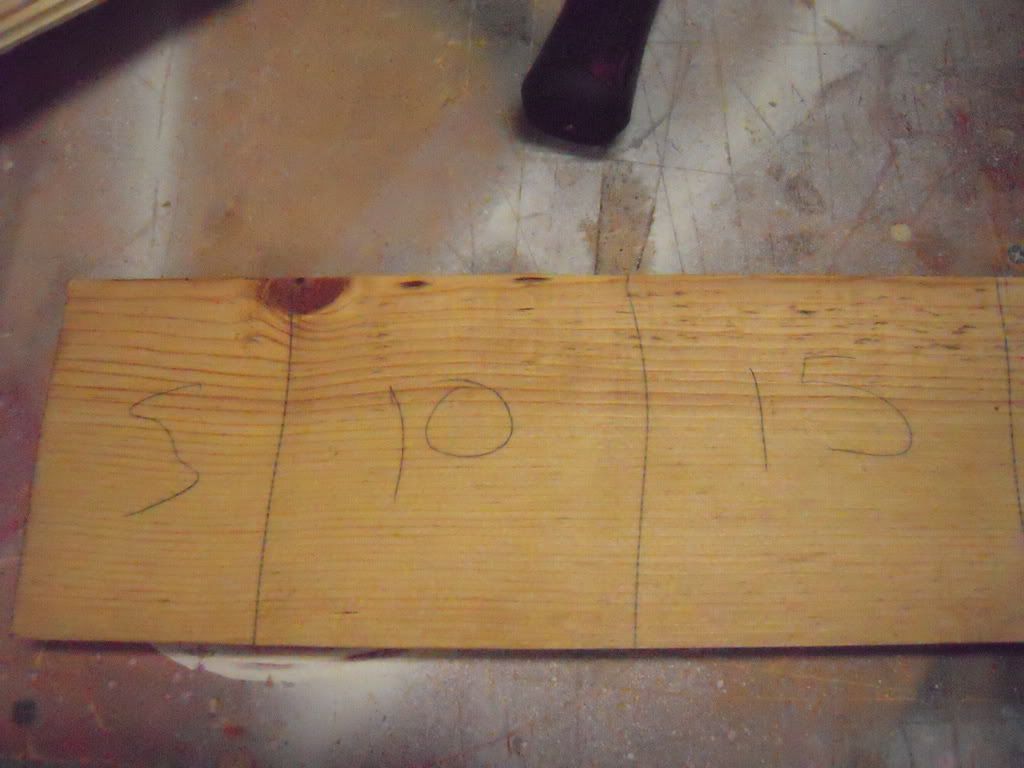 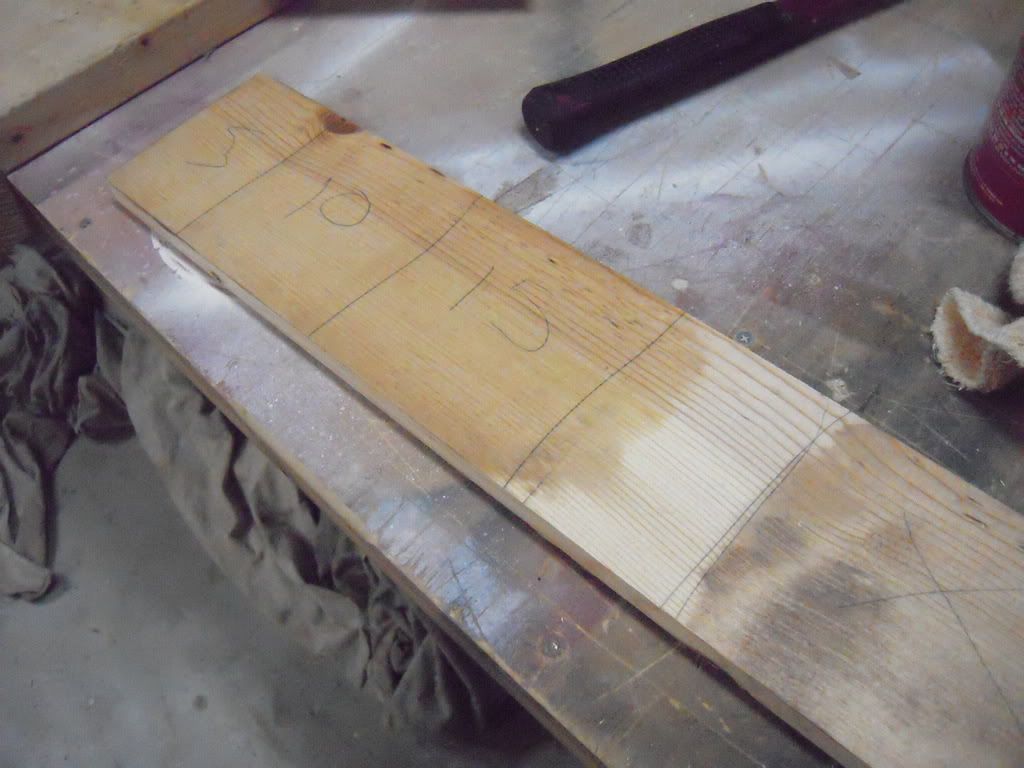 as you can see there really is very little difference in letting the stain soak for diff time periods and i think its because im using a pre stain wood conditioner which essentially makes the board less porous im still not 100% sure if this is the stain i want...i think i want something darker..anyone have any suggestions? |
|
|
|
|
12/30/2008, 03:06 PM
|
#16 |
|
Premium Member
 Join Date: Mar 2004
Location: Cape Girardeau, MO
Posts: 2,529
|
The stand is looking nice! Great job.
|
|
|
|
|
12/31/2008, 10:49 AM
|
#17 |
|
Moved On
Join Date: Dec 2007
Location: Tiger Stadium Baton Rouge, Louisiana
Posts: 529
|
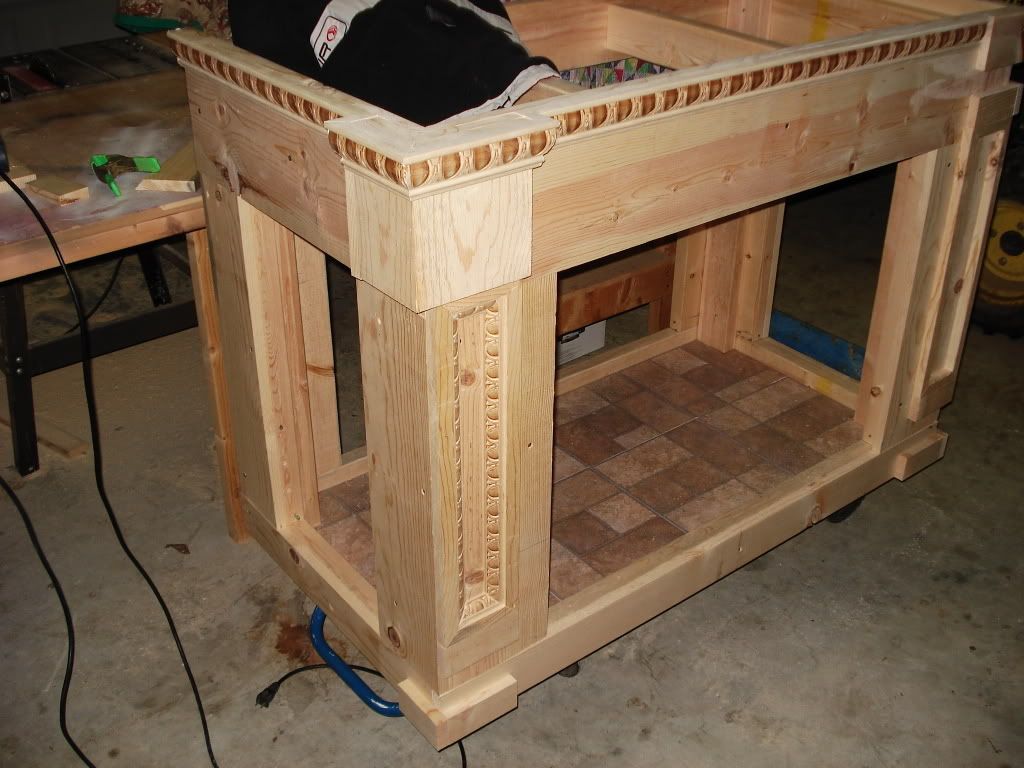
Here she is all stained with one coat! It came out better than i thought and i still have a couple more coats to do.
|
|
|
|
|
12/31/2008, 10:50 AM
|
#18 |
|
Moved On
Join Date: Dec 2007
Location: Tiger Stadium Baton Rouge, Louisiana
Posts: 529
|
by the way marino, thanks for sharing your build thread as i know its been a guide for a lot of people...i tried not to make mine to similar to yours as everyone likes to have a little bit different but this moulding happened to be the only nice thing my local lowes carried...i like how it came out though, i still need to add a couple more coats of stain
|
|
|
|
|
12/31/2008, 10:59 AM
|
#19 |
|
Registered Member
Join Date: Dec 2003
Location: Denver, Colorado
Posts: 9,579
|
Lookin good!!
Keep the updates coming.
__________________
Make it a Great Day!!!! Current Tank Info: 60 gal SPS cube, with 25 gal refugium, 400W MH, DIY Lumenarc III, DIY skimmer, DIY stand and canopy. 40 breeder LPS with 40 gallon sump, DIY stand, 250W MH |
|
|
|
|
12/31/2008, 12:16 PM
|
#20 |
|
Premium Member
Join Date: Mar 2004
Location: Cape Girardeau, MO
Posts: 2,529
|
No problem. That's the whole reason I documented the process with pictures.
Now hurry up and get some water in this tank
|
|
|
|
|
12/31/2008, 12:47 PM
|
#21 |
|
Registered Member

Join Date: Feb 2007
Location: Miami, FL
Posts: 810
|
very nice build JRL, thats stand looks great. We have a couple of things in common, Im also working on a 120 right now and Im studying ME as well
 You can check out my build thread by clicking on the red house. Not much progress thus far as Im still waiting for stuff to come in and the stand to be built, but I should be filling it up in a couple of weeks as well. Subscribed 
__________________
-- Javier Current Tank Info: AGA 120g peninsula w/ 40g sump, 175w MH, Octopus NW200 with Sicce, Panworld return |
|
|
|
|
12/31/2008, 03:06 PM
|
#22 | |
|
Moved On
Join Date: Dec 2007
Location: Tiger Stadium Baton Rouge, Louisiana
Posts: 529
|
Quote:
ahoy, glad to see a fellow ME! |
|
|
|
|
|
01/01/2009, 03:14 PM
|
#23 |
|
Moved On
Join Date: Dec 2007
Location: Tiger Stadium Baton Rouge, Louisiana
Posts: 529
|
drumroll please............TA DA DONE STAINING! now for some poly tomorrow
|
|
|
|
|
01/01/2009, 03:31 PM
|
#24 |
|
Registered Member
Join Date: Jan 2008
Location: Northern NJ
Posts: 1,812
|
Looks great!
|
|
|
|
|
01/01/2009, 04:11 PM
|
#25 |
|
Registered Member
Join Date: Feb 2005
Location: Indiana
Posts: 982
|
Nice tank and DIY skills, that stand is great. In a earlier post you said your tank is made by Oceanview. Do you have any info on this company and or tank.
Thank you, Gary |
|
|
|
 |
|
|


